


Google developed ARCore to be accessible from multiple development platforms (Android [Java], Web [JavaScript], Unreal [C++], and Unity [C#]), thus giving developers plenty of flexibility and options to build applications on various platforms. While each platform has its strengths and weaknesses, all the platforms essentially extend from the native Android SDK that was originally built as Tango. This means that regardless of your choice of platform, you will need to install and be somewhat comfortable working with the Android development tools.
In this article, we will focus on setting up the Android development tools and building an ARCore application for Android. The following is a summary of the major topics we will cover in this post:
- Installing Android Studio
- Installing ARCore
- Build and deploy
- Exploring the code
Installing Android Studio
Android Studio is a development environment for coding and deploying Android applications. As such, it contains the core set of tools we will need for building and deploying our applications to an Android device. After all, ARCore needs to be installed to a physical device in order to test. Follow the given instructions to install Android Studio for your development environment:
- Open a browser on your development computer to https://developer.android.com/studio.
- Click on the green DOWNLOAD ANDROID STUDIO button.
- Agree to the Terms and Conditions and follow the instructions to download.
- After the file has finished downloading, run the installer for your system.
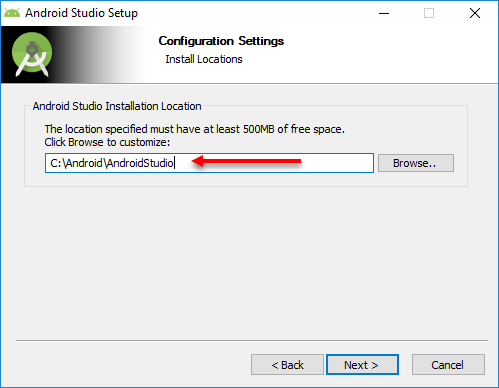
- Follow the instructions on the installation dialog to proceed. If you are installing on Windows, ensure that you set a memorable installation path that you can easily find later, as shown in the following example:
- Click through the remaining dialogs to complete the installation.
- When the installation is complete, you will have the option to launch the program. Ensure that the option to launch Android Studio is selected and click on Finish.
Android Studio comes embedded with OpenJDK. This means we can omit the steps to installing Java, on Windows at least. If you are doing any serious Android development, again on Windows, then you should go through the steps on your own to install the full Java JDK 1.7 and/or 1.8, especially if you plan to work with older versions of Android.
Now that we have Android Studio installed, we are not quite done. We still need to install the SDK tools that will be essential for building and deployment. Follow the instructions in the next exercise to complete the installation:
- If you have not installed the Android SDK before, you will be prompted to install the SDK when Android Studio first launches, as shown:
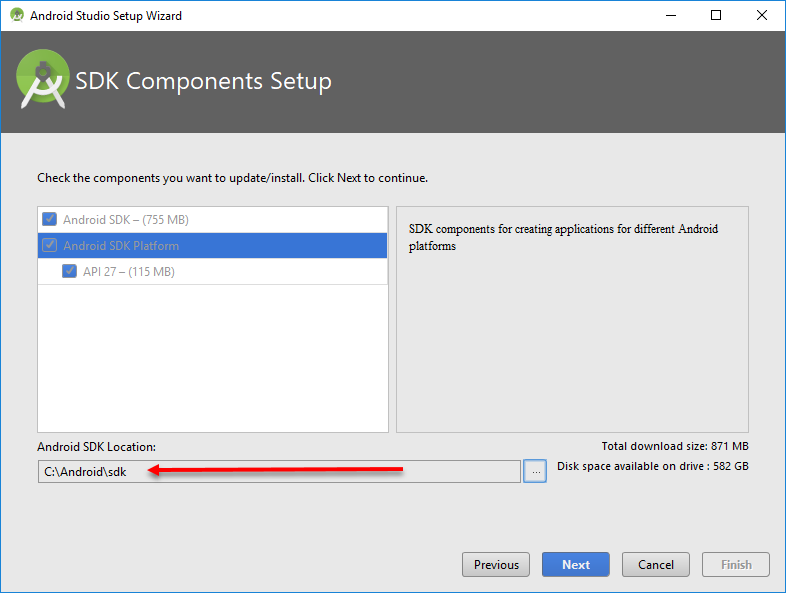
- Select the SDK components and ensure that you set the installation path to a well-known location, again, as shown in the preceding screenshot.
- Leave the Welcome to Android Studio dialog open for now. We will come back to it in a later exercise.
That completes the installation of Android Studio. In the next section, we will get into installing ARCore.
Installing ARCore
Of course, in order to work with or build any ARCore applications, we will need to install the SDK for our chosen platform. Follow the given instructions to install the ARCore SDK:
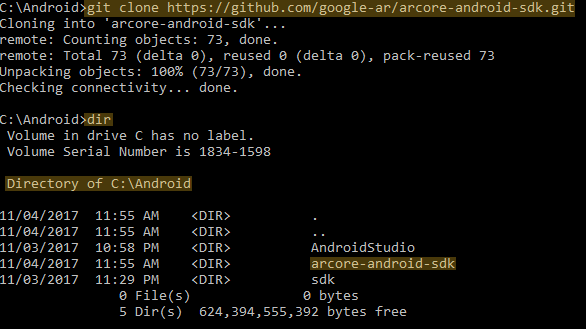
- Open Command Prompt or Windows shell and navigate to the Android (C:Android on Windows) installation folder.
- Enter the following command:
git clone https://github.com/google-ar/arcore-android-sdk.git
- This will download and install the ARCore SDK into a new folder called arcore-android-sdk, as illustrated in the following screenshot:
- Ensure that you leave the command window open. We will be using it again later.
Installing the ARCore service on a device
Now, with the ARCore SDK installed on our development environment, we can proceed with installing the ARCore service on our test device. Use the following steps to install the ARCore service on your device:
- Grab your mobile device and enable the developer and debugging options by doing the following:
- Opening the Settings app
- Selecting the System
- Scrolling to the bottom and selecting About phone
- Scrolling again to the bottom and tapping on Build number seven times
- Going back to the previous screen and selecting Developer options near the bottom
- Selecting USB debugging
- Download the ARCore service APK from https://github.com/google-ar/arcore-android-sdk/releases/download/sdk-preview/arcore-preview.apk to the Android installation folder (C:Android). Also note that this URL will likely change in the future.
- Connect your mobile device with a USB cable. If this is your first time connecting, you may have to wait several minutes for drivers to install. You will then be prompted to switch on the device to allow the connection. Select Allow to enable the connection.
- Go back to your Command Prompt or Windows shell and run the following command:
adb install -r -d arcore-preview.apk
//ON WINDOWS USE:
sdkplatform-toolsadb install -r -d arcore-preview.apk
After the command is run, you will see the word Success.
This completes the installation of ARCore for the Android platform. In the next section, we will build our first sample ARCore application.
Build and deploy
Now that we have all the tedious installation stuff out of the way, it’s time to build and deploy a sample app to your Android device. Let’s begin by jumping back to Android Studio and following the given steps:
- Select the Open an existing Android Studio project option from the Welcome to Android Studio window. If you accidentally closed Android Studio, just launch it again.
- Navigate and select the Androidarcore-android-sdksamplesjava_arcore_hello_ar folder, as follows:
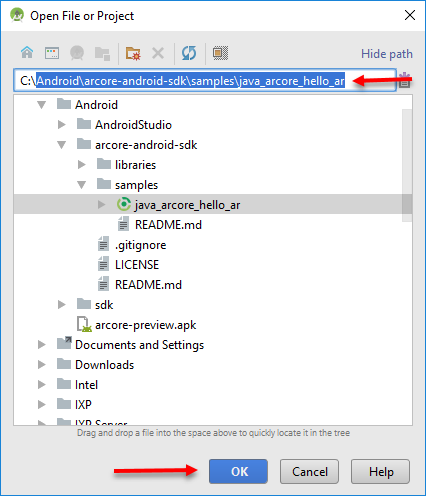
- Click on OK. If this is your first time running this project, you will encounter some dependency errors, such as the one here:

- In order to resolve the errors, just click on the link at the bottom of the error message. This will open a dialog, and you will be prompted to accept and then download the required dependencies. Keep clicking on the links until you see no more errors.
- Ensure that your mobile device is connected and then, from the menu, choose Run – Run. This should start the app on your device, but you may still need to resolve some dependency errors. Just remember to click on the links to resolve the errors.
- This will open a small dialog. Select the app option. If you do not see the app option, select Build – Make Project from the menu. Again, resolve any dependency errors by clicking on the links.
– Alton Brown
- Select your device from the next dialog and click on OK. This will launch the app on your device. Ensure that you allow the app to access the device’s camera. The following is a screenshot showing the app in action:
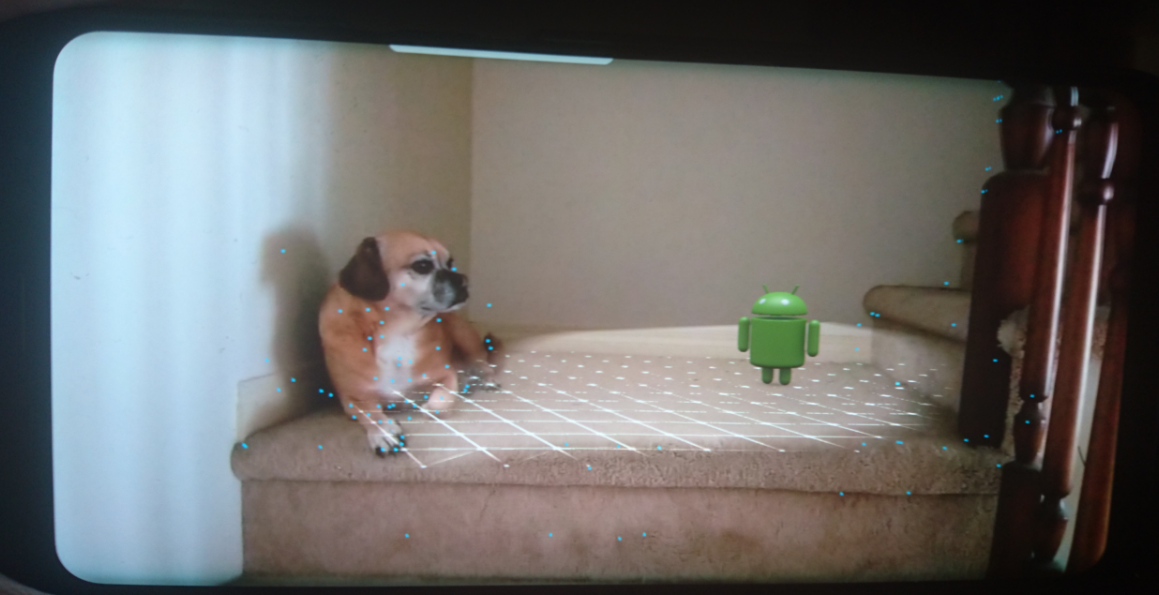
Great, we have built and deployed our first Android ARCore app together. In the next section, we will take a quick look at the Java source code.
Exploring the code
Now, let’s take a closer look at the main pieces of the app by digging into the source code. Follow the given steps to open the app’s code in Android Studio:
- From the Project window, find and double-click on the HelloArActivity, as shown:
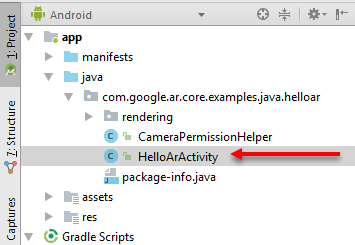
- After the source is loaded, scroll through the code to the following section:
private void showLoadingMessage() {
 runOnUiThread(new Runnable() {
  @Override
  public void run() {
   mLoadingMessageSnackbar = Snackbar.make(
    HelloArActivity.this.findViewById(android.R.id.content),
    "Searching for surfaces...",
    Snackbar.LENGTH_INDEFINITE);
   mLoadingMessageSnackbar.getView().setBackgroundColor(0xbf323232);
   mLoadingMessageSnackbar.show();
  }
 });
}
- Note the highlighted text—"Searching for surfaces..". Select this text and change it to "Searching for ARCore surfaces..". The showLoadingMessage function is a helper for displaying the loading message. Internally, this function calls runOnUIThread, which in turn creates a new instance of Runnable and then adds an internal run function. We do this to avoid thread blocking on the UI, a major no-no. Inside the run function is where the messaging is set and the message Snackbar is displayed.
- From the menu, select Run – Run ‘app‘ to start the app on your device. Of course, ensure that your device is connected by USB.
- Run the app on your device and confirm that the message has changed.
Great, now we have a working app with some of our own code. This certainly isn’t a leap, but it’s helpful to walk before we run.
In this article, we started exploring ARCore by building and deploying an AR app for the Android platform.
- We did this by first installing Android Studio.
- Then, we installed the ARCore SDK and ARCore service onto our test mobile device.
- Next, we loaded up the sample ARCore app and patiently installed the various required build and deploy dependencies.
- After a successful build, we deployed the app to our device and tested.
- Finally, we tested making a minor code change and then deployed another version of the app.
You read an excerpt from the book, Learn ARCore – Fundamentals of Google ARCore, written by Micheal Lanham. This book will help you will create next-generation Augmented Reality and Mixed Reality apps with the latest version of Google ARCore.