


")
Once we learn how to deploy an Ubuntu server, how to manage users, and how to manage software packages, we should take a moment to learn some important concepts and commands that will allow us to build more of the foundational knowledge that will serve us well while understanding the advanced concepts and treading the path of expertise. These foundational concepts include core Linux commands for navigating the shell.
This article is an excerpt from the book, Mastering Ubuntu Server, Third Edition by Jeremy “Jay” La Croix – A hands-on book that will teach you how to deploy, maintain and troubleshoot Ubuntu Server.
Learning essential Linux commands
Building a solid competency on the command line is essential and effectively gives any system administrator or engineer superpowers. Our new abilities won’t allow us to leap tall buildings in a single bound, but will definitely enable us to execute terminal commands as if we’re ninjas. While we won’t master the art of using the command line in this section (that can only come with years and experience), we will definitely become more confident.
First, let’s talk about moving from one place to another within the Linux filesystem. Specifically, by “Linux filesystem”, I’m referring to the default structure of the various folders (also referred to as “directories”) contained within your Ubuntu installation. The Linux filesystem contains many important directories, each with their own designated purpose, which we’ll talk about in more detail in the book. Before we can explore that further, we’ll need to learn how to navigate from one directory to another. The first command we’ll cover in this section relative to navigating the filesystem will clarify the directory you’re currently working from. For that, we have the pwd command.
The pwd command
pwd stands for print working directory, and shows you where you currently are in the filesystem. If you run it, you may see output such as this: 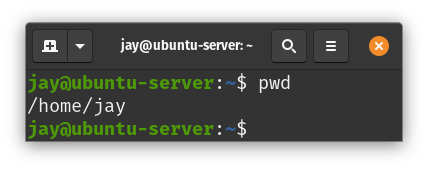
Figure 4.1: Viewing the current working directory
In this example, when I ran pwd, the output informed me that my current working directory is /home/jay. This is known as your home directory and, by default, every user has one. This is where all the files for your user account will reside by default. Sure, you can create files anywhere you’d like, even outside your home directory if you have permission to do so or you use sudo. But just because you can doesn’t mean you should. As you’ll learn in this article, the Linux filesystem has a designated place for just about everything. But your home directory, located at /home/<username>, is yours. You own it, you control it—it’s your home on the server. In the early 2000s, Linux installations with a graphical user interface even depicted your home directory with an icon of a house.
Typically, files that you create in your home directory will have permission string similar to this:
-rw-rw-r-- 1 jay jay 0 Jul 5 14:10 testfile.txt
You can see by default, files you create in your home directory are owned by your user, your group, and are readable by all three categories (user, group, and other).
The cd command
To change our current directory and navigate to another, we can use the cd command along with a path we’d like to move to:
cd /etc
Now, I haven’t gone over the file and directory layout yet, so I just randomly picked the etc directory. The forward slash at the beginning designates the beginning of the filesystem. More on that later. Now, we’re in the /etc directory, and our command prompt has even changed as well:
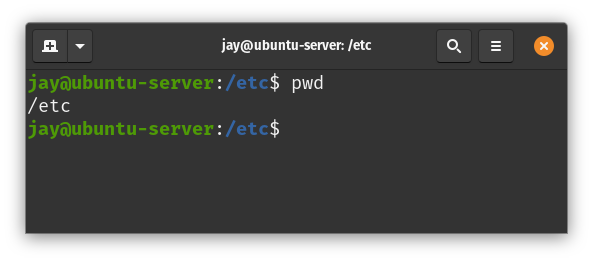
Figure 4.2: Command prompt and pwd command after changing a directory
As you could probably guess, the cd command stands for change directory, and it’s how you move your working directory from one to another while navigating around. You can use the following command, for example, to return back to the home directory:
cd /home/<user>
In fact, there are several ways to return home, a few of which are demonstrated in the following screenshot:
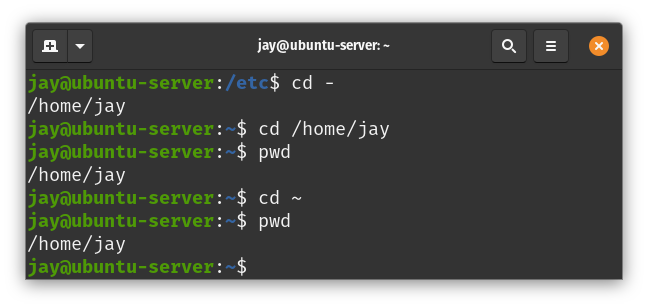
Figure 4.3: Other ways of navigating to the home directory
The first command, cd -, doesn’t actually have anything to do with your home directory specifically. It’s a neat trick to return you to whatever directory you were in most previously. For me, the cd – command took me to the previous directory I was just in, which just so happened to be /home/jay. The second command, cd /home/jay, took me directly to my home directory since I called out the entire path. The last command, cd ~, also took me to my home directory. This is because ~ is shorthand for the full path to your home directory, so you don’t really ever have to type out the entire path to /home/<user>. You can just refer to that path simply as ~.
The ls command
Another essential command is ls. The ls command lists the contents of the current working directory. We probably don’t have any contents in our home directory yet. But if we navigate to /etc by running cd /etc, as we did earlier, and then execute ls, we’ll see that the /etc</span> directory has a number of files in it. Go ahead and try it yourself and see:
cd /etc
ls
We didn’t actually have to change our working directory to /etc just to list the contents. We could’ve just executed the following command:
ls /etc
Even better, we can run:
ls -l /etc
This gives us the contents in a long list, which I think is much easier to understand. It will show each directory or file entry on its own line, along with the permission string. But you probably already must be knowing ls as well as ls -l so I won’t go into too much more detail here. The -l portion of the ls command in that example is known as an argument. I’m not referring to an argument such as the ever-ensuing debate in the Linux community over which command-line text editor is the best between vim and emacs (it’s clearly vim). Instead, I’m referring to the concept of an argument in shell commands that allow you to override the defaults, or feed options to the command in some way, such as in this example, where we format the output of ls to be in a long list.
The rm command
The rm command is another one that we touched on in, when we were discussing manually removing the home directory of a user that was removed from the system. So, at this point, you’re probably well aware of that command and what it does (it removes files and directories). It’s a potentially dangerous command, as you could use it to accidentally remove something that you shouldn’t have. We used the following command to remove the home directory of user dscully:
rm -r /home/dscully
As you can see, we’re using the -r argument to alter the behavior of the rm command, which, by default, doesn’t remove directories but only files. The -r argument instructs rm to remove everything recursively, even if it’s a directory. The -r argument will also remove subdirectories of the path as well, so you’ll definitely want to be careful with this command. As I’ve mentioned earlier in the book, if you use sudo with rm, you can hypothetically delete your entire Ubuntu installation!
Another option offered by rm is the -f argument which is short for force, and it tells rm not to prompt before removing things. This argument won’t be needed as often, and use cases for it are outside the scope of this article. But keep in mind that it exists, should you need it.
The touch command
Another foundational command that’s good to know is touch, which actually serves two purposes. First, assuming you have permission to do so in your current working directory, the touch command will create an empty file if it doesn’t already exist. Second, the touch command will update the modification time of a file or directory if it does already exist:
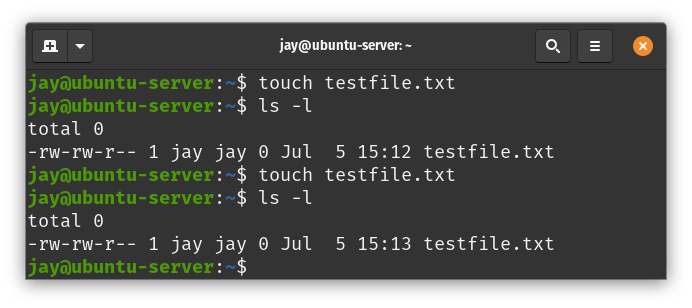
Figure 4.4: Experimenting with the touch command
To illustrate this, in the related screenshot, I ran several commands. First, I ran the following command to create an empty file:
touch testfile.txt That file didn’t exist before, so when I ran ls -l afterward, it showed the newly created file with a size of 0 bytes. Next, I ran the touch testfile.txt command again a minute later, and you can see in the screenshot that the modification time went from 15:12 to 15:13.
When it comes to viewing the contents of a file, we’ll get to that later on in the book, Mastering Ubuntu Server, Third Edition. And there are definitely more commands that we’ll need to learn to build the basis of our foundation. But for now, let’s take a break from the foundational concepts to understand the Linux filesystem layout better.
Summary
There are more Linux commands than you will never be able to memorize. Most of us just memorize our favorite commands and variations of commands. You’ll develop your own menu of these commands as you learn and expand your knowledge. In this article, we covered many of the foundational commands that are, for the most part, essential. Commands such as grep, cat, cd, ls, and others were explored this time around.
About
Jeremy “Jay” La Croix is a technologist and open-source enthusiast, specializing in Linux. Jay is currently the director of Cloud Services, Adaptavist. He has a net field experience of 20 years across different firms as a Solutions Architect and holds a master’s degree in Information Systems Technology Management from Capella University.
In addition, Jay also has an active Linux-focused YouTube channel with over 186K followers and 15.9M views, available at LearnLinux.tv, where he posts instructional tutorial videos and other Linux-related content.


