


A web service is an application that runs on a server and allows a client (such as a browser) to remotely write/retrieve data to/from the server over HTTP.
In this article we will be covering the following set of topics:
- Using Laravel to create a web service
- Writing database migrations and seed files
- Creating API endpoints to make data publicly accessible
- Serving images from Laravel
The interface of a web service will be one or more API endpoints, sometimes protected with authentication, that will return data in an XML or JSON payload:
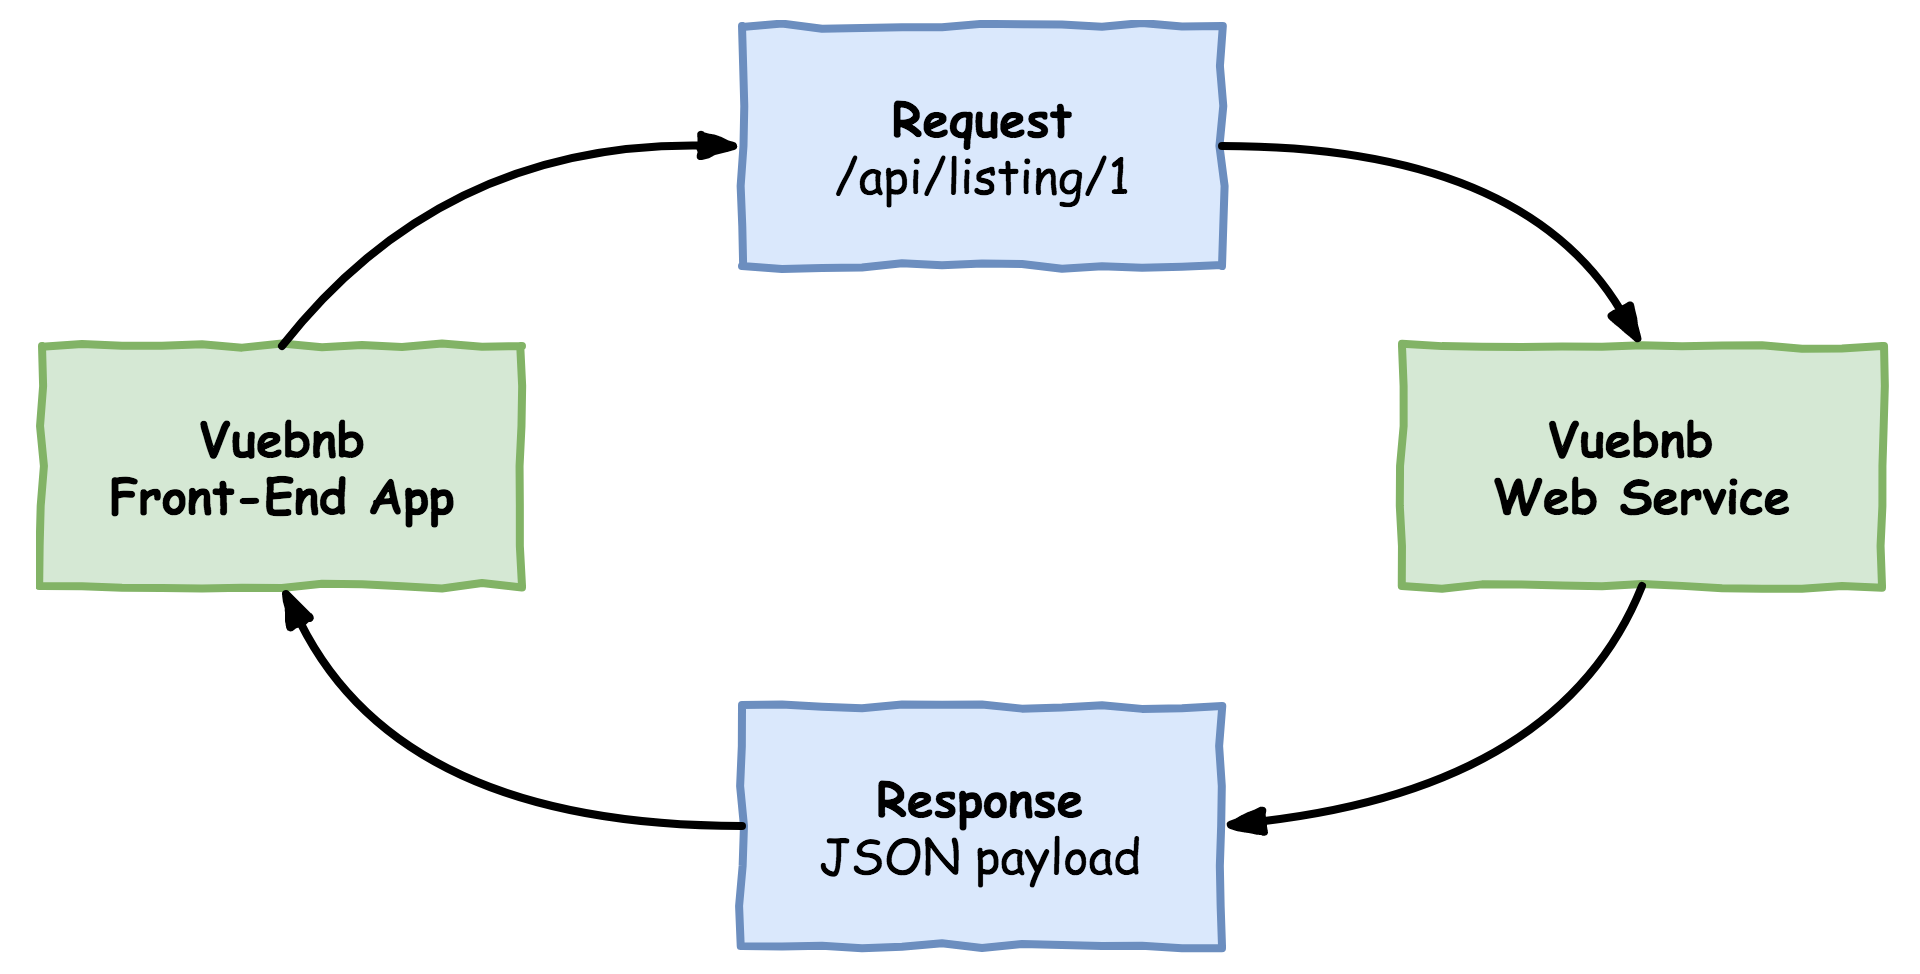
Web services are a speciality of Laravel, so it won’t be hard to create one for Vuebnb. We’ll use routes for our API endpoints and represent the listings with Eloquent models that Laravel will seamlessly synchronize with the database:

Laravel also has inbuilt features to add API architectures such as REST, though we won’t need this for our simple use case.
Mock data
The mock listing data is in the file database/data.json. This file includes a JSON- encoded array of 30 objects, with each object representing a different listing. Having built the listing page prototype, you’ll no doubt recognize a lot of the same properties on these objects, including the title, address, and description.
database/data.json:

[
{
"id":  1,
"title":  "Central  Downtown  Apartment  with  Amenities", "address":  "...",
"about":  "...", "amenity_wifi":  true, "amenity_pets_allowed":  true, "amenity_tv":  true, "amenity_kitchen":  true, "amenity_breakfast":  true, "amenity_laptop":  true, "price_per_night":  "$89" "price_extra_people":  "No  charge", "price_weekly_discount":  "18%", "price_monthly_discount":  "50%",
},
{
"id":  2,
...
},
...
]
Each mock listing includes several images of the room as well. Images aren’t really part of a web service, but they will be stored in a public folder in our app to be served as needed.
Database
Our web service will require a database table for storing the mock listing data. To set this up we’ll need to create a schema and migration. We’ll then create a seeder that will load and parse our mock data file and insert it into the database, ready for use in the app.
Migration
A migration is a special class that contains a set of actions to run against the database, such as creating or modifying a database table. Migrations ensure your database gets set up identically every time you create a new instance of your app, for example, installing in production or on a teammate’s machine.
To create a new migration, use the make:migration Artisan CLI command. The argument of the command should be a snake-cased description of what the migration will do:
$ php artisan make:migration create_listings_tableYou’ll now see your new migration in the database/migrations directory. You’ll notice the filename has a prefixed timestamp, such as 2017_06_20_133317_create_listings_table.php. The timestamp allows Laravel to determine the proper order of the migrations, in case it needs to run more than one at a time.
Your new migration declares a class that extends Migration. It overrides two methods: up, which is used to add new tables, columns, or indexes to your database; and down, which is used to delete them. We’ll implement these methods shortly.
You’ll now see your new migration in the database/migrations directory. You’ll notice the filename has a prefixed timestamp, such as 2017_06_20_133317_create_listings_table.php. The timestamp allows Laravel to determine the proper order of the migrations, in case it needs to run more than one at a time.
Your new migration declares a class that extends Migration. It overrides two methods: up, which is used to add new tables, columns, or indexes to your database; and down, which is used to delete them. We’ll implement these methods shortly.
2017_06_20_133317_create_listings_table.php:

<?php

use  Illuminate\Support\Facades\Schema;
use  Illuminate\Database\Schema\Blueprint;
use  Illuminate\Database\Migrations\Migration;

class  CreateListingsTable  extends  Migration
{
public  function  up()
{
//
}

public  function  down()
{
//
}
}
Schema
A schema is a blueprint for the structure of a database. For a relational database such as MySQL, the schema will organize data into tables and columns. In Laravel, schemas are declared by using the Schema facade’s create method.
We’ll now make a schema for a table to hold Vuebnb listings. The columns of the table will match the structure of our mock listing data. Note that we set a default false value for the amenities and allow the prices to have a NULL value. All other columns require a value.
The schema will go inside our migration’s up method. We’ll also fill out the down with a call to Schema::drop.
2017_06_20_133317_create_listings_table.php:

public  function  up()
{
Schema::create('listings',  function  (Blueprint  $table)  {
$table->primary('id');
$table->unsignedInteger('id');
$table->string('title');
$table->string('address');
$table->longText('about');

//  Amenities
$table->boolean('amenity_wifi')->default(false);
$table->boolean('amenity_pets_allowed')->default(false);
$table->boolean('amenity_tv')->default(false);
$table->boolean('amenity_kitchen')->default(false);
$table->boolean('amenity_breakfast')->default(false);
$table->boolean('amenity_laptop')->default(false);

//  Prices
$table->string('price_per_night')->nullable();
$table->string('price_extra_people')->nullable();
$table->string('price_weekly_discount')->nullable();
$table->string('price_monthly_discount')->nullable();
});
}

public  function  down()
{
Schema::drop('listings');
}
A facade is an object-oriented design pattern for creating a static proxy to an underlying class in the service container. The facade is not meant to provide any new functionality; its only purpose is to provide a more memorable and easily readable way of performing a common action. Think of it as an object-oriented helper function.
Execution
Now that we’ve set up our new migration, let’s run it with this Artisan command:
$ php artisan migrateYou should see an output like this in the Terminal:
Migrating: 2017_06_20_133317_create_listings_table

Migrated:            2017_06_20_133317_create_listings_table
To confirm the migration worked, let’s use Tinker to show the new table structure. If you’ve never used Tinker, it’s a REPL tool that allows you to interact with a Laravel app on the command line. When you enter a command into Tinker it will be evaluated as if it were a line in your app code.
Firstly, open the Tinker shell:
$ php artisan tinkerNow enter a PHP statement for evaluation. Let’s use the DB facade’s select method to run an SQL DESCRIBE query to show the table structure:
>>>> DB::select('DESCRIBE listings;');The output is quite verbose so I won’t reproduce it here, but you should see an object with all your table details, confirming the migration worked.
Seeding mock listings
Now that we have a database table for our listings, let’s seed it with the mock data. To do so we’re going to have to do the following:
- Load the database/data.json file
- Parse the file
- Insert the data into the listings table
Creating a seeder
Laravel includes a seeder class that we can extend called Seeder. Use this Artisan command to implement it:
$ php artisan make:seeder ListingsTableSeederWhen we run the seeder, any code in the run method is executed.
database/ListingsTableSeeder.php:

<?php

use  Illuminate\Database\Seeder;

class  ListingsTableSeeder  extends  Seeder
{
public  function  run()
{
//
}
}
Loading the mock data
Laravel provides a File facade that allows us to open files from disk as simply as File::get($path). To get the full path to our mock data file we can use the base_path() helper function, which returns the path to the root of our application directory as a string.
It’s then trivial to convert this JSON file to a PHP array using the built-in json_decode method. Once the data is an array, it can be directly inserted into the database given that the column names of the table are the same as the array keys.
database/ListingsTableSeeder.php:

public  function  run()

{

$path  = base_path()  . '/database/data.json';

$file  = File::get($path);

$data  = json_decode($file,  true);

}
Inserting the data
In order to insert the data, we’ll use the DB facade again. This time we’ll call the table method, which returns an instance of Builder. The Builder class is a fluent query builder that allows us to query the database by chaining constraints, for example, DB::table(…)->where(…)->join(…) and so on. Let’s use the insert method of the builder, which accepts an array of column names and values.
database/seeds/ListingsTableSeeder.php:

public  function  run()

{

$path  = base_path()  . '/database/data.json';

$file  = File::get($path);

$data  = json_decode($file,  true); DB::table('listings')->insert($data);

}
Executing the seeder
To execute the seeder we must call it from the DatabaseSeeder.php file, which is in the same directory.
database/seeds/DatabaseSeeder.php:

<?php

use  Illuminate\Database\Seeder;

class  DatabaseSeeder  extends  Seeder

{
public  function  run()
{
$this->call(ListingsTableSeeder::class);
}
}
With that done, we can use the Artisan CLI to execute the seeder:
$ php artisan db:seedYou should see the following output in your Terminal:
Seeding: ListingsTableSeederWe’ll again use Tinker to check our work. There are 30 listings in the mock data, so to confirm the seed was successful, let’s check for 30 rows in the database:
$ php artisan tinker

>>>> DB::table('listings')->count();

# Output: 30
Finally, let’s inspect the first row of the table just to be sure its content is what we expect:
>>>> DB::table('listings')->get()->first();Here is the output:
=> {#732
+"id": 1,
+"title": "Central Downtown Apartment with Amenities",
+"address": "No. 11, Song-Sho Road, Taipei City, Taiwan 105",
+"about": "...",
+"amenity_wifi": 1,
+"amenity_pets_allowed": 1,
+"amenity_tv": 1,
+"amenity_kitchen": 1,
+"amenity_breakfast": 1,
+"amenity_laptop": 1,
+"price_per_night": "$89",
+"price_extra_people": "No charge",
+"price_weekly_discount": "18%",
+"price_monthly_discount": "50%"
}
If yours looks like that you’re ready to move on!
Listing model
We’ve now successfully created a database table for our listings and seeded it with mock listing data. How do we access this data now from the Laravel app?
We saw how the DB facade lets us execute queries on our database directly. But Laravel provides a more powerful way to access data via the Eloquent ORM.
Eloquent ORM
Object-Relational Mapping (ORM) is a technique for converting data between incompatible systems in object-oriented programming languages. Relational databases such as MySQL can only store scalar values such as integers and strings, organized within tables. We want to make use of rich objects in our app, though, so we need a means of robust conversion.
Eloquent is the ORM implementation used in Laravel. It uses the active record design pattern, where a model is tied to a single database table, and an instance of the model is tied to a single row.
To create a model in Laravel using Eloquent ORM, simply extend the
Illuminate\Database\Eloquent\Model class using Artisan:
$ php artisan make:model ListingThis generates a new file.
app/Listing.php:

<?php

namespace  App;

use  Illuminate\Database\Eloquent\Model;

class  Listing  extends  Model
{
//
}
How do we tell the ORM what table to map to, and what columns to include? By default, the Model class uses the class name (Listing) in lowercase (listing) as the table name to use. And, by default, it uses all the fields from the table.
Now, any time we want to load our listings we can use code such as this, anywhere in our app:
<?php

//  Load  all  listings
$listings  =  \App\Listing::all();

//  Iterate  listings,  echo  the  address foreach  ($listings  as  $listing)  {
echo  $listing->address  .  '\n'  ;
}

/*
*  Output:
*
*  No.  11,  Song-Sho  Road,  Taipei  City,  Taiwan  105
*  110,  Taiwan,  Taipei  City,  Xinyi  District,  Section  5,  Xinyi  Road,  7
*  No.  51,  Hanzhong  Street,  Wanhua  District,  Taipei  City,  Taiwan  108
*  ...
*/
Casting
The data types in a MySQL database don’t completely match up to those in PHP. For example, how does an ORM know if a database value of 0 is meant to be the number 0, or the Boolean value of false?
An Eloquent model can be given a $casts property to declare the data type of any specific attribute. $casts is an array of key/values where the key is the name of the attribute being cast, and the value is the data type we want to cast to.
For the listings table, we will cast the amenities attributes as Booleans.
app/Listing.php:

<?php

namespace  App;

use  Illuminate\Database\Eloquent\Model;

class  Listing  extends  Model
{
protected  $casts  =  [
'amenity_wifi'  =>  'boolean',
'amenity_pets_allowed'  =>  'boolean',
'amenity_tv'  =>  'boolean',
'amenity_kitchen'  =>  'boolean',
'amenity_breakfast'  =>  'boolean',
'amenity_laptop'  =>  'boolean'
];
}
Now these attributes will have the correct type, making our model more robust:
echo  gettype($listing->amenity_wifi());

//  boolean
Public interface
The final piece of our web service is the public interface that will allow a client app to request the listing data. Since the Vuebnb listing page is designed to display one listing at a time, we’ll at least need an endpoint to retrieve a single listing.
Let’s now create a route that will match any incoming GET requests to the URI /api/listing/{listing} where {listing} is an ID. We’ll put this in the routes/api.php file, where routes are automatically given the /api/ prefix and have middleware optimized for use in a web service by default.
We’ll use a closure function to handle the route. The function will have a $listing argument, which we’ll type hint as an instance of the Listing class, that is, our model. Laravel’s service container will resolve this as an instance with the ID matching {listing}.
We can then encode the model as JSON and return it as a response.
routes/api.php:

<?php

use  App\Listing;

Route::get('listing/{listing}',  function(Listing  $listing)  {
return  $listing->toJson();
});
We can test this works by using the curl command from the Terminal:
$ curl http://vuebnb.test/api/listing/1
The response will be the listing with ID 1:

Controller
We’ll be adding more routes to retrieve the listing data as the project progresses. It’s a best practice to use a controller class for this functionality to keep a separation of concerns. Let’s create one with Artisan CLI:
$ php artisan make:controller ListingControllerWe’ll then move the functionality from the route into a new method, get_listing_api.
app/Http/Controllers/ListingController.php:

<?php

namespace  App\Http\Controllers;

use  Illuminate\Http\Request;
use  App\Listing;

class  ListingController  extends  Controller
{
public  function  get_listing_api(Listing  $listing)
{
return  $listing->toJson();
}
}
For the Route::get method we can pass a string as the second argument instead of a closure function. The string should be in the form [controller]@[method], for example, ListingController@get_listing_web. Laravel will correctly resolve this at runtime.
routes/api.php:

<?php

Route::get('/listing/{listing}',  'ListingController@get_listing_api');
Images
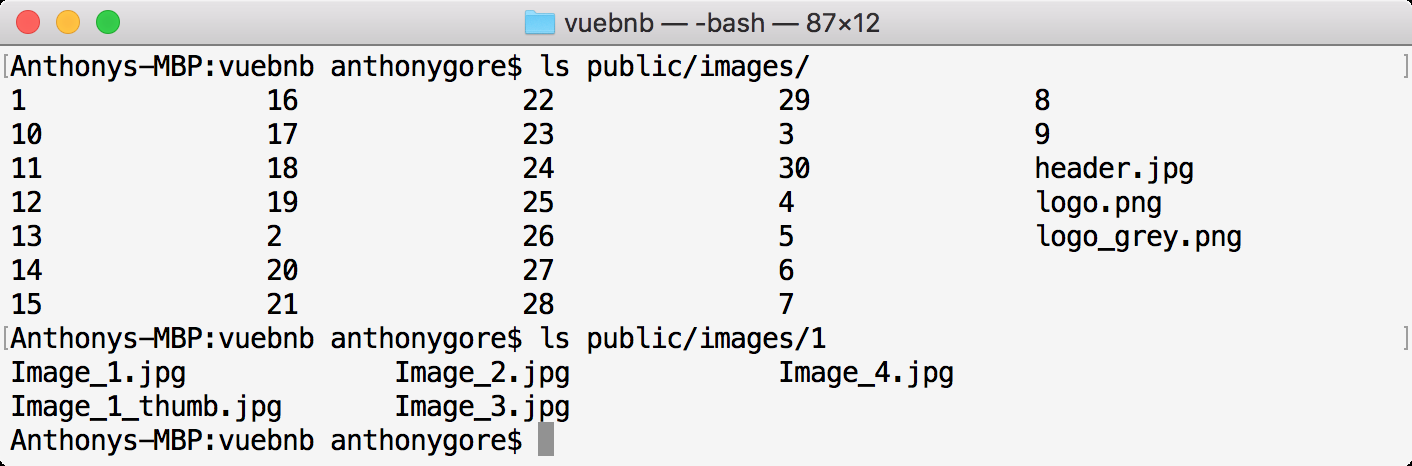
As stated at the beginning of the article, each mock listing comes with several images of the room. These images are not in the project code and must be copied from a parallel directory in the code base called images.
Copy the contents of this directory into the public/images folder:
$ cp -a ../images/. ./public/imagesOnce you’ve copied these files, public/images will have 30 sub-folders, one for each mock listing. Each of these folders will contain exactly four main images and a thumbnail image:
Accessing images
Files in the public directory can be directly requested by appending their relative path to the site URL. For example, the default CSS file, public/css/app.css, can be requested at http://vuebnb.test/css/app.css.
The advantage of using the public folder, and the reason we’ve put our images there, is to avoid having to create any logic for accessing them. A frontend app can then directly call the images in an img tag.
You may think it’s inefficient for our web server to serve images like this, and you’d be right.
Let’s try to open one of the mock listing images in our browser to test this thesis: http://vuebnb.test/images/1/Image_1.jpg:
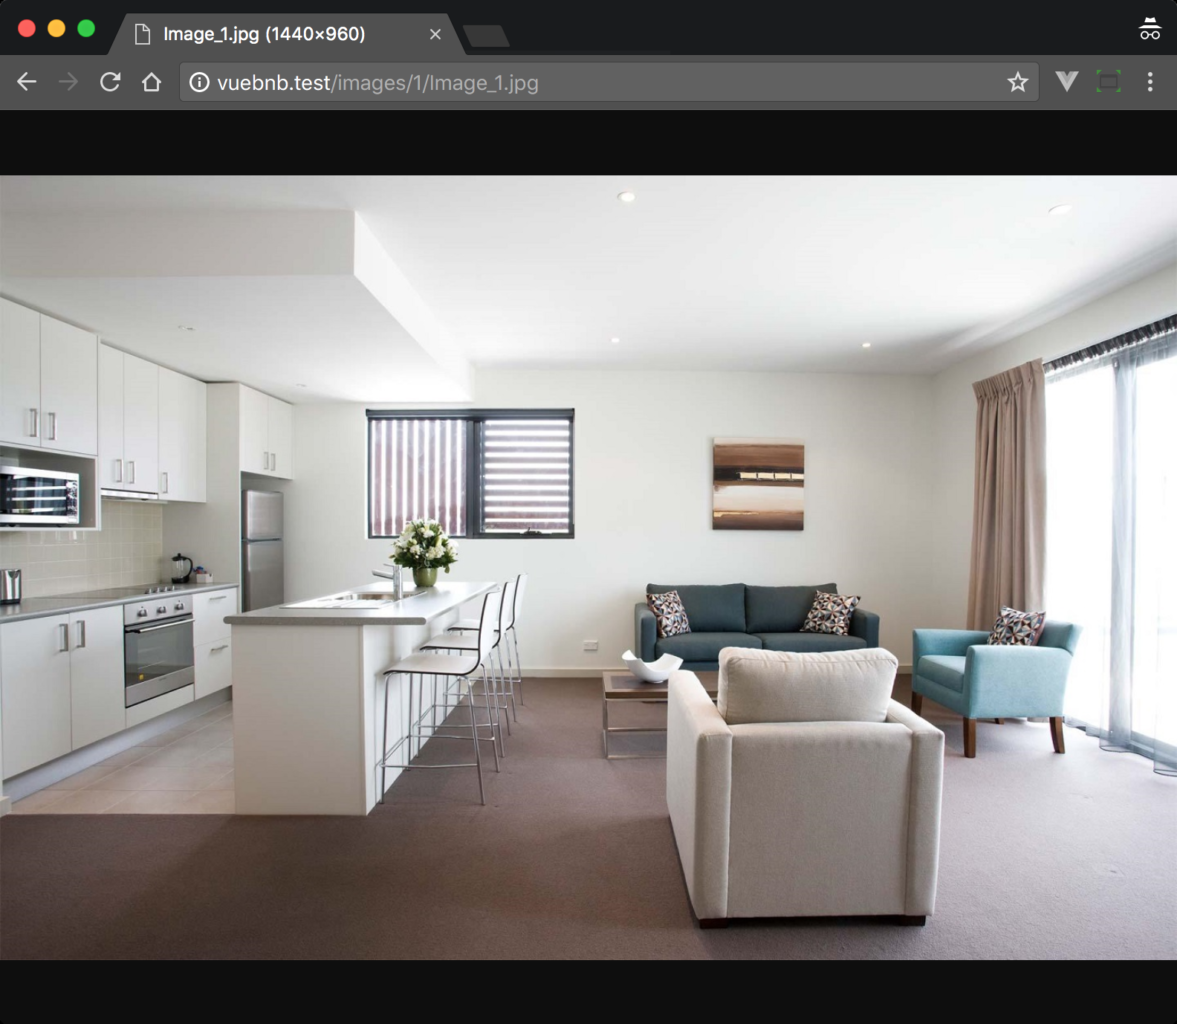
Image links
The payload for each listing in the web service should include links to these new images so a client app knows where to find them. Let’s add the image paths to our listing API payload so it looks like this:
{
"id":  1, "title":  "...", "description":  "...",
...
"image_1": "http://vuebnb.test/app/image/1/Image_1.jpg", "image_2": "http://vuebnb.test/app/image/1/Image_2.jpg", "image_3": "http://vuebnb.test/app/image/1/Image_3.jpg", "image_4":  "http://vuebnb.test/app/image/1/Image_4.jpg"
}
To implement this, we’ll use our model’s toArray method to make an array representation of the model. We’ll then easily be able to add new fields. Each mock listing has exactly four images, numbered 1 to 4, so we can use a for loop and the asset helper to generate fully- qualified URLs to files in the public folder.
We finish by creating an instance of the Response class by calling the response helper. We use the json; method and pass in our array of fields, returning the result.
app/Http/Controllers/ListingController.php:

public  function  get_listing_api(Listing  $listing)
{
$model  =  $listing->toArray();
for($i  =  1;  $i  <=4;  $i++)  {
$model['image_'  .  $i]  =  asset(
'images/'  .  $listing->id  .  '/Image_'  .  $i  .  '.jpg'
);
}
return  response()->json($model);
}
The /api/listing/{listing} endpoint is now ready for consumption by a client app.
To summarize, we built a web service with Laravel to make the data publicly accessible. This involved setting up a database table using a migration and schema, then seeding the database with mock listing data. We then created a public interface for the web service using routes.
You enjoyed an excerpt from a book written by Anthony Gore, titled Full-Stack Vue.js 2 and Laravel 5 which would help you bring the frontend and backend together with Vue, Vuex, and Laravel.
Read More
Testing RESTful Web Services with Postman
How to develop RESTful web services in Spring


