Today, we will explore the basics of creating a project in Spring and how to leverage Spring Tool Suite for managing the project.
To create a new project, we can use a Maven command prompt or an online tool, such as Spring Initializr (http://start.spring.io), to generate the project base. This website comes in handy for creating a simple Spring Boot-based web project to start the ball rolling.
Creating a project base
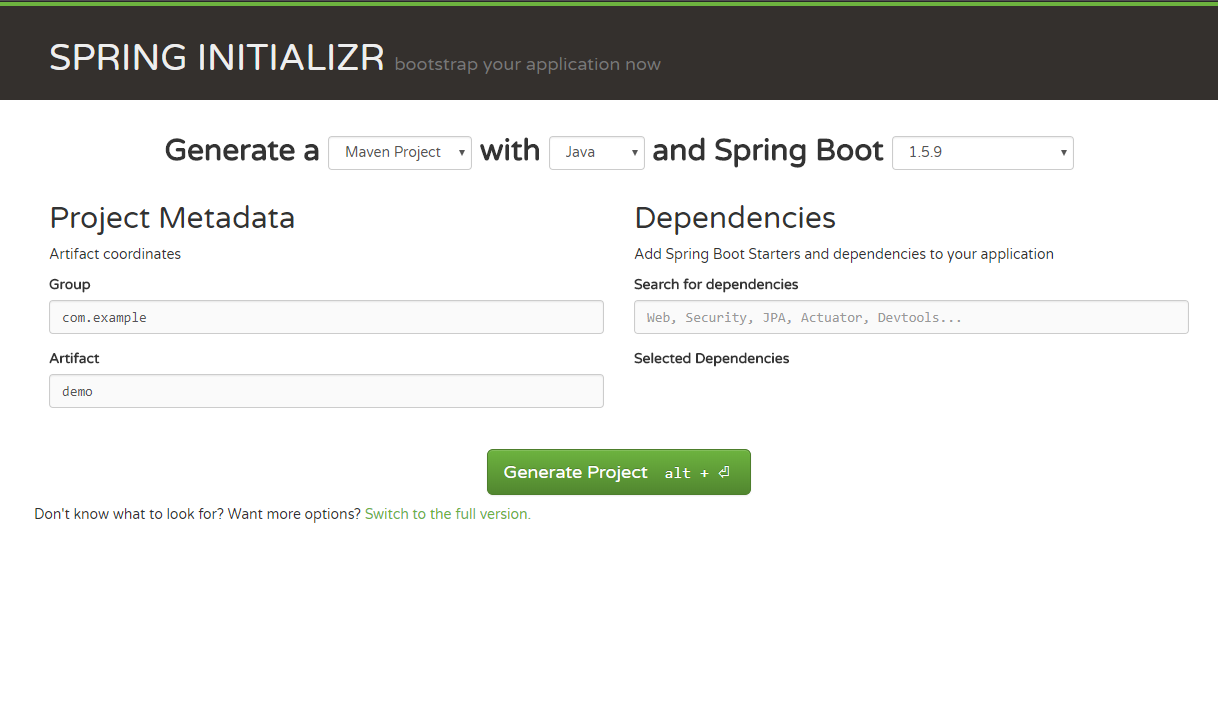
Let’s go to http://start.spring.io in our browser and configure our project by filling in
the following parameters to create a project base:
- Group: com.packtpub.restapp
- Artifact: ticket-management
- Search for dependencies: Web (full-stack web development with Tomcat and Spring MVC)
After configuring our project, it will look as shown in the following screenshot:
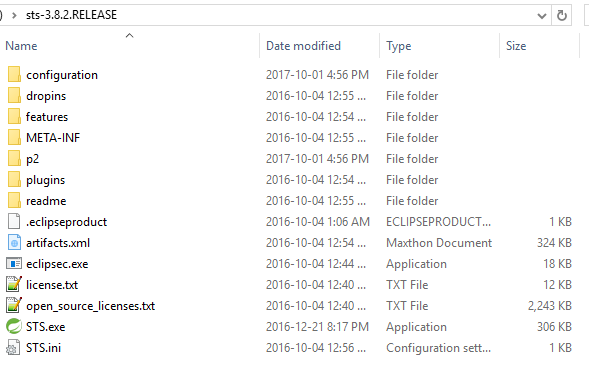
 Now you can generate the project by clicking Generate Project. The project (ZIP file) should be downloaded to your system. Unzip the .zip file and you should see the files as shown in the following screenshot:

Copy the entire folder (ticket-management) and keep it in your desired location.
Working with your favorite IDE
Now is the time to pick the IDE. Though there are many IDEs used for Spring Boot projects, I would recommend using Spring Tool Suite (STS), as it is open source and easy to manage projects with. In my case, I use sts-3.8.2.RELEASE. You can download the latest STS from this link: https://spring. io/tools/sts/ all. In most cases, you may not need to install; just unzip the file and start using it:
After extracting the STS, you can start using the tool by running STS.exe (shown in the preceding screenshot).
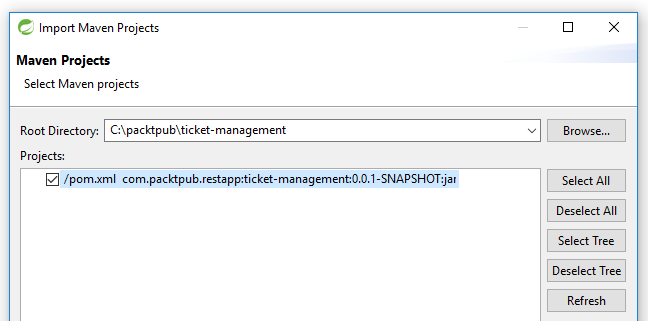
In STS, you can import the project by selecting Existing Maven Projects, shown as follows:
After importing the project, you can see the project in Package Explorer, as shown in the following screenshot:
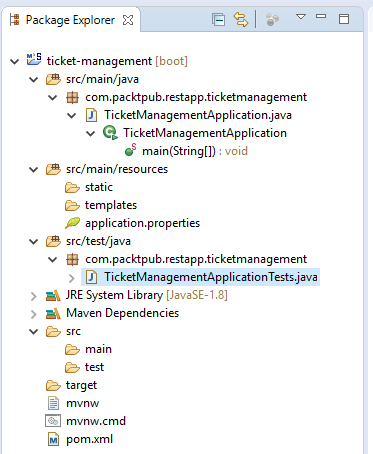
You can see the main Java file (TicketManagementApplication) by default:
To simplify the project, we will clean up the existing POM file and update the required dependencies. Add this file configuration to pom.xml:
<?xml version="1.0" encoding="UTF-8"?>
<project xmlns="http://maven.apache.org/POM/4.0.0"
xmlns:xsi="http://www.w3.org/2001/XMLSchema-instance"
xsi:schemaLocation="http://maven.apache.org/POM/4.0.0
http://maven.apache.org/xsd/maven-4.0.0.xsd">
<modelVersion>4.0.0</modelVersion>
<groupId>com.packtpub.restapp</groupId>
<artifactId>ticket-management</artifactId>
<version>0.0.1-SNAPSHOT</version>
<packaging>jar</packaging>
<name>ticket-management</name>
<description>Demo project for Spring Boot</description>
<properties>
<project.build.sourceEncoding>UTF-8</project.build.sourceEncoding>
<project.reporting.outputEncoding>UTF-8</project.reporting.outputEncoding>
</properties>
<dependencies>
<dependency>
<groupId>org.springframework</groupId>
<artifactId>spring-web</artifactId>
<version>5.0.1.RELEASE</version>
</dependency>
<dependency>
<groupId>org.springframework.boot</groupId>
<artifactId>spring-boot-starter</artifactId>
<version>1.5.7.RELEASE</version>
</dependency>
<dependency>
<groupId>org.springframework.boot</groupId>
<artifactId>spring-boot-starter-tomcat</artifactId>
<version>1.5.7.RELEASE</version>
</dependency>
<dependency>
<groupId>com.fasterxml.jackson.core</groupId>
<artifactId>jackson-databind</artifactId>
<version>2.9.2</version>
</dependency>
<dependency>
<groupId>org.springframework</groupId>
<artifactId>spring-web</artifactId>
<version>5.0.0.RELEASE</version>
</dependency>
<dependency>
<groupId>org.springframework</groupId>
<artifactId>spring-webmvc</artifactId>
<version>5.0.1.RELEASE</version>
</dependency>
<dependency>
<groupId>org.springframework.boot</groupId>
<artifactId>spring-boot-starter-test</artifactId>
<scope>test</scope>
<version>1.5.7.RELEASE</version>
</dependency>
</dependencies>
<build>
<plugins>
<plugin>
<groupId>org.springframework.boot</groupId>
<artifactId>spring-boot-maven-plugin</artifactId>
</plugin>
</plugins>
</build>
</project>
In the preceding configuration, you can check that we have used the following libraries:
- spring-web
- spring-boot-starter
- spring-boot-starter-tomcat
- spring-bind
- jackson-databind
As the preceding dependencies are needed for the project to run, we have added them to our pom.xml file.
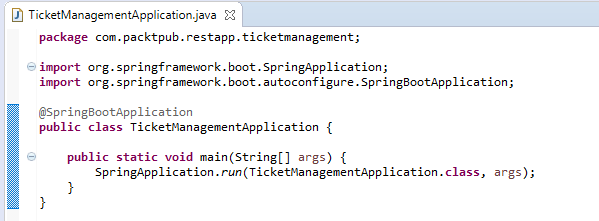
So far we have got the base project ready for Spring Web Service. Let’s add a basic REST code to the application. First, remove the @SpringBootApplication annotation from the TicketManagementApplication class and add the following annotations:
@Configuration
@EnableAutoConfiguration
@ComponentScan
@Controller
These annotations will help the class to act as a web service class. I am not going to talk much about what these configurations will do in this chapter. After adding the annotations, please add a simple method to return a string as our basic web service method:
@ResponseBody
@RequestMapping("/")
public String sayAloha(){
return "Aloha";
}
Finally, your code will look as follows:
package com.packtpub.restapp.ticketmanagement;
import org.springframework.boot.SpringApplication;
import org.springframework.boot.autoconfigure.EnableAutoConfiguration;
import org.springframework.context.annotation.ComponentScan;
import org.springframework.context.annotation.Configuration;
import org.springframework.stereotype.Controller;
import org.springframework.web.bind.annotation.RequestMapping;
import org.springframework.web.bind.annotation.ResponseBody;
@Configuration
@EnableAutoConfiguration
@ComponentScan
@Controller
public class TicketManagementApplication {
@ResponseBody
@RequestMapping("/")
public String sayAloha(){
return "Aloha";
}
public static void main(String[] args) {
SpringApplication.run(TicketManagementApplication.class, args);
}
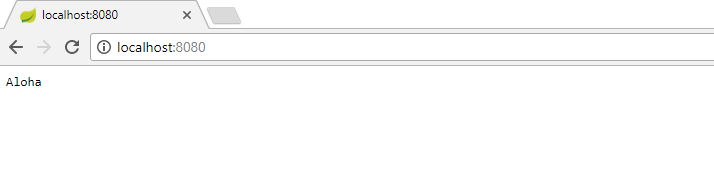
}Once all the coding changes are done, just run the project on Spring Boot App (Run As | Spring Boot App). You can verify the application has loaded by checking this message in the console:
Tomcat started on port(s): 8080 (http)
Once verified, you can check the API on the browser by simply typing localhost:8080. Check out the following screenshot:
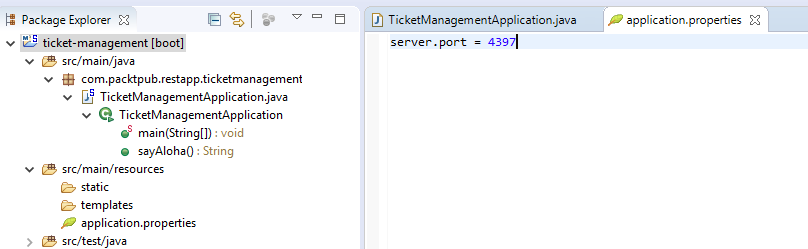
If you want to change the port number, you can configure a different port number in application.properties, which is in src/main/resources/application.properties. Check out the following screenshot:
You read an excerpt from Building RESTful Web Services with Spring 5 – Second Edition written by Raja CSP Raman. From this book, you will learn to implement the REST architecture to build resilient software in Java.
Check out other related posts:
Testing RESTful Web Services with Postman
Applying Spring Security using JSON Web Token (JWT)