


We know how to write diagnostic analyzers to analyze and report issues about .NET source code and contribute them to the .NET developer community. In this article by the author Manish Vasani, of the book Roslyn Cookbook, we will show you how to search, install, view and configure the analyzers that have already been published by various analyzer authors on NuGet and VS Extension gallery. We will cover the following recipes:
(For more resources related to this topic, see here.)
- Searching and installing analyzers through the NuGet package manager.
- Searching and installing VSIX analyzers through the VS extension gallery.
- Viewing and configuring analyzers in solution explorer in Visual Studio.
- Using ruleset file and ruleset editor to configure analyzers.
Diagnostic analyzers are extensions to the Roslyn C# compiler and Visual Studio IDE to analyze user code and report diagnostics. User will see these diagnostics in the error list after building the project from Visual Studio and even when building the project on the command line. They will also see the diagnostics live while editing the source code in the Visual Studio IDE. Analyzers can report diagnostics to enforce specific code styles, improve code quality and maintenance, recommend design guidelines or even report very domain specific issues which cannot be covered by the core compiler.
Analyzers can be installed to a .NET project either as a NuGet package or as a VSIX. To get a better understanding of these packaging schemes and learn about the differences in the analyzer experience when installed as a NuGet package versus a VSIX.
Analyzers are supported on various different flavors of .NET standard, .NET core and .NET framework projects, for example, class library, console app, etc.
Searching and installing analyzers through the NuGet package manager
In this recipe we will show you how to search and install analyzer NuGet packages in the NuGet package manager in Visual Studio and see how the analyzer diagnostics from an installed NuGet package light up in project build and as live diagnostics during code editing in Visual Studio.
Getting ready
You will need to have Visual Studio 2017 installed on your machine to this recipe. You can install a free community version of Visual Studio 2017 from https://www.visualstudio.com/thank-you-downloading-visual-studio/?sku=Community&rel=15.
How to do it…
- Create a C# class library project, say ClassLibrary, in Visual Studio 2017.
- In solution explorer, right click on the solution or project node and execute Manage NuGet Packages command.
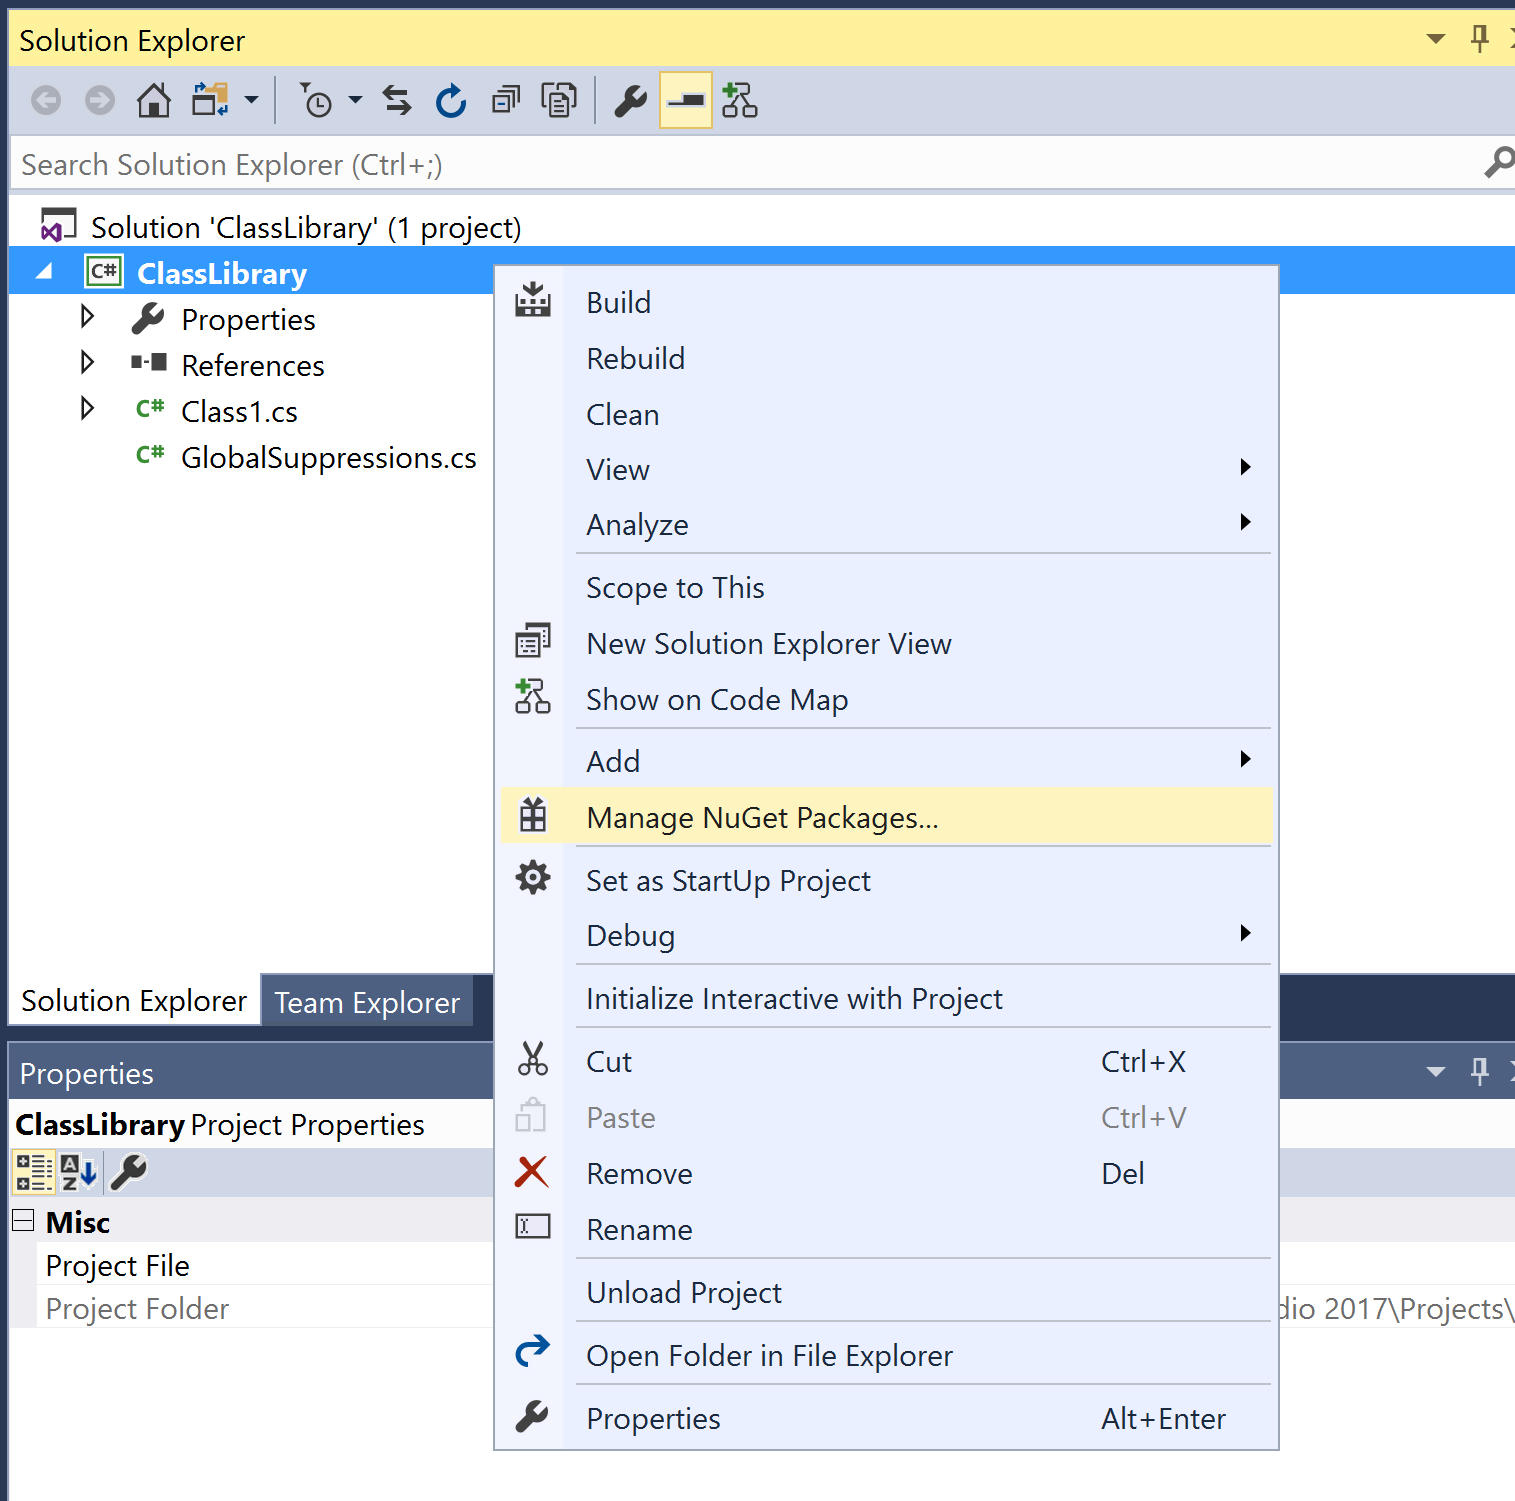
- This brings up the NuGet Package Manager, which can be used to search and install NuGet packages to the solution or project.
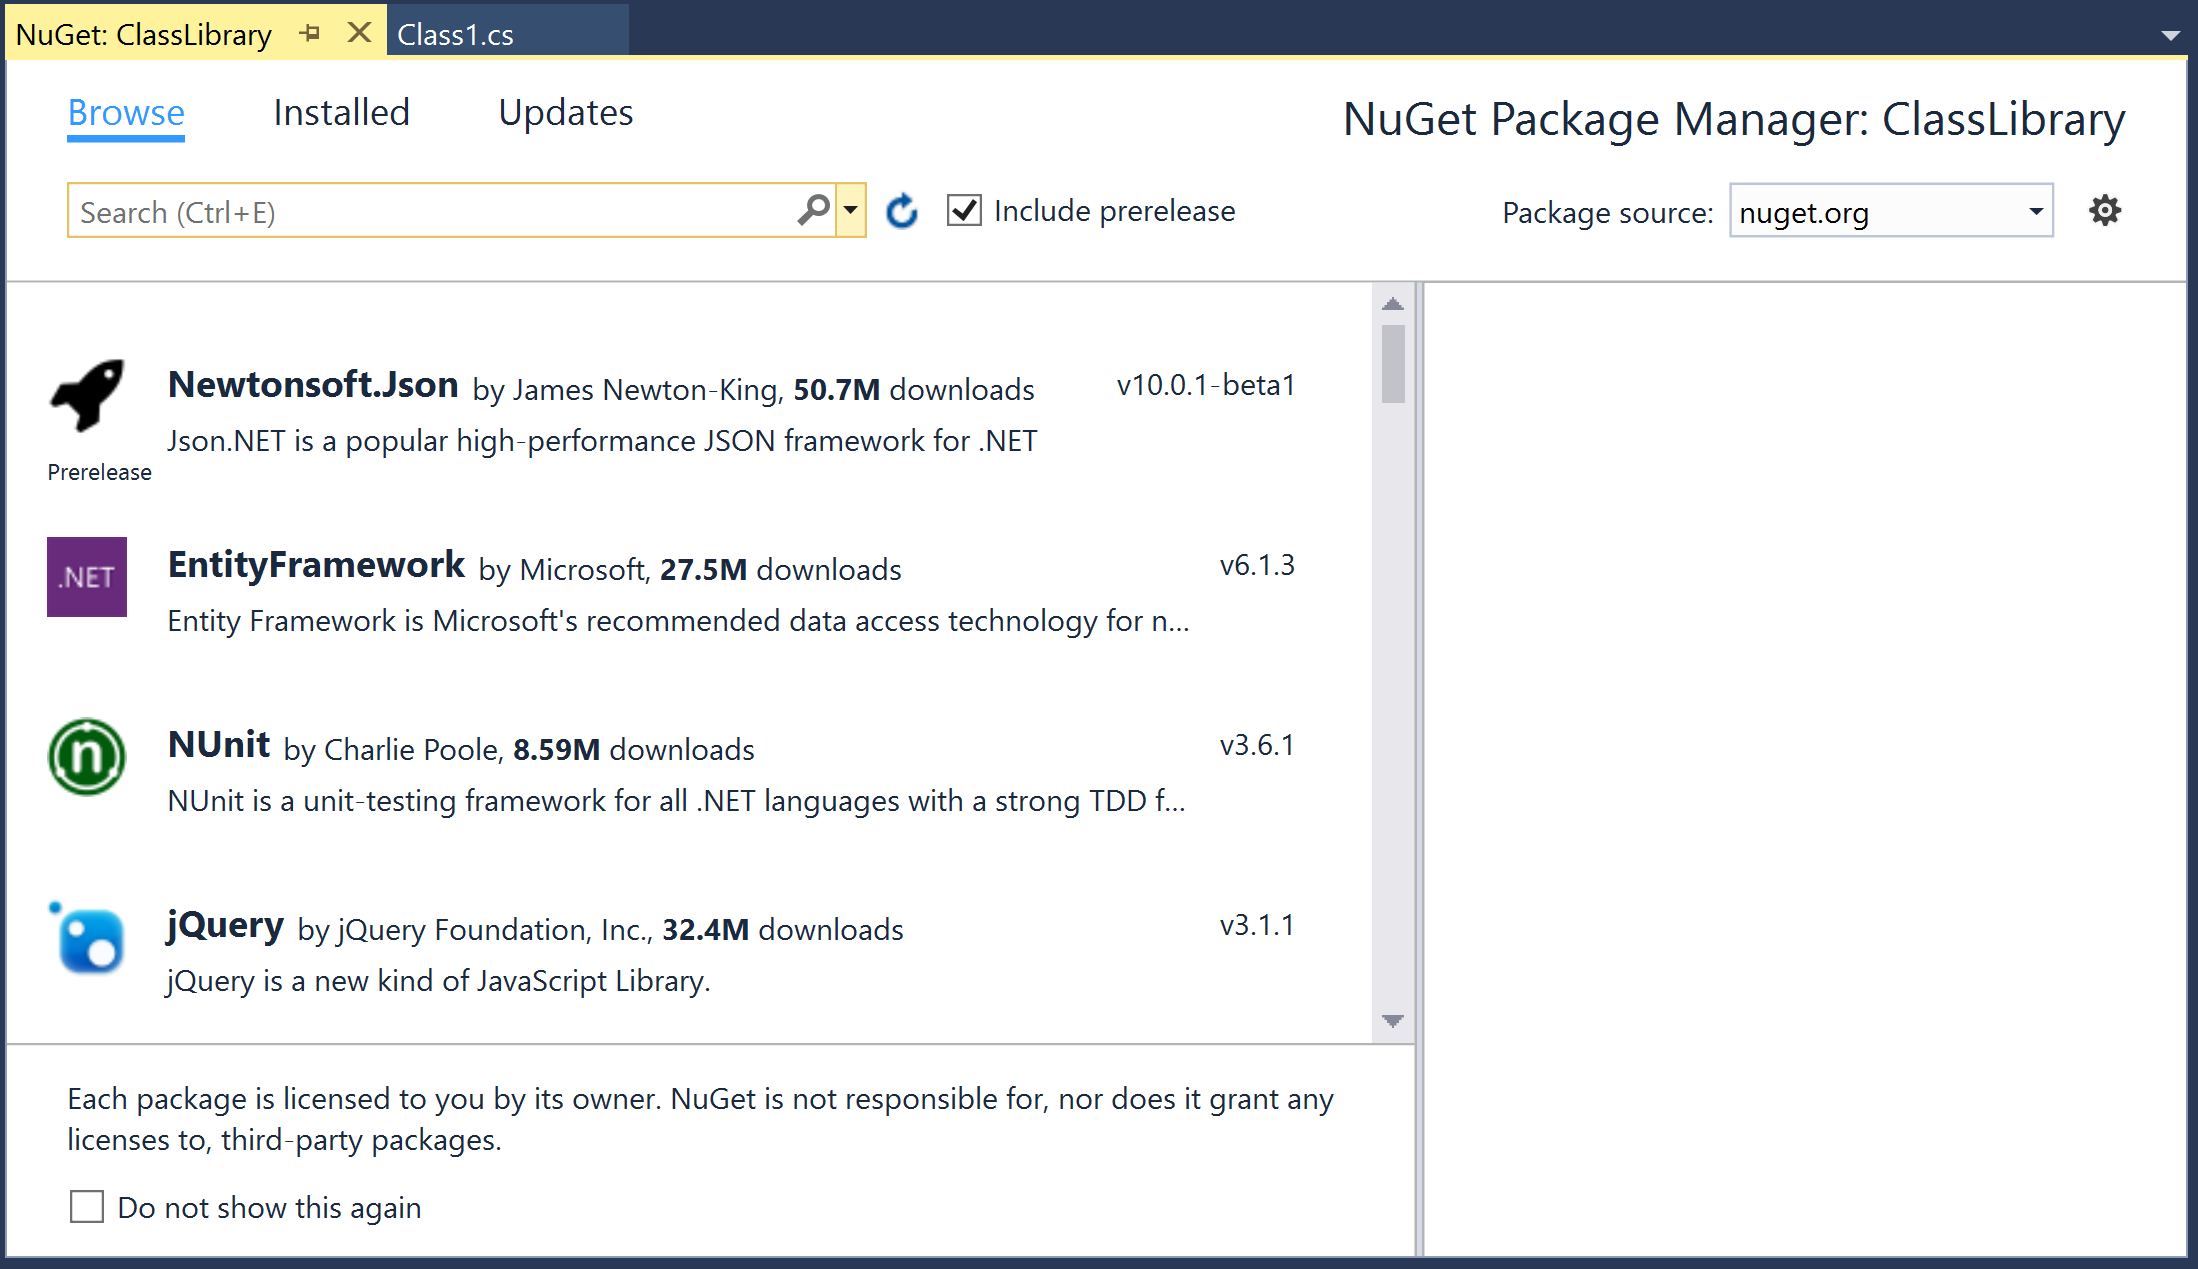
- In the search bar type the following text to find NuGet packages tagged as analyzers:
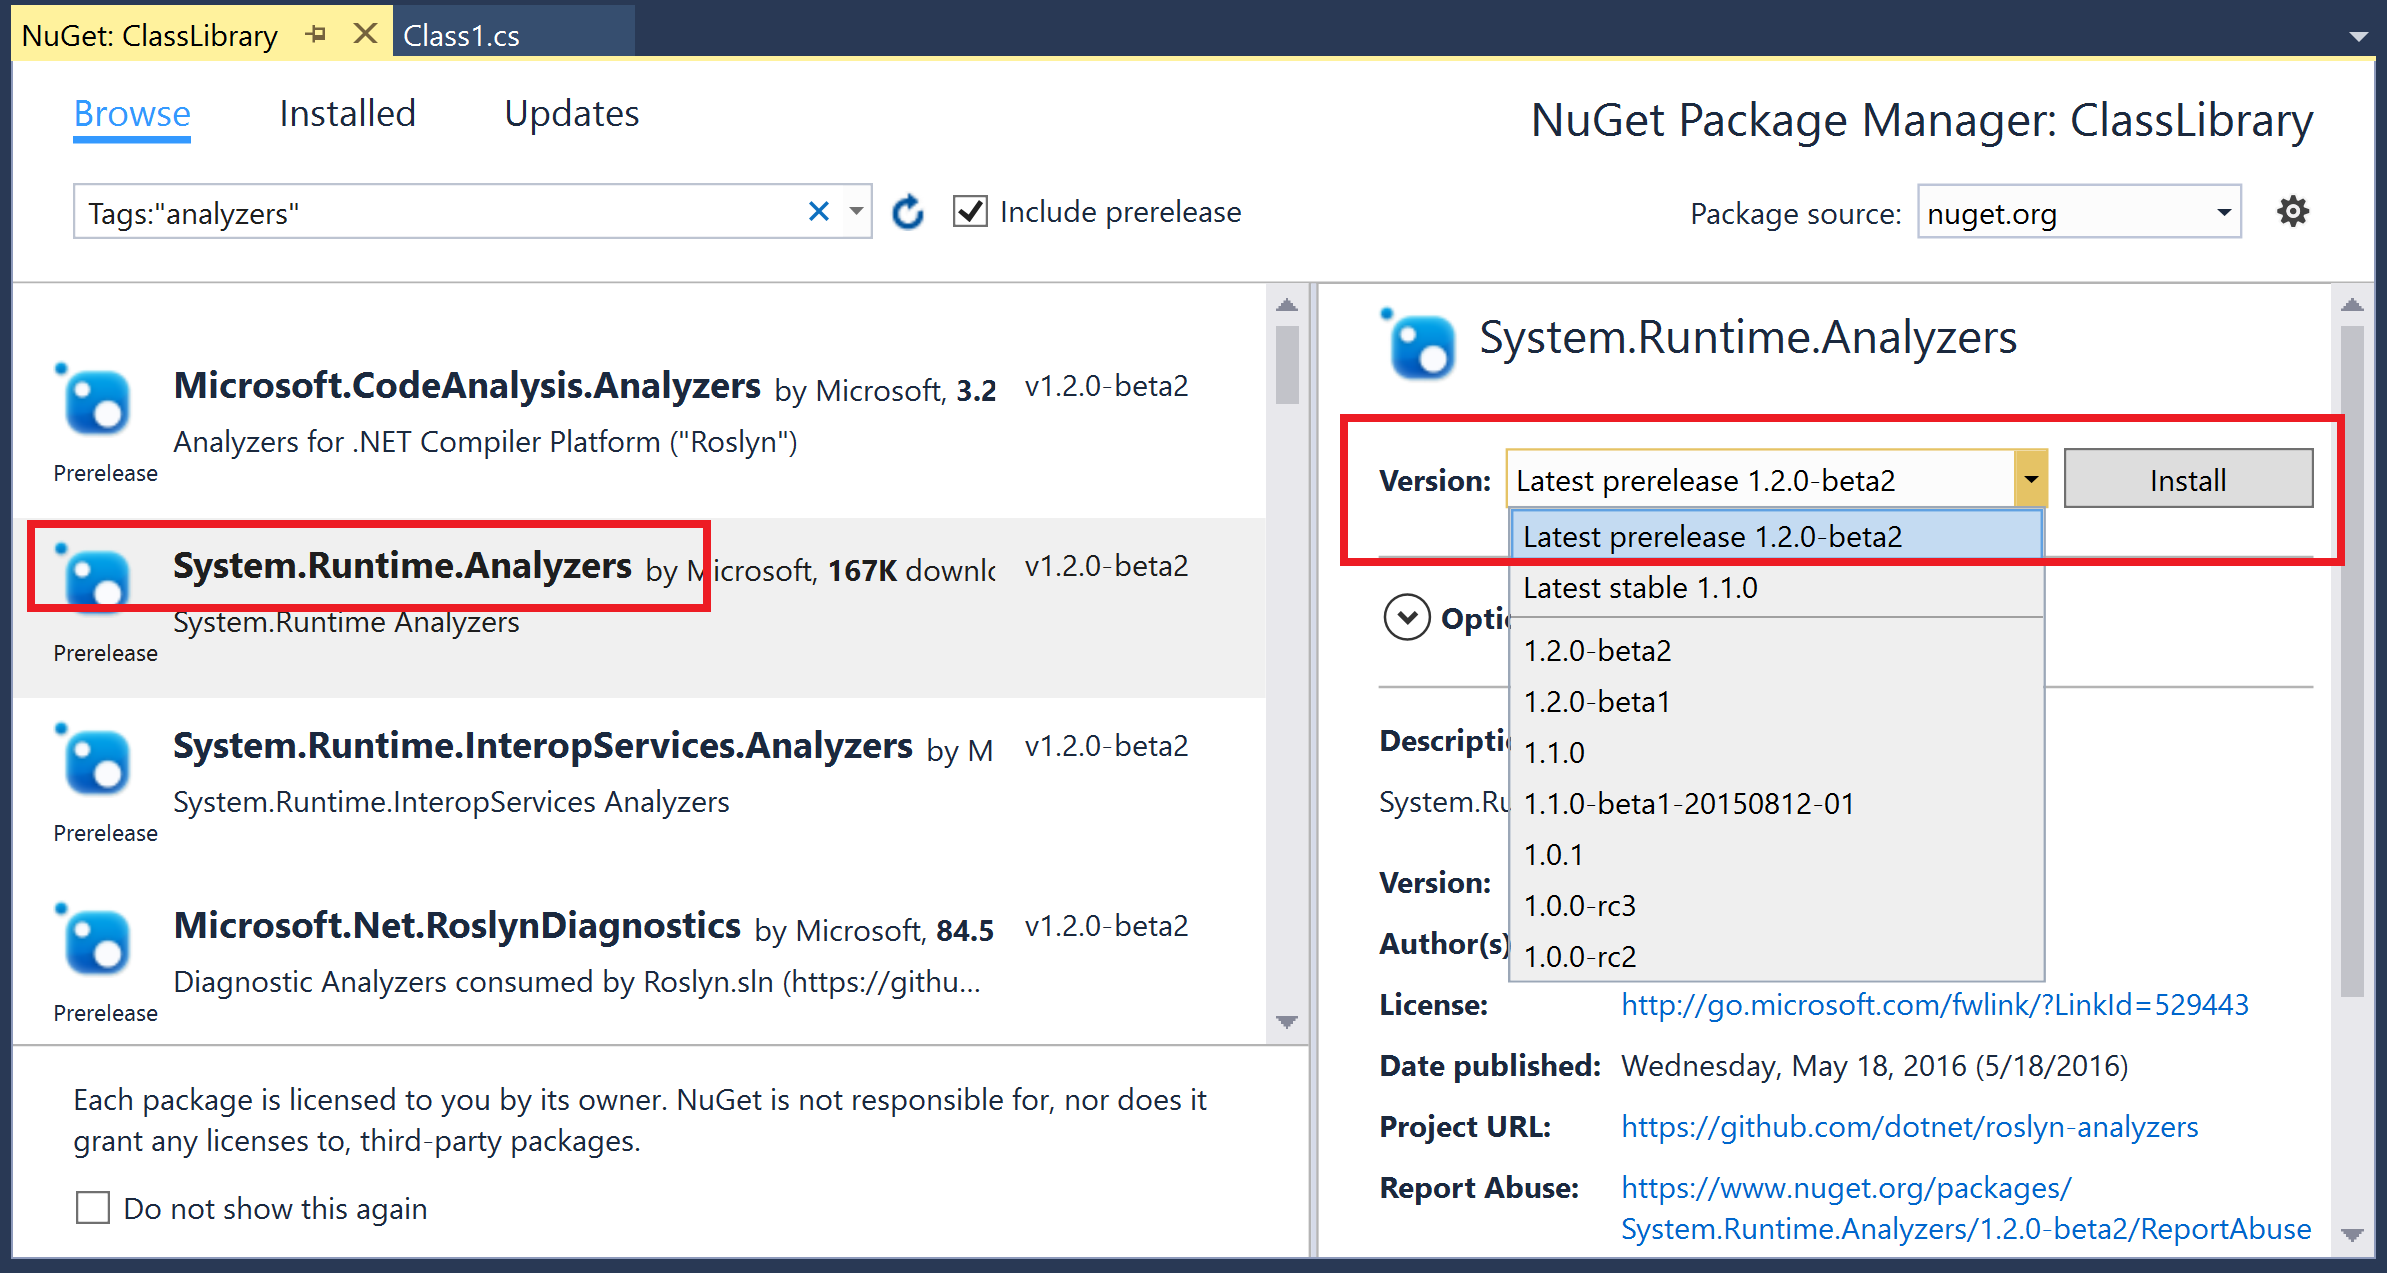
Tags:"analyzers"Note that some of the well known packages are tagged as analyzer, so you may also want to search:Tags:"analyzer" - Check or uncheck the Include prerelease checkbox to the right of the search bar to search or hide the prerelease analyzer packages respectively. The packages are listed based on the number of downloads, with the highest downloaded package at the top.

- Select a package to install, say System.Runtime.Analyzers, and pick a specific version, say 1.1.0, and click Install.
- Click on I Accept button on the License Acceptance dialog to install the NuGet package.
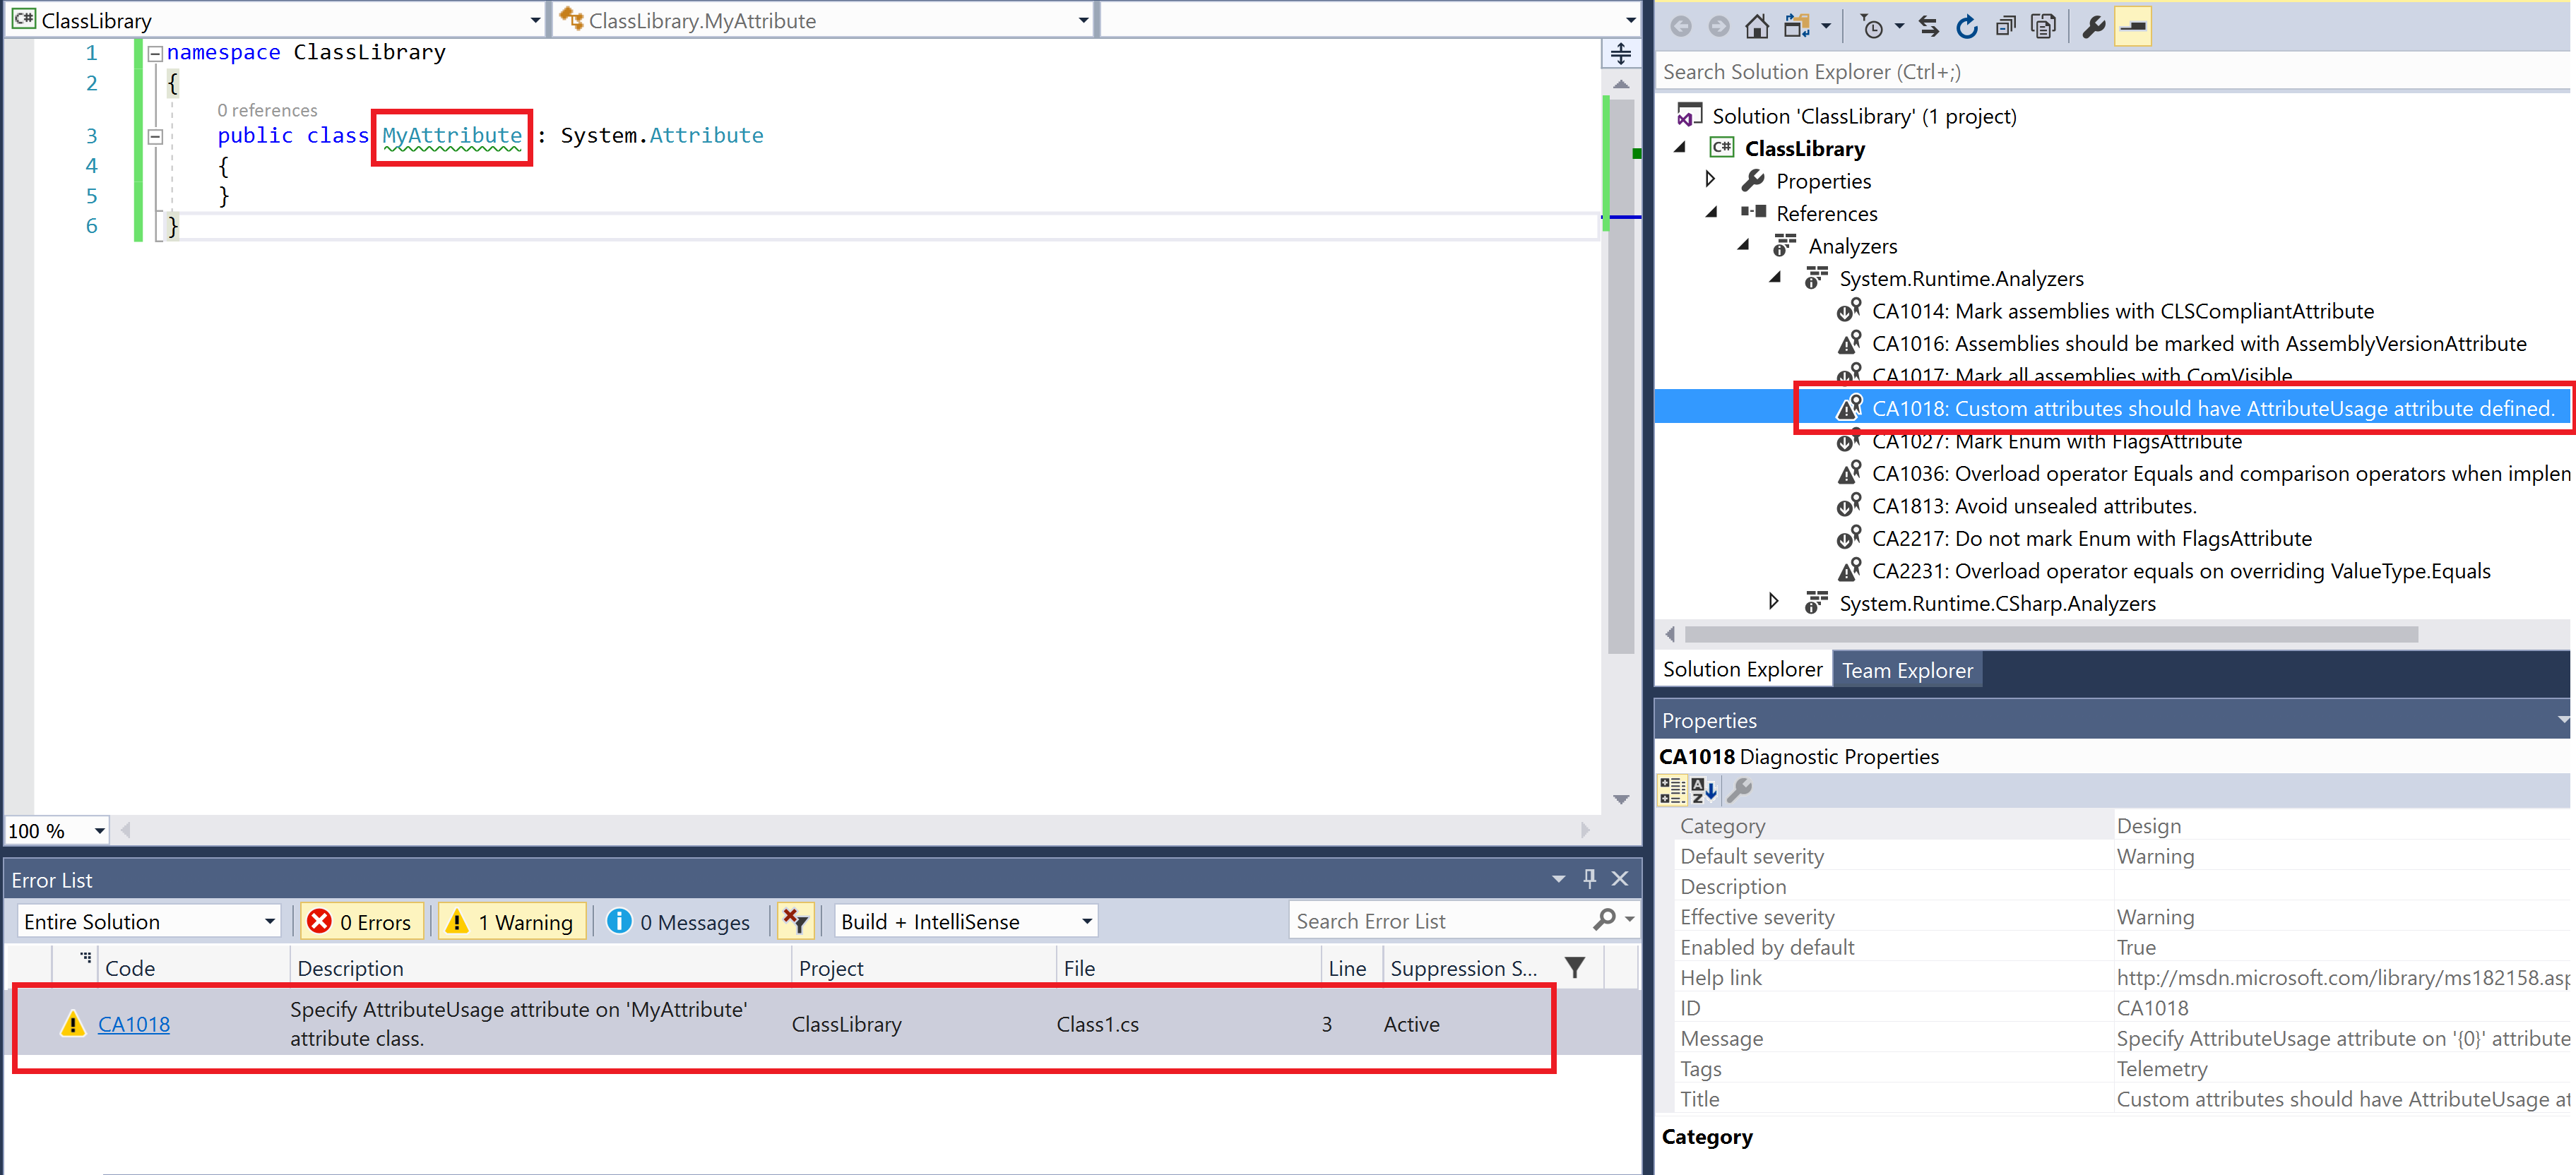
- Verify the installed analyzer(s) show up under the Analyzers node in the solution explorer.
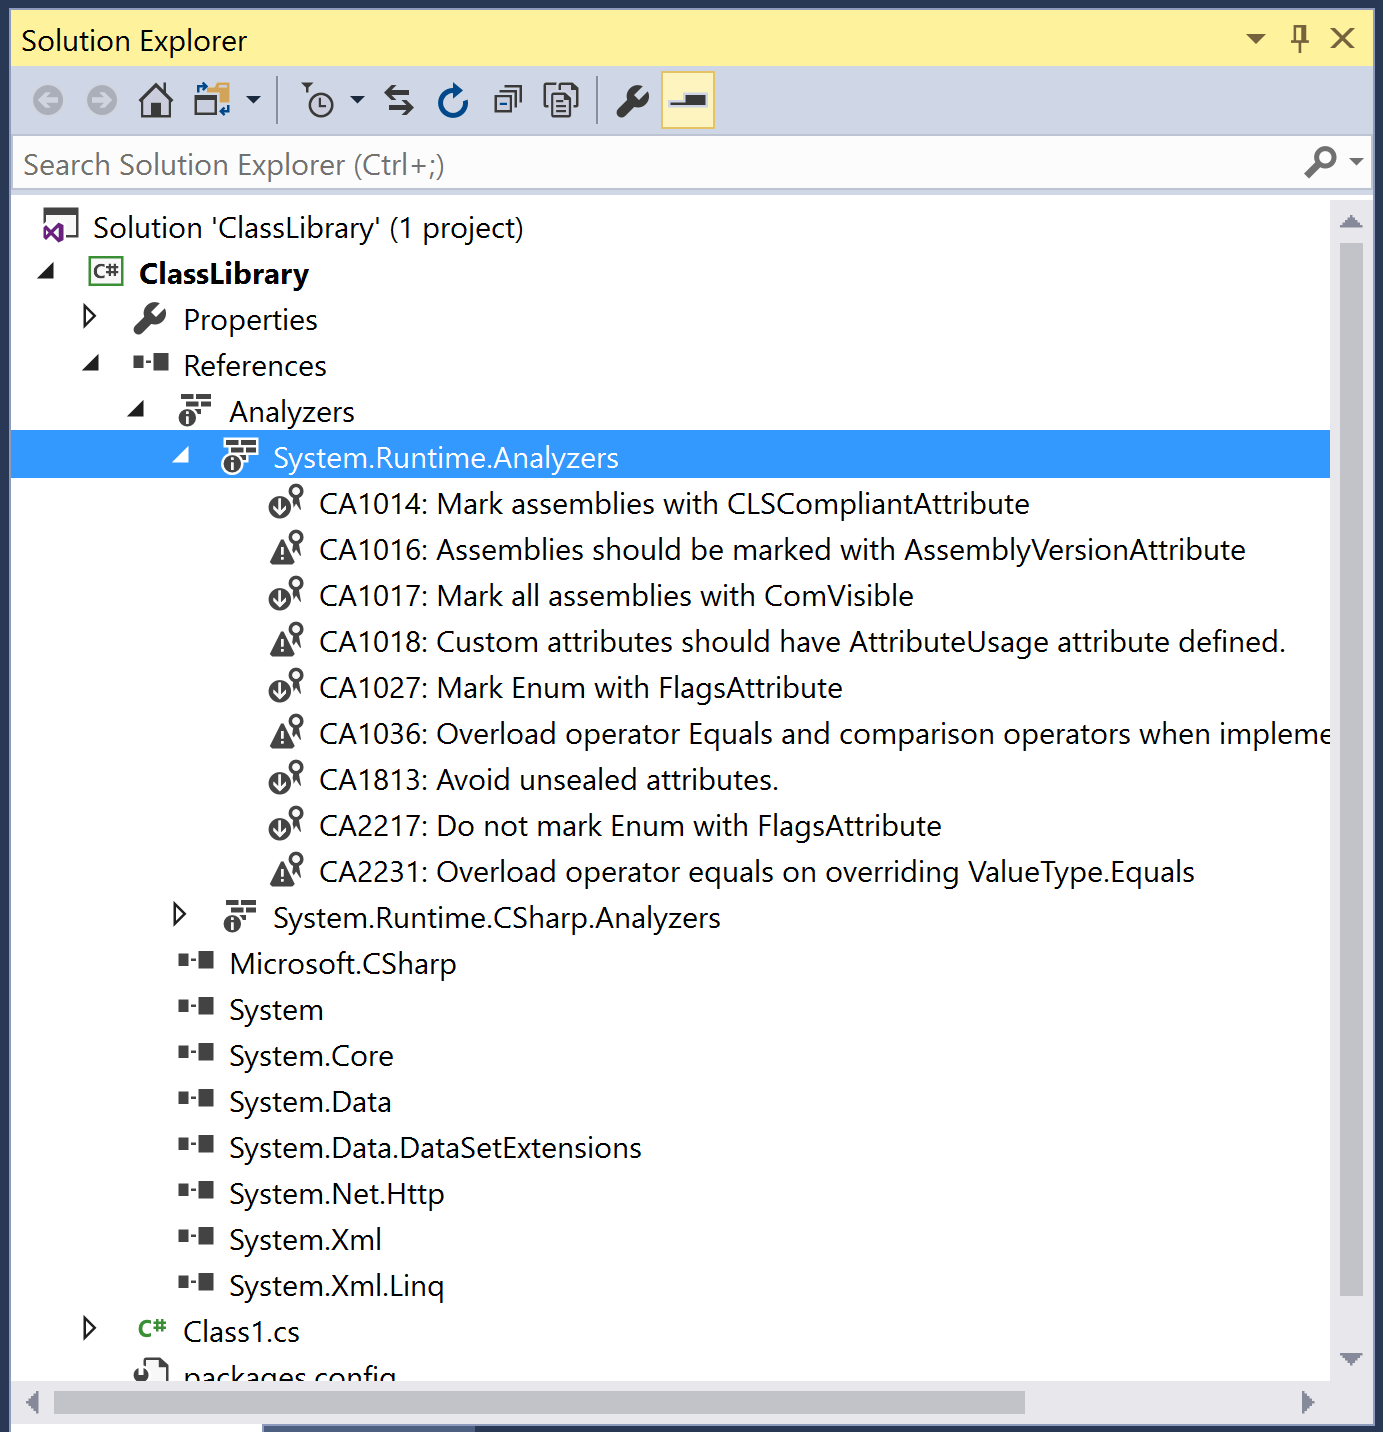
- Verify the project file has a new ItemGroup with the following analyzer references from the installed analyzer package:
<ItemGroup> <Analyzer Include="..packagesSystem.Runtime.Analyzers.1.1.0analyzersdotnetcsSystem.Runtime.Analyzers.dll" /> <Analyzer Include="..packagesSystem.Runtime.Analyzers.1.1.0analyzersdotnetcsSystem.Runtime.CSharp.Analyzers.dll" /> </ItemGroup> - Add the following code to your C# project:
namespace ClassLibrary { public class MyAttribute : System.Attribute { } } - Verify the analyzer diagnostic from the installed analyzer is shown in the error list:
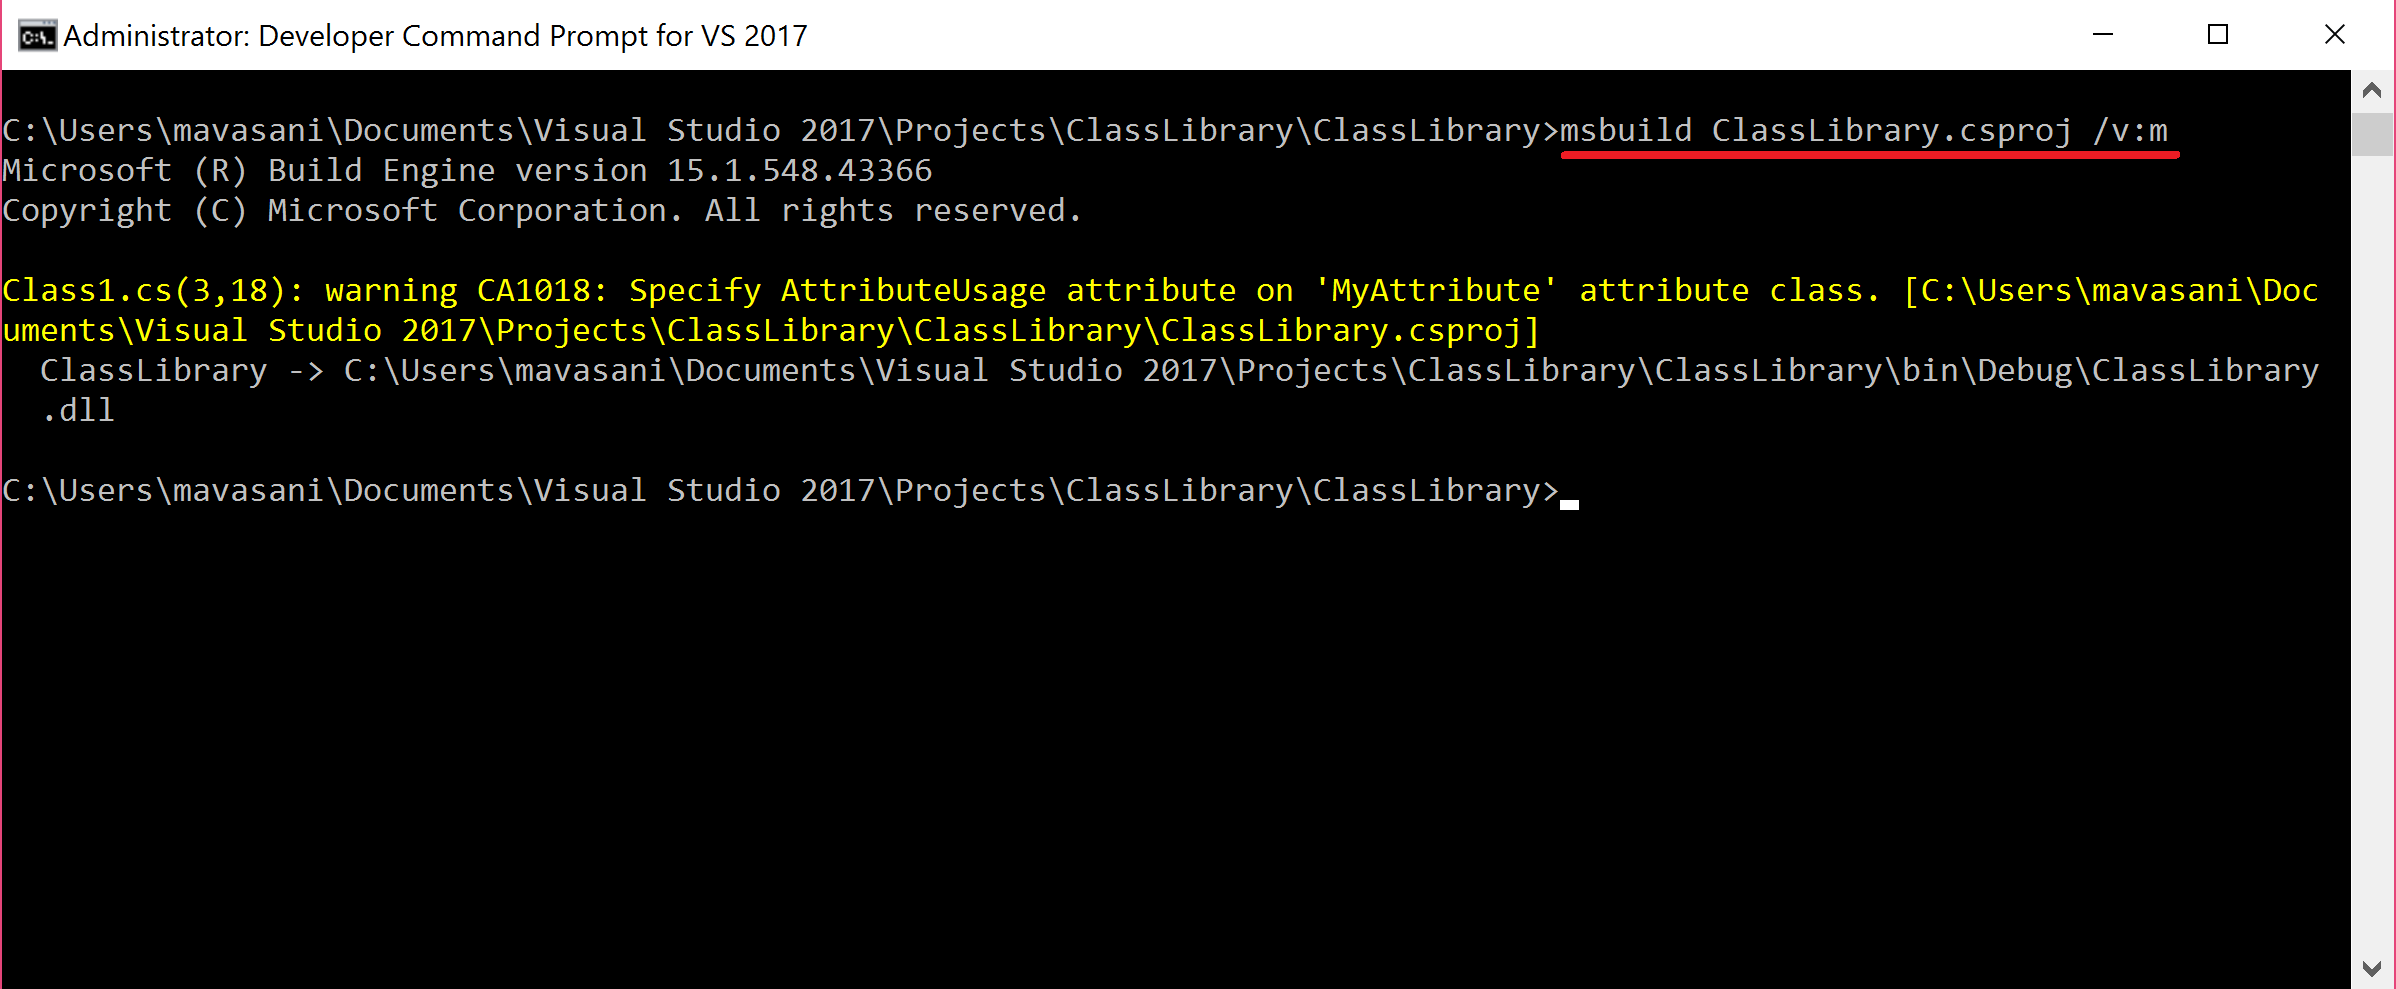
- Open a Visual Studio 2017 Developer Command Prompt and build the project to verify that the analyzer is executed on the command line build and the analyzer diagnostic is reported:
- Create a new C# project in VS2017 and add the same code to it as step 9 and verify no analyzer diagnostic shows up in error list or command line, confirming that the analyzer package was only installed to the selected project in steps 1-6.
Note that CA1018 (Custom attribute should have AttributeUsage defined) has been moved to a separate analyzer assembly in future versions of FxCop/System.Runtime.Analyzers package. It is recommended that you install Microsoft.CodeAnalysis.FxCopAnalyzers NuGet package to get the latest group of Microsoft recommended analyzers.
Searching and installing VSIX analyzers through the VS extension gallery
In this recipe we will show you how to search and install analyzer VSIX packages in the Visual Studio Extension manager and see how the analyzer diagnostics from an installed VSIX light up as live diagnostics during code editing in Visual Studio.
Getting ready
You will need to have Visual Studio 2017 installed on your machine to this recipe. You can install a free community version of Visual Studio 2017 from https://www.visualstudio.com/thank-you-downloading-visual-studio/?sku=Community&rel=15.
How to do it…
- Create a C# class library project, say ClassLibrary, in Visual Studio 2017.
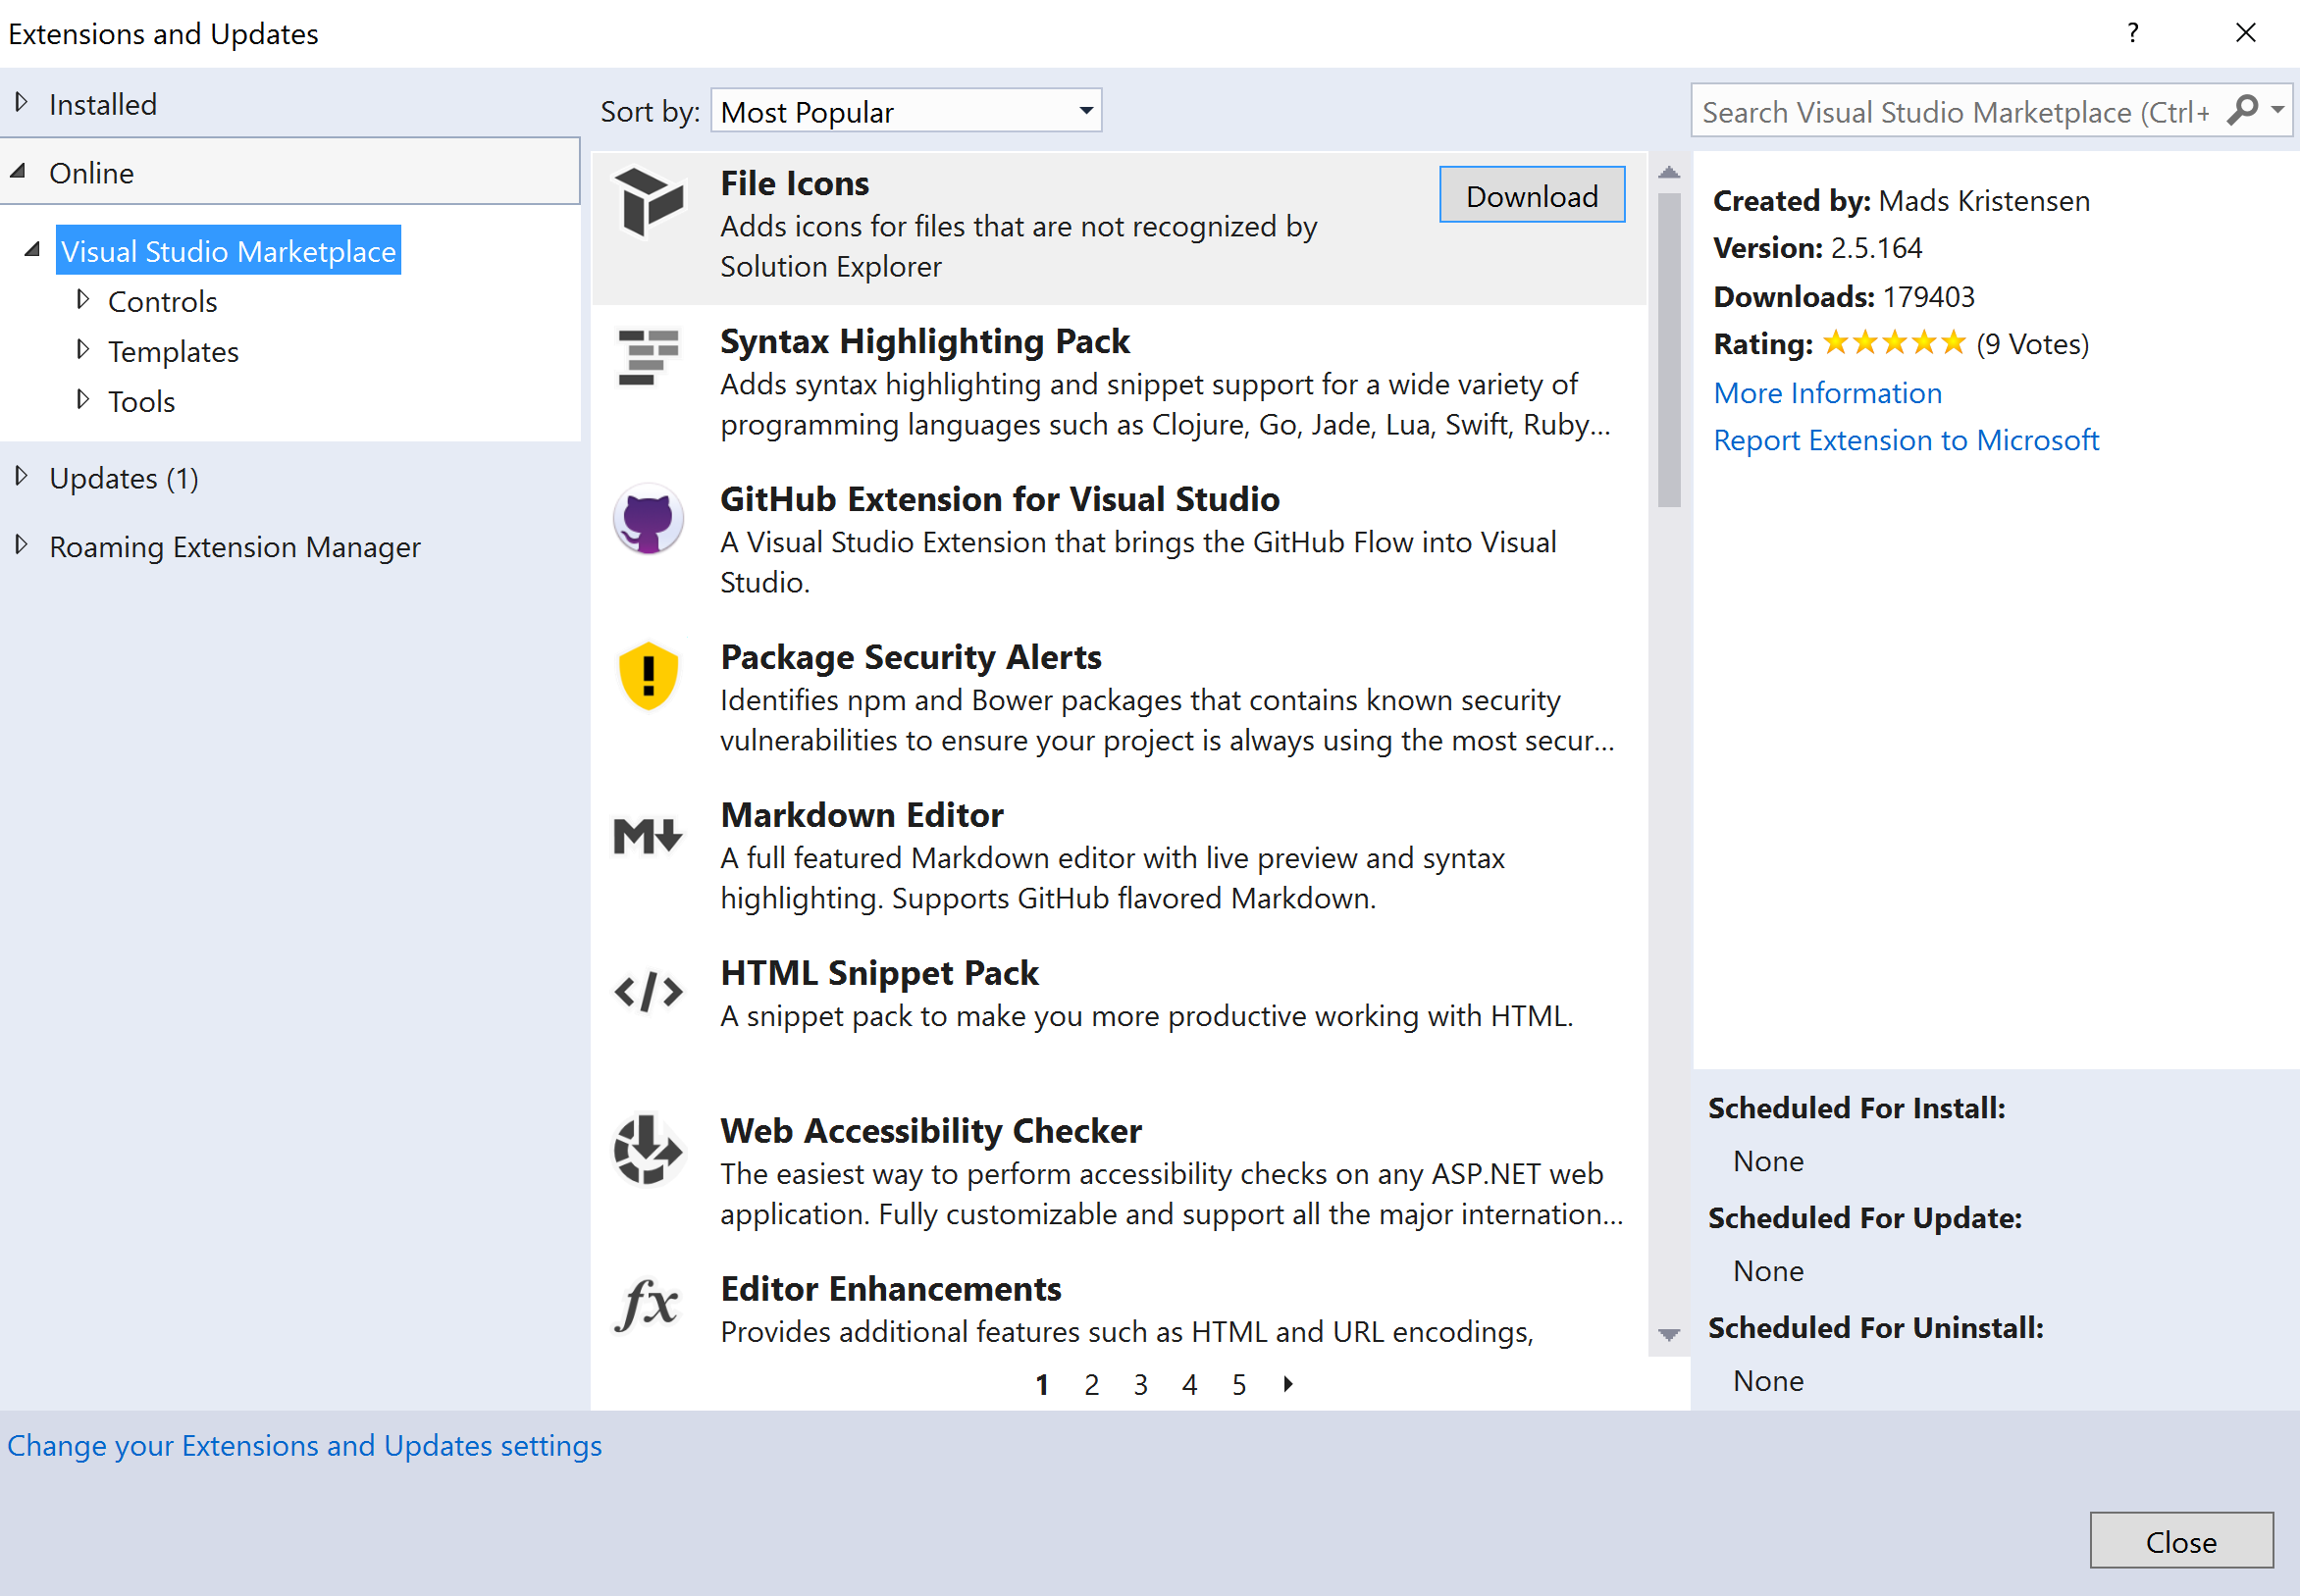
- From the top level menu, execute Tools | Extensions and Updates
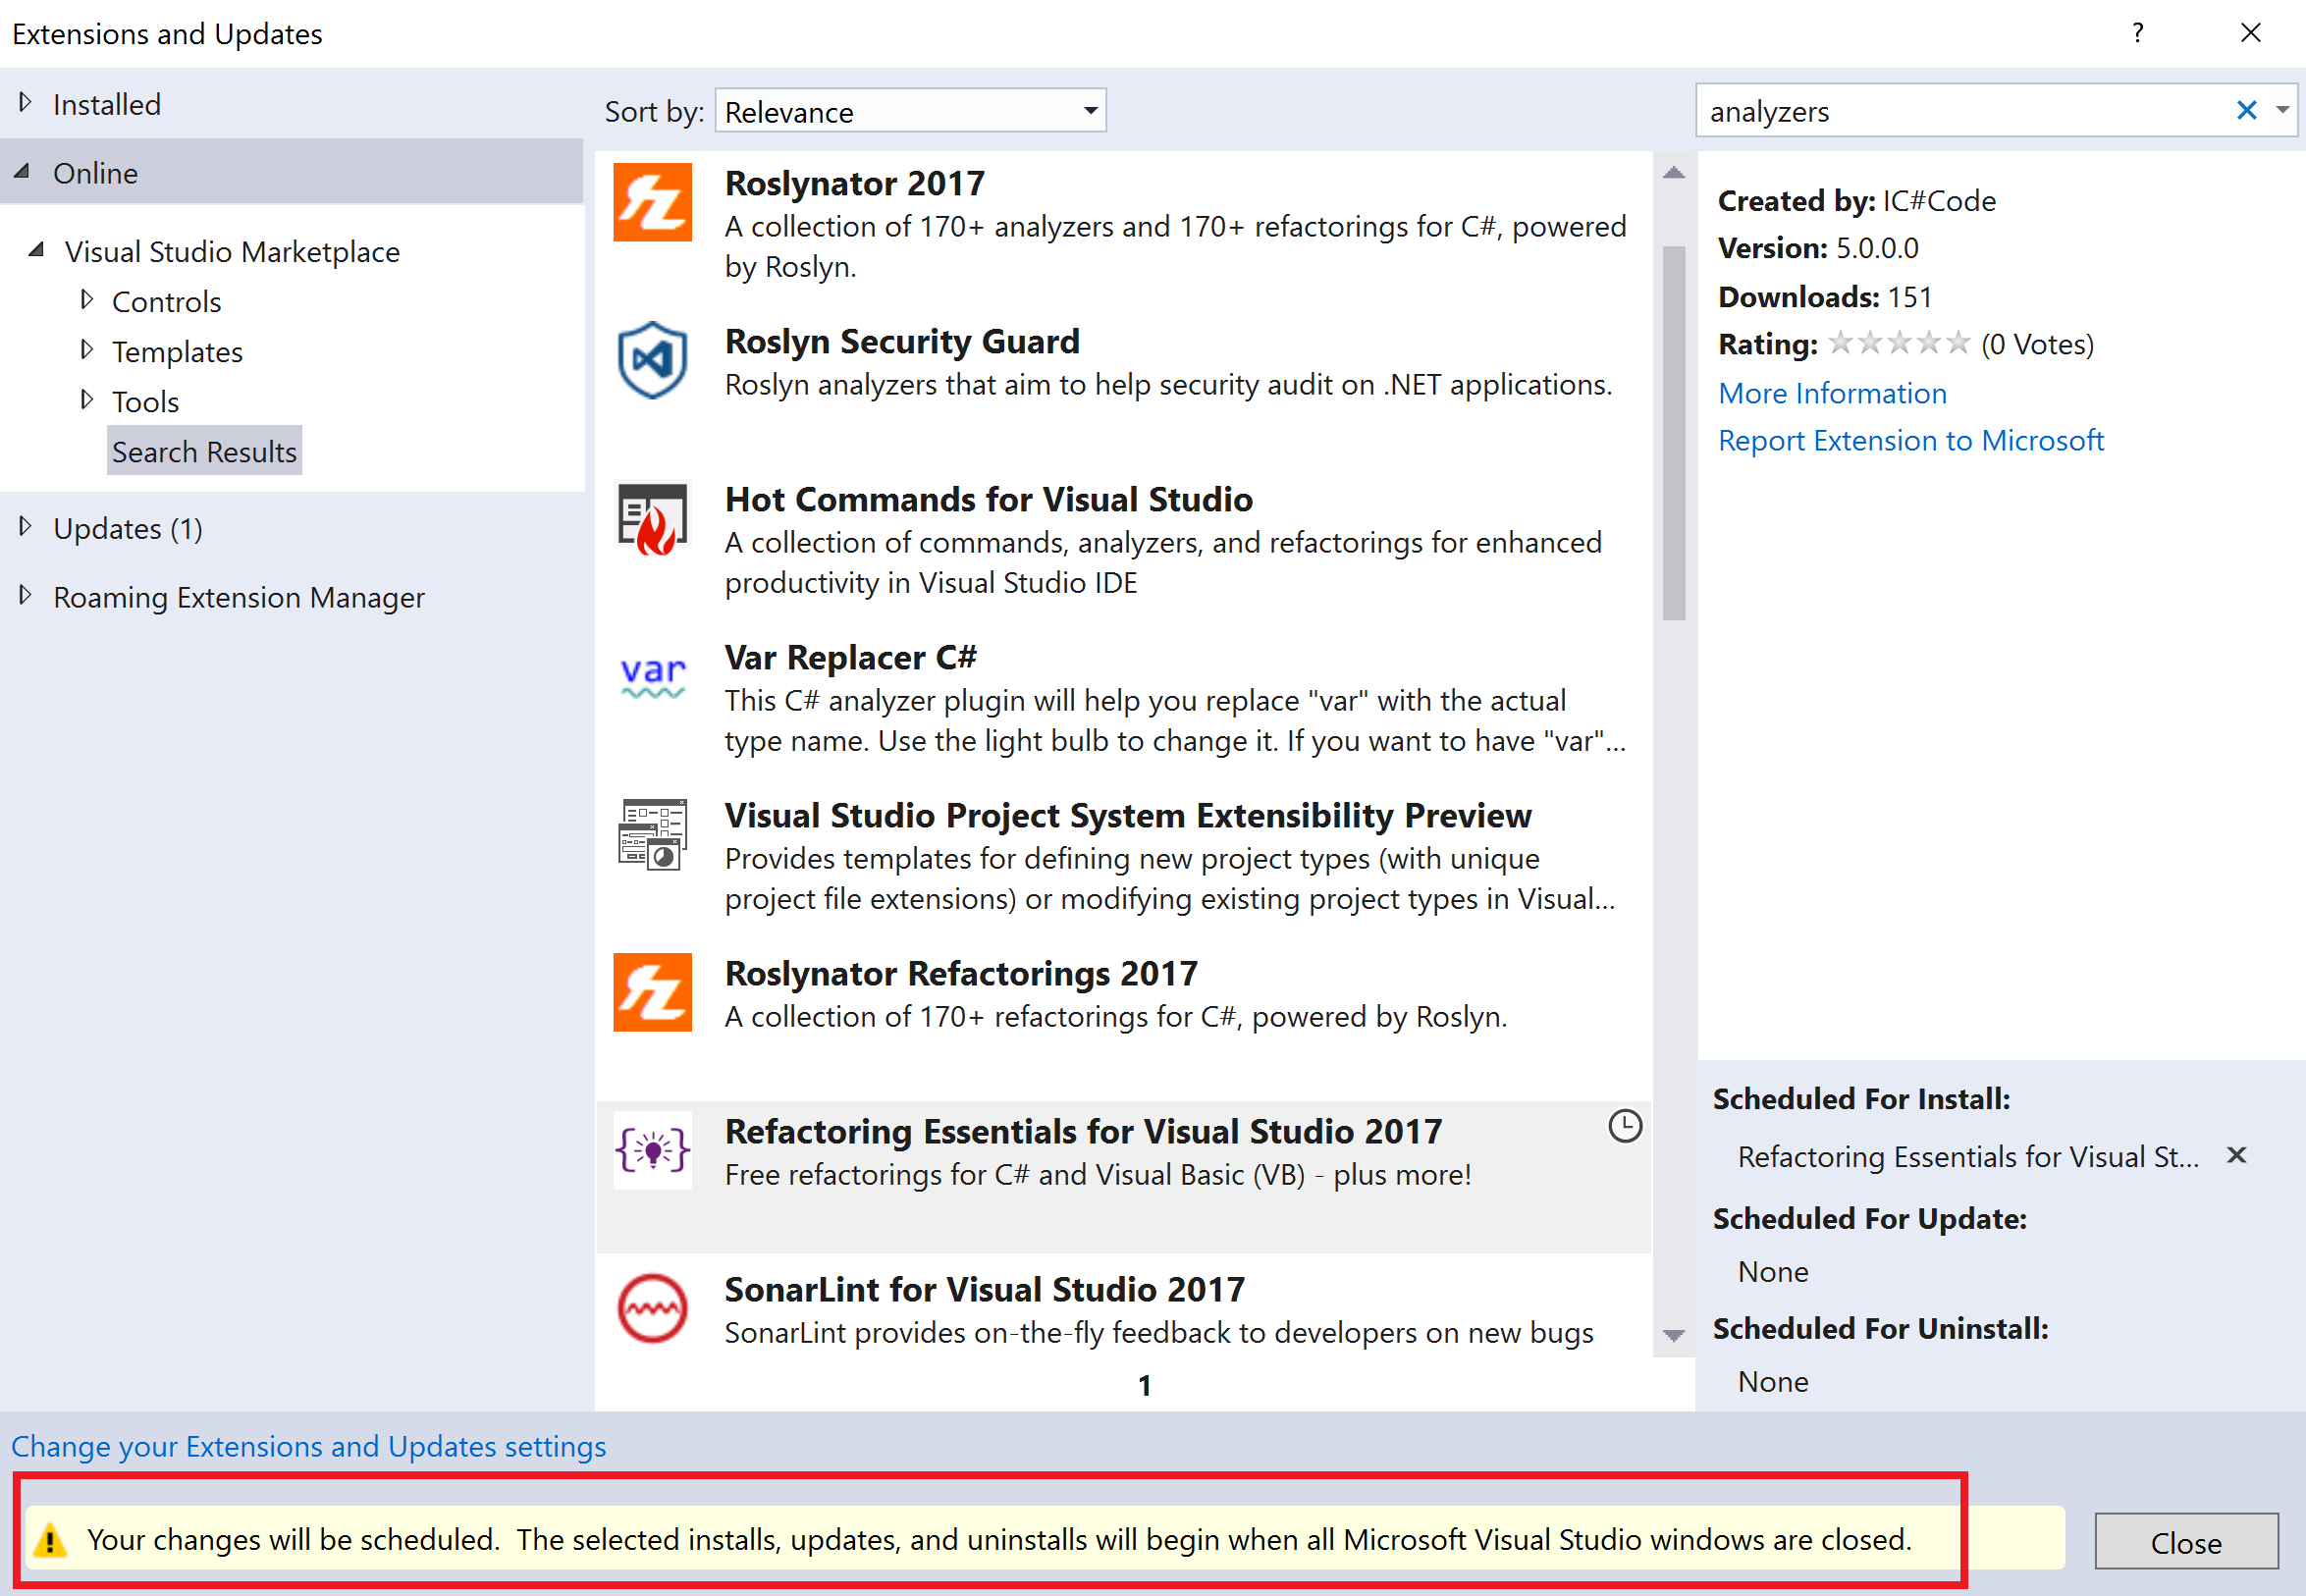
- Navigate to Online | Visual Studio Marketplace on the left tab of the dialog to view the available VSIXes in the Visual Studio extension gallery/marketplace.
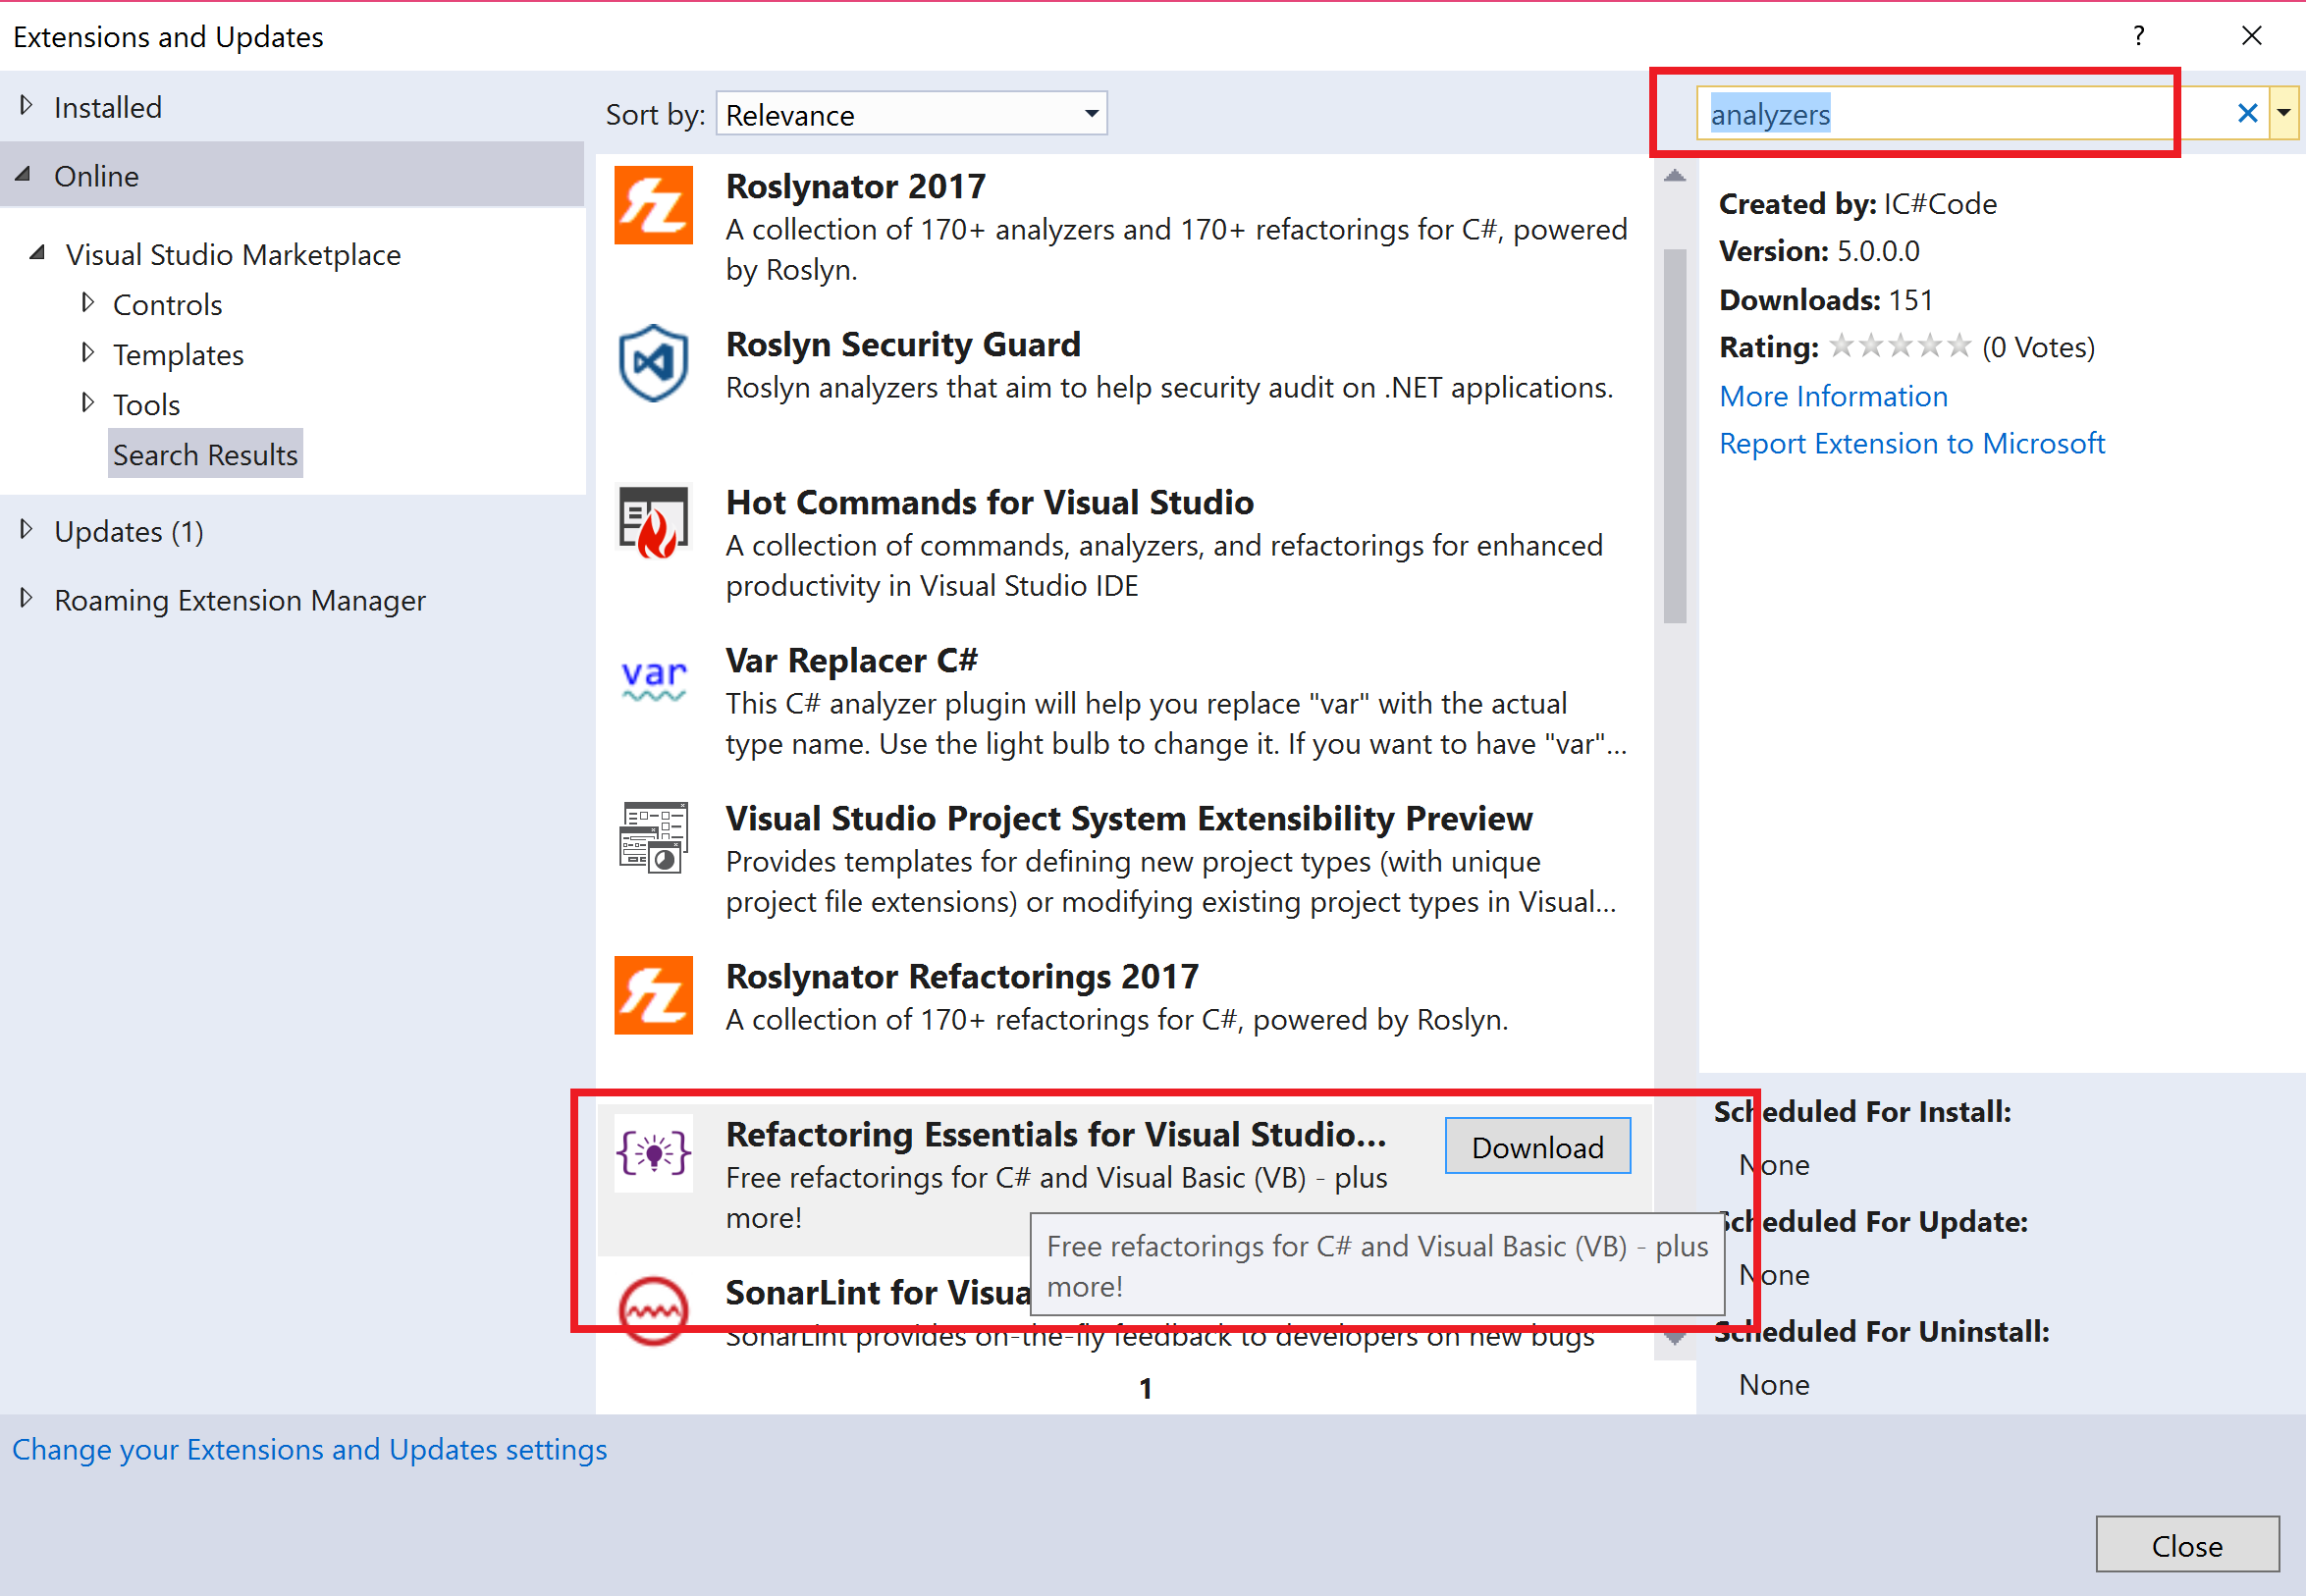
- Search analyzers in the search text box in the upper right corner of the dialog and download an analyzer VSIX, say Refactoring Essentials for Visual Studio.
- Once the download completes, you will get a message at the bottom of the dialog that the install will be scheduled to execute once Visual Studio and related windows are closed.
- Close the dialog and then close the Visual Studio instance to start the install.
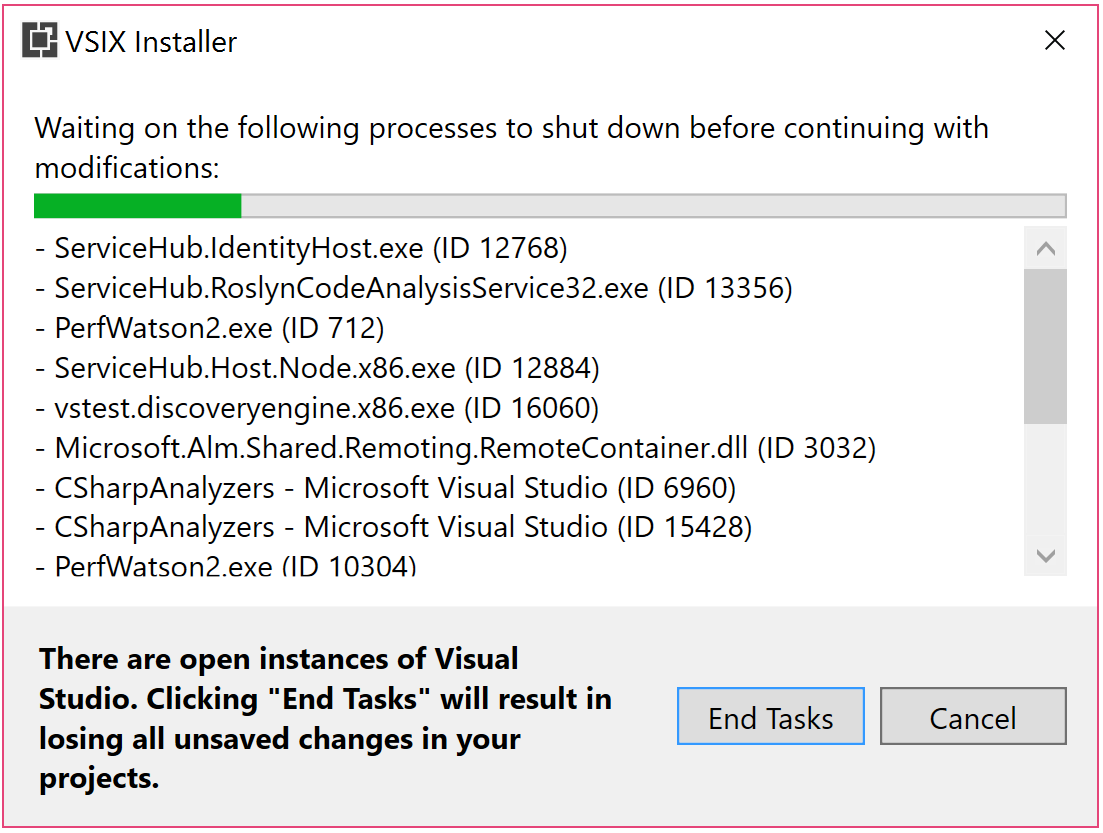
- In the VSIX Installer dialog, click Modify to start installation.

- The subsequent message prompts you to kill all the active Visual Studio and satellite processes. Save all your relevant work in all the open Visual Studio instances, and click End Tasks to kill these processes and install the VSIX.
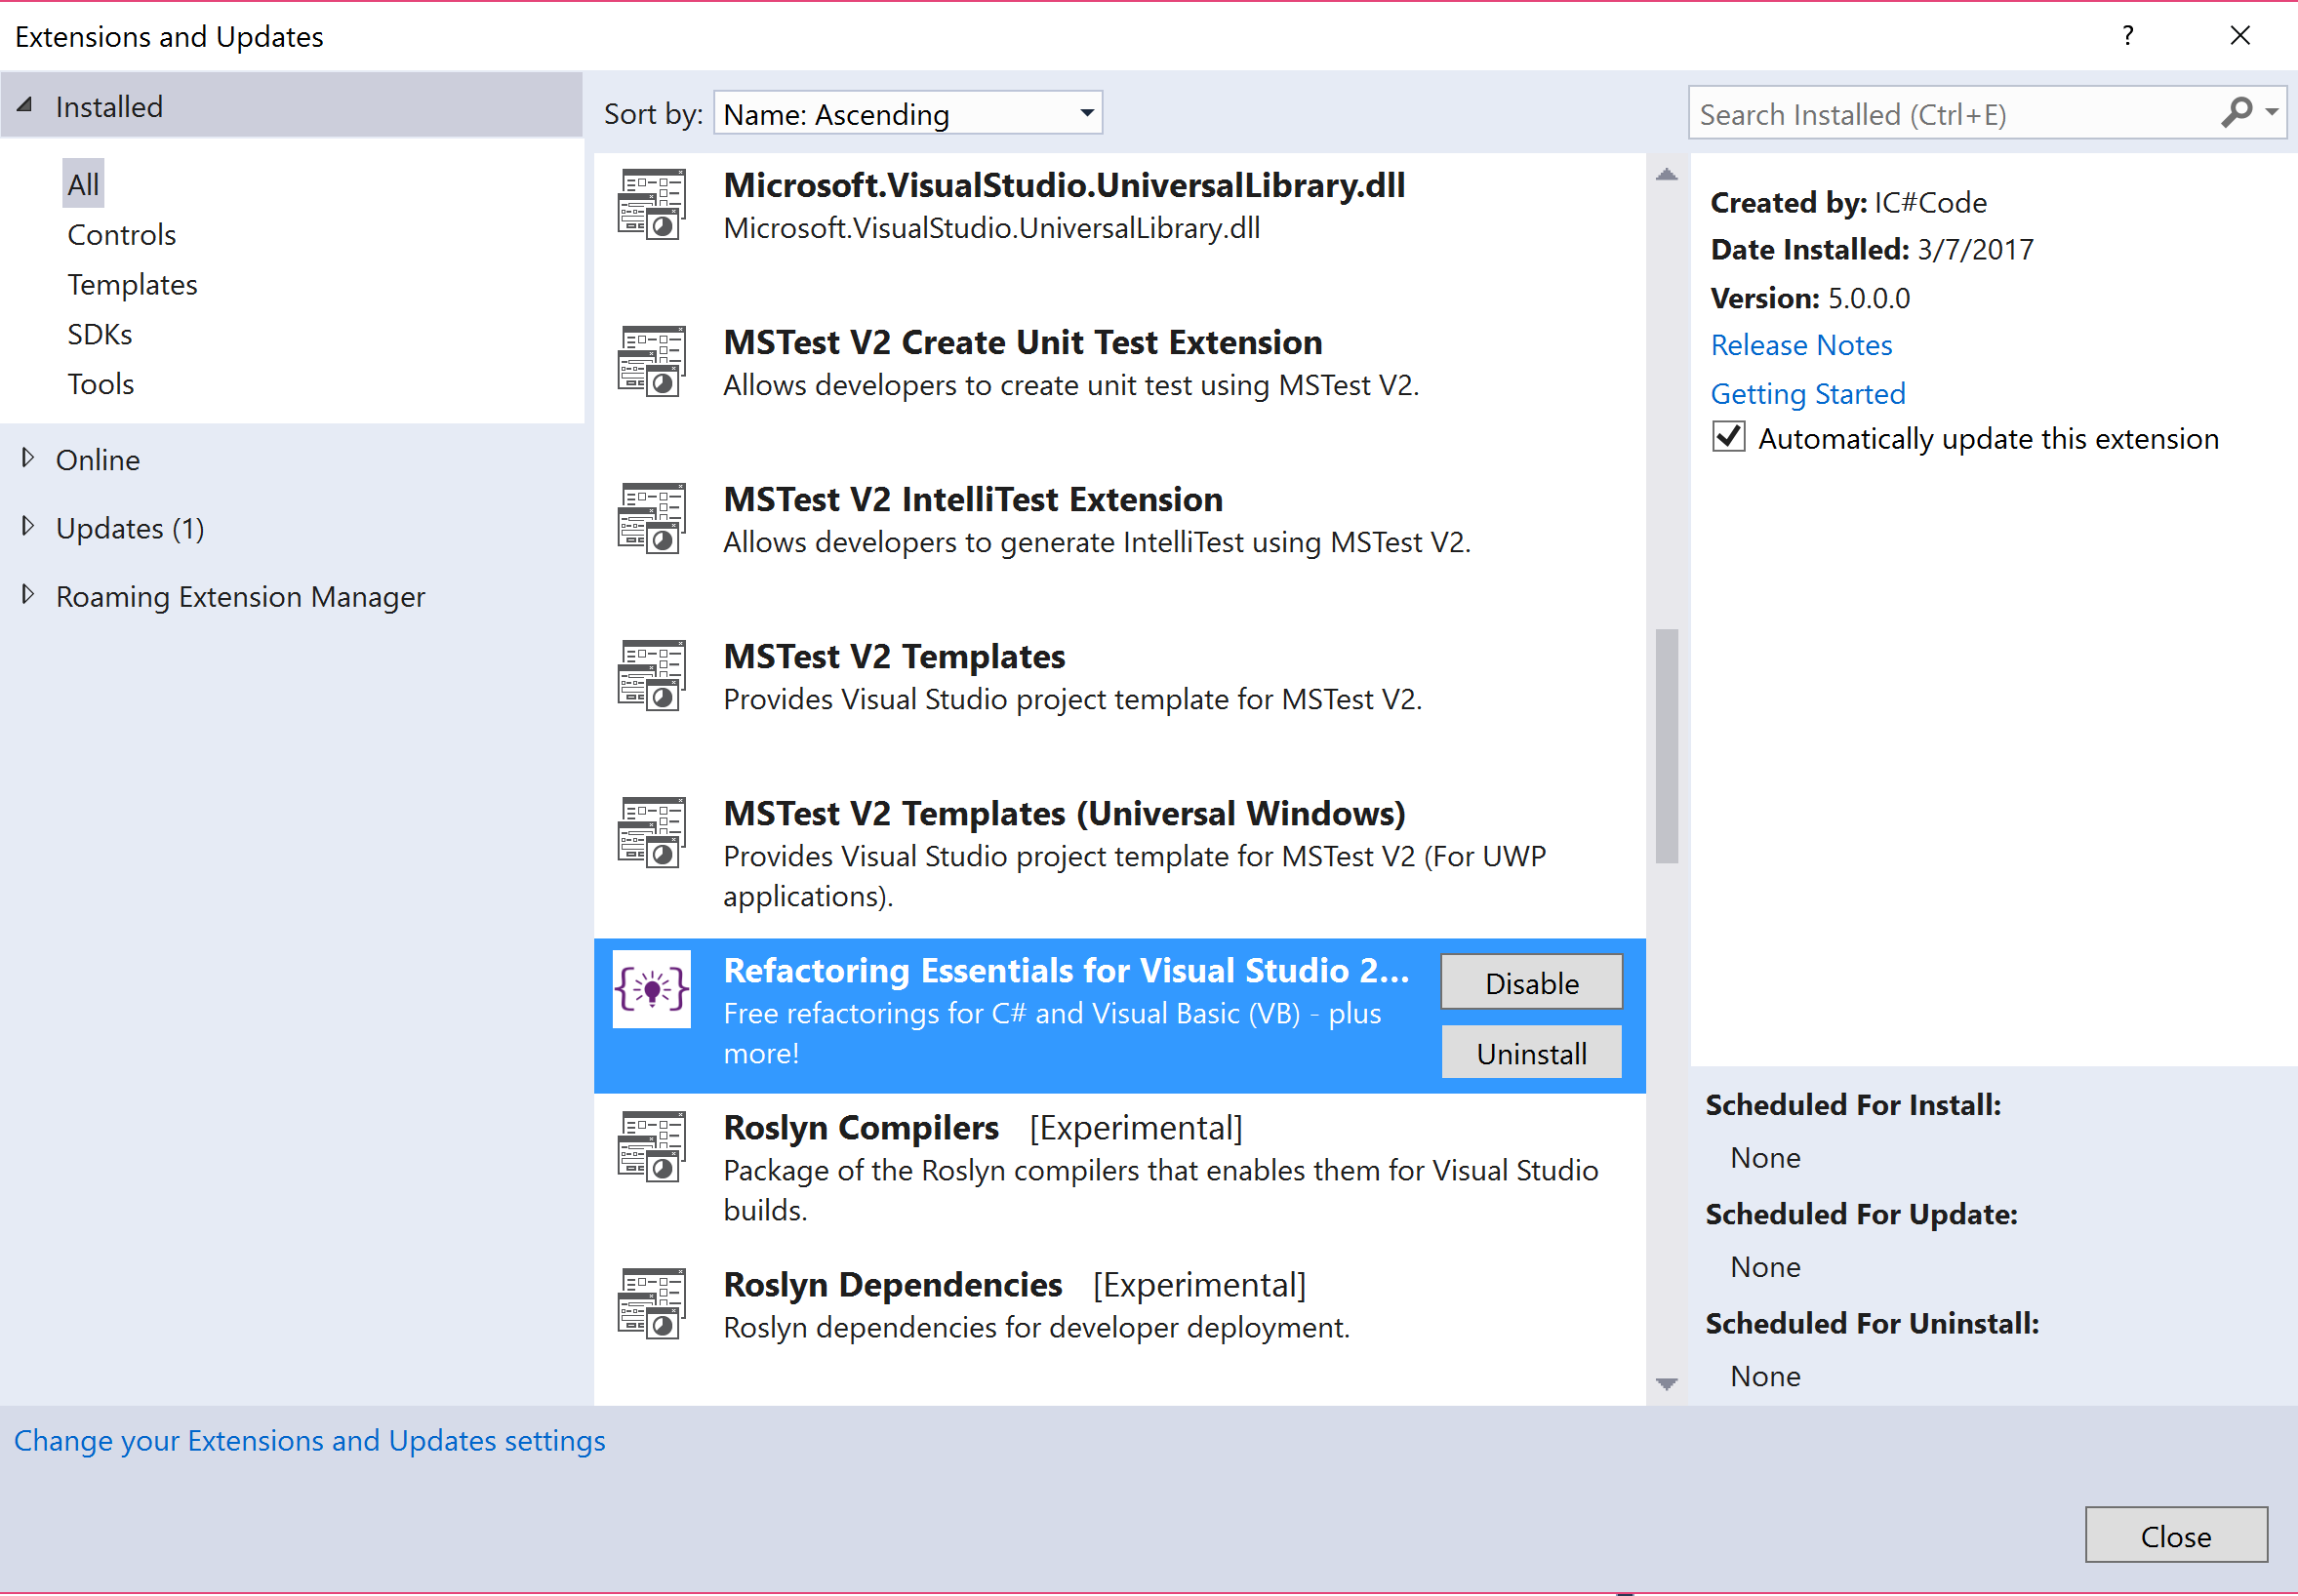
- After installation, restart VS, click Tools | Extensions And Updates, and verify Refactoring Essentials VSIX is installed.
- Create a new C# project with the following source code and verify analyzer diagnostic RECS0085 (Redundant array creation expression) in the error list:
namespace ClassLibrary
{
 public class Class1
 {
 void Method()
 {
 int[] values = new int[] { 1, 2, 3 };
 }
 }
}
- Build the project from Visual Studio 2017 or command line and confirm no analyzer diagnostic shows up in the Output Window or the command line respectively, confirming that the VSIX analyzer did not execute as part of the build.
Resources for Article:
Further resources on this subject:
- C++, SFML, Visual Studio, and Starting the first game [article]
- Connecting to Microsoft SQL Server Compact 3.5 with Visual Studio [article]
- Creating efficient reports with Visual Studio [article]


