


In this tutorial, we will be covering JavaScript from a browser perspective. We will create a single page web app that will show the weather forecast for seven days from the current date. The user will provide a ZIP code as input for which the weather will be displayed. We will display all the basic information about the weather on a given day. We believe in learning by doing practicals. Let’s see the power of Kotlin from a browser perspective.
[box type=”shadow” align=”” class=”” width=””]This article is an excerpt from the book, Kotlin Blueprints, written by Ashish Belagali, Hardik Trivedi, and Akshay Chordiya. This book is a practical guide to building industry-grade web, mobile, and desktop applications in Kotlin using frameworks such as Spring Boot and Node.js[/box]
Conceptually, we will cover the following points while making a web app:
- Setting up a project to use Kotlin along with JavaScript
- Showing simple text using Kotlin code
- Interacting with Document Object Model (DOM) using Kotlin
- DSL and usage of kotlinx.html
Creating your first Kotlin and JavaScript project
Tighten your shoelaces! As a first step, we will do the setup and create a simple app that prints on a console and changes the background color of a page.
Choosing an IDE
From Microsoft Visual Studio, NetBeans to Eclipse and Code::Blocks, we have a series of great and powerful IDEs. Each of them has their own pros and cons. JetBrains is one of the giants that is famous for its cutting-edge software and IntelliJ IDEA Ultimate is considered among one of the most intelligent IDEs for Java. It supports Kotlin and JavaScript by default. There is no other hassle in setting up the environments. Just install it from https://www.jetbrains.com/idea and you are all set to create your first JavaScript project using Kotlin.
Creating a project
If you are all done with setting up an IDE, launch IntelliJ IDEA and select Create New Project. You will then have the following screen opened. Select Kotlin | Kotlin (JavaScript) options as shown in the following screenshot:
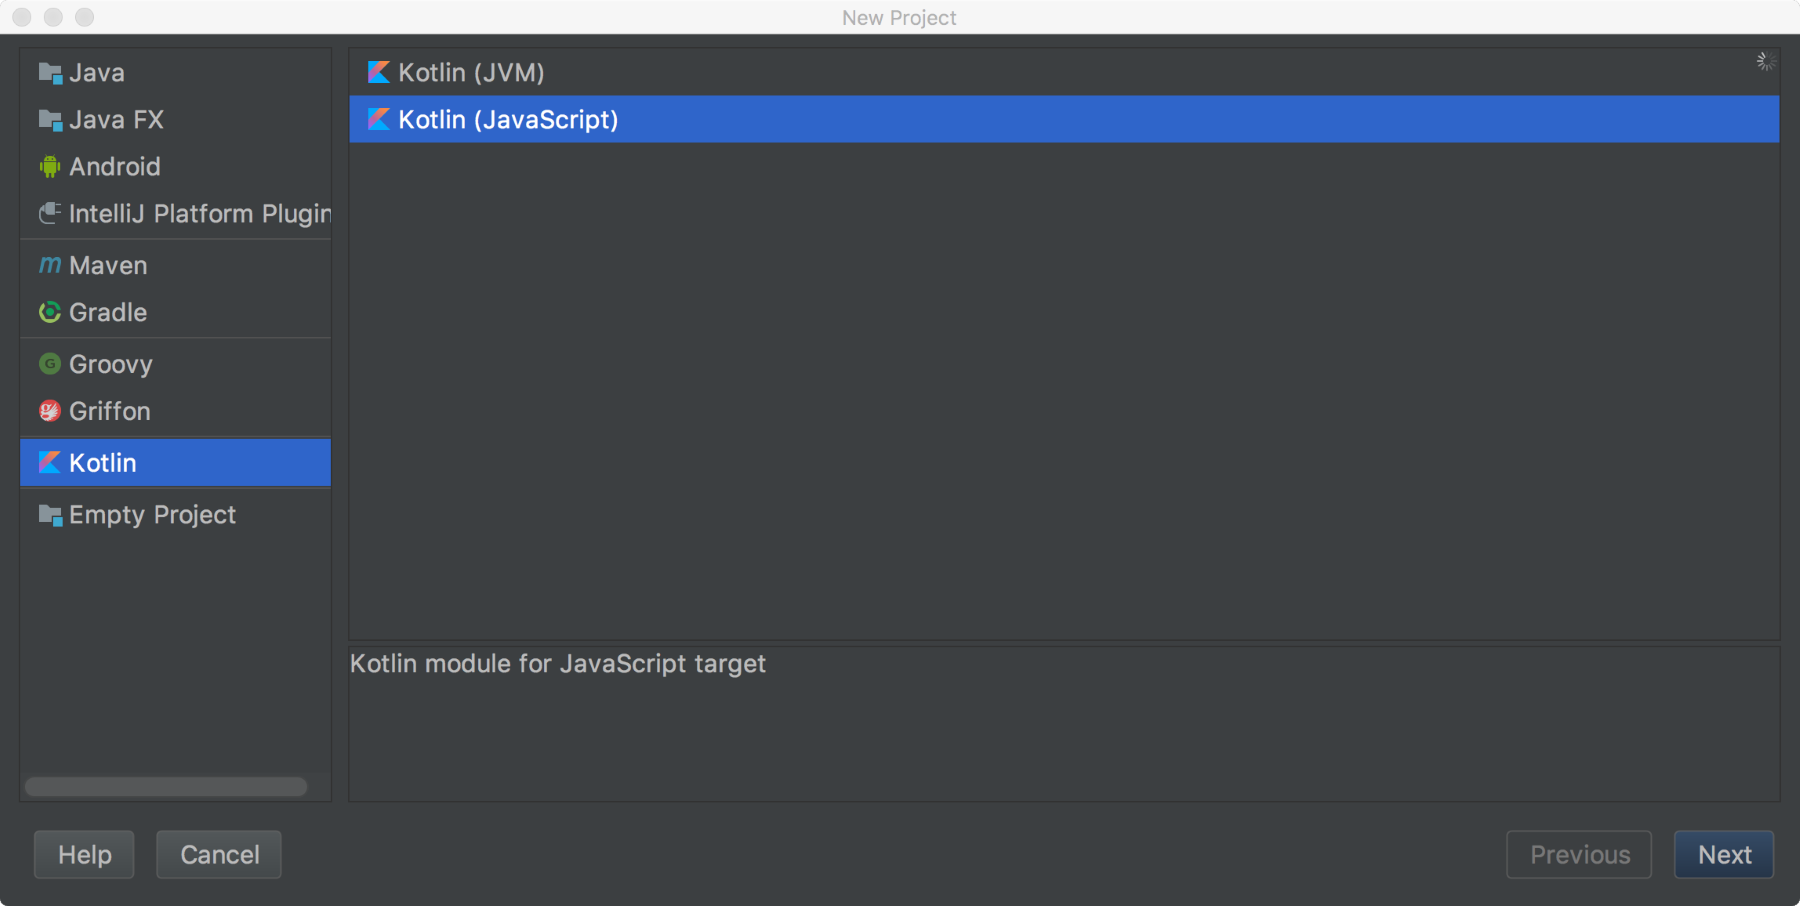
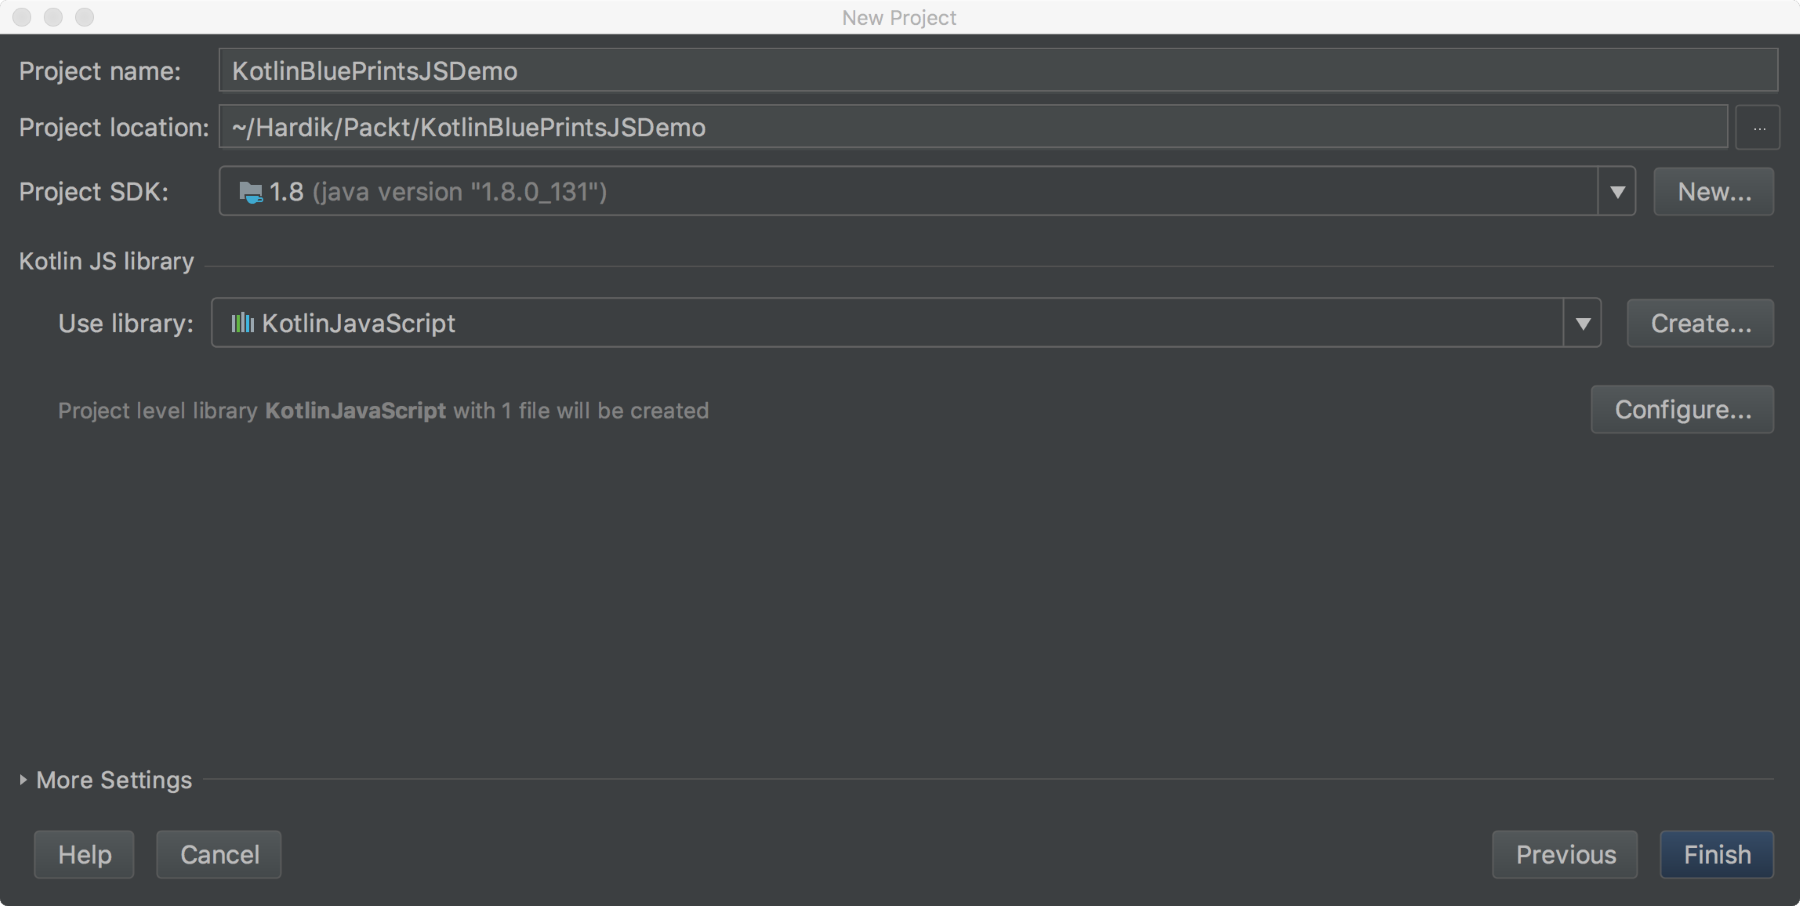
Make sure you select Kotlin (JavaScript) as highlighted in the preceding screenshot. The next step is to provide your Project name and choose a destination for your project directory:
Creating an HTML page
No browser project is complete without an HTML page. Create an index.html page in the root directory of your project. And write the following lines in a <body> tag:
    <body>
      <script type="text/javascript"
       src="out/production/KotlinWeb/lib/kotlin.js"></script>
      <script type="text/javascript"
       src="out/production/KotlinWeb/KotlinWeb.js"></script>
    </body>
Creating a Main.kt file
After creating our index.html page. Let’s create our first Kotlin file. Name it as Main.kt or provide any desired name. Create a file in the src folder and write the following function inside:
    fun main(args: Array<String>) {
      document.bgColor="FF0000"
      val message = "Kotlin Blueprints"
      println("Your first JS code using Kotlin")
    }
Build the project, by selecting the Build | Build Project menu option. On expanding the project explorer on the left of your workspace you will have the following type of directory structure:
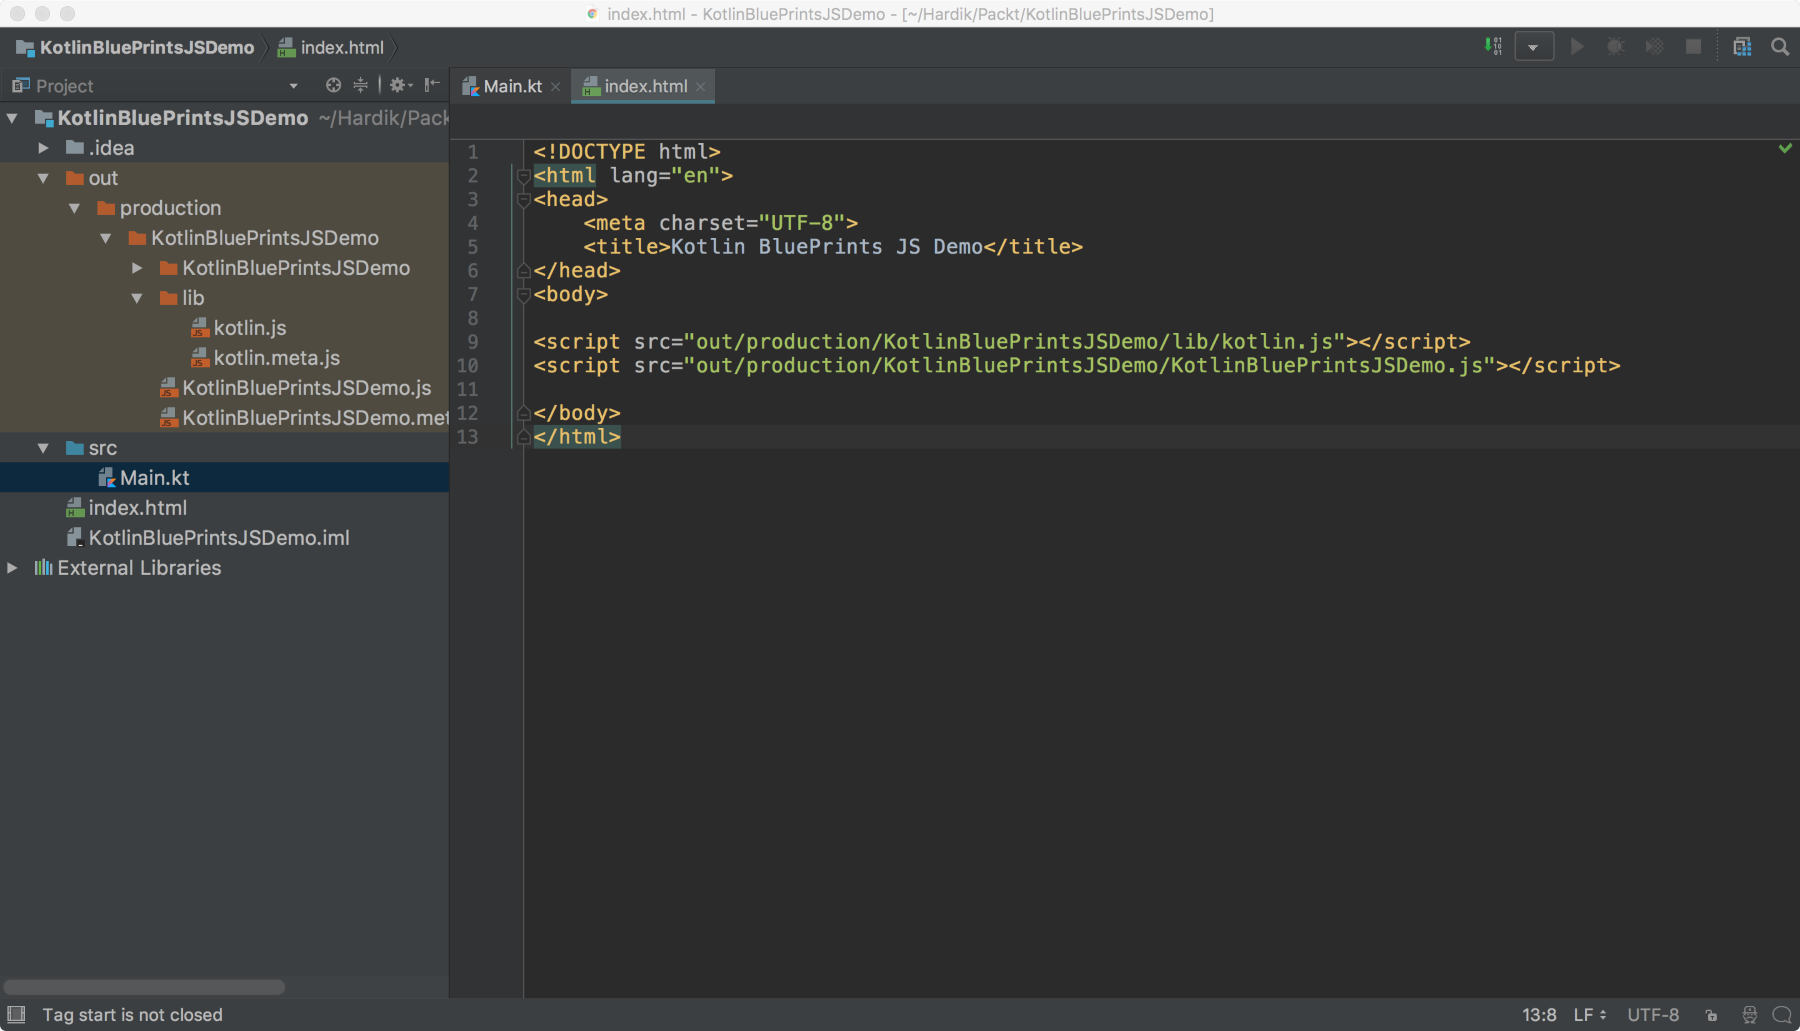
Make sure you double-check that the <script> tags are added in the <body>. They should match the name with the files created inside out/production/KotlinBluePrintsJSDemo/.
Running the project
If you have followed all the steps simply execute your index.html file in any browser and you should see the following output on your console and a red colored page rendered on your DOM:

Congratulations! You have executed your first Kotlin code on the browser. Since we have code written in Kotlin, source code needs to recompile every time we update the code. Simply reloading an HTML page will not work. So build your project from the Build | Build Project menu option.
Developing a weather forecast web app
It was fun writing Kotlin code for a browser and seeing it working, wasn’t it? Now we should target bigger goals. Let’s develop another app step by step. We will build a weather forecast app, where the user will enter a ZIP code and can see the weather details (seven-day forecast) for the provided region. We will use the OpenWeatherMap API to get the weather details. Please find more details at https://openweathermap.org/api.
Before we move to the next step we should create a new project named KotlinBluePrintsJSDemo. Some quick steps to follow:
- Create a Kotlin+JavaScript project named KotlinBluePrintsJSDemo.
- Create an index.html page under the root directory.
- Create a Main.kt file inside the src directory.
- Add script tags to add two JavaScript files, kotlin.js and KotlinBluePrintsJSDemo.js.
- Build a project.
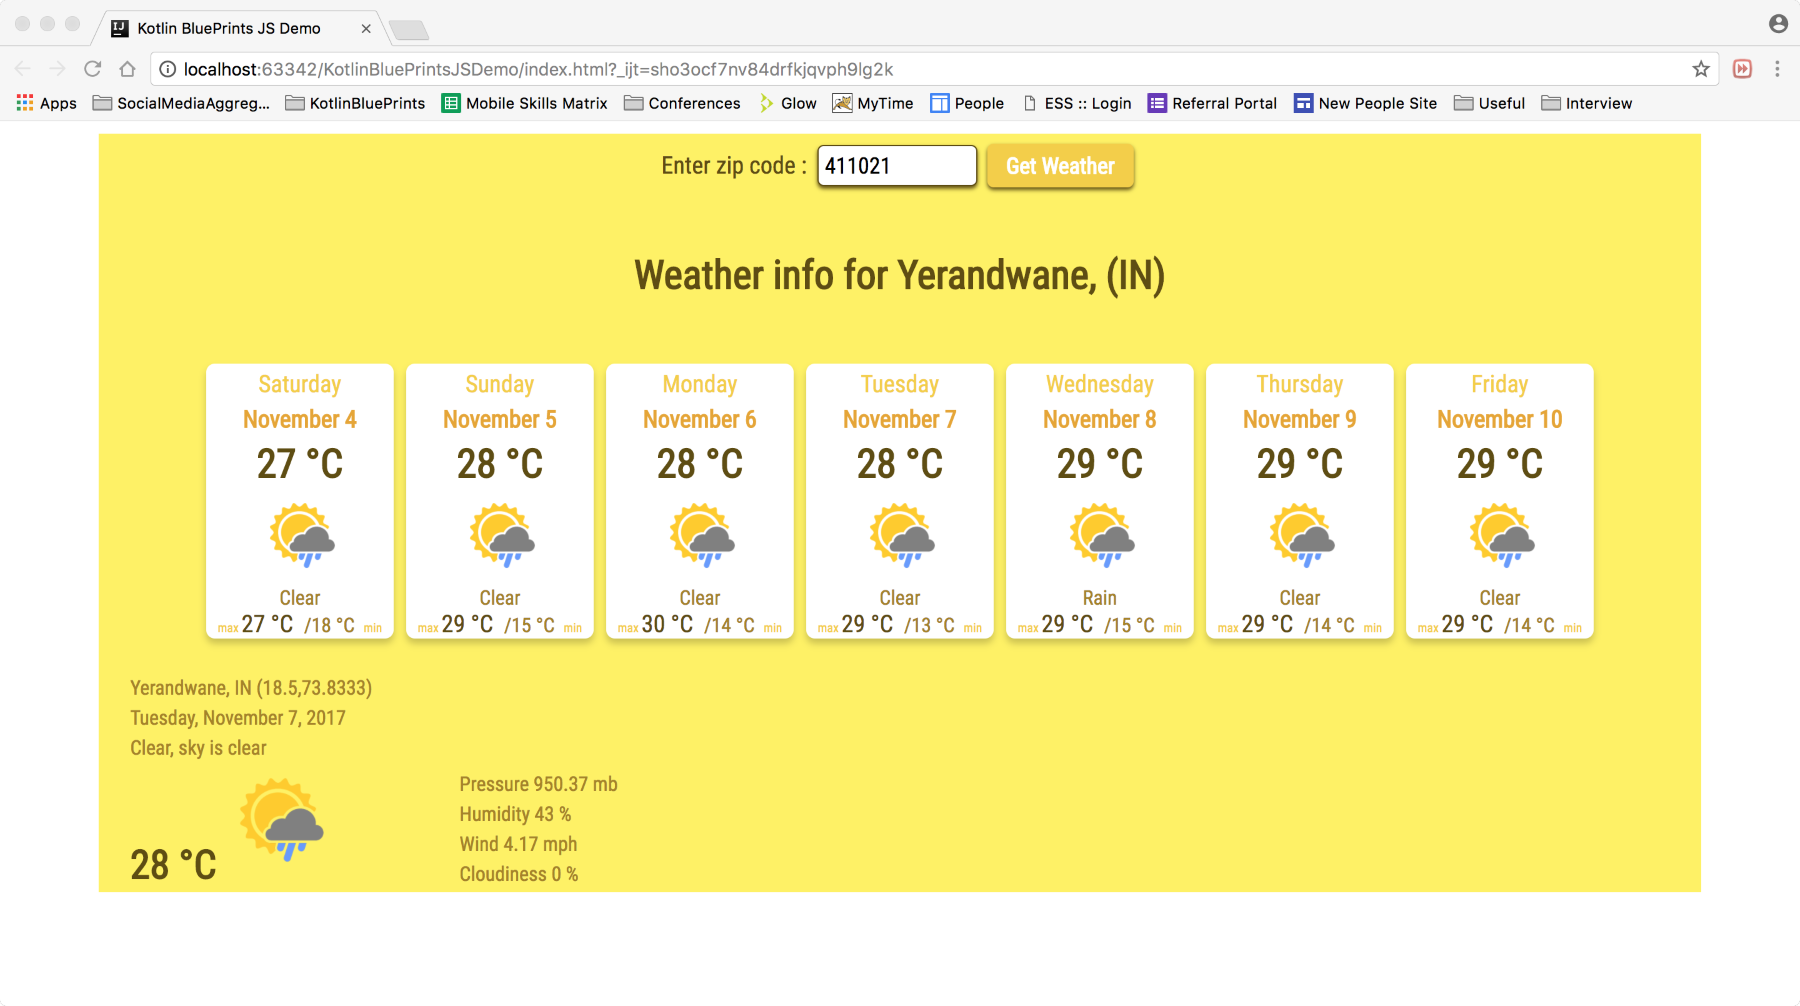
We want to create an app that will look like this at the end. Entirely in Kotlin:
Creating a UI with dummy data
The very first thing we do is to create a dummy view and get a clear idea of how our HTML page will look. We will also use a bit of CSS to give basic styles to our <div> tags.
Simple HTML approach
Now we shall look at the index.html file that we created by writing the following code. It’s boring plain HTML tags:
    <!DOCTYPE html>
    <html lang="en">
    <head>
      <meta charset="UTF-8">
      <title>Kotlin BluePrints JS Demo</title>
    </head>
    <body>
      <link rel="stylesheet" type="text/css" href="css/main.css">
      <div id="container">
        <label>Enter zip code : <input id="zipCode" type="number">
         </label>
      <button id="submitZipCode" type="button">Get Weather</button>

      <div class="weatherContainer">
        <div class="weatherBlock">
          <div>13 Oct, 2017</div>
            <img src="images/weather_img.png" height="40px"
             width="40px">
          <div> <span>35</span> <span>20</span> </div>
        </div>
        <div class="weatherBlock">
          <div>13 Oct, 2017</div>
            <img src="images/weather_img.png" height="40px"
             width="40px">
            <div> <span>35</span> <span>20</span> </div>
          </div>
          <!-- Similarly you can have remaining divs here -->
          </div>
        </div>

    <script src="out/production/KotlinBluePrintsJSDemo/lib/kotlin.js">
     </script>
    <script
     src="out/production/KotlinBluePrintsJSDemo
     /KotlinBluePrintsJSDemo.js"></script>

    </body>
    </html>
Observe two tags, <script> and <link>. We haven’t added CSS yet. Let’s create a CSS folder under the root directory and create a main.css file inside. The main.css will contain the following code for now:
    .weatherContainer {
      width: 90%;
      background: #EEEEEE;
      margin: 10px auto;
      position: relative;
      text-align:center;
    }
.weatherBlock {
background: #FFFFFF;
height: 100px;
width: 100px;
display:inline-block;
margin: 10px;
}
In a source code, we have also created an images directory and put some weather images in it to make the UI more beautiful.
Creating UI using Kotlin
The index.html page contains all the HTML code. We need to now move that HTML code to Kotlin. Kotlin has the capability to manipulate the DOM element and it can also deal with the tree elements and their hierarchy.
Simply put two <script> tags and a parent <div> tag in an HTML page and everything will go to a Kotlin page:
    <div id="container">

    </div>
Now, in Main.kt we will write the HTML code that we previously wrote inside index.html. Main.kt and it will look as follows:
    fun main(args: Array<String>) {
      createUserInput()
    }
fun createUserInput() {
val root = document.getElementById("container")
root?.innerHTML = "<label>Enter zip code : <input id="zipCode"
type="number"></label>" +
"<button id="submitZipCode" type="button">Get
Weather</button>" +
"<div class="weatherContainer">" +
"<div class="weatherBlock">" +
"<div>13 Oct, 2017</div>" +
"<img src="images/weather_img.png" height="40px"
width="40px">"+
"<div>" +
"<span>35</span>" +
"<span>20</span>" +
"</div>" +
"</div>" +
"<div class="weatherBlock">" +
"<div>13 Oct, 2017</div>" +
"<img src="images/weather_img.png" height="40px"
width="40px">"+
"<div>" +
"<span>35</span>" +
"<span>20</span>" +
"</div>" +
"</div>"
// Similarly add remaining divs
}
Take a note of the document object and its function getElementById. This is coming from the kotlin.browser.document package. Also org.w3c.dom as companion classes for all HTML elements.
With object root, we get access to an innerHTML property and we can assign any valid HTML strings to it and it will get rendered.
It is noteworthy that the nullability of root objects is handled with Null Safety operator ? of Kotlin.
What is DSL?
Now, the previous approach doesn’t create much difference. Kotlin would want to do better! Let us introduce you to the beautiful concept of DSL.
DSL stands for Domain Specific Language. As the name indicates, it gives you the feeling that you are writing code in a language, using terminology particular to a given domain, without being geeky, but then this terminology is cleverly embedded as a syntax in a powerful language. If you are from the Groovy community you must be aware of builders. Groovy builders allow defining data in a semi declarative way. It’s a kind of mini-language of its own. Builders are considered good for generating XML and laying out UI components. Kotlin DSL uses Lambdas a lot.
Using Kotlinx.html
The DSL to build HTML trees is a pluggable dependency. We, therefore, need to set it up and configure it for our project. For now, we will keep things simple and add the dependency in them in the form of a .jar file. We will keep this .jar file in the lib folder, which will reside at the root level.
The library is created by the JetBrains team only and it’s open source. You can find it at https://github.com/Kotlin/kotlinx.html. You can simply visit the URL https://dl.bintray.com/kotlin/kotlinx.html/org/jetbrains/kotlinx/kotlinx-html-js/0.6.4/ and download the .jar file from there. For this demo app, we have used v 0.6.4.
The .jar repository page can look as follows:
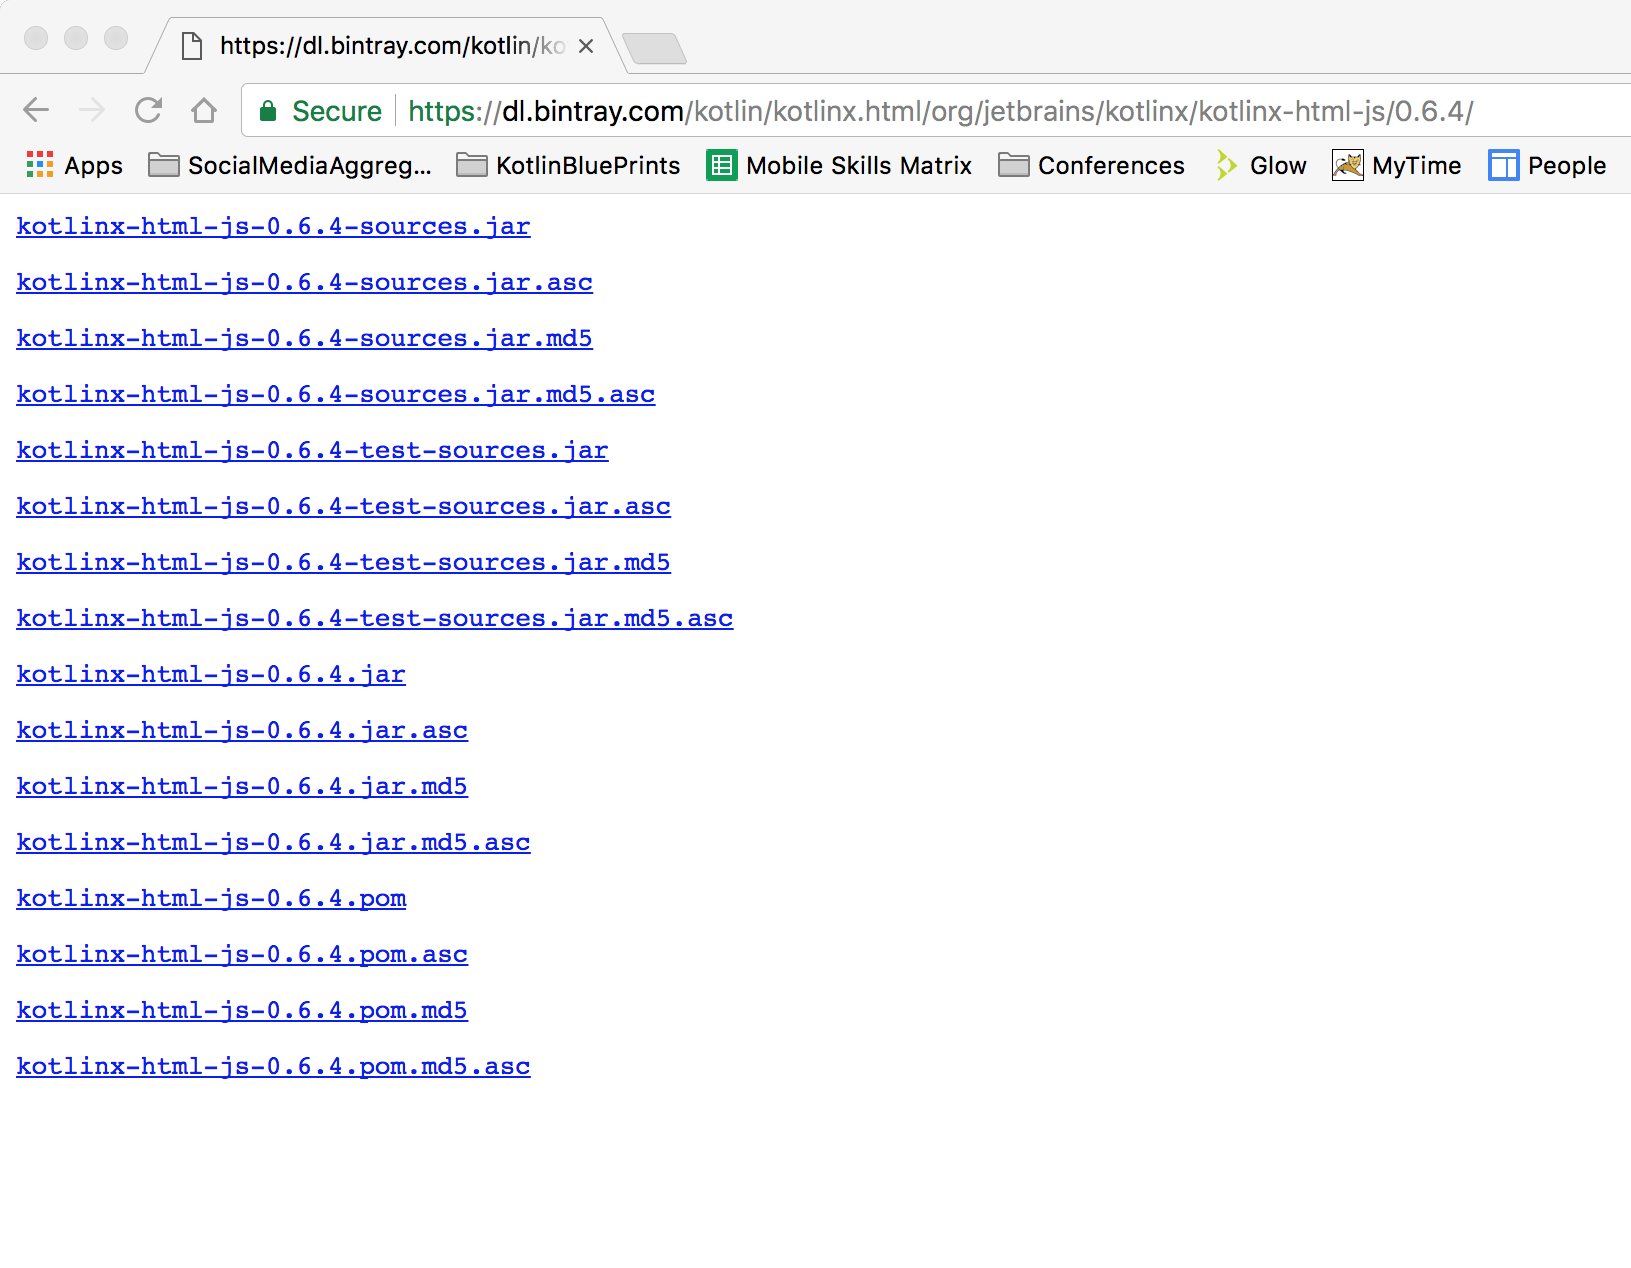
To set up the kotlinx.html dependency in your app please follow these steps:
- In our app, we are using v 0.6.4. Make sure you download the JAR file named kotlinx-html-js-0.6.4.jar.
- Please verify that you have kept the .jar file inside the lib directory.
- Also, do not forget to add the .jar file as a library.
- Right-click on the .jar file and select Add As Library….
- Select classes as a category while adding them as a library. Or you can simply choose to add the dependency via Gradle, in that, you need to add the following things to your build.gradle file:
     repositories {
       jcenter()
     }
     dependencies {
       //Fill this in with the version of kotlinx in use in your
       project
       def kotlinx_html_version = "your_version_here"

       // include for client-side
       compile "org.jetbrains.kotlinx:kotlinx-html-
       js:${kotlinx_html_version}"
     }
Refactoring the HTML code using DSL
The DSL code to make a button with the title "Get Weather" looks as follows:
    button {
      +"Get Weather"
      type = ButtonType.button
      onClickFunction = {
        // Your code to handle button click goes here.
      }
    }
Simple and clean code.
Similarly, let’s create a function that will display an entire div, which has a label, text input, and button:
    fun getInputDiv(): HTMLDivElement {
      val inputDiv = document.create.div {
        label {
          +"Enter zip code : "
          input {
            id = "zipCode"
            type = InputType.number
            value = 411021.toString()
          }
      }
        button {
          +"Get Weather"
          type = ButtonType.button
          onClickFunction = {
            // Your code to handle button click goes here
          }
        }
      }
      return inputDiv
    }
Observe how we have provided ID, input types, and a default ZIP code value. A default ZIP code value is optional.
Let’s spend some time understanding the previous code. label, input, button, type, id, and onClickFunction are nothing but functions. They are basically Lambda functions.
Some of the functions that use Lambda parameters and call variations can be as follows:
someFunction({})
someFunction("KotlinBluePrints",1,{})

someFunction("KotlinBluePrints",1){}

someFunction{}
Let’s run the code. You may get an error on the console saying:
Error Uncaught Error: Error loading module 'KotlinBluePrintsJSDemo'. Its dependency 'kotlinx-html-js' was not found. Please, check whether 'kotlinx-html-js' is loaded prior to 'KotlinBluePrintsJSDemo'.
This is because kotlinx-html-js is missing, which is required to process the DSL generated code. You can see the kotlinx-html-js file generated under the out/production/KotlinBluePrintsJSDemo/lib path.
Calling a weather API
Now it’s time to get the weather data and display it on the page.
We will use XMLHttpRequest to achieve this. Register yourself at http://openweathermap.org/appid and get your application ID. Your application ID will be appended to the actual URL to make the authenticated call to the weather API. Once you get the app ID let’s keep that information in the Constants.kt file:
    const val IMAGE_URL = "http://openweathermap.org/img/w/%s.png"

    const val BASE_URL =
     "https://api.openweathermap.org/data/2.5/forecast/daily?
      mode=json&units=metric&cnt=7"
    const val APP_ID = "Your open weather map application id"
    const val FULL_URL = "$BASE_URL&appid=$APP_ID&q="
The Constants.kt file is not as simple as it looks. Check how we have stored different values. We have used const val, which is equivalent to const and static used combined. Also defining FULL_URL uses the concept of string interpolation. String interpolation is used to concatenate static strings along with string objects. You can also call functions in string interpolation as follows:
    h4 {
      +"Weather info for ${forecastResult.city.name},
       (${forecastResult.city.country})"
    }
Now, in onClickFunction we write the following code to perform the API call and on the successful response we call a showData function, which takes a forecastResult object:
    onClickFunction = {
      val zipCode = document.getElementById("zipCode") as
       HTMLInputElement
      val xmlHttpRequest = XMLHttpRequest()
      xmlHttpRequest.open("GET", FULL_URL + zipCode.value, false)
      xmlHttpRequest.send()
      println(xmlHttpRequest.responseText)
      val forecastResult = JSON.parse<ForecastResult>
      (xmlHttpRequest.responseText)
      showData(forecastResult)
    }
Reading data from input elements
See how we read data from input elements:
document.getElementById("zipCode") as HTMLInputElement
The as HTMLInputElement construct is basically casting a result into the HTMLInputElement class.
Data classes
We are maintaining ForecastResult, which is our model. For this purpose, we have data classes in Kotlin. One of the coolest features in Kotlin is data classes. All the pain that we used to endure to create and maintain POJO classes in Java is gone. No need to have those dedicated packages to hold your model class. Any Kotlin file can hold your data class. By default it provides you methods such as toString(), equals(), copy(), and hashCode() method implementation. In Android, we mostly use these types of classes to hold our JSON responses in the form of model classes. You can check out the data classes we created in ServerResponses.kt:
data class ForecastResult(val city: City, val list:
     Array<Forecast>)
data class City(val id: Long, val name: String, val coord:
Coordinates, val country: String, val population: Int)

data class Coordinates(val lon: Float, val lat: Float)

data class Forecast(val dt: Long, val temp: Temperature, val
pressure: Float, val humidity: Int, val weather: Array<Weather>,
val speed: Float, val deg: Int, val clouds: Int)

data class Temperature(val day: Float, val min: Float, val max:
Float, val night: Float, val eve: Float, val morn: Float)

data class Weather(val id: Long, val main: String, val description:
String, val icon: String)
Some of the points to consider while using data classes are:
- The primary constructor needs to have at least one parameter
- All primary constructor parameters need to be marked as val or var
- Data classes cannot be abstract, open, sealed, or inner
- (Before version 1.1) data classes may only implement interfaces
Showing data to the user
Now comes the interesting part. We gate a ForecastResult object, which holds all the records. The list object holds records for seven days. Let’s create a showData function that takes a ForecastResult object and display title text in <h4>. The code will look like the following snippet. Also, it has yet again one more example of string interpolation:
    fun showData(forecastResult: ForecastResult) {
      val root = document.getElementById("container")
      root?.appendChild(document.create.div(classes = "currentTemp") {
        h4 {
          +"Weather info for ${forecastResult.city.name
           (${forecastResult.city.country})"
        }
      })
    }
This is simple now, quickly create a showForecast function that will be called from showData and will display the weather forecast for seven days. The showForecast is used with a function from Kotlin. thewith() is one of those functions that is liked by the developer community a lot; it makes use of Kotlin sweeter. The with() function accepts the receiver and the code written inside the function automatically applies to the receiver object. It’s an inline function. Check out the following document:
/** * Calls the specified function [block] with the given [receiver] as its receiver and returns its result. */
public inline fun <T, R> with(receiver: T, block: T.() -> R): R = receiver.block()
In the code, observe how each iteration is using a with block. We have removed some of the lines from the original code, so that we can have the clean code snippet here:
    forecastResult.list.forEachIndexed { index, forecast ->
      with(forecast)
      {
        weatherContainer.appendChild(document.create.div(classes =
         "weatherBlock") {
           div {
             p(classes = "currentTemp") {
               +"${Math.round(temp.day)} °C"
             }
        }
        img(classes = "weatherImage") {
          src = "images/weather_img.png"
        }
           div {
             span(classes = "secondaryText") {
               +weather[0].main
             }
           }
           div {
             with(temp) {
               span(classes = "primaryText") { +"${Math.round(max)}
                °C"
             }
             span(classes = "secondaryText") { +"
              /${Math.round(min)} °C" }
             }
           }
           onClickFunction = {
             showDetailedForecast(forecastResult.city, forecast)
           }
        })
      }
    }
DSL and Kotlin code are now beautifully gelled. Also, notice the onClickFunction that we wrote on div. Sweet, isn’t it?
Showing weather details
A very small part of the app is left now. Let’s show some more details to the user. Along with this, we will also learn a few more features of Kotlin. We have created a showDetailedForecast function that takes the City and Forecast objects as parameters. The following code snippets provide two things to learn:
    fun showDetailedForecast(city: City, forecast: Forecast) {
      val root = document.getElementById("container")
      val weatherDetailDiv = document.create.div(classes =
       "detailsContainer")
      val basicDetailDiv = document.create.div {
        p(classes = "secondaryText") {
          +"${city.name}, ${city.country}
           (${city.coord.lat},${city.coord.lon})"
        }
        p(classes = "secondaryText") {
          +forecast.dt.getFullDate()
        }
        p(classes = "secondaryText") {
          +"${forecast.weather[0].main},
           ${forecast.weather[0].description}"
        }
    }
      val otherDetailsDiv = document.create.div {
        div {
          id = "leftDiv"
          span(classes = "currentTemp") {
            +"${Math.round(forecast.temp.day)} °C"
          }
          img {
            src = "images/weather_img.png"
            width = 90.toString()
            height = 90.toString()
          }
      }
      div {
        id = "rightDiv"
        p(classes = "secondaryText") { +"Pressure:
          ${forecast.pressure}
         mb" }
        p(classes = "secondaryText") { +"Humidity:
          ${forecast.humidity}
         %" }
        p(classes = "secondaryText") { +"Wind: ${forecast.speed} mph" }
        p(classes = "secondaryText") { +"Cloudiness:
          ${forecast.clouds}
         %" }

      }
      div(classes = "clearBoth")
    }

    weatherDetailDiv.appendChild(basicDetailDiv)
    weatherDetailDiv.appendChild(otherDetailsDiv)
root?.appendChild(weatherDetailDiv)
}
Named parameters
In Kotlin, we can call/bind a parameter with their name for any function. We can call the preceding function by interchanging the parameter sequence as well. Something like the following:
    showDetailedForecast(forecast = forecast, city =
     forecastResult.city)
Observe that we swapped the place of the variable. And no wonder, all CSS classes that we have applied so far have a named parameter. Check all previous <div>, <h>, and <p> tags. Consider the following examples:
    val weatherDetailDiv = document.create.div(classes =
     "detailsContainer")
button(classes = "getWeatherButton")
span(classes = "primaryText") { +"${Math.round(max)} °C" }
Extension functions
Extension functions are a beautiful feature of Kotlin. Extension functions allow us to add the functions in the native class sets. All extension functions are statically resolved. Check out DateExtension.kt, it has three extension functions written for Long objects. They return different date formats. The code inside it may look a bit strange, which we will discuss in the following section:
    fun Long.getShortDate(): String {
      val getFormattedDate: dynamic = js("window.getShortDate")
      return getFormattedDate(this)
    }
fun Long.getFullDate(): String {
val getFormattedDate: dynamic = js("window.getFullDate")
return getFormattedDate(this)
}

fun Long.getFullWeekDay(): String {
val getFormattedDate: dynamic = js("window.getFullWeekDay")
return getFormattedDate(this)
}
We don’t need to write utility methods in Kotlin. We should prefer extension functions over Utils. Do not try to have any heavy methods as extension functions, instance functions are always good.
Giving final touches
We wrote many lines of code so far. We also refactored them periodically. Once again it’s a time to refactor and look for the possible improvements. Let’s take a look back and see if there is any possibility of refactoring the code further.
Adding CSS
Let’s add some custom font and style some of the missed HTML elements. We have used Robot font, you can use any font of your desire.
It’s a simple one-liner code to mention the font in the app. Add the following line to your index.html page just after the <body> tag:
    <link href="https://fonts.googleapis.com/css?
     family=Roboto+Condensed" rel="stylesheet">
And in main.css apply the font to an entire HTML page:
    html *
    {
      font-family: 'Roboto Condensed', sans-serif;
    }
Reload the page. Looks beautiful now, doesn’t it?
To summarize, we learned various elements of Kotlin such as setting up Kotlin for JavaScript projects, interacting with DOM elements, DSL, and so on.
The purpose of this article was to show that Kotlin’s support for JavaScript is no more an experiment. It’s already production ready. You can see what can be done using the benefits of statically typed programming languages and powerful JavaScript ecosystems.
To know more about how to use Kotlin code for writing a Node.js application, you may refer to this book Kotlin Blueprints.
Read Next
Build your first Android app with Kotlin
How to convert Java code into Kotlin
5 application development tools that will matter in 2018