In this article by Dan Ristic, author of the book Learning WebRTC, we will cover the following topics:
Getting a file with File API
Setting up our page
Getting a reference to a file
The real power of a data channel comes when combining it with other powerful technologies from a browser. By opening up the power to send data peer-to-peer and combining it with a File API, we could open up all new possibilities in your browser. This means you could add file sharing functionalities that are available to any user with an Internet connection. The application that we will build will be a simple one with the ability to share files between two peers. The basics of our application will be real-time, meaning that the two users have to be on the page at the same time to share a file. There will be a finite number of steps that both users will go through to transfer an entire file between them:
User A will open the page and type a unique ID.
User B will open the same page and type the same unique ID.
The two users can then connect to each other using RTCPeerConnection.
Once the connection is established, one user can select a file to share.
The other user will be notified of the file that is being shared, where it will be transferred to their computer over the connection and they will download the file.
The main thing we will focus on throughout the article is how to work with the data channel in new and exciting ways. We will be able to take the file data from the browser, break it down into pieces, and send it to the other user using only the RTCPeerConnection API. The interactivity that the API promotes will stand out in this article and can be used in a simple project.
Getting a file with the File API
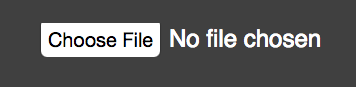
One of the first things that we will cover is how to use the File API to get a file from the user's computer. There is a good chance you have interacted with the File API on a web page and have not even realized it yet! The API is usually denoted by the Browse or Choose File text located on an input field in the HTML page and often looks something similar to this:
Although the API has been around for quite a while, the one you are probably familiar with is the original specification, dating back as far as 1995. This was the Form-based File Upload in HTML specification that focused on allowing a user to upload a file to a server using an HTML form. Before the days of the file input, application developers had to rely on third-party tools to request files of data from the user. This specification was proposed in order to make a standard way to upload files for a server to download, save, and interact with. The original standard focused entirely on interacting with a file via an HTML form, however, and did not detail any way to interact with a file via JavaScript. This was the origin of the File API.
Fast-forward to the groundbreaking days of HTML5 and we now have a fully-fledged File API. The goal of the new specification was to open the doors to file manipulation for web applications, allowing them to interact with files similar to how a native-installed application would. This means providing access to not only a way for the user to upload a file, but also ways to read the file in different formats, manipulate the data of the file, and then ultimately do something with this data.
Although there are many great features of the API, we are going to only focus on one small aspect of this API. This is the ability to get binary file data from the user by asking them to upload a file. A typical application that works with files, such as Notepad on Windows, will work with file data in pretty much the same way. It asks the user to open a file in which it will read the binary data from the file and display the characters on the screen. The File API gives us access to the same binary data that any other application would use in the browser.
This is the great thing about working with the File API: it works in most browsers from a HTML page; similar to the ones we have been building for our WebRTC demos. To start building our application, we will put together another simple web page. This will look similar to the last ones, and should be hosted with a static file server as done in the previous examples. By the end of the article, you will be a professional single page application builder! Now let's take a look at the following HTML code that demonstrates file sharing:
The page should be fairly recognizable at this point. We will use the same page showing and hiding via CSS as done earlier. One of the main differences is the appearance of the file input, which we will utilize to have the user upload a file to the page. I even picked a different background color this time to spice things up.
Setting up our page
Create a new folder for our file sharing application and add the HTML code shown in the preceding section. You will also need all the steps from our JavaScript file to log in two users, create a WebRTC peer connection, and create a data channel between them. Copy the following code into your JavaScript file to get the page set up:
var name,
connectedUser;
var connection = new WebSocket('ws://localhost:8888');
connection.onopen = function () {
console.log("Connected");
};
// Handle all messages through this callback
connection.onmessage = function (message) {
console.log("Got message", message.data);
var data = JSON.parse(message.data);
switch(data.type) {
case "login":
onLogin(data.success);
break;
case "offer":
onOffer(data.offer, data.name);
break;
case "answer":
onAnswer(data.answer);
break;
case "candidate":
onCandidate(data.candidate);
break;
case "leave":
onLeave();
break;
default:
break;
}
};
connection.onerror = function (err) {
console.log("Got error", err);
};
// Alias for sending messages in JSON format
function send(message) {
if (connectedUser) {
message.name = connectedUser;
}
connection.send(JSON.stringify(message));
};
var loginPage = document.querySelector('#login-page'),
usernameInput = document.querySelector('#username'),
loginButton = document.querySelector('#login'),
theirUsernameInput = document.querySelector('#their- username'),
connectButton = document.querySelector('#connect'),
sharePage = document.querySelector('#share-page'),
sendButton = document.querySelector('#send'),
readyText = document.querySelector('#ready'),
statusText = document.querySelector('#status');
sharePage.style.display = "none";
readyText.style.display = "none";
// Login when the user clicks the button
loginButton.addEventListener("click", function (event) {
name = usernameInput.value;
if (name.length > 0) {
send({
type: "login",
name: name
});
}
});
function onLogin(success) {
if (success === false) {
alert("Login unsuccessful, please try a different name.");
} else {
loginPage.style.display = "none";
sharePage.style.display = "block";
// Get the plumbing ready for a call
startConnection();
}
};
var yourConnection, connectedUser, dataChannel, currentFile, currentFileSize, currentFileMeta;
function startConnection() {
if (hasRTCPeerConnection()) {
setupPeerConnection();
} else {
alert("Sorry, your browser does not support WebRTC.");
}
}
function setupPeerConnection() {
var configuration = {
"iceServers": [{ "url": "stun:stun.1.google.com:19302 " }]
};
yourConnection = new RTCPeerConnection(configuration, {optional: []});
// Setup ice handling
yourConnection.onicecandidate = function (event) {
if (event.candidate) {
send({
type: "candidate",
candidate: event.candidate
});
}
};
openDataChannel();
}
function openDataChannel() {
var dataChannelOptions = {
ordered: true,
reliable: true,
negotiated: true,
id: "myChannel"
};
dataChannel = yourConnection.createDataChannel("myLabel", dataChannelOptions);
dataChannel.onerror = function (error) {
console.log("Data Channel Error:", error);
};
dataChannel.onmessage = function (event) {
// File receive code will go here
};
dataChannel.onopen = function () {
readyText.style.display = "inline-block";
};
dataChannel.onclose = function () {
readyText.style.display = "none";
};
}
function hasUserMedia() {
navigator.getUserMedia = navigator.getUserMedia || navigator.webkitGetUserMedia || navigator.mozGetUserMedia || navigator.msGetUserMedia;
return !!navigator.getUserMedia;
}
function hasRTCPeerConnection() {
window.RTCPeerConnection = window.RTCPeerConnection || window.webkitRTCPeerConnection || window.mozRTCPeerConnection;
window.RTCSessionDescription = window.RTCSessionDescription || window.webkitRTCSessionDescription || window.mozRTCSessionDescription;
window.RTCIceCandidate = window.RTCIceCandidate || window.webkitRTCIceCandidate || window.mozRTCIceCandidate;
return !!window.RTCPeerConnection;
}
function hasFileApi() {
return window.File && window.FileReader && window.FileList && window.Blob;
}
connectButton.addEventListener("click", function () {
var theirUsername = theirUsernameInput.value;
if (theirUsername.length > 0) {
startPeerConnection(theirUsername);
}
});
function startPeerConnection(user) {
connectedUser = user;
// Begin the offer
yourConnection.createOffer(function (offer) {
send({
type: "offer",
offer: offer
});
yourConnection.setLocalDescription(offer);
}, function (error) {
alert("An error has occurred.");
});
};
function onOffer(offer, name) {
connectedUser = name;
yourConnection.setRemoteDescription(new RTCSessionDescription(offer));
yourConnection.createAnswer(function (answer) {
yourConnection.setLocalDescription(answer);
send({
type: "answer",
answer: answer
});
}, function (error) {
alert("An error has occurred");
});
};
function onAnswer(answer) {
yourConnection.setRemoteDescription(new RTCSessionDescription(answer));
};
function onCandidate(candidate) {
yourConnection.addIceCandidate(new RTCIceCandidate(candidate));
};
function onLeave() {
connectedUser = null;
yourConnection.close();
yourConnection.onicecandidate = null;
setupPeerConnection();
};
We set up references to our elements on the screen as well as get the peer connection ready to be processed. When the user decides to log in, we send a login message to the server. The server will return with a success message telling the user they are logged in.
Unlock access to the largest independent learning library in Tech for FREE!
Get unlimited access to 7500+ expert-authored eBooks and video courses covering every tech area you can think of.
Renews at $19.99/month. Cancel anytime
From here, we allow the user to connect to another WebRTC user who is given their username. This sends offer and response, connecting the two users together through the peer connection. Once the peer connection is created, we connect the users through a data channel so that we can send arbitrary data across.
Hopefully, this is pretty straightforward and you are able to get this code up and running in no time. It should all be familiar to you by now. This is the last time we are going to refer to this code, so get comfortable with it before moving on!
Getting a reference to a file
Now that we have a simple page up and running, we can start working on the file sharing part of the application. The first thing the user needs to do is select a file from their computer's filesystem. This is easily taken care of already by the input element on the page. The browser will allow the user to select a file from their computer and then save a reference to that file in the browser for later use.
When the user presses the Send button, we want to get a reference to the file that the user has selected. To do this, you need to add an event listener, as shown in the following code:
sendButton.addEventListener("click", function (event) {
var files = document.querySelector('#files').files;
if (files.length > 0) {
dataChannelSend({
type: "start",
data: files[0]
});
sendFile(files[0]);
}
});
You might be surprised at how simple the code is to get this far! This is the amazing thing about working within a browser. Much of the hard work has already been done for you.
Here, we will get a reference to our input element and the files that it has selected. The input element supports both multiple and single selection of files, but in this example we will only work with one file at a time. We then make sure we have a file to work with, tell the other user that we want to start sending data, and then call our sendFile function, which we will implement later in this article.
Now, you might think that the object we get back will be in the form of the entire data inside of our file. What we actually get back from the input element is an object representing metadata about the file itself. Let's take a look at this metadata:
This will give us the information we need to tell the other user that we want to start sending a file with the example.gif name. It will also give a few other important details, such as the type of file we are sending and when it has been modified. The next step is to read the file's data and send it through the data channel. This is no easy task, however, and we will require some special logic to do so.
Summary
In this article we covered the basics of using the File API and retrieving a file from a user's computer. The article also discusses the page setup for the application using JavaScript and getting a reference to a file.

 United States
 Great Britain
 India
India
 Germany
 France
 Canada
 Russia
 Spain
Spain
 Brazil
 Australia
 Singapore
 Canary Islands
 Hungary
 Ukraine
 Luxembourg
 Estonia
 Lithuania
 South Korea
 Turkey
 Switzerland
 Colombia
 Taiwan
 Chile
Chile
 Norway
 Ecuador
 Indonesia
 New Zealand
 Cyprus
 Denmark
 Finland
 Poland
 Malta
Malta
 Czechia
 Austria
 Sweden
 Italy
Italy
 Egypt
Egypt
 Belgium
 Portugal
 Slovenia
 Ireland
 Romania
 Greece
 Argentina
 Netherlands
 Bulgaria
 Latvia
 South Africa
 Malaysia
 Japan
Japan
 Slovakia
 Philippines
 Mexico
 Thailand