In this article, we will learn how to install Django and Django REST framework in an isolated environment. We will also look at the Django folders, files, and configurations, and how to create an app with Django. We will also introduce various command-line and GUI tools that are use to interact with the RESTful Web Services.
Installing Django and Django REST frameworks in an isolated environment
First, run the following command to install the Django web framework:
pip install django==1.11.5The last lines of the output will indicate that the django package has been successfully installed. The process will also install the pytz package that provides world time zone definitions. Take into account that you may also see a notice to upgrade pip. The next lines show a sample of the four last lines of the output generated by a successful pip installation:
Collecting django

Collecting pytz (from django)

Installing collected packages: pytz, django Successfully installed django-1.11.5 pytz-2017.2
Now that we have installed the Django web framework, we can install Django REST framework. Django REST framework works on top of Django and provides us with a powerful and flexible toolkit to build RESTful Web Services. We just need to run the following command to install this package:
pip install djangorestframework==3.6.4The last lines for the output will indicate that the djangorestframework package has been successfully installed, as shown here:
Collecting djangorestframework

Installing collected packages: djangorestframework Successfully installed djangorestframework-3.6.4
After following the previous steps, we will have Django REST framework 3.6.4 and Django 1.11.5 installed in our virtual environment.
Creating an app with Django
Now, we will create our first app with Django and we will analyze the directory structure that Django creates. First, go to the root folder for the virtual environment: 01.
In Linux or macOS, enter the following command:
cd ~/HillarDjangoREST/01If you prefer Command Prompt, run the following command in the Windows command line:
cd /d %USERPROFILE%\HillarDjangoREST\01If you prefer Windows PowerShell, run the following command in Windows PowerShell:
cd /d $env:USERPROFILE\HillarDjangoREST\01In Linux or macOS, run the following command to create a new Django project named restful01. The command won’t produce any output:
python bin/django-admin.py startproject restful01In Windows, in either Command Prompt or PowerShell, run the following command to create a new Django project named restful01. The command won’t produce any output:
python Scripts\django-admin.py startproject restful01The previous command creates a restful01 folder with other subfolders and Python files. Now, go to the recently created restful01 folder. Just execute the following command on any platform:
cd restful01Then, run the following command to create a new Django app named toys within the restful01 Django project. The command won’t produce any output:
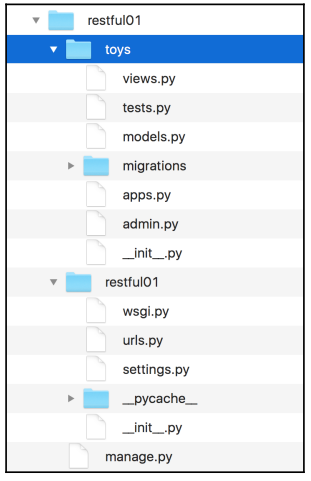
python manage.py startapp toysThe previous command creates a new restful01/toys subfolder, with the following files:
- views.py
- tests.py
- models.py
- apps.py
- admin.py
- init .py
In addition, the restful01/toys folder will have a migrations subfolder with an init .py Python script. The following diagram shows the folders and files in the directory tree, starting at the restful01 folder with two subfolders – toys and restful01:
Understanding Django folders, files, and configurations
After we create our first Django project and then a Django app, there are many new folders and files. First, use your favorite editor or IDE to check the Python code in the apps.py file within the restful01/toys folder (restful01\toys in Windows). The following lines show the code for this file:
from django.apps import AppConfig

class ToysConfig(AppConfig): name = 'toys'
The code declares the ToysConfig class as a subclass of the django.apps.AppConfig class that represents a Django application and its configuration. The ToysConfig class just defines the name class attribute and sets its value to ‘toys’.
Now, we have to add toys.apps.ToysConfig as one of the installed apps in the restful01/settings.py file that configures settings for the restful01 Django project. I built the previous string by concatenating many values as follows: app name + .apps. + class name, which is, toys + .apps. + ToysConfig. In addition, we have to add the rest_framework app to make it possible for us to use Django REST framework.
The restful01/settings.py file is a Python module with module-level variables that define the configuration of Django for the restful01 project. We will make some changes to this Django settings file. Open the restful01/settings.py file and locate the highlighted lines that specify the strings list that declares the installed apps. The following code shows the first lines for the settings.py file. Note that the file has more code:
"""
Django settings for restful01 project.
Generated by 'django-admin startproject' using Django 1.11.5. For more information on this file, see
https://docs.djangoproject.com/en/1.11/topics/settings/

For the full list of settings and their values, see https://docs.djangoproject.com/en/1.11/ref/settings/ """

import os
# Build paths inside the project like this: os.path.join(BASE_DIR, ...) BASE_DIR = os.path.dirname(os.path.dirname(os.path.abspath(  file  )))


# Quick-start development settings - unsuitable for production
# See https://docs.djangoproject.com/en/1.11/howto/deployment/checklist/

# SECURITY WARNING: keep the secret key used in production secret! SECRET_KEY = '+uyg(tmn%eo+fpg+fcwmm&x(2x0gml8)=cs@$nijab%)y$a*xe'

# SECURITY WARNING: don't run with debug turned on in production! DEBUG = True

ALLOWED_HOSTS = []


# Application definition

INSTALLED_APPS = [
'django.contrib.admin', 'django.contrib.auth', 'django.contrib.contenttypes', 'django.contrib.sessions', 'django.contrib.messages', 'django.contrib.staticfiles',
]
Add the following two strings to the INSTALLED_APPS strings list and save the changes to the restful01/settings.py file:
'rest_framework' 'toys.apps.ToysConfig'The following lines show the new code that declares the INSTALLED_APPS string list with the added lines highlighted and with comments to understand what each added string means. The code file for the sample is included in the hillar_django_restful_01 folder:
INSTALLED_APPS = [

'django.contrib.admin', 'django.contrib.auth', 'django.contrib.contenttypes', 'django.contrib.sessions', 'django.contrib.messages', 'django.contrib.staticfiles',

# Django REST framework 'rest_framework',

# Toys application 'toys.apps.ToysConfig',

]
This way, we have added Django REST framework and the toys application to our initial Django project named restful01.
Installing tools
Now, we will leave Django for a while and we will install many tools that we will use to interact with the RESTful Web Services that we will develop throughout this book.
We will use the following different kinds of tools to compose and send HTTP requests and visualize the responses throughout our book:
- Command-line tools
- GUI tools
- Python code
- Web browser
- JavaScript code
You can use any other application that allows you to compose and send HTTP requests. There are many apps that run on tablets and smartphones that allow you to accomplish this task. However, we will focus our attention on the most useful tools when building RESTful Web Services with Django.
Installing Curl
We will start installing command-line tools. One of the key advantages of command-line tools is that you can easily run again the HTTP requests again after we have built them for the first time, and we don’t need to use the mouse or tap the screen to run requests. We can also easily build a script with batch requests and run them.
As happens with any command-line tool, it can take more time to perform the first requests compared with GUI tools, but it becomes easier once we have performed many requests and we can easily reuse the commands we have written in the past to compose new requests.
Curl, also known as cURL, is a very popular open source command-line tool and library that allows us to easily transfer data. We can use the curl command-line tool to easily compose and send HTTP requests and check their responses.
In Linux or macOS, you can open a Terminal and start using curl from the command line. In Windows, you have two options. You can work with curl in Command Prompt or you can decide to install curl as part of the Cygwin package installation option and execute it
from the Cygwin terminal. You can read more about the Cygwin terminal and its installation procedure at: http://cygwin.com/install.html. Windows Powershell includes a curl alias that calls the Invoke-WebRequest command, and therefore, if you want to work with Windows Powershell with curl, it is necessary to remove the curl alias.
If you want to use the curl command within Command Prompt, you just need to download and unzip the latest version of the curl download page: https://curl.haxx.se/download.html. Make sure you download the version that includes SSL and SSH.
The following screenshot shows the available downloads for Windows. The Win64 – Generic section includes the versions that we can run in Command Prompt or Windows Powershell.
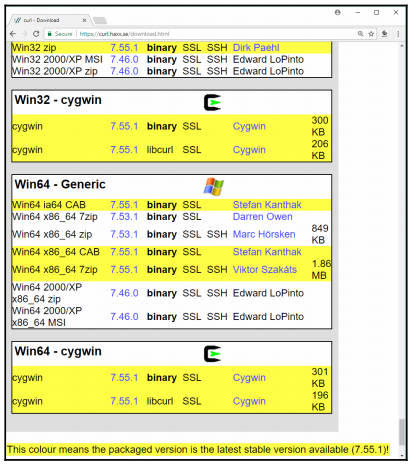
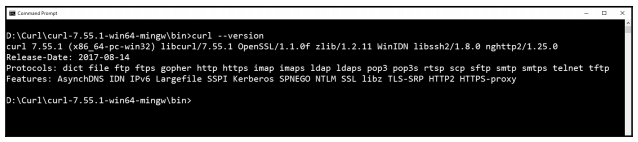
After you unzip the .7zip or .zip file you have downloaded, you can include the folder in which curl.exe is included in your path. For example, if you unzip the Win64 x86_64.7zip file, you will find curl.exe in the bin folder. The following screenshot shows the results of executing curl –version on Command Prompt in Windows 10.
The –version option makes curl display its version and all the libraries, protocols, and features it supports:
Installing HTTPie
Now, we will install HTTPie, a command-line HTTP client written in Python that makes it easy to send HTTP requests and uses a syntax that is easier than curl. By default, HTTPie displays colorized output and uses multiple lines to display the response details. In some cases, HTTPie makes it easier to understand the responses than the curl utility. However, one of the great disadvantages of HTTPie as a command-line utility is that it takes more time to load than curl, and therefore, if you want to code scripts with too many commands, you have to evaluate whether it makes sense to use HTTPie.
We just need to make sure we run the following command in the virtual environment we have just created and activated. This way, we will install HTTPie only for our virtual environment.
Run the following command in the terminal, Command Prompt, or Windows PowerShell to install the httpie package:
pip install --upgrade httpieThe last lines of the output will indicate that the httpie package has been successfully installed:
Collecting httpie
Collecting colorama>=0.2.4 (from httpie) Collecting requests>=2.11.0 (from httpie) Collecting Pygments>=2.1.3 (from httpie)
Collecting idna<2.7,>=2.5 (from requests>=2.11.0->httpie) Collecting urllib3<1.23,>=1.21.1 (from requests>=2.11.0->httpie) Collecting chardet<3.1.0,>=3.0.2 (from requests>=2.11.0->httpie) Collecting certifi>=2017.4.17 (from requests>=2.11.0->httpie) Installing collected packages: colorama, idna, urllib3, chardet,
certifi, requests, Pygments, httpie
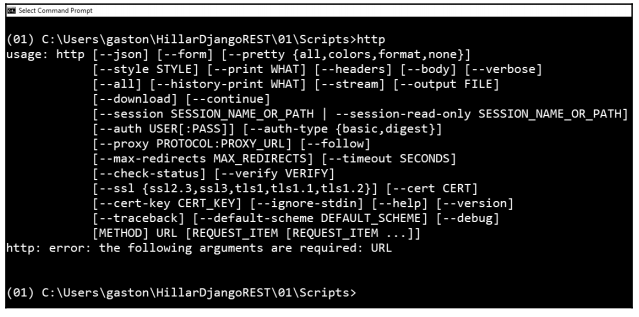
Successfully installed Pygments-2.2.0 certifi-2017.7.27.1 chardet-3.0.4 colorama-0.3.9 httpie-0.9.9 idna-2.6 requests-2.18.4 urllib3-1.22Now, we will be able to use the http command to easily compose and send HTTP requests to our future RESTful Web Services build with Django. The following screenshot shows the results of executing http on Command Prompt in Windows 10. HTTPie displays the valid options and indicates that a URL is required:
Installing the Postman REST client
So far, we have installed two terminal-based or command-line tools to compose and send HTTP requests to our Django development server: cURL and HTTPie. Now, we will start installing Graphical User Interface (GUI) tools.
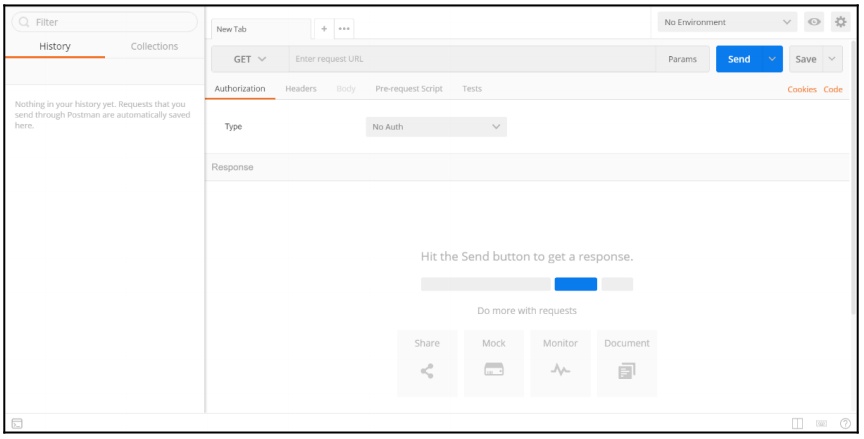
Postman is a very popular API testing suite GUI tool that allows us to easily compose and send HTTP requests, among other features. Postman is available as a standalone app in Linux, macOS, and Windows. You can download the versions of the Postman app from the following URL: https://www.getpostman.com.
The following screenshot shows the HTTP GET request builder in Postman:
Installing Stoplight
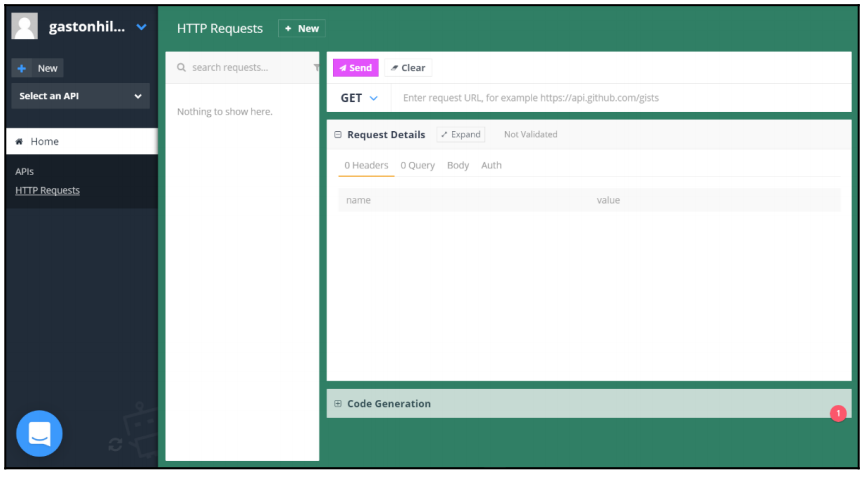
Stoplight is a very useful GUI tool that focuses on helping architects and developers to model complex APIs. If we need to consume our RESTful Web Service in many different programming languages, we will find Stoplight extremely helpful. Stoplight provides an HTTP request maker that allows us to compose and send requests and generate the necessary code to make them in different programming languages, such as JavaScript, Swift, C#, PHP, Node, and Go, among others.
Stoplight provides a web version and is also available as a standalone app in Linux, macOS, and Windows. You can download the versions of Stoplight from the following URL: http://stoplight.io/.
The following screenshot shows the HTTP GET request builder in Stoplight with the code generation at the bottom:
Installing iCurlHTTP
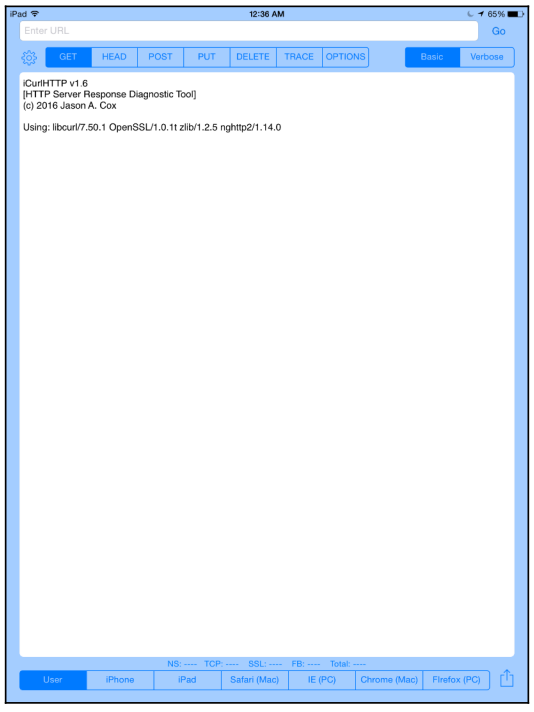
We can also use apps that can compose and send HTTP requests from mobile devices to work with our RESTful Web Services. For example, we can work with the iCurlHTTP app on iOS devices such as iPad and iPhone: https://itunes.apple.com/us/app/icurlhttp/id611943891. On Android devices, we can work with the HTTP Request app: https://play.google.com/store/apps/details?id=air.http.request&hl=en.
The following screenshot shows the UI for the iCurlHTTP app running on an iPad Pro:
At the time of writing, the mobile apps that allow you to compose and send HTTP requests do not provide all the features you can find in Postman or command-line utilities.
We learnt to set up a virtual environment with Django and Django REST framework and created an app with Django. We looked at Django folders, files, and configurations and installed command-line and GUI tools to interact with the RESTful Web Services.
This article is an excerpt from the book, Django RESTful Web Services, written by Gaston C. Hillar. This book serves as an easy guide to build Python RESTful APIs and web services with Django. The code bundle for the article is hosted on GitHub.