


In February I wrote a high level overview of the primary Kubernetes features. In this blog post, we’ll actively use all of these features to deploy a simple 2-tier application inside of a Kubernetes cluster. I highly recommend reading the intro blog before getting started.
Setup
The easiest way to deploy a cluster is to use the Google Container Engine, which is available on your Google Compute Engine account. If you don’t have an account, you may use one of the available Getting Started guides in the official Github repository. One of the great things about Kubernetes is that it will function almost identically regardless of where it’s deployed with the exception of some cloud provider integrations.
I’ve created a small test cluster on GCE, which resulted in three instances being created. I’ve also added my public SSH key to master node so that I may log in via SSH and use the kubectl command locally. kubectl is the CLI for Kubernetes and you can also install it locally on your workstation if you prefer.
My demo application is a small python based app that leverages redis as a backend. The source is available here. It expects Docker style environment variables for to point to the redis server and will purposely throw a 5XX status code if there are issues reaching the database.
Walkthrough
First we’re going to change the Kubernetes configuration to allow privileged containers. This is only being done for demo purposes and shouldn’t be used in a production environment if you can avoid it. This is for the logging container we’ll be deploying with the application.
- SSH into the master instance.
- Run the following commands to update the salt configuration
sudo sed -i 's/false/true/' /srv/pillar/privilege.sls sudo salt '*' saltutil.refresh_pillar sudo salt-minion - Reboot your non-master nodes to force the salt changes.
- On the master create a redis-master.yaml file with the following content once the nodes are back online:
id: redis-master
kind: Pod
apiVersion: v1beta1
labels:
  name: redis-master
desiredState:
  manifest:
    version: v1beta1
    id: redis-master
    containers:
      - name: redis-master
        image: dockerfile/redis
        ports:
          - containerPort: 6379
I’m using a Pod as opposed to a replicationController since this is a stateful service and it would not be appropriate to run multiple redis nodes in this scenario.
- Once ready, instruct kubenetes to deploy the container:
kubectl create -f redis-master.yaml
kubectl get pods
- Create a redis-service.yaml with the following:
kind: Service
apiVersion: v1beta1
id: redis
port: 6379
selector:
  name: redis-master
containerPort: 6379


kubectl create –f redis-service.yaml
kubectl get services
Notice that I’m hard coding the service port to match the standard redis port of 6379. Making these match isn’t required as so long as the containerPort is correct.
Under the hood, creating a service causes a new iptables entry to be created on each node. The entries will automatically redirect traffic to a port locally where kube-proxy is listening. Kube-proxy is in turn aware of where my redis-master container is running and will proxy connections for me.
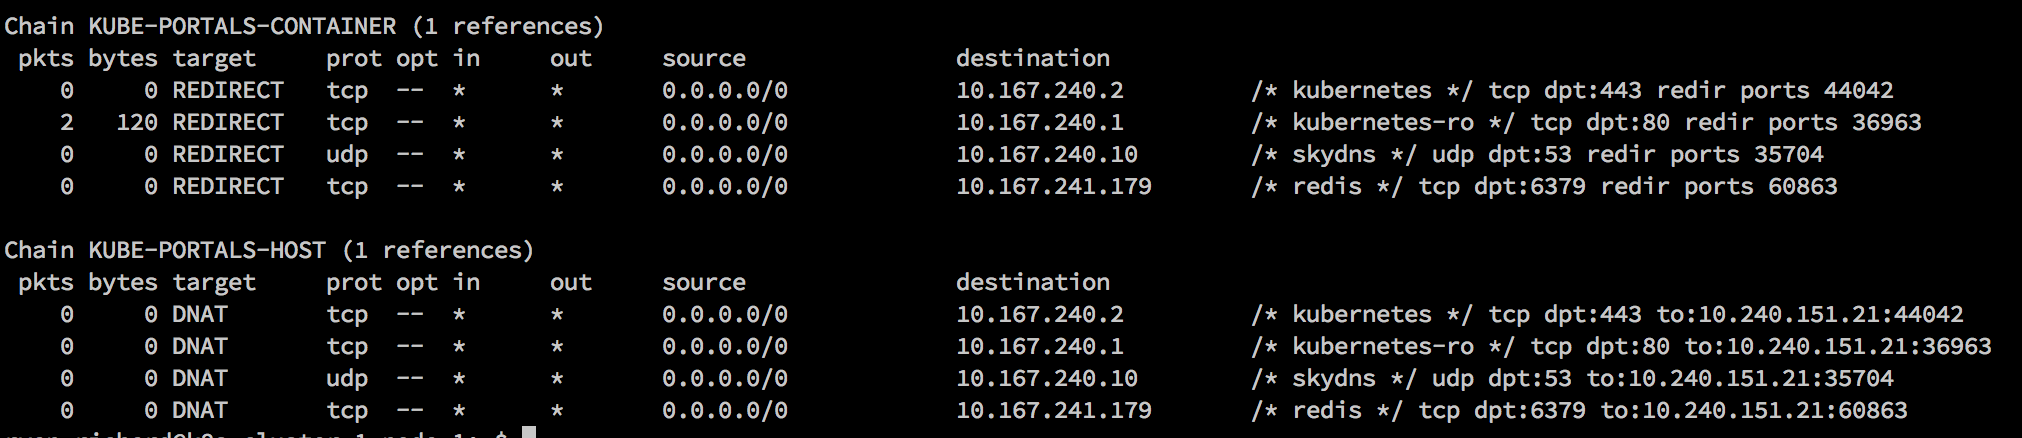
To prove this works, I’ll connect to redis via my local address (127.0.0.1:60863) which does not have redis running and I’ll get a proper connection to my database which is on another machine:

Seeing as that works, let’s get back to the point at hand and deploy our application.
- Write a demoapp.yaml file with the following content:
id: frontend-controller
apiVersion: v1beta1
kind: ReplicationController
labels:
  name: frontend-controller
desiredState:
  replicas: 2
  replicaSelector:
    name: demoapp
  podTemplate:
    labels:
      name: demoapp
    desiredState:
      manifest:
        id: demoapp
        version: v1beta3
        containers:
          - name: frontend
            image: doublerr/redis-demo
            ports:
            - containerPort: 8888
              hostPort: 80
          - name: logentries
            privileged: true
            command:
              - "--no-stats"
              - "-l"
              - "<log token>"
              - "-j"
              - "-t"
              - "<account token>"
              - "-a app=demoapp"
            image: logentries/docker-logentries
            volumeMounts:
              - mountPath: /var/run/docker.sock
                name: dockersock
                readOnly: true
        volumes:
          - name: dockersock
            source:
              hostDir:
                path: /var/run/docker.sock
In the above description, I’m grouping 2 containers based on my redis-demo image and the logentries image respectively. I wanted to show the idea of sidecar containers, which are containers deployed alongside of the primary container and whose job is to support the primary container. In the above case, the sidecar forwards logs to my logentries.com account tagged with name of my app.
If you’re following along you can sign up for a free logentries account to test this out. You’ll need to create a new log, retrieve the log token and account token first. You can then replace the <log token> and <account token> in the yaml file with your values.
- Deploy the application
kubectl create -f demoapp.yaml
kubectl get pods
- If your cloud provider is blocking port 80 traffic, make sure to allow it directly to your nodes and you should be able to see the app running in a browser once the pod status is “Running”.

Co-locating Containers
Co-locating containers is a powerful concept worth spending some time talking about. Since Kubernetes guarantees co-located containers be run together, my primary container doesn’t need to be aware of anything beyond running the application. In this case logging is dealt with separately. If I want to switch logging services, I just need to redeploy the app with a new sidecar container that is able to send the logs elsewhere. Imagine doing this for monitoring, application content updates, etc . You can really see the power of co-locating containers together.
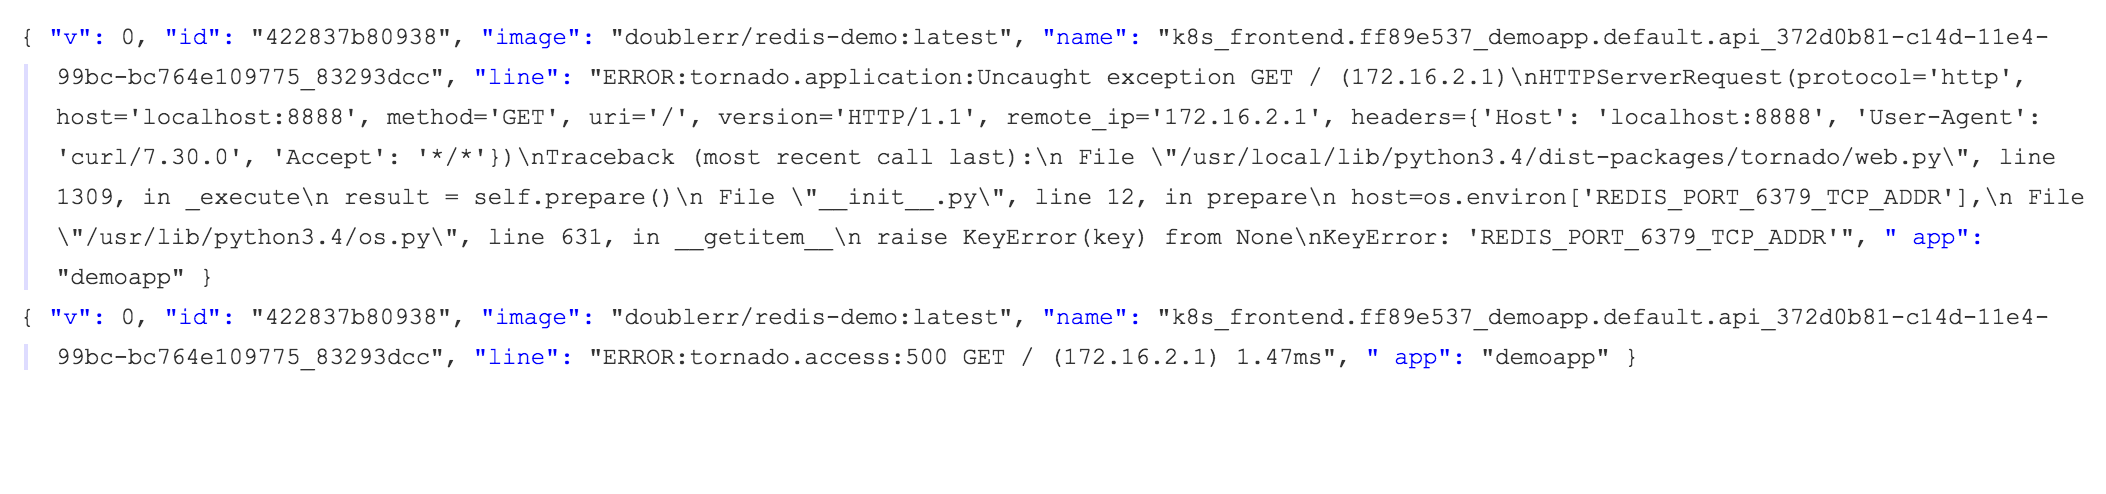
On a side note the logentries image isn’t perfectly suited for this methodology. It’s designed such that you should run 1 of these containers per docker host and it will forward all container logs upstream. It also requires access to the docker socket on the host. A better design for Kubernetes paradigm would be a container that only collects STDOUT and STDERR for the container it’s attached to. The logentries image works for this proof of concept though and I can see errors in my account:
In closing, Kubernetes is fun to deploy applications into especially if you start thinking of how best to leverage group containers. Most stateless applications will want to leverage the ReplicationController instead of a single pod and services help tie everything together.
For more Docker tutorials, insight and analysis, visit our dedicated Docker page.
About the Author
Ryan Richard is a systems architect at Rackspace with a background in automation and OpenStack. His primary role revolves around research and development of new technologies. He added the initial support for the Rackspace Cloud into the Kubernetes codebase. He can be reached at: @rackninja on Twitter.