


In this post, we are going to create a simple HTML 5, JavaScript, and CSS application then use PhoneGap to build it and turn it into an Android application, which will be useful for game development. We will learn how to structure a PhoneGap project, leverage Eclipse ADT for development, and use Eclipse as our build tool.
To follow along with this post, it is useful to have a decent working knowledge of JavaScript and HTML, otherwise you might find the examples challenging.
Understanding the typical workflow
Before we begin developing our application, let’s look quickly at a workflow for creating a PhoneGap application. Generally you want to design your web application UI, create your HTML, and then develop your JavaScript application code. Then you should test it on your web browser to make sure everything works the way you would like it to. Finally, you will want to build it with PhoneGap and try deploying it to an emulator or mobile phone to test. And, if you plan to sell your application on an app store, you of course need to deploy it to an app store.
The To-Do app
For the example in this post we are going to build a simple To-Do app. The code for the whole application can be found here, but for now we will be working with two main files: the index.html and the todo.js. Usually we would create a new application using the command line argument phonegap create myapp but for this post we will just reuse the application we already made in Post 1. So, open your Eclipse ADT bundle and navigate to your project, which is most likely called HelloWorld since that’s the default app name.
Now expand the application in the left pane of Eclipse and expand the www folder. You should end up seeing something like this:
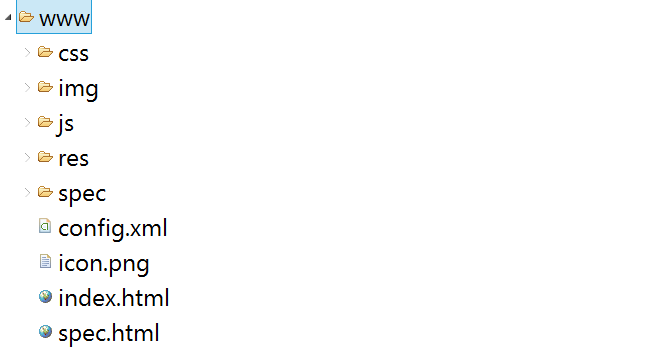
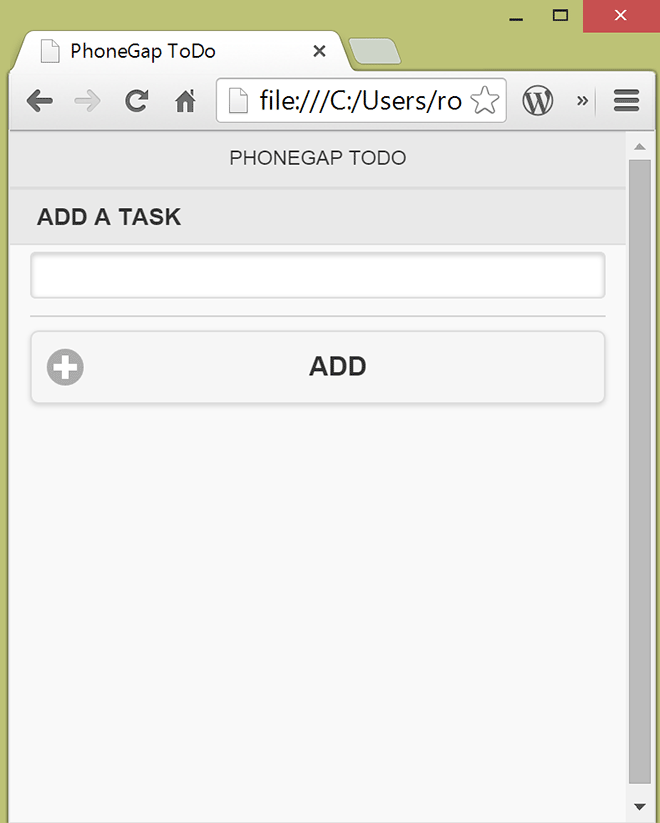
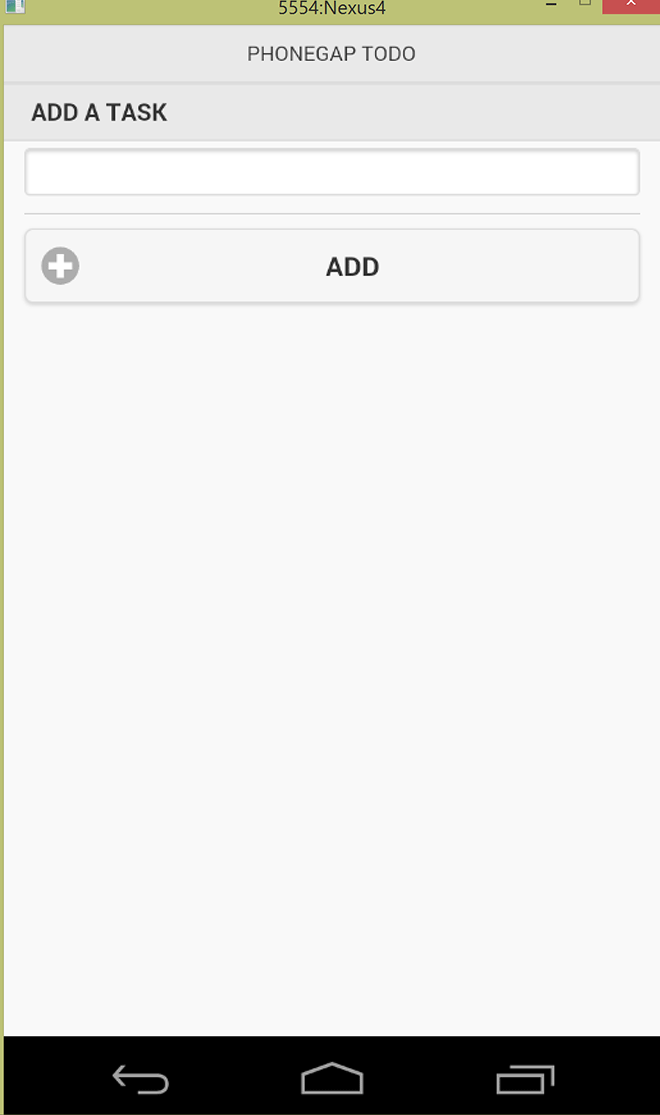
When PhoneGap creates an Android project it automatically creates several directories. The www directory under the root directory is where you create all your HTML, CSS, JavaScript, and store assets to be used in your project. When you build your project, using Eclipse or the command line, PhoneGap will turn your web application into your Android application. So, now that we know where to build our web application, let’s get started. Our goal is to make something that looks like the application in the following figure, which is the HTML we want to use shown in the Chrome browser:
First let’s open the existing index.html file in Eclipse. We are going to totally rewrite the file so you can just delete all the existing HTML. Now let’s add the following code as shown here:
<!DOCTYPE html>
<html>
<head>
    <meta charset="utf-8" />
    <meta name="format-detection" content="telephone=no" />
    <meta name="msapplication-tap-highlight" content="no" />
    <meta name="viewport" content="user-scalable=no, initial-scale=1, maximum-scale=1, minimum-scale=1, width=device-width, height=device-height, target-densitydpi=device-dpi" />
    <title>PhoneGap ToDo</title>
    <link rel="stylesheet" type="text/css" href="css/jquery.mobile-1.4.3.min.css">
    <link rel="stylesheet" type="text/css" href="css/index.css" />
    <link rel="stylesheet" type="text/css" href="css/jquery.mobile-1.0.1.custom.css?" />
    <script type="text/javascript" src="js/jquery-1.11.1.min.js"></script>
    <script type="text/javascript"src="js/jquery.mobile-1.4.3.min.js"></script>
</head>
OK; there is a bunch of stuff going on in this code. If you are familiar with HTML, you can see this is where we are importing a majority of our style sheets and JavaScript. For this example we are going to make use of JQuery and JQuery Mobile. You can get JQuery from here http://jquery.com/download/ and JQuery mobile from here http://jquerymobile.com/download/, but it’s easier if you just download the files from GitHub here. Those files need to go under mytestapp/www/js. Next, download the style sheets from here on GitHub and put them in mytestapp/www/cs. You will also notice the use of the meta tag. PhoneGap uses the meta tag to help set preferences for your application such as window sizing of the application, scaling, and the like. For now this topic is too big for discussion, but we will address it in further posts. OK, with that being said, let’s work on the HTML for the GUI. Now add the code shown here:
<body>
<script type="text/javascript"src="js/todo.js"></script>
<div id="index" data-url="index" data-role="page">
<div data-role="header">
    <h1>PhoneGap ToDo</h1>
</div>

<div data-role="content">

<ul id="task_list" data-role="listview">
    <li data-role="list-divider">Add a task</li>
</ul>

<form id="form_336" method="GET">

    <div data-role="fieldcontain">
    <label for="inp_337"></label>
    <input type="text" name="inp_337" id="inp_337" />
    </div>

    <input id="add" type="button" data-icon="plus" value="Add"/>
</form>

</div></div>

<div id="confirm" data-url="confirm" data-role="page">
<div data-role="header">
<h1>Finish Task</h1>
</div>

<div data-role="content">
Mark this task as<br>
<a class="remove_task" href="#done" data-role="button" data-icon="delete" data-theme="f">Done</a>
<a class="remove_task" href="#notdone" data-role="button" data-icon="check" data-theme="g">Not Done</a>
<br><br>
<a href="#index" data-role="button" data-icon="minus">Cancel</a>

</div></div>

<div id="done" data-url="done" data-role="page">
<div data-role="header">
<h1>Right On</h1>
</div>

<div data-role="content">
You did it<br><br>
<a href="#index" data-role="button">Good Job</a>
</div></div>

<div id="notdone" data-url="notdone" data-role="page">
<div data-role="header">
<h1>Get to work!</h1>
</div>

<div data-role="content">
Keep at it<br><br>
<a href="#index" data-role="button">Back</a>
</div></div>
</body>
</html>
This HTML should make the GUI you saw earlier in this post.
Go ahead and save the HTML code. Now go to the js directory under www. Create a new file by right clicking and selecting create new file, text. Name the new file todo.js. Now open the file in Eclipse and add the following code:
var todo = {};
/** Read the new task and add it to the list */
todo.add = function(event) {
// Read the task from the input
var task=$('input').val();
if (task) {
// Add the task to array and refresh list
todo.list[todo.list.length] = task;
todo.refresh_list();
// Clear the input
$('input').val('');
}
event.prevetodoefault();
};
/** Remove the task which was marked as selected */
todo.remove = function() {
// Remove from array and refresh list
todo.list.splice(todo.selected,1);
todo.refresh_list();
};
/** Recreate the entire list from the available list of tasks */
todo.refresh_list = function() {
var $tasks = $('#task_list'), i;
// Clear the existing task list
$tasks.empty();
if (todo.list.length) {
// Add the header
$tasks.append('<li data-role="list-divider">To Do's</li>');
for (var i=0;i<todo.list.length;i++){
// Append each task
var li = '<li><a data-rel="dialog" data-task="' + i
+ '" href="#confirm">' + todo.list[i] + '</a></li>'
$tasks.append(li);
}
}
// Add the header for addition of new tasks
$tasks.append('<li data-role="list-divider">Add a task</li>');
// Use jQuery Mobile's listview method to refresh
$tasks.listview('refresh');
// Store back the list
localStorage.todo_list = JSON.stringify(todo.list || []);
};
// Initialize the index page
$(document).delegate('#index','pageinit', function() {
// If no list is already present, initialize it
if (!localStorage.todo_list) {
localStorage.todo_list = "[]";
}
// Load the list by parsing the JSON from localStorage
todo.list = JSON.parse(localStorage.todo_list);
$('#add').bind('vclick', todo.add);
$('#task_list').on('vclick', 'li a', function() {
todo.selected = $(this).data('task');
});
// Refresh the list everytime the page is reloaded
$('#index').bind('pagebeforeshow', todo.refresh_list);
});
// Bind the 'Done' and 'Not Done' buttons to task removal
$(document).delegate('#confirm', 'pageinit', function(){
$('.remove_task').bind('vclick', todo.remove);
});
// Make the transition in reverse for the buttons on the done and notdone pages
$(document).delegate('#done, #notdone', 'pageinit', function(){
// We reverse transition for any button linking to index page
$('[href="#index"]').attr('data-direction','reverse');
})What todo.js does is store the task list as a JavaScript array. We then just create simple functions to add or remove from the array and then a function to update the list. To allow us to persist the task list we use HTML 5’s localStorage (for information on localStorage go here) to act like a simple data base and store simple name/value pairs directly in the browser. Because of this, we don’t need to use an actual database like SQLite or a custom file storage option.
Now save the file and try out the application in your browser. Try playing with the application a bit to test out how it’s working. Once you can confirm that it’s working, build and deploy the application in the Android emulate via Eclipse. To do this create a custom “builder” in Eclipse to allow you to easily build or rebuild your PhoneGap applications each time you make want to make changes.
Making Eclipse auto-build your PhoneGap apps
One of the reasons we want to use the Eclipse ADT with PhoneGap is that we can simplify our workflow, assuming you’re doing most of your work targeting Android devices, by being able to do all of our web development, potentially native Android develop, testing, and building, all through Eclipse. Doing this, though, is not covered in the PhoneGap documentation and can cause a lot of confusion, since most people assume you have to use the PhoneGap CLI command line interface to do all the application building.
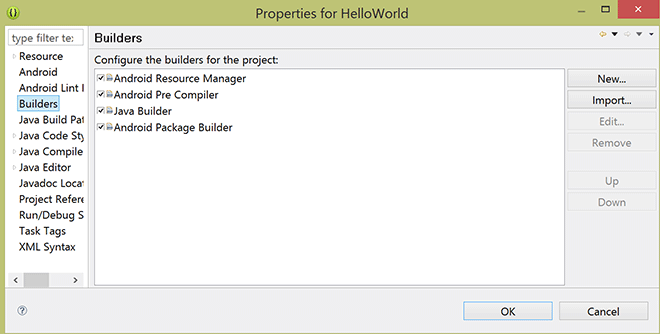
To make your application auto-build, first right-click on the application and select Properties. Then select Builders.
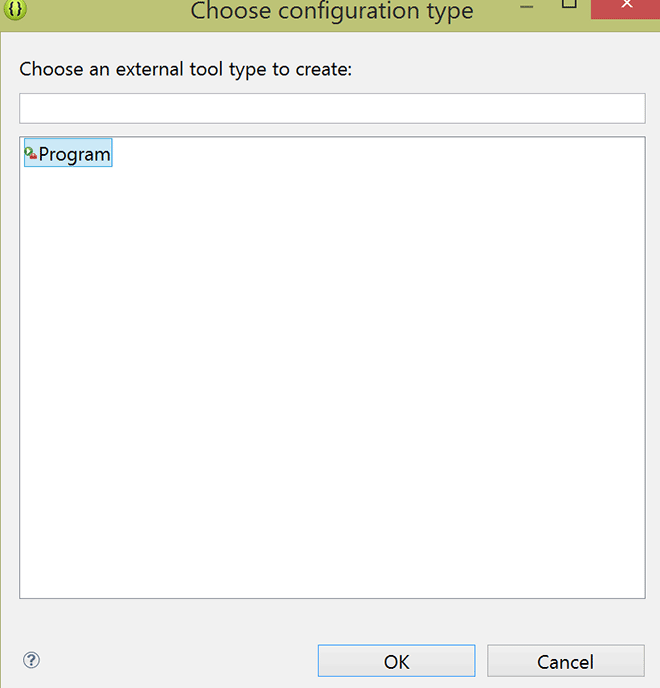
Now select New, which will pop up a configuration type screen. On this screen select Program.
You should now see the Edit Configuration screen:
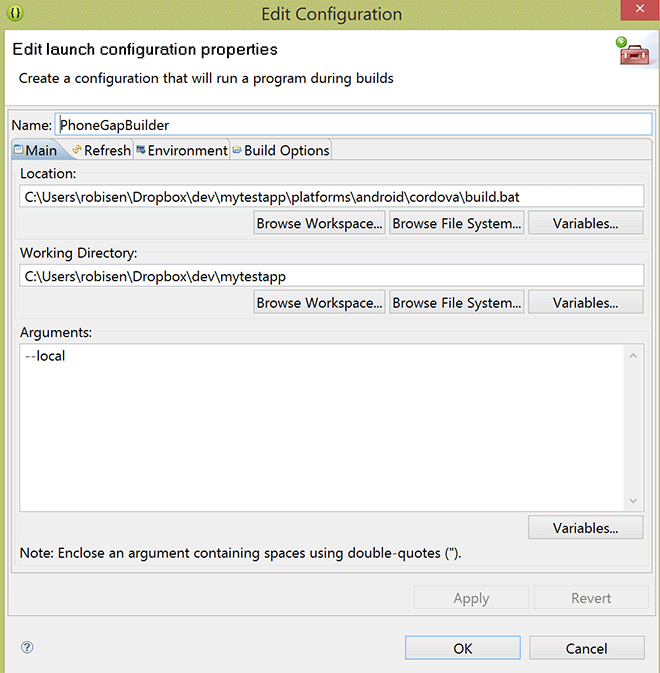
Name the new builder “PhoneGap Builder” and for the location field select Browse File System and navigate to /android/cordova/build.bat under our mytestapp folder. Then, for a working directory, you will want to put in the path to your mytestapp root directory. Finally, you’ll want to use the argument – –local. Then select ok. What this will do is that every time you build the application in Eclipse it will run the build.bat file with the —local argument. This will build the .apk and update the project with your latest changes made in the application www directory. For this post that would be mytestappwww. Also, if you made any changes to the Android source code, which we will not in this post, those changes will be updated and applied to the APK build.
Now that we have created a new builder, right-click on the project in the selected build. The application should now take a few seconds and then build. Once it has completed building, go ahead and select the project again and select Run As an Android application. Like what was shown in Post 1, expect this to take a few minutes as Eclipse starts the Android emulator and deploys the new Android app (you can find your Android app in mytestappplatformsandroidbin). You should now see something like the following:
Go ahead and play around with the application.
Summary
In this post, you learned how to use PhoneGap and the Eclipse ADT to build your first real web application with HTML 5 and JQuery and then deploy it as a real Android application. You also used JQuery and HTML 5’s localStorage to simplify the creation of your GUI. Try playing around with your application and clean up the UI with CSS. In our next post we will dive deeper into working with PhoneGap to make our application more sophisticated and add additional capabilities using the phone’s camera and other sensors.
About the author
Robi Sen, CSO at Department 13, is an experienced inventor, serial entrepreneur, and futurist whose dynamic twenty-plus year career in technology, engineering, and research has led him to work on cutting edge projects for DARPA, TSWG, SOCOM, RRTO, NASA, DOE, and the DOD. Robi also has extensive experience in the commercial space, including the co-creation of several successful start-up companies. He has worked with companies such as UnderArmour, Sony, CISCO, IBM, and many others to help build out new products and services. Robi specializes in bringing his unique vision and thought process to difficult and complex problems allowing companies and organizations to find innovative solutions that they can rapidly operationalize or go to market with.