In this article by Chris Halverson, the author of the book, PowerCLI Essentials, has discussed a few important tips on effective scripting. He starts off with a simple everyday example to make you aware of the situation in a humorous manner.
Let's take an easy example. Monday morning rolls around and the boss comes into your office with a big smile on his face, "Great report!", he says in his loud booming voice. "The information you provided helped the department secure another $150K for the budget. We are supposed to build a new automation framework that will allow us to produce these types of reports to the management team on a weekly basis." So you reply, "So we got a $150K budget for developing this framework in-house?" The boss chuckles and says, "No, it is for an office renovation. I'm getting my corner window office!" and he walks away laughing. "Typical!" you think.
In building an automation framework, there needs to be a methodology to document procedures, create central stores, establish tools, design development standards, and form repositories. Each process takes time and in some cases, capital. However, setting precedence beforehand makes the task of sorting and running scripts later handy and usable. This article deals with the building of a central script store and establishing a means to build consistent and usable scripting experience to provision, report, or configure a virtual environment that is simple and straightforward. We'll be looking on the following topics:
Building a code repository
Scripting with the intention of repurpose
Establishing quality control
Code repositories – why would I need that?
The first problem that may arise when developing code is that you spend hours designing and writing a script and then, the script is not found. Or you pass the script along to another member of the team and they respond, "It doesn't work". Having a well-defined repository helps to save the definition of the script into an open and robust place. This repository can later be used by everyone in the team to build something new. A repository can consist of a shared folder on a centralized file, a document like SharePoint, a commercial code repository such as CVS or Team Foundation Server, or a public-facing code sharing site such as personal Software Change Manager (SCM) or even a personal blogsite. The value of the repository is dependent upon the sensitivity of the script data being placed in the store. If the scripts are being written with the intention of sharing them with a work associate, a file share may be enough; however, if the scripts are very generic and has no company-sensitive data and there is a desire to get more feedback and more contributors, a public SCM account might be beneficial.
Building an internal repository
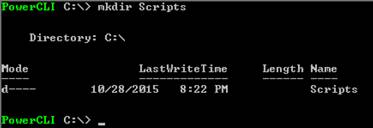
Let's start with a file share layout. Most IT shops have a central server that tends to be a "Jump box" or a utility server that runs general scripts or contains a multitude of administration tools. This server could be set up with a file folder named Scripts that will contain the repository.
Next, let's think through the structure. Any good store of scripts should have an area that stores final scripts and scripts under development; it needs a way to label versioning and should have a runtime area that has input files and output files. This enables consistency and provides a means to develop more functionality in the code, while helping to control the script's content and allowing additional functionality to be developed while still allowing the script to be run.
So with this in mind, this is an example of a folder structure for Scripts:
Scripts Final Input Output Modules Test Input Output Modules Development Input Output Modules
Storing the scripts in the main folder will allow a repository to be useful in a layout. Start by building the scripts in the Development folder; once the script is functional, a copy would be placed in the Test folder, and would be available for testing by the remaining operational staff. Once confirmed, the script would be copied to the Final or Production folder. This would allow multiple copies of a script and set for different stages of the code base.
The main disadvantage of this is that it quickly becomes unruly and loses its effectiveness once the script repository exceeds a couple of hundred scripts, or the user/developer base exceeds about 10 individuals. This is due to most of the check-in, checkout process. These processes are very manual and prone to overwrites and loss. Other issues such as having multiple people trying to edit the same script at the same time, problems cropping up when versions become out of sync (editing version 1.4 while the script that is in test is version 1.1 and the one in Production is version 1.3), or not knowing what is the latest version to work with. The fact is that there is no way to lock a script and see its history can be some of the biggest issues.
Using a third-party tool for code check-in and checkout
Downloading and integration aside, there are numerous solutions that could be used to help alleviate the check-in/checkout problem. Using a document management solution such as Microsoft SharePoint or EMC Documentum can resolve some of the version control and sign-in and sign-out issues; however, these can be large and expensive solutions requiring local support staff, and these are truly relatively small issues. If these tools are already running in the environment, look at them as options for the Development portion of the repository.
The alternative solution is to utilize a Version Control System (VCS) or Software Change Manager (SCM), which is smaller, has a number of open source forks, and can solve a number of the previously-mentioned issues. As with any solution, there is the typical problem of having another product to learn and another product to support.
Any solution that is to be installed in the site needs to be robust and be jointly agreed upon by all the parties that will use it: development, administration, and users. Having one individual that supports and operates a proprietary solution will become either a bottleneck or lose the point of the original solution when that person moves on to a different job.
Send it to the cloud! Public-facing script repositories
There are a number of places to store code snippets, one-liners, and short examples for a team to view and comment on. Blog sites such as Blogger.com or WordPress can provide a static means of storing scripts and a Wiki can provide a simple collaboration for the team. When these items are shared as a team within a common source, it can be very useful. For most individuals, this static area provides a place to share their experience.
GitHub.com is an example of a cloud-based VCS and provides up to a 5-user repository for free. This site adds to the VCS that were mentioned in the previous section and allows scripts to be collaborated through a team whose members may not reside in the same geographic area or in the same time zone.
Conclusions
No matter what method is chosen, the organization of scripts should be planned beforehand. Planning the structure helps to ensure that whatever automation mechanism is chosen in the future, such as VMware vRealize Automation, VMware vRealize Orchestration or some other custom developed workflow, the scripts will be available to anyone requiring them to run.
Scripting with the intention of reuse
Changing gears from storing scripts will in fact enable us to repurpose them, or use portions of a script in multiple areas. Functions, workflows, and modules are critical to this end. Each will be described in detail in this section of the book.
Functions, functions, functions – the fun with functions
What is a function? The help file defines it as a named block of code that performs an action. So writing a function would look like this:
Function Get-PS {get-process PowerShell}
The output would be nothing unless the function is called like this:
Function Get-PS {get-process PowerShell}
Get-PS
The output of this is the same as Get-Process PowerShell, but it is reusable and could be called at any point in the script. There is a simple and useful function that I personally use in many of the developed scripts to arrive at a decision and return a true or a false value:
Function Get-Decision ($Decision) {
Switch ($Decision.toupper()) {
"Y" {$Decision = $True}
"N" {$Decision = $False}
Default {"Enter a ''Y'' for a Yes or a ''N'' for No." ;
Get-Decision ($Decision)}
}
Return ($Decision)
}
As you can see, the preceding function is called Get-Decision and accepts an object through Read-Host and returns the decision. So the command that would call this would be something like this.
$MakeCSV = Get-Decision $(Read-Host "`nDo you need to make this a CSV to duplicate the settings and create more than one? (Y/N)")
So the $MakeCSV variable would be either $True or $False depending on the outcome of the user prompt. Then the next line would do something based upon that decision.
Important tip
All functions must be before the mainline code. All PoSH runs in a linear fashion from start to end, therefore if the function is being called, it has to be run to enter into the running memory. The function is also removed from memory upon the closing of the command window, so think it through where the function is needed and open it accordingly.
An example for a multifunction script is as follows:
Premise: Build a script that automates the building of a VM.
Inputs: The script should capture the VM name, how many CPUs, how much memory, and build a VM with the settings captured and a 50 GB hard disk.
Output: Builds VM.
Assumption: $cred is captured using the $cred = Get-Credential command before this script is run.
Script: Insert the following code snippet:
If ($Cred -ne $null)
{
Get-vc vCenter.domain.local -credential $cred |
out-null
}
Else
{
End
}
Function Gather-Data
{
$Sys = @{
Name = Read-Host "What is the name of the VM?";
NumCPU = Read-Host "What is the amount of CPUs
required?";
MeminGB = Read-Host "How much RAM is required?"
VMHost = get-vmhost | select -first 1
}
Return ($Sys)
}
Function Build-VM ($Sys)
{
New-VM –Name $Sys.Name –NumCPU $Sys.NumCPU –MemoryGB
$Sys.MeminGB –DiskGB 50 -vmhost $Sys.vmhost
}
$output = Gather-Data
Build-VM($output)
This is a pretty simple example of building a hash table in one function, outputting the hash table, and using it as the input for a second function. The information stored in the hash table is used to populate a New-VM command. The point is that the Gather-Data function can be used to collect data for other things such as a CSV file, or a different function that searches for the information and removes the VM. The best part is that the information is deleted once the window is closed and is useful only when the script is run.
Using modules
Building modules
As building modules are a little more of an advanced topic, this book will only discuss their use. However, a little understanding of what they are may whet your appetite to delve deeper into the topic. MSDN provides an outline of four different module types: the script module, the binary module, the manifest module, and the dynamic module.
Primarily, PowerCLI modules have always been typically plug-ins and not modules; they always required a separate running of the PowerCLI icon to allow the use of their cmdlets. Recent versions have changed that mantra and are now using modules. Type Get-Help About_PSSnapins in your PowerShell interface to learn more about the difference.
A module is, again as pointed out in the help file, a package of commands. It is a collection of cmdlets, scripts, workflows, aliases, variables, and functions that when imported allow the user to run true and tested commands. Every install of PoSH has modules installed by default. To view the installed modules type Get-Module –ListAvailable and the command will list the installed modules. After the installation of the PowerCLI package, there are a number of modules that are added to the available list of packages. They can be as follows:
Each of these modules includes numerous pieces of code that perform various functions with the VMware environment. To list the commands available in a module such as VMware.VimAutomation.Core, run the Get-Command –module VMware.VimAutomation.Core command, where the outputs is, as of PowerCLI v6.0 R3, 291 individual cmdlets.
With the use of modules and PoSH v3, importing modules from another system is now a reality. This importing isn't a permanent addition, but can be very handy in a pinch. Firstly, WinRM must be running and configured for remote management; this is done through the WinRM quickconfig command running on an administrative PowerShell window. Once WinRM allows remote connections, type $PS = New-PSSession –Computername <computername>; this allows a remote connection to be established through WinRM to the other computer. Once this PSSession is established, commands can be run on an alternate computer as well as modules can be imported to the local computer.
This shows the available modules on the remote computer. Adding the Import-Module –PSSession $PS Module_name method will permit the import of a module into the current PoSH window. So if there is no VMware.VimAutomation.Core installed on the local system, the preceding method allows it to run as if it were already installed. The running of the commands become slower as they are run through the remote connection; however, they do run and can get the information needed. Note that this command doesn't transfer the aliases as well, so try and remember its full syntax.
Calling other scripts within the script
Calling other scripts within a script is fairly straightforward as is a single command. invoke-expression –command .script.ps1 or "c:scriptssample_script.ps1" | invoke-expression, allows an external script to be run and for the output of that script to be captured within the main script. Think about it this way, as the wrapper ps1 or a scripting framework that has been developed it can call another script that another person can write and the output from the external expression. It wouldn't matter what the output would be unless it needs to be parsed and processed for a different output.
We will use same the example that was written in the preceding multifunction section, where there was a need to capture the VM name, how many CPUs, and how much memory, and then build a VM with the settings captured and on a 50 GB hard disk.
An example of a framework script is as follows:
Premise: Build a script that automates the building of a VM.
Inputs: The script should capture the VM name, how many CPUs, how much memory, and then build a VM with the settings captured and a 50 GB Hard Disk.
Unlock access to the largest independent learning library in Tech for FREE!
Get unlimited access to 7500+ expert-authored eBooks and video courses covering every tech area you can think of.
Renews at $19.99/month. Cancel anytime
Output: Builds VM.
Assumption: This script must call other scripts through invoke-expression.
Script: Insert the following code snippet:
Connect-vCenter.ps1 <#
.Synopsis
Does the lifting of connecting to a vCenter
.Description
Starts VIMAutomation Module
Gets Credentials
Gets the vCenter name and connects to vCenter
.Input
User Input
Credentials
vCenter Name
.Output
None
.Author
Chris Halverson
.Change Log
11/6/2015
.FileName
Connect-vCenter.ps1
.Version
Draft 0.1
#>
#Call the Module
If ($(get-module -ListAvailable) –notmatch`
"VMware.VimAutomation.Core") {
Import-Module VMware.vimautomation.core
}
#Test for stored credentials
If ($Cred -ne $null){
write-Host 'Using the Credential '$Cred.UserName
}
Else {
$Cred = Get-Credential
}
$VC = Read-Host "What is the name of the vCenter server? "
#Trying a ping of the vCenter Host
If (Test-Connection -ComputerName $VC -Count 2 -quiet) {
Connect-ViServer $VC -Credential $Cred | Out-Null
Write-Host "Connected to vCenter $VC " -ForegroundColor
Green
[Console]::Foregroundcolor = "Gray"
}
Else {
Write-Host "vCenter not found. Exiting script" `
-ForegroundColor Red
[console]::ForegroundColor = "Gray"
Break}
Gather-Data.ps1
<#
.Synopsis
Collects Information for build data
.Description
Gets Appropriate data and outputs to a variable
.Input
User Input
VM Name
Number of CPUs
Amount of RAM in GB
.Output
Variable
.Author
Chris Halverson
.Change Log
11/6/2015
.FileName
Gather-Data.ps1
.Version
Draft 0.1
#>
$global:Sys = @{
Name = Read-Host "What is the name of the VM?";
NumCPU = Read-Host "What is the amount of CPUs
required?";
MeminGB = Read-Host "How much RAM is required?"
}
Build-VM.ps1
<#
.Synopsis
Builds a VM
.Description
Calls the Connect-vCenter.ps1 Script to connect to
vCenter
Gathers Data from Gather-Data.ps1
Builds VM based on Specs
.Input
Called through other Scripts
.Output
Builds VM
.Author
Chris Halverson
.Change Log
11/6/2015
.FileName
Build-VM.ps1
.Version
Draft 0.1
#>
Invoke-Expression -command .Connect-vCenter.ps1
Invoke-Expression -command .Gather-Data.ps1
$vHost = Get-VMhost | Select -first 1
New-VM –Name $Sys.Name –NumCPU $Sys.NumCPU –MemoryGB $Sys.MeminGB `
–DiskGB 50 -vmhost $vhost
Upon completion of the Build-VM.ps1 script, a new VM is created and although the Guest OS type is Windows XP and some of the other configuration is a little off from what a typical build would be, the script was successful and it has components that can be reused in a loop or a workflow.
Building a framework that others can build upon
A framework in this context is a set of standard components that every other script that has been developed would want to access. For example, building a wrapper that can do email a final output without running the command and specifying certain information, or something that automatically opens the connection to the vCenter's environment. These are some of the things that building a wrapper or workflow can do.
Some of the advantages of workflows are that they can run parallel instead of serially as compared to a standard PowerShell script; they can be paused, stopped, or restarted as needed, and they can be run on remote hosts and can increase the performance ten times if there are enough remote engines to run it. Logging is included in the workflow engine. These become huge as more and more administrative tasks need to have parallelism to run properly. One important thing of note is that workflows are built using the .NET framework Windows Workflow Foundation (WWF), and the PowerShell code that is being run in the workflow is actually being translated into XAML for WWF.
The XAML code can actually be seen when a workflow is created by typing this: get-command [Workflow name] | select-object XamlDefinition
Typing Help About_Workflows gives a lengthy bit of information that discusses what a workflow is, its benefits, and why it is are needed:
ABOUT WORKFLOWS
Workflows are commands that consist of an ordered sequence of
related activities. Typically, they run for an extended period
of time, gathering data from and making changes to hundreds of
computers, often in heterogeneous environments.
Workflows can be written in XAML, the language used in Windows
Workflow Foundation, or in the Windows PowerShell language.
Workflows are typically packaged in modules and include help
Workflows are critical in an IT environment because they can
survive reboots and recover automatically from common failures.
You can disconnect and reconnect from sessions and computers
running workflows without interrupting workflow processing,
and suspend and resume workflows transparently without data
loss. Each activity in a workflow can be logged and audited
for reference. Workflow can run as jobs and can be scheduled
by using the Scheduled Jobs feature of Windows PowerShell.
The state and data in a workflow is saved or "persisted" at
the beginning and end of the workflow and at points that you
specify. Workflow persistence points work like database snapshots
or program checkpoints to protect the workflow from the effects
of interruptions and failures. In the case of a failure from
which the workflow cannot recover, you can use the persisted
data and resume from the last persistence point, instead of
rerunning an extensive workflow from the beginning.
So to add to the description from the help file, these are jobs or scheduled jobs that can be started, run, rerun and be paused for a reboot. The workflow engine should use PoSH v3 and higher to run, as it gains many advantages when run through these jobs. The workflow requires the following:
A client computer to run the workflow
A workflow session (a PowerShell session otherwise known as a PSSession) on the client computer (it can be local or remote)
And a target for the workflow activities
Running a workflow
To run a workflow, there are some caveats to make sure things run smoothly. Firstly, make sure that PowerShell is running in an administrative window or option. Either right-click on the PowerShell icon and select Run as Administrator (which triggers an User Access Control or UAC verification window), or type Start-Process PowerShell –verb RunAs that does the same thing.
Next, enable the client or the remote client to have a remote PSSession run by typing Enable-PSRemoting –Force or Set-WSManQuickConfig or as seen in a previous section, type WinRM QuickConfig, which allows the computer to accept WinRM or remote management commands. These commands will start the WinRM service, configure a firewall exception for the service, and allow Kerberos authentication for the commands to be run.
To return the configuration back
Disable-PSRemoting –force returns the configuration back to the original condition of the OS.
A typical way to set up a remote session is to use the New-PSWorkflowSession cmdlet. Let's see what this actually looks like and then process a simple workflow script.
Premise: Build a workflow that gets a WMI entry for Win32_BIOS, lists running processes, lists the stopped services on the computer, and does all that in parallel.
Inputs: All inputs will be hardcoded for simplicity.
Output: The contents of the Win32_BIOS processes that are running and the stopped services.
When this workflow is run, it is easy to see that these commands are run in parallel, as the output is not displayed in the order of execution. In fact, the CimInstance completes first, then the services and finally, the processes, and export outputs shows these were run in parallel. The order would change depending on what completes first. These workflows will be developed more when we mix VMware administration scripts with Windows administration scripts to fill out more of remote development.
Summary
This article summarized good coding practices, outlined the use of repeatable code, and ways to use that code for other general use. It built a longer code base and methods to keep the practicalities from the concept and transform the thought to action. This article also summed up a version control technique to keep historical information into the script management structure.

 United States
 Great Britain
 India
India
 Germany
 France
 Canada
 Russia
 Spain
Spain
 Brazil
 Australia
 Singapore
 Canary Islands
 Hungary
 Ukraine
 Luxembourg
 Estonia
 Lithuania
 South Korea
 Turkey
 Switzerland
 Colombia
 Taiwan
 Chile
Chile
 Norway
 Ecuador
 Indonesia
 New Zealand
 Cyprus
 Denmark
 Finland
 Poland
 Malta
Malta
 Czechia
 Austria
 Sweden
 Italy
Italy
 Egypt
Egypt
 Belgium
 Portugal
 Slovenia
 Ireland
 Romania
 Greece
 Argentina
 Netherlands
 Bulgaria
 Latvia
 South Africa
 Malaysia
 Japan
Japan
 Slovakia
 Philippines
 Mexico
 Thailand