Windows Phone 7.5 supports two methods of map display in your mobile app:
Bing Maps Silverlight Control for Windows Phone
Bing Maps task Launcher
Before we delve into the methods, actions, and tasks of the Windows Phone Bing Maps Silverlight Control or the Bing Maps task Launcher, it is a good idea to get acquainted with the background of map geometry and how it works for Bing Maps. If you have a background in Computer Science, then you would be aware of keywords such as projection, trajectory, coordinate systems, raster and scalable graphics. If you are not from a Computer Science background, then a basic understanding of the Bing Maps API can be found at http://msdn.microsoft.com/en-us/library/ff428643.aspx. This should be good to get you started with Bing Maps.
Bing Maps uses the Mercator projection model of converting the Earth's sphere into a corresponding flat surface, grid-based, parallel map. In such a projection the longitude lines are parallel, and hence the land mass further from the equator tends to be distorted. However, the Mercator projection works well for navigational purposes, and therefore, despite the drawbacks, it is still used today.
The Mercator projection offers two compelling advantages:
The map scale is constant around any position.
Mercator projection is a cylindrical projection. North and south are straight up and down, while west and east are always left and right respectively. (This helps in keeping track of your course in navigation.)
The following diagrams should give you a good idea about the Mercator projection:
The world map is pre-rendered at many different levels of detail and cut into tiles for quick retrieval. When you zoom in or zoom out on your Bing Maps, it is nothing but loading different tiles at different levels. To read more about the Bing Maps Tile System please see the following MSDN link:
Overview of the Windows Phone Bing Maps Silverlight Control
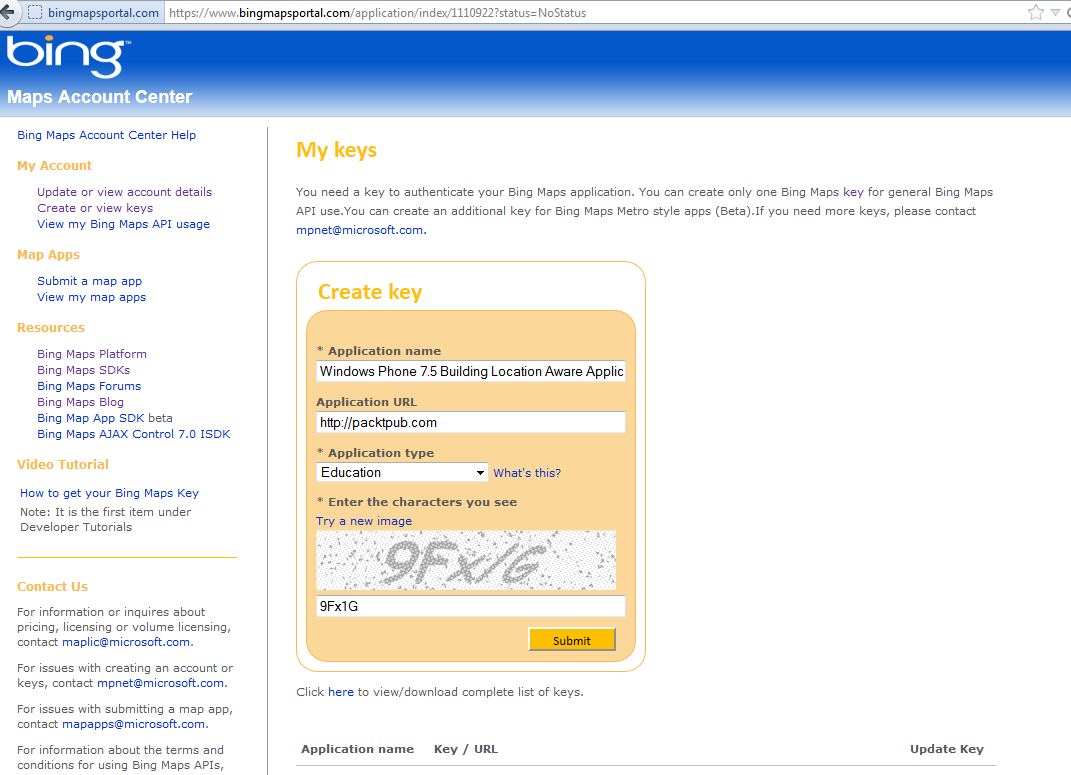
The Bing Maps Silverlight Control for Windows Phone 7.5 is a port of the desktop version of the Silverlight Map Control, which provides full mapping capabilities on the Windows Phone 7.5 device. Before using the Bing Maps control you need to get an application key from Microsoft's Bing Maps portal at: https://www.bingmapsportal.com/.
Unlock access to the largest independent learning library in Tech for FREE!
Get unlimited access to 7500+ expert-authored eBooks and video courses covering every tech area you can think of.
Renews at $19.99/month. Cancel anytime
The Microsoft.Phone.Controls.Maps namespace contains the classes of the Bing Maps Silverlight Control for Windows Phone. Let us quickly see an example of using maps in our WP7.5 app.
Using maps in your Windows Phone 7.5 app – Hello Maps
We will now create a new application titled HelloMaps that shows the Windows Phone Bing Maps Silverlight Control in action:
Launch Microsoft Visual Studio 2010 Express for Windows Phone.
Create a new Project from the File | New Project menu option and Name it HelloMaps.
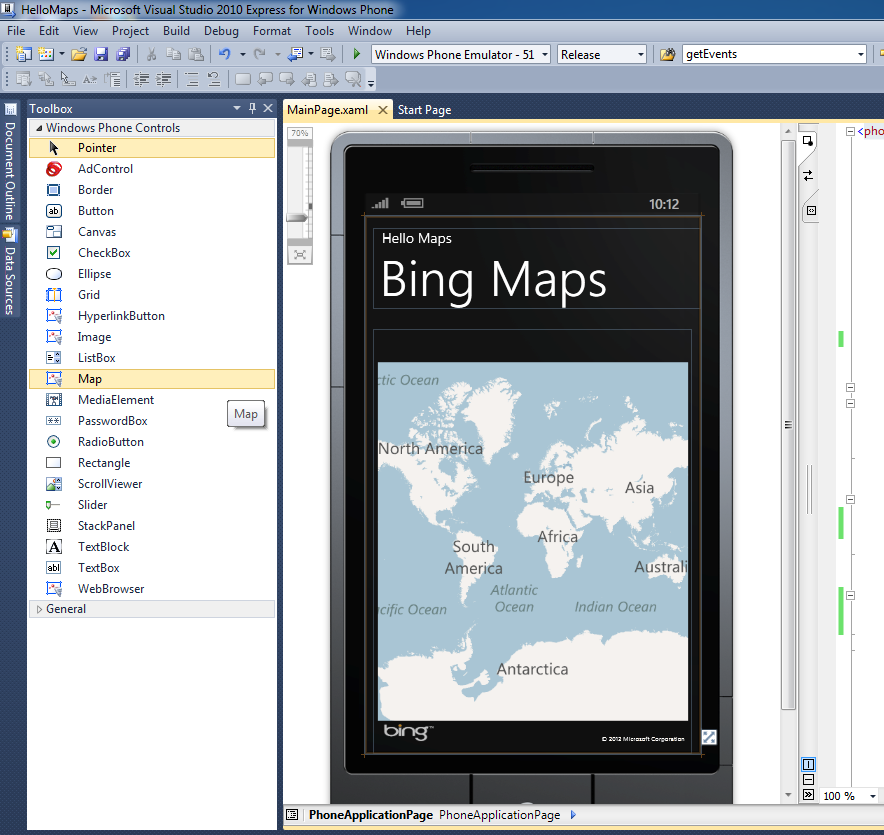
Add the Map control to your app by selecting it from the Toolbox. Change the Application Title to Hello Maps and the Page Title to Bing Maps. Your project should now look like the following screenshot:
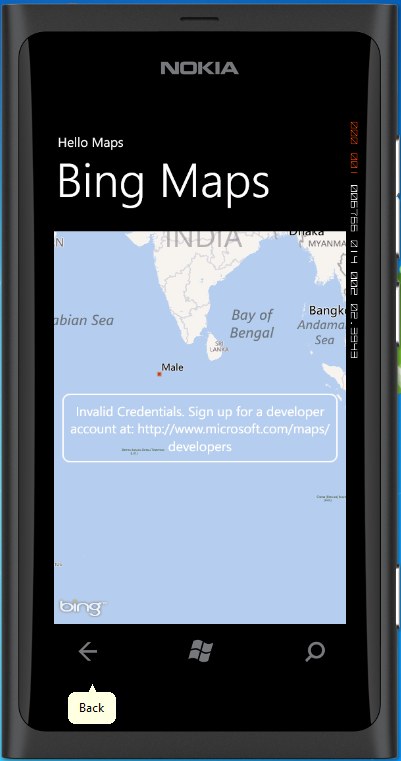
If you run the app now it will show the following output, as depicted in the next screenshot: Invalid Credentials. Sign up for a developer account at:http://www.microsoft.com/maps/developers
Visit https://www.bingmapsportal.com/ and sign up or log in with your Windows Live ID. Create your application and store the map key in a safe place.
Now that we have our key, (for safety reason we assume xxxxxxxxxxxxxx as the key) let us initialize our Map control with the same.
Notice the XAML tag <my:Map> when you added the Map control to your application. Add the key we got from step 7 by using the CredentialsProvider attribute of the Bing Maps Silverlight Control. Also change the name of the map to myMap.
Running the app in the emulator now will not show the Invalid Credentials message we saw earlier.
Now let us make our application more exciting. We will add an Application Bar to our Hello Maps application that will allow us to choose the map mode: Road Mode or Aerial Mode.
In your MainPage.xaml uncomment the following lines that add a default application bar to your application:
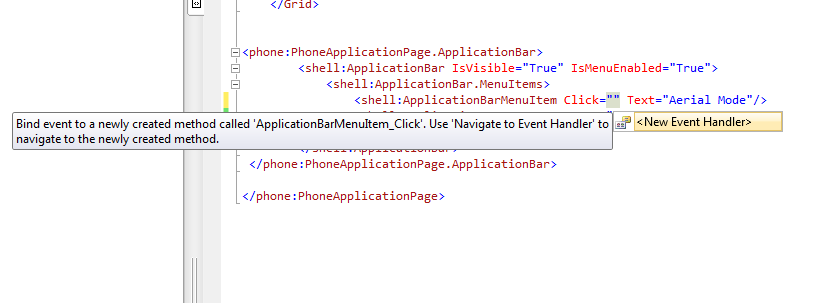
With your code editor open, go to the Aerial Mode Application Bar Menu Item and before the Text property enter Click="". IntelliSense will prompt you <New Event Handler> as shown in the following screenshot. Select it.
Do the same for the other Application Bar Menu Item. Your code should now be as follows:
Open your MainPage.xaml.cs file and you will find the two click event functions created automatically: ApplicationBarMenuItem_Click and ApplicationBarMenuItem_Click_1.
As the first menu item is for Aerial Mode, we set the map mode to Aerial Mode by using the following code in the ApplicationBarMenuItem_Click function:
Run the application in the emulator and click on the three dots you see on the lower right-hand side of your application footer. This invokes the Application Bar and your app screen should like the following screenshot:
Select the aerial mode menu item and see your map change to Aerial Mode in real-time. You can switch back to Road Mode by selecting the road mode menu item again.

 United States
 Great Britain
 India
India
 Germany
 France
 Canada
 Russia
 Spain
Spain
 Brazil
 Australia
 Singapore
 Canary Islands
 Hungary
 Ukraine
 Luxembourg
 Estonia
 Lithuania
 South Korea
 Turkey
 Switzerland
 Colombia
 Taiwan
 Chile
Chile
 Norway
 Ecuador
 Indonesia
 New Zealand
 Cyprus
 Denmark
 Finland
 Poland
 Malta
Malta
 Czechia
 Austria
 Sweden
 Italy
Italy
 Egypt
Egypt
 Belgium
 Portugal
 Slovenia
 Ireland
 Romania
 Greece
 Argentina
 Netherlands
 Bulgaria
 Latvia
 South Africa
 Malaysia
 Japan
Japan
 Slovakia
 Philippines
 Mexico
 Thailand