


The Jupyter notebook is an interactive notebook allowing you to write documents with embedded code, and execute this code on the fly. It was originally developed as a part of the Ipython project, and could only be used for Python code at that time. Nowadays, the Jupyter notebook integrates multiple languages, such as R, Julia, Haskell and much more – the notebook supports about 50 languages.
One of the best features of the notebook is to be able to mix code and markdown with embedded HTML/CSS. It allows an easy creation of beautiful interactive documents, such as documentation examples. It can also help with the writing of full documentation using its export mechanism to HTML, RST (ReStructured Text), markdown and PDF.
Interactive documentation examples
When writing library documentation, a lot of time should be dedicated to writing examples for each part of the library. However, those examples are quite often static code, each part being explained through comments. To improve the writing of those examples, a solution could be using a Jupyter notebook, which can be downloaded and played with by anyone reading your library documentation. Solutions also exist to have the notebook running directly on your website, as seen on the Jupyter website, where you can try the notebooks. This will not be explained in this post, but the notebook was designed on a server-client pattern, making this easy to get running.
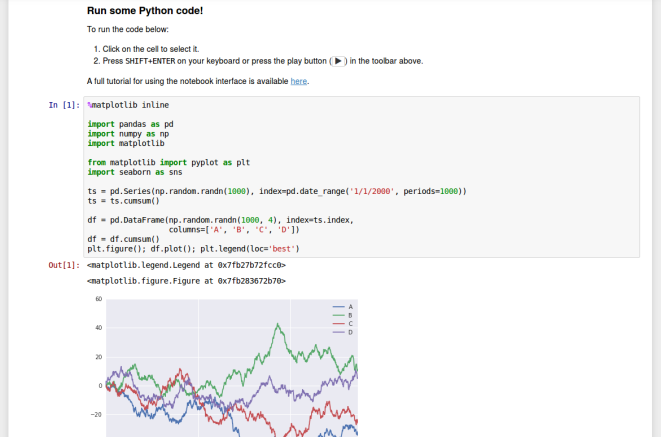
Using the notebook cells capabilities, you can separate each part of your code, or each example, and describe it nicely and properly outside the code cell, improving readability. From the Jupyter Python notebook example, we see what the following code does, execute it (and even get graphics back directly on the notebook!). Here is an example of a Jupyter notebook, for the Python language, with matplotlib integration:
Even more than that, instead of just having your example code in a file, people downloading your notebook will directly get the full example documentation, giving them a huge advantage in understanding what the example is and what it does when opening the notebook again after six months. And they can just hit the run button, and tinker with your example to understand all its details, without having to go back and forth between the website and their code editor, saving them time. They will love you for that!
Generate documentation from your notebooks
Developing mainly in Python, I am used to the Sphinx library as a documentation generator. It can export your documentation to HTML from RST files, and scoops your code library to generate documentation from docstring, all with a single command, making it quite useful in the process of writing. As Jupyter notebooks can be exported to RST, why not use this mechanism to create your RST files with Jupyter, then generate your full documentation with Sphinx?
To manually convert your notebook, you can click on File -> Download As -> reST.

You will be prompted to download the file. That’s it! Your notebook was exported.
However, while this method is good for testing purposes, this will not be good for an automatic generation of documentation with sphinx. To be able to convert automatically, we are going to use a tool named nbconvert with which can do all the required conversions from the command line. To convert your notebook to RST, you just need to do the following
$ jupyter nbconvert --to rst *your_notebook*.ipynbor to convert every notebook in the current folder:
$ jupyter nbconvert --to rst *.ipynbThose commands can easily be integrated in a Makefile for your documentation, making the process of converting your notebooks completely invisible. If you want to keep your notebooks in a folder notebooks and your generated files in a folder rst, you can run assuming you have the following directory tree:
Current working directory
|
|-rst/
|-notebooks/
    |-notebook1.ipynb
    |-notebook2.ipynb
    |-...
the following commands:
$ cd rst
$ jupyter nbconvert --to rst ../notebooks/*.ipynb
This will convert all the notebooks in notebooks and place them in the rst folder. A Python API is also available if you want to generate your documentation from Python (Documentation).
A lot more export options are available on the nbconvert documentation. You can create PDF, HTML or even slides, if you want to make a presentation based on a notebook, and can even pull a presentation from a remote location.
Jupyter notebooks are very versatile documents, allowing interactive code exploration, export to a large number of formats, remote work, collaborative work and more. You can find more information on the official Jupyter website where you will also be able to try it. I mainly focused this post on the Python language, in which the IPython notebooks, ancestor of Jupyter were developed, but with the integration of more than 50 languages, it makes it a tool that every developer should be aware of, to create documentation, tutorials, or just to try code and keep notes at the same place.
About the author
Marin Gilles is a PhD student in Physics, in Dijon, France. A large part of his work is dedicated to physical simulations for which he developed his own simulation framework using Python, and contributed to open-source libraries such as Matplotlib or Ipython.


