(For more resources on CMS, see here.)
Have a go hero – determine your keywords
Search engines read, crawl, and index text and only text. They don't recognize images, Flash, or Silverlight content. That's why it's important to use the most relevant text for your website and sprinkle the content with the right keywords, while placing the selected keywords in strategic locations where there is a maximum chance for the spiders of a search engine to read, crawl, and index. Embedding keywords in the heading, initial part of the first paragraph, page titles, filenames, and directory names are some of the most commonly used strategies for improving page ranking. You can also consider including keyword phrases in the URLs or domain names of your website. This is one of the most important ways to improve the page ranking in various search engines' results pages.
You need to be very careful when selecting the keywords for your website and choose words that describe your website. Sometimes, you may be confident that keywords that you choose are the best descriptions. But how do you know whether you have chosen the best keywords? What if there is no one out there who will submit a search query for the keywords you chose? This is where web analytis plays an important part.
While it's tempting—resist the urge to go with uniquely different keywords or made up words. This may sound appealing to reduce the overlap with your competitor's websites. Unfortunately, you may find yourself not featured in any specific results at all. This is the main reason you should consider using keyword phrases that are popularly searched. There is a wide variety of keyword suggestion tools available, which can give you statistics, competition level, and search popularity that can help a company make an informed decision.
While it is typical to determine a list of six keywords, depending on your marketing budget, you may only want to finalize a list of three. Spend some time with your marketing department to determine these keywords. Once this is done, validate these against several of the online keyword suggestion tools available. Finalize this list and make it available to all content editors with specific recommendations about their usage.
Time for action – forbidden URL characters
In order to guarantee URL consistency, HTTP defines a set of forbidden characters (' / : * ? " < > | & ; % . ; % . ' # [ ] + =.). In addition to these pre-defined characters, we want to remove the $ character from any URL string in our site to provide better navigation. This can be done using the following steps:
- Log in to Site Manager, select the Settings tab, select URLs and SEO, as shown in the following screenshot:
(move cursor over image to enlarge)
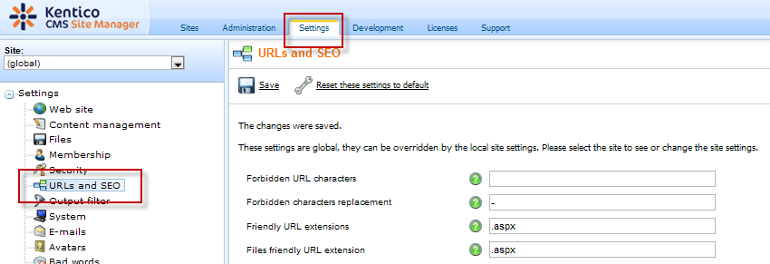
- In the Forbidden URL characters field, enter $ and select Save, as shown in the following screenshot:

Don't forget
This setting defines characters in addition to the HTTP forbidden characters mentioned earlier.
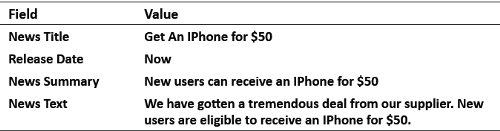
- Log in to CMS Desk, select the News folder, and click the New document icon. In the New document screen, select the News item, enter the following information, and select Save.
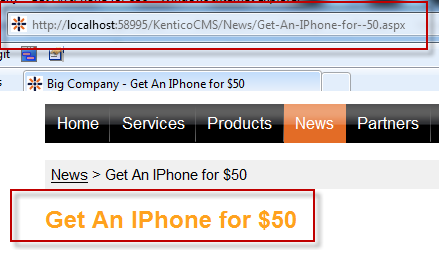
- Sign out of CMS Desk. In the live site, select the News menu item, click the Get An IPhone for $50 link to view the URL containing the replaced characters, and the News item, as shown in the following screenshot:
Unlock access to the largest independent learning library in Tech for FREE!
Get unlimited access to 7500+ expert-authored eBooks and video courses covering every tech area you can think of.
Renews at $19.99/month. Cancel anytime
What just happened?
When you selected the URLs and SEO menu option, this brought us to the system management screen. This screen contains a variety of options for managing various advanced aspects of the URL and SEO functions. When we entered the $ into the Forbidden URL characters field, this appended our character to the default HTTP forbidden list. Once this was saved, we then created a new news item that contained a $ in the title. By default, all new News URLs are created using the News title as the default URL. The resulting URL contained a - instead of a $.
Time for action – changing the site name
The name of any page displayed in the browser window is based on a system-wide default that starts with a page prefix. Now that we have our basic site configured, we want to change the name of the page prefix from Corporate Site to the name of our company, namely, Big Company, using the following steps:
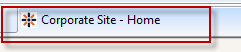
- Log in to the live site to view the default site name, Corporate Site, as shown in the following screenshot:
- Log in to Site Manager, select the Settings tab, and then select Web site, as shown in the following screenshot:
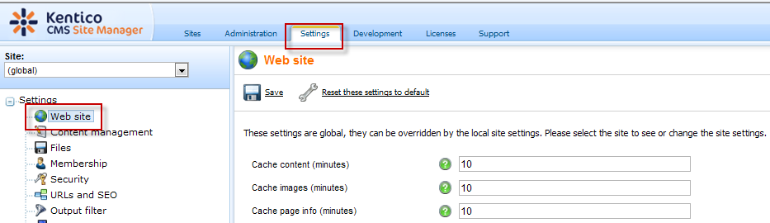
- In the Site drop-down menu, select Corporate Site, as shown in the following screenshot:
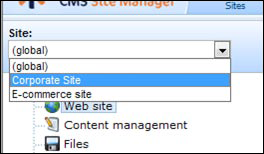
- In the Web site properties for the Corporate Site, change the Page title prefix field to Big Company, as shown in the following screenshot and select Save.

- Log in to the live site to view the changed page prefix to our company name, as shown in the following screenshot:

What just happened?
When we selected the Web site and then Corporate Site, this brought up the default site settings. We then changed the Page title prefix field to our company name, and when we logged into the live site, this was reflected across all pages. This change is also captured by any search engines currently indexing our site.
Global settings
You can configure the format of all page titles, descriptions, and keywords for all sites by logging into Site Manager selecting Settings, then the Web site dialog, and then by selecting the (global) site. This allows you to configure the Page title format for all pages. The default title format is:
{%prefix%} - {%pagetitle_orelse_name%}
This means that the format consists of the site prefix followed by the page title value. If the page title value is not set, the document name is used.

 United States
 Great Britain
 India
India
 Germany
 France
 Canada
 Russia
 Spain
Spain
 Brazil
 Australia
 Singapore
 Canary Islands
 Hungary
 Ukraine
 Luxembourg
 Estonia
 Lithuania
 South Korea
 Turkey
 Switzerland
 Colombia
 Taiwan
 Chile
Chile
 Norway
 Ecuador
 Indonesia
 New Zealand
 Cyprus
 Denmark
 Finland
 Poland
 Malta
Malta
 Czechia
 Austria
 Sweden
 Italy
Italy
 Egypt
Egypt
 Belgium
 Portugal
 Slovenia
 Ireland
 Romania
 Greece
 Argentina
 Netherlands
 Bulgaria
 Latvia
 South Africa
 Malaysia
 Japan
Japan
 Slovakia
 Philippines
 Mexico
 Thailand


