


An active account with AWS means you are on your way with building in the cloud. Before you start building, you need to tackle the Billing and Cost Management, under Account. It is likely that you are starting with a Free-Tier, so it is important to know that you still have the option of paying for additional services. Also, if you decide to continue with AWS,you should get familiar with this page. This is not your average bill or invoice page—it is much more than that.
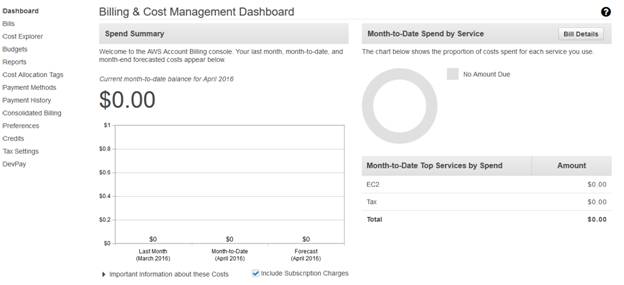
The Billing & Cost Management Dashboard is a bird’s-eye view of all of your account activity. Once you start accumulating pay-as-you-go services, this page will give you a quick review of your monthly spending based on services. Part of managing your cloud services includes billing, so it is a good idea to become familiar with this from the start.
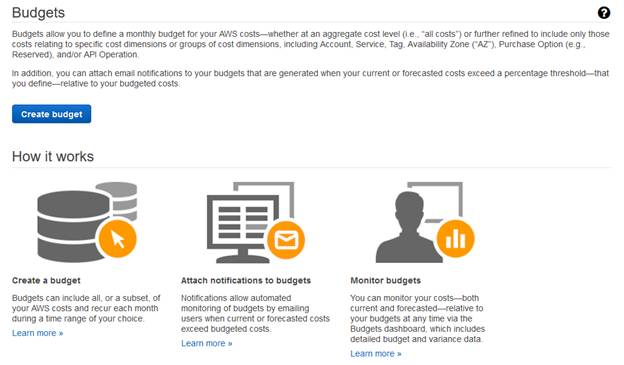
Amazon also gives you the option of setting up cost-based alerts for your system, which is essential if youwant to be alerted by any excessive cost related to your cloud services. Budgets allow you to receive e-mailed notifications or alerts if spending exceeds the budget that you have created.
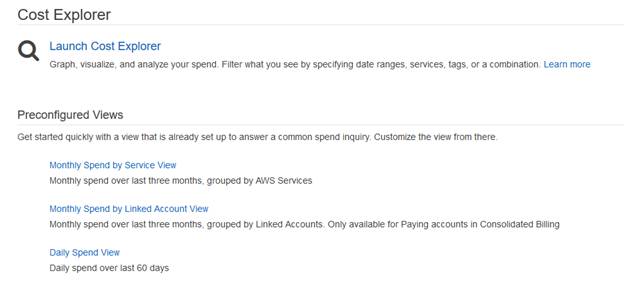
If you want to dig in even deeper, try turning on the Cost Explorer for an analysis of your spending.
The Billing and Cost Management section of your account is much more than just invoices. It is the AWS complete cost management system for your cloud. Being familiar with all aspects of the cost management system will help you to monitor your cloud services, and hopefully avoid any expenses that may exceed your budget.
In our previous discussion, we considered all AWSservices. Let’s take another look at the details of the services.
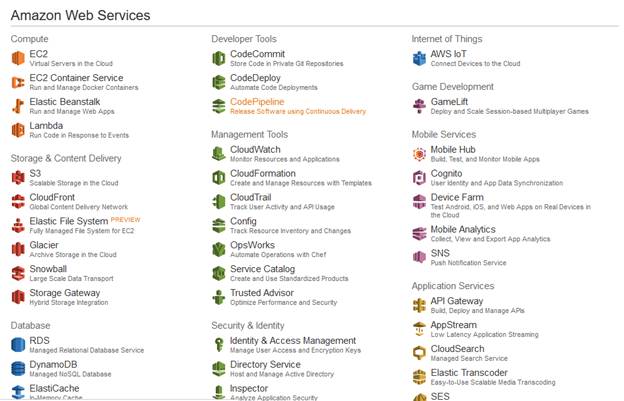
Amazon Web Services
Based on this illustration, you can see that the build options are grouped by words such asCompute, Storage & Content Delivery and Databases. Each of these objects or services lists a step-by-step routine that is easy to follow. Within the AWS site, there are numerous tutorials with detailed build instructions. If you are still exploring in the free-tier, AWS also has an active online community of users whotry to answer most questions.
Let’s look at the build process for Amazon’s EC2 Virtual Server. The first thing that you will notice is that Amazon provides 22 different Amazon Machine Images (AMIs) to choose from (at the time this post was written).At the top of the screen is a Step process that will guide you through the build. It should be noted that some of the images available are not defined as a part of the free-tier plan. The remaining images that do fit into the plan should fit almost any project need.
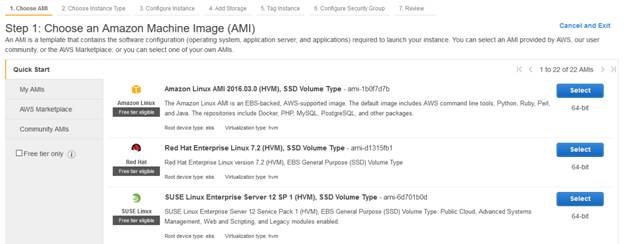
For this walkthrough, let’s select SUSE Linux (free eligible).
It is important to note that just because the image itself is free, that does not mean all the options available within that image are free.
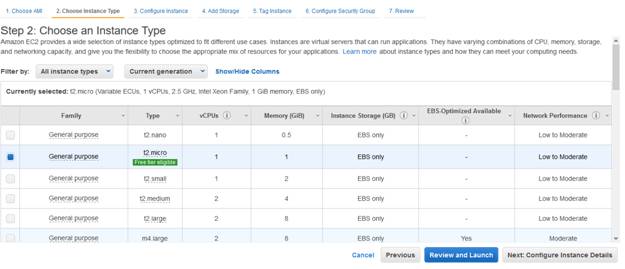
Notice on this screen that Amazon has pre-selected the only free-tier option available for this image. From this screen you are given two options: (Review and Launch) or (Next Configure Instance Details).
Let’s try Review and Launch to see what occurs.
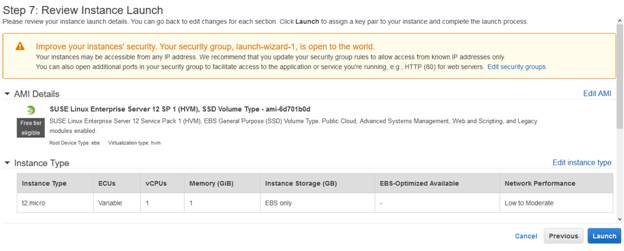
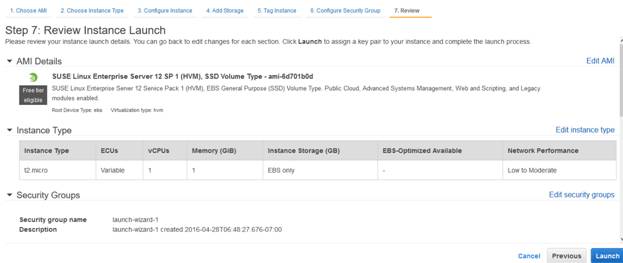
Notice that our Step process advanced to Step 7. Amazon gives you a soft warning regarding the state of the build and potential risk. If you are okay with these risks, you can proceed and launch your server. It is important to note that the Amazon build process is user driven. It will allow you to build a server with these potential risks in your cloud. It is recommended that you carefully consider each screen before proceeding. In this instance,select Previous and not Cancel to return to Step 3. Selecting Cancelwill stop the build process and return you to the AWS main services page. Until you actually launch your server, nothing is built or saved.
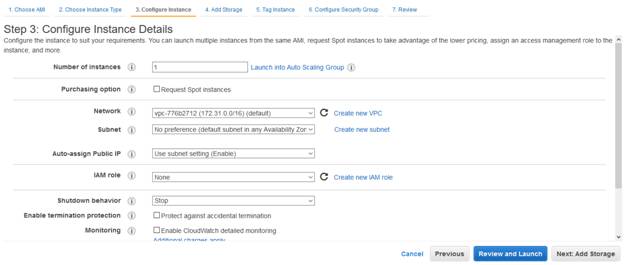
There are information bubbles for each line in Step 3: Configure Instance Details. Review the content of each bubble, make any changes if needed, and then proceed to the next step.
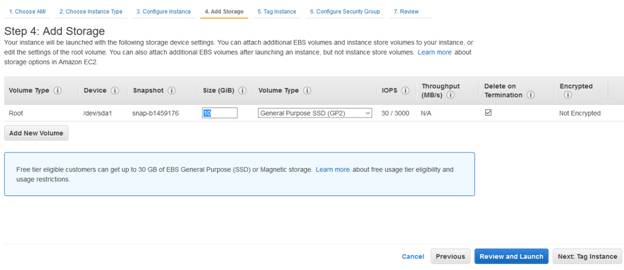
Select the storage size; then select Next Tag Instance.
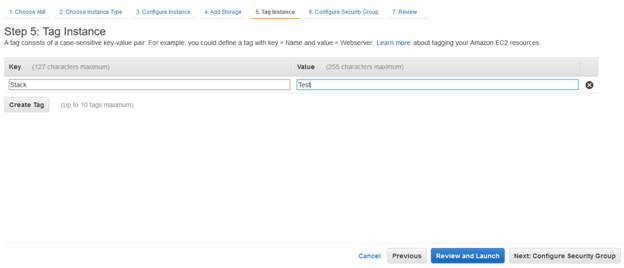
Enter Values and Continue or Learn More for further information. Select the Next: Configure Security Group button.
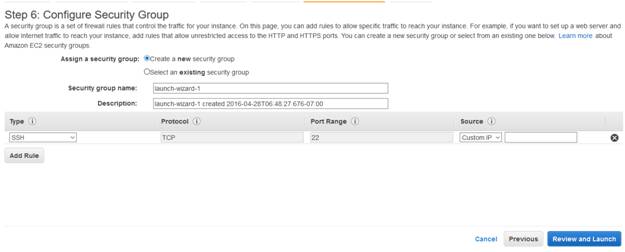
Security is an extremely important part of setting up your virtual server. It is recommended that you speak to your security administrator to determine the best option. For source, it is recommended that you avoid using the Anywhereoption. This selection will put your build at risk. Select my IP or custom IP as shown. If you are involved in a self-study plan, you can select the Learn More link to determine the best option.
Next: Review and Launch
The full details of this screen be expanded, reviewed or edited. If everything appears to be okay,proceed to Launch.
One additional screen will appear for adding Private and/or Public Keys to access your new server. Make the appropriate selection and proceed to the Launch Instances.
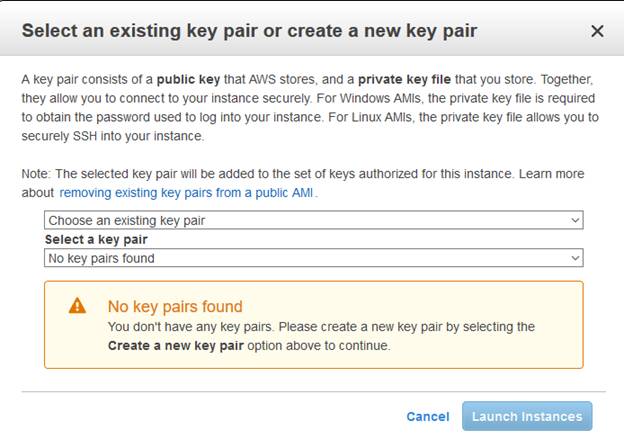
One more screen will appear for adding Private and/or Public Keys to access your new server. Make the appropriate selection and proceed to Launch Instances to see the build process.

You can access your new server from the EC2 Dashboard.

This example of a build process gives you a window into how the AWS build process works. The other objects and services have a similar step-through process. Once you have launched your server, you should be able to access it and proceed with your development. Additional details for development are also available through the site.
Amazon’s Web Services Platform is an all-in-one solution for your graduation to the cloud. Not only can you manage your technical environment, but also it has features that allow you to manage your budget. By setting up your virtual applicances and servers appropriately, you can maximize the value of the first 12 months of your free-tier. Carefully monitoring activities through alerts and notification will help you to avoid having any billing surprises. Going through the tutorials and visting the online community will only aid to increase your knowledge base of AWS. AWS is inviting everyone to test their services on this exciting platform, so I would definitely recommend taking advantage of it. Have fun!
About the author
Cheryl Adams is a senior cloud data andinfrastructure architect in the healthcare data realm. She is also the co-author of Professional Hadoop by Wrox.


