(For more resources on Oracle, see here.)
How to set up and change workflows
First thing's first. Let's start by looking at the tools that you will be using to set up and configure your workflows.
Discover the Workflow Admin application
Go to Administration Admin Applets| and launch Workflow Admin. The Workflow Admin application comes up (as shown in the following screenshot):
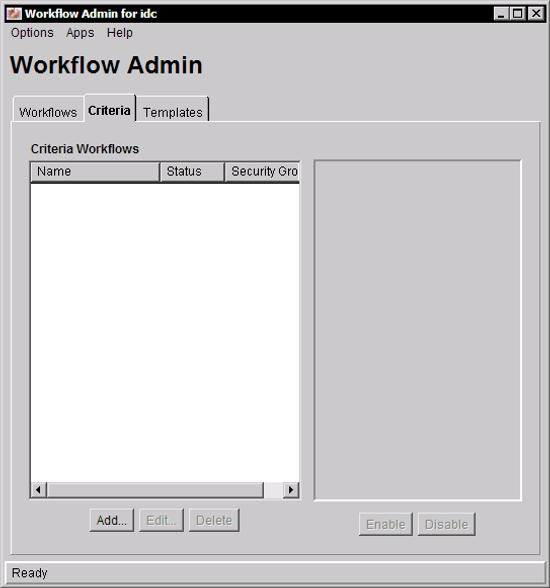
There are three tabs:
- Workflows: This tab is used for administering Basic or Manual Workflows.
- Criteria: This tab deals with Automatic or Criteria Workflows—the type we will be using most often.
- Templates: This is the place where you can pre-assemble Workflow Templates—reusable pieces that you can use to create new basic workflows.
Let's create a simple automatic workflow. I call it automatic because content enters the workflow automatically when it is modified or created.
If you will be using e-mail notifications then be sure to check your Internet Configuration screen in Admin Server.
I'll walk you through the steps in using automatic workflows.
Lab 7: Using automatic workflows
Here's the process for creating a criteria workflow:
Creating a criteria workflow
Follow these steps:
- Go to the Criteria tab and click on Add. The New Criteria Workflow dialog comes up (as shown in the following screenshot):
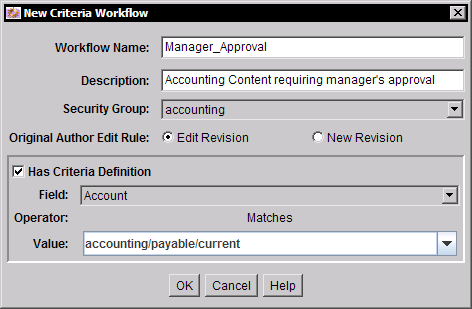
- Fill in Workflow Name and Description.
- Pick the Security Group. Only items with the same security group as the workflow can enter it. Let's use the security group we've created. Select accounting.
- We're creating a Criteria Workflow, so let's check the Has Criteria Definition box.
- Now you can specify criteria that content must match to enter the workflow.For the sake of this lab, let's pick Account for the Field, and accounting/payable/current for the Value.
Please note that a content item must match at least two conditions to enter the workflow: it must belong to the same security group as the workflow, and it must match the criteria of the workflow.
As soon as a new content item is created with Security Group of accounting and Content Account value is set to accounting/payable/current, it will enter our workflow.
Unlock access to the largest independent learning library in Tech for FREE!
Get unlimited access to 7500+ expert-authored eBooks and video courses covering every tech area you can think of.
Renews at $19.99/month. Cancel anytime
It will not enter the workflow if its metadata is simply updated to these values. It takes a new check-in for an item to enter a criteria workflow.
If you need it to enter a workflow after a metadata update then consider custom components available from the Fishbowl Solutions (www.fishbowlsolutions.com).
You can use any metadata field and value pair as criteria for entering the workflow. But you can only have one condition. What if that's not enough?
If you need to perform additional checks before you can accept the item in a workflow then keep your criteria really open, and do your checks in the workflow itself. I'll show you how, later in this article.
The diagram next illustrates how a content item flows through a criteria workflow. You may find it useful to refer back to it as you follow the steps in this lab.
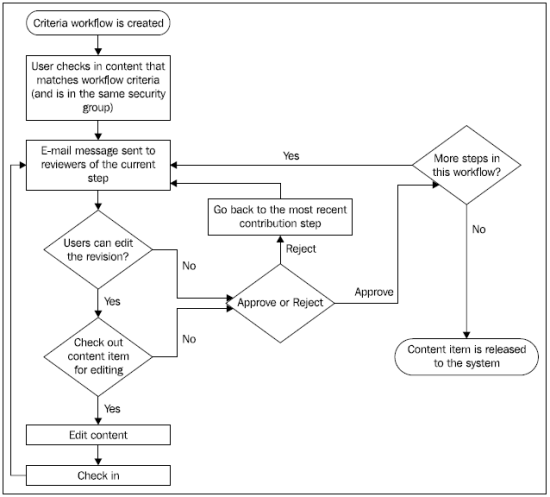
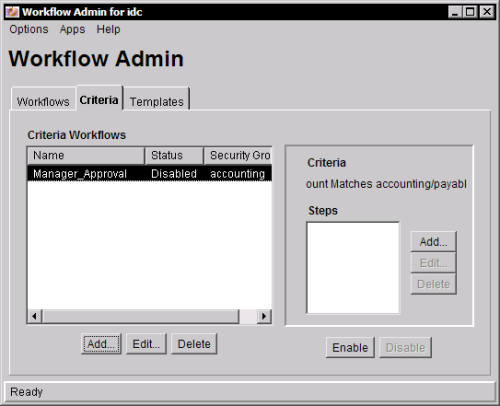
OK. We have a workflow created but there're two problems with it: it has no steps in it and it is disabled. Let's begin by seeing how to add workflow steps.
Adding workflow steps
Here's how you add workflow steps:
- Click on the Add button in the Steps section on the right (as shown in the following screenshot):
- The Add New Step dialog opens. Fill in the step name and description (as shown in the following screenshot):
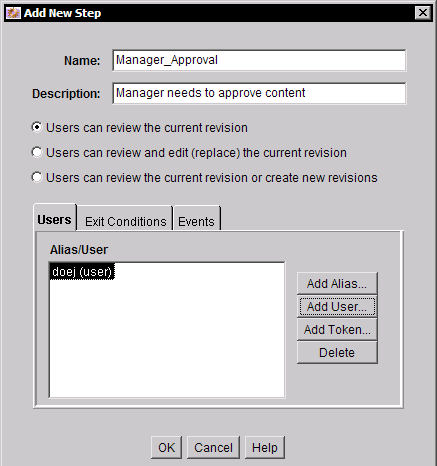
- Click on the Add User button on the right and select approvers for this step. Also add yourself to the list of approvers so you can test the workflow.
- Switch to the Exit Conditions tab (as shown in the following screenshot):
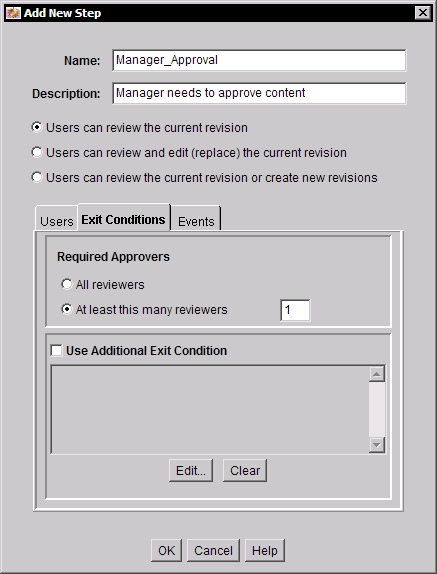
- You can change the number of approvers required to move the item to the next step. You can make all approvers required to advance a step or just any one as shown on the screenshot.
- And if you put zero in the text box, no approvers will be required at all. They will still receive notification, but the item will go immediately to the next step. And when the current step is the last the workflow will end and the new revision will be released into the system. What do I mean by that? Until workflow is complete, revisions that are currently in a workflow will not come up in searchers and will not show on the Web. You will still see them in the content info screen but that's it.
- OK the dialog. You now have a workflow with one step. Let's test it.
But first, you need to enable the workflow.
 United States
 Great Britain
 India
India
 Germany
 France
 Canada
 Russia
 Spain
Spain
 Brazil
 Australia
 Singapore
 Canary Islands
 Hungary
 Ukraine
 Luxembourg
 Estonia
 Lithuania
 South Korea
 Turkey
 Switzerland
 Colombia
 Taiwan
 Chile
Chile
 Norway
 Ecuador
 Indonesia
 New Zealand
 Cyprus
 Denmark
 Finland
 Poland
 Malta
Malta
 Czechia
 Austria
 Sweden
 Italy
Italy
 Egypt
Egypt
 Belgium
 Portugal
 Slovenia
 Ireland
 Romania
 Greece
 Argentina
 Netherlands
 Bulgaria
 Latvia
 South Africa
 Malaysia
 Japan
Japan
 Slovakia
 Philippines
 Mexico
 Thailand


