 |
Learn from the experts – teach yourself Oracle BPM Suite 11g with an accelerated and hands-on learning path brought to you by Oracle BPM Suite Product Management team members
- Offers an accelerated learning path for the much-anticipated Oracle BPM Suite 11g release
- Set the stage for your BPM learning experience with a discussion into the evolution of BPM, and a comprehensive overview of the Oracle BPM Suite 11g Product Architecture
- Discover BPMN 2.0 modeling, simulation, and implementation
- Understand how Oracle uses standards like Services Component Architecture (SCA) to simplify the process of application development
- Describes how Oracle has unified services and events into one platform
- Built around an iterative tutorial, using a real-life scenario to illustrate all the key features
- Full of illustrations, diagrams, and tips for developing SOA applications faster, with clear step-by-step instructions and practical examples
- Written by Oracle BPM Suite Product Management team members
|
Read more about this book
(For more resources on Oracle, see here.)
The BPM Application consists of a set of related business processes and associated shared artifacts such as Process Participants and Organization models, User Interfaces, Services, and Data. The process-related artifacts such as Services and Data are stored in the Business Catalog. The Business Catalog facilitates collaboration between the various stakeholders involved in the development of the business process. It provides a mechanism for Process Developer (IT) to provide building blocks that can in turn be used by the process analyst in implementing the business process.
Start BPM Studio using Start | Programs | Oracle Fusion Middleware 11.1.1.3 | Oracle JDeveloper 11.1.1.3. BPM Studio supports two roles or modes of process development. The BPM Role is recommended for Process Analysts and provides a business perspective with focus on business process modeling. The Default Role is recommended for Process Developers for refinement of business process models and generation of implementation artifacts to complete the BPM Application for deployment and execution.
Tutorial: Creating SalesQuote project and modeling RequestQuote process
This is the beginning of the BPM 11gR1 hands-on tutorial. Start by creating the BPM Application and then design the Sales Quote business process.
- Open BPM Studio by selecting the BPM Process Analyst role when you start JDeveloper or if JDeveloper is already open, select Preferences from the Tools menu and in the Roles section, select BPM Process Analyst. Go to File | New to launch the Application wizard.
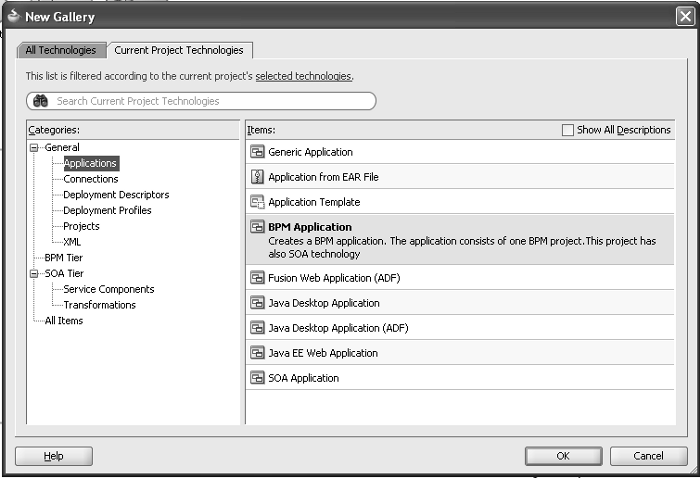
- In the New Gallery window, select Applications in the Categories panel. Select BPM Application in the Items panel. Specify the Application Name —SalesQuoteLab; the folder name should also be set to SalesQuoteLab.
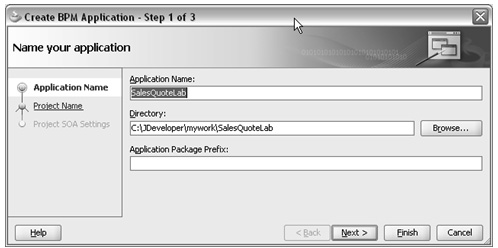
- Click on the Next button. Enter QuoteProcessLab for the Project Name. Click on the Finish button.
- Go to the View | BPM Project Navigator. The BPM Project Navigator opens up the QuoteProcessLab – BPM Project that you just created.
A single BPM Project can contain multiple related business processes. Notice that the BPM Project contains several folders. Each folder is used to store a specific type of BPM artifact. The Processes folder stores BPMN business process models; the Activity Guide folder is used to store the process milestones; the Organization folder stores Organization model artifacts such as Roles and Organization Units; the Business Catalog folder stores Services and Data; the Simulation folder stores simulation models to capture what-if scenarios for the business process and the Resources folder holds XSLT data transformation artifacts.
- To create a new business process model, you need to right-click on Processes and select New | Process. This launches the Create BPMN Process wizard. Select From Pattern option and select the Manual Process pattern. Recall that the Sales Quote Process is instantiated when Enter Quote task gets assigned to the Sales Representative role. The Asynchronous Service and the Synchronous Service patterns are used to expose the BPMN process as a Service Provider.

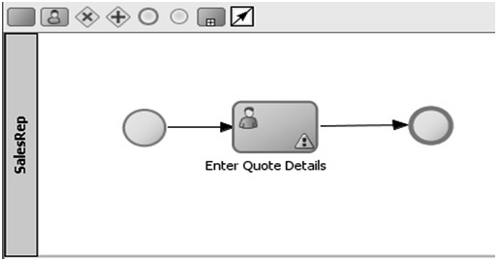
- Click on the Next button. Specify the name for the Process—RequestQuoteLab. Click on the Finish button. This creates a RequestQuoteLab process with a Start Event (thin circle) and End Event (thicker circle) of type None with a User Task in between. The User Task represents a human step that is managed by the BPM run-time engine—workflow component. The Start Event of type None signifies that there is no external event triggering the process. The first activity after the Start Event creates the process instance. In addition, a default swim lane—Role, gets created.
In BPM Studio, the swim lanes in the BPMN process point to logical roles. A logical role represents a process participant (user or group) and needs to be mapped to physical roles (LDAP users/groups) before the process is deployed.
Unlock access to the largest independent learning library in Tech for FREE!
Get unlimited access to 7500+ expert-authored eBooks and video courses covering every tech area you can think of.
Renews at $19.99/month. Cancel anytime
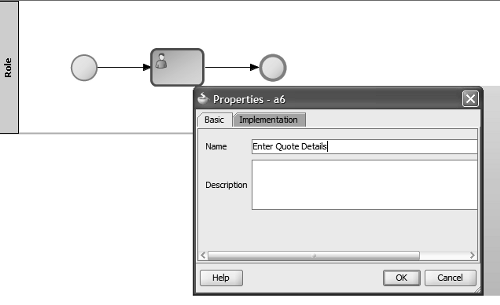
- Right-click on the User Task step, select Properties, and specify the name Enter Quote Details for the step. Click on the OK button.
- The next step is to rename the default created role to SalesRep. Navigate to QuoteProcessLab—BPM Project node and select the Organization node underneath it. Right-click on the Organization node and select Open. This opens up the Organization pane.

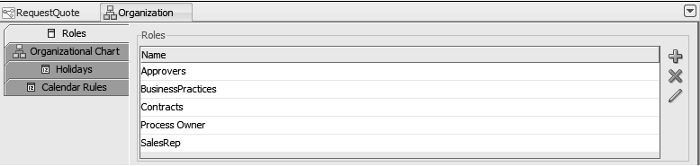
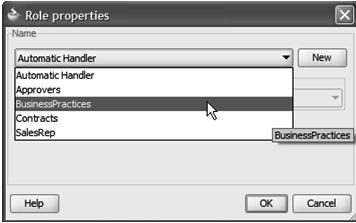
- Highlight the default role named Role and use the pencil icon to edit it to be SalesRep. Click on the + sign to add the following roles—Approvers, BusinessPractices, and Contracts. The following screenshot shows the list of roles that you just created:
- Close the Organization window. Go back to the RequestQuoteLab—process model. The participant for the Enter Quote Details—User Task is now set to the SalesRep role. Ignore the yellow triangular symbol with the exclamation for now. It indicates that certain configuration information is missing for the activity.
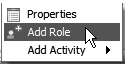
- Right-click on the process diagram just below the SalesRep-Lane. Choose the Add Role option.
- Choose Business Practices from the list of options available. Click on the OK button.
- Open the View | Component Palette. Drag and drop a User Task from the Interactive Tasks section of the BPMN Component Palette.
Note: The Interactive Tasks refers to a step that is managed by the workflow engine. The Assignees (Participants) represent the business users who need to carry out the Interactive Task. The associated Task (work to be performed) is shown in the inbox of the assignees (similar to Email Inbox) when the Interactive Task is triggered. The User Task is the simplest type of Interactive Task where the assignee of the task is set to a single role. The actual work is performed only when the Assignee executes on his Task. The Task is presented to the Assignee through a browser based worklist application. In BPM Studio, the Assignee is automatically set to the role associated with the swim lane into which the Interactive Task is dropped.
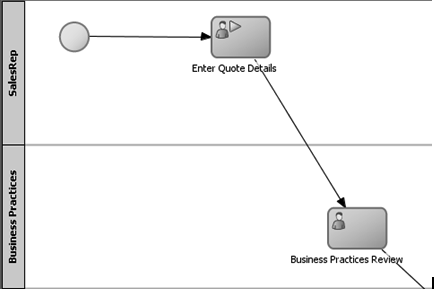
- Place this new User Task after the existing Enter Quote Details—User Task by hovering on the center of the connector until it turns blue and name it Business Practices Review. The connection lines are automatically created.
- Drag the new Business Practices Review—User Task to the Business Practices lane. The performer or assignee for the Business Practices Review—User Task is automatically set to Business Practices—role.
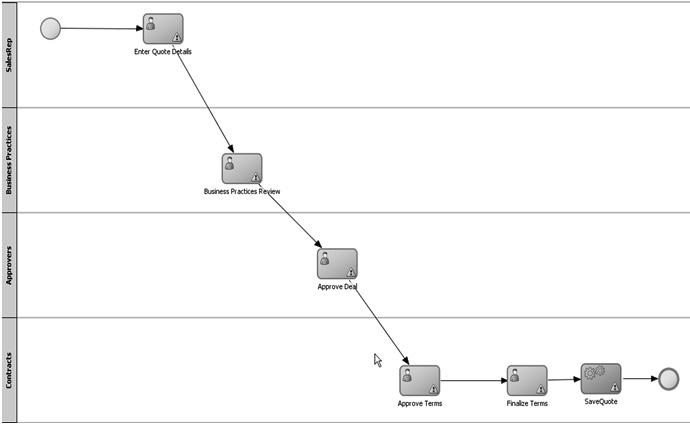
- Create two more lanes for Approvers and Contracts. Drag and drop three User Tasks on to the process diagram, one following the other, and name them Approve Deal, Approve Terms, and Finalize Contracts respectively. Pin the Approve Deal step to the Approvers Lane. Pin the other two User Tasks—Approve Terms and Finalize Contracts steps to the Contracts Lane. Finally add a Service Task right after the Finalize Contracts step from the BPM Component Palette and name it Save Quote. The modified diagram should look like the following:

 United States
 Great Britain
 India
India
 Germany
 France
 Canada
 Russia
 Spain
Spain
 Brazil
 Australia
 Singapore
 Canary Islands
 Hungary
 Ukraine
 Luxembourg
 Estonia
 Lithuania
 South Korea
 Turkey
 Switzerland
 Colombia
 Taiwan
 Chile
Chile
 Norway
 Ecuador
 Indonesia
 New Zealand
 Cyprus
 Denmark
 Finland
 Poland
 Malta
Malta
 Czechia
 Austria
 Sweden
 Italy
Italy
 Egypt
Egypt
 Belgium
 Portugal
 Slovenia
 Ireland
 Romania
 Greece
 Argentina
 Netherlands
 Bulgaria
 Latvia
 South Africa
 Malaysia
 Japan
Japan
 Slovakia
 Philippines
 Mexico
 Thailand


