 |
Develop and evaluate quizzes and tests using Moodle modules
- Create and evaluate interesting and interactive tests using a variety of Moodle modules
- Create simple vocabulary or flash card tests and complex tests by setting up a Lesson module
- Motivate your students to excel through feedback and by keeping their grades online
- A well-structured practical guide packed with illustrative examples and screenshots
|
(For more resources on Moodle 1.9, see here.)
Adding images to multiple-choice questions
You are not going to always want simple text-based questions or answers. One common type of question that instructors frequently use is the image-based question. This item incorporates an image into the question.
These questions are easy to create and can offer new dimensions for questions, as well as make the questions and test much more interesting to students. You can add images to any question or any field that allows you to use the rich-text editor, but we are going to use a single-answer, multiple choice question. We will follow the same basic steps as before.
Unlock access to the largest independent learning library in Tech for FREE!
Get unlimited access to 7500+ expert-authored eBooks and video courses covering every tech area you can think of.
Renews at $19.99/month. Cancel anytime
Step 1
We need to create a new multiple-choice question. When we are editing the question, we need to add the question name. We then need to add the question text. The question text we will be using for ours will be Which holiday is this girl celebrating?
Step 2
We now go to the toolbar and click on the Insert Image icon. It is the icon that looks like a framed picture of a mountain, located two places to the left of the smiley face icon.
Once we click on this icon, a pop-up menu will appear, as shown in the next screenshot:
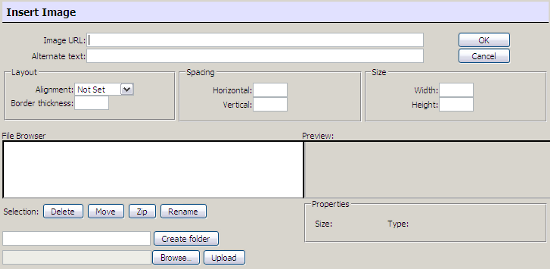
Here we have a few options in regards to how to use images and how they will be displayed in the question.
Image URL & Alternate text
If we use this option, we are able to take images directly from the Internet and use them for our tests.
To use it we first need to have the address where the image is found. We are not looking for the address of the site here, but just the image. If you simply link to the web page, it will not work. To get just the image address, click on the image and you should get a menu with one of the options being View Image. Select View Image and you will be taken to a different page with only that image. This is the address you want to use.
Once you have the image address, you copy and paste it to the Image URL text area.With the image address entered, we need to give the image a title in the Alternate text area. You can use anything you'd like here, but I tend to use the image name itself if it describes the image. If not, I create a short descriptive text of the image, something like "Girl celebrating Halloween".
After you have entered text in both the Image URL and the Alternate text, click on the OK button and the image will be added to your question. It is important to note that if the website you pulled the image from removes it or changes its location, it will not be available for the question. It is therefore advisable to download the image, so that it will always be available to you.
When you have finished adding responses and saving the question, you will see something like the following screenshot:
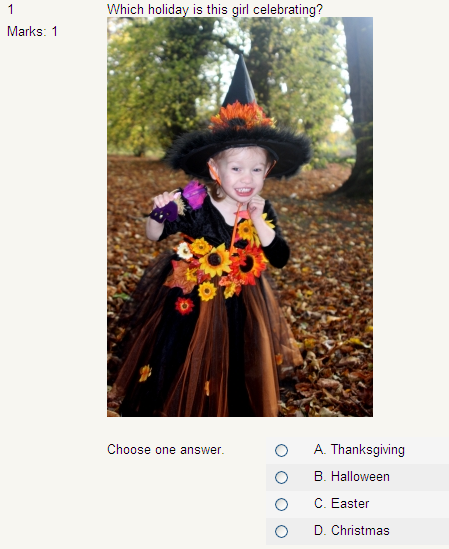
Source: Image: Tina Phillips / FreeDigitalPhotos.net
Now, looking back at the options available in the Insert image pop-up, you see three formatting options directly under the Image URL and Alternate text box where we were just working. They are called: Layout, Spacing, and Size.
Layout
In this fieldset, we are given ways to alter the Alignment and the Border thickness. Note that the image may be displayed differently on different browsers, although the CSS of the theme you are using will usually provide the appropriate margins and padding
Alignment
There are several options available here that show how the text and the image will be displayed. The full list is shown in the next screenshot:
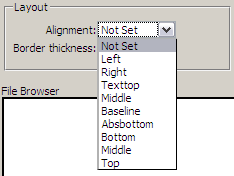
Most of these options are self-explanatory: Left will place the image to the left of the text, Right will place the image to the right of the text, and so on. However, there are a few possibly new terms. Texttop, Baseline, and Absbottom are HTML terms that many people might be unsure of. Texttop simply means that the very top of the tallest text (for example, l, b) will be aligned with the top of the image. This function works same as Top with some browsers. Baseline means that the imaginary line that all letters sit on will be aligned with the bottom of the image. In most browsers today, this functions the same as Bottom. Absbottom means that the letters that go below the baseline are aligned with the bottom of the image (for example, g, j). The top option, Not Set will place the image wherever the cursor is, without any special guide as to how it should be displayed.
Border thickness
The image you put into the question should look identical to the image you chose to use. If you are placing this image inside of text, or the edges are indistinct, or you simply want to frame it, use Border Thickness
By placing a number in the Border thickness box, we will create a black border around the image. A small number will give a narrow border and a bigger number will give a thicker one.
Here are three images showing the difference in borders. The first is set with a border of 0, the second has a border of 5, and the third with 10. You will notice that the image size itself is the same, but the border causes the viewable area of the image to compress
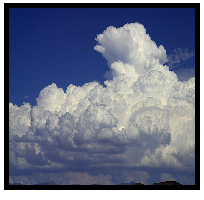
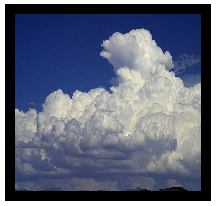
Source: Images courtesy of: freeimages.co.uk
Spacing
There are two spacing options available, Horizontal and Vertical. The larger the number entered, the more space there is between the text and the images.
Horizontal
This setting allows you to set the horizontal distance between the image and the text surrounding it. This option can be useful if you need to have the image set apart from the text in the question or explanation.
Vertical
This setting is like the horizontal setting. It allows you to set the vertical distance between text and the image. This option can be useful if you need to have set distances between the text or have multiple images in a list with text surrounding them.
Size
The two options here are Width and Height. These two settings allow you to alter the size of the image; smaller numbers will make the image smaller and probably easier to work with. Note that the actual images are not resized. For the best result, first resize the images on your computer to the size you want them to be.
Width
This setting allows you to alter the width of the image. Altering this setting without altering the height will produce narrow or wide images, depending on whether you adjust the value up or down.
Height
This setting allows you to alter the height of the image. This option functions just like Width, and will allow you to produce images that are vertically stretched or shrunk.
File Browser
In this space, you will see any images that have been uploaded to the course. As you can see in the previous screenshot, it is empty, which tells us that there aren't pictures available in the course yet. If you look below File Browser, you will see four options for images uploaded to the course. You can Delete, Move, Zip, or Rename any images that have already been uploaded into the course.
Preview
This is where you can view any images that have been added to the course. This feature can be useful if you have a lot of images and tend to forget which images are which.
 United States
 Great Britain
 India
India
 Germany
 France
 Canada
 Russia
 Spain
Spain
 Brazil
 Australia
 Singapore
 Canary Islands
 Hungary
 Ukraine
 Luxembourg
 Estonia
 Lithuania
 South Korea
 Turkey
 Switzerland
 Colombia
 Taiwan
 Chile
Chile
 Norway
 Ecuador
 Indonesia
 New Zealand
 Cyprus
 Denmark
 Finland
 Poland
 Malta
Malta
 Czechia
 Austria
 Sweden
 Italy
Italy
 Egypt
Egypt
 Belgium
 Portugal
 Slovenia
 Ireland
 Romania
 Greece
 Argentina
 Netherlands
 Bulgaria
 Latvia
 South Africa
 Malaysia
 Japan
Japan
 Slovakia
 Philippines
 Mexico
 Thailand


