 |
A clear, hands-on guide to build websites that get the most out of Kentico CMS 5's many powerful features
- Create websites that meet real-life requirements using example sites built with easy-to-follow steps
- Learn from easy-to-use examples to build a dynamic website
- Learn best practices to make your site more discoverable
- Practice your Kentico CMS skills from organizing your content to changing the site's look and feel
- Get going with example starter sites such as a corporate site, an e-commerce site, and a community-driven website to jumpstart your web development
- Written by Thom Robbins, the Web Evangelist for Kentico Software LLC
|
Read more about this book
(For more resources on CMS, see here.)
Workflow management
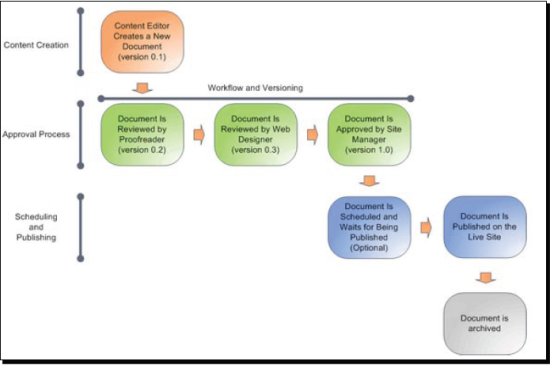
Workflow is a way to automate a business process for publishing content. Using workflow allows you to delegate portions of the business process to different users or groups for approval. Kentico CMS allows you to use workflow for all documents, including uploaded files. The workflow engine organizes the process of content creation, updates, and publishing content. The following diagram shows an example document lifecycle with workflow. It's important to keep in mind that document versioning is tightly bound with workflow and allows document comparison and version rollback.
Time for action – configuring workflow
The Kentico CMS workflow process is designed as a state machine. This means that workflows are event driven. A workflow contains three or more states, with only one state active at any given time. Based on an event, a transition is made to another state. Once a transition is made to the final state, the workflow is completed. Within each workflow step, members of authorized roles are allowed to modify, approve, or reject a document.
Now, let's configure a workflow for the News folder.
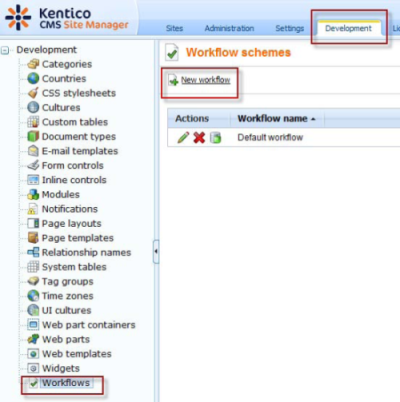
- In CMS Site Manager, select the Development tab, select Workflows, and click New workflow, as shown in the following screenshot:
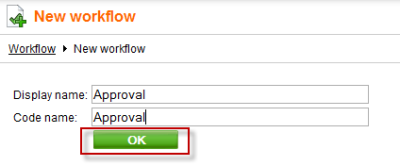
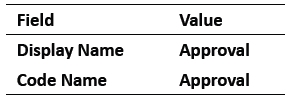
- For the New workflow, enter the Display Name as Approval and Code Name as Approval, as shown in the following screenshot:
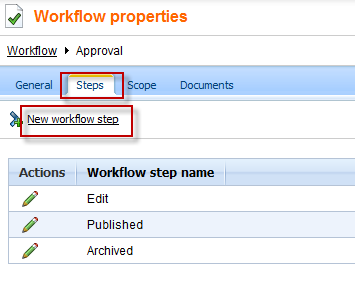
- Select the Steps tab and click on the New workflow step link, as shown in the following screenshot:
Unlock access to the largest independent learning library in Tech for FREE!
Get unlimited access to 7500+ expert-authored eBooks and video courses covering every tech area you can think of.
Renews at $19.99/month. Cancel anytime
Quick tip
The Edit, Published, and Archived steps are automatically created for every workflow and can't be deleted. These steps use the default system security.
- Enter the following information and select OK.
- Select the Roles tab and click Add roles, as shown in the following screenshot:
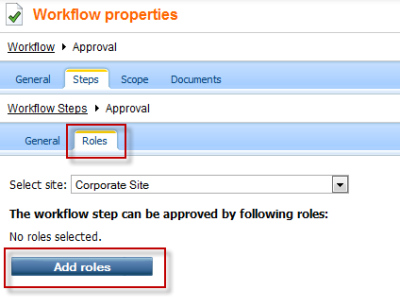
- Select the CMS Desk Administrators role and select OK.
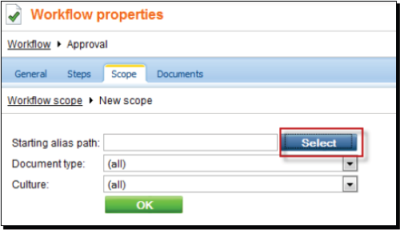
- Select the Scope tab and click on the New workflow scope link, as shown in the following screenshot:

What is a workflow scope?
The workflow scope defines the folder, documents, and languages that are included in the workflow.
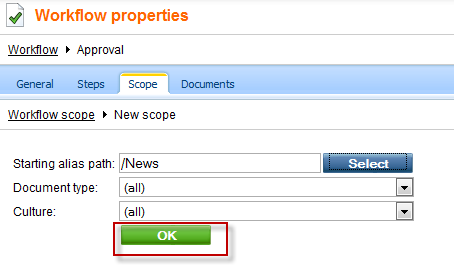
- In the Starting alias path, click the Select button, as shown in the following screenshot:
- Select News and then click the Select button, as shown in the following screenshot:
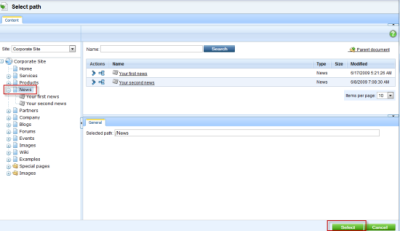
- Select OK, as shown in the following screenshot, to save the workflow scope.

 United States
 Great Britain
 India
India
 Germany
 France
 Canada
 Russia
 Spain
Spain
 Brazil
 Australia
 Singapore
 Canary Islands
 Hungary
 Ukraine
 Luxembourg
 Estonia
 Lithuania
 South Korea
 Turkey
 Switzerland
 Colombia
 Taiwan
 Chile
Chile
 Norway
 Ecuador
 Indonesia
 New Zealand
 Cyprus
 Denmark
 Finland
 Poland
 Malta
Malta
 Czechia
 Austria
 Sweden
 Italy
Italy
 Egypt
Egypt
 Belgium
 Portugal
 Slovenia
 Ireland
 Romania
 Greece
 Argentina
 Netherlands
 Bulgaria
 Latvia
 South Africa
 Malaysia
 Japan
Japan
 Slovakia
 Philippines
 Mexico
 Thailand


