
Over 80 great recipes for taking control of Joomla! Extensions
- Set up and use the best extensions available for Joomla!
- Covers extensions for just about every use of Joomla!
- Packed with recipes to help you get the most of the Joomla! extensions
- Part of Packt's Cookbook series: Each recipe is a carefully organized sequence of instructions to complete the task as efficiently as possible
Getting ready...
The Seminar for Joomla! component allows visitors to register for events. Download this component from http://seminar.vollmar.ws/downloads/com_Seminar_V1.3.0.zip, and install it from the Extensions | Install/Uninstall screen in the Joomla! administration panel.
How to do it...
Once installed, follow these steps to allow registration for events:
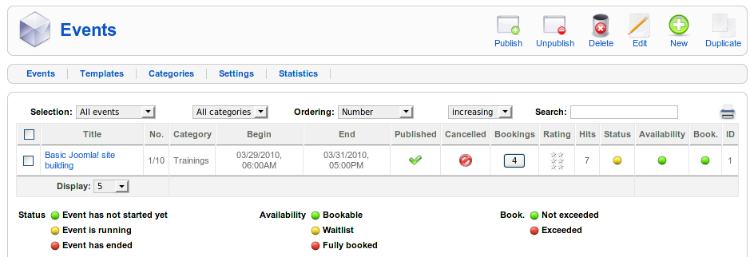
- From the Joomla! administration panel, select Components | Seminar. It shows the Events screen, listing the available events.
- To create event categories, click on Categories and then click on New. This shows you the Category: [New] screen.
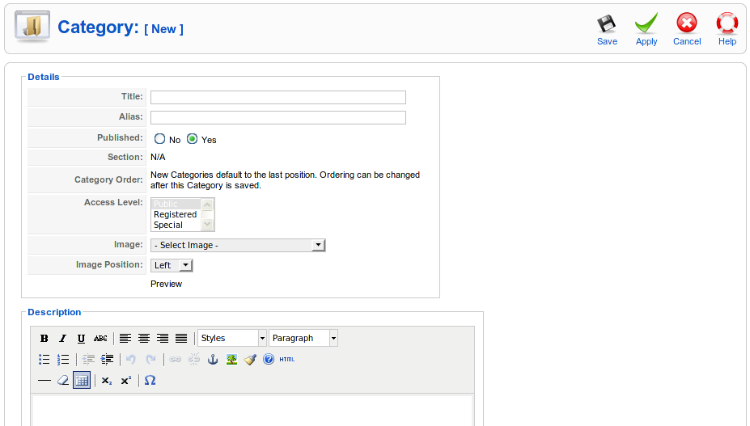
- On the Category: [New] screen, type in the Title and Alias, and select Yes in the Published radio box. Then select the Access Level, Image, and Image Position. Enter a description for the category. Click on Save in the toolbar. Repeat this step to add as many categories as you need.
- Click on Events and then click on New. It will show you the New Event screen.
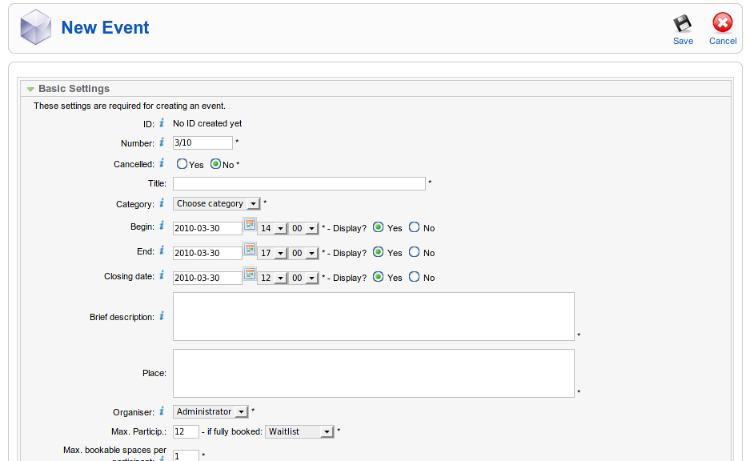
- Type the Title of the event. Then select Begin, End, Closing Date, and the time of the event. Select Yes in the Display field if you want to show this information. Type a brief description of the event, and the place of the event. Select an organizer from the Organiser drop-down list. Then type the maximum number of participants in the Max. Particip. field. Also, select what to do when the number of participants exceeds this number. When this is done, click on Additional Settings. This shows you the Additional Settings screen.
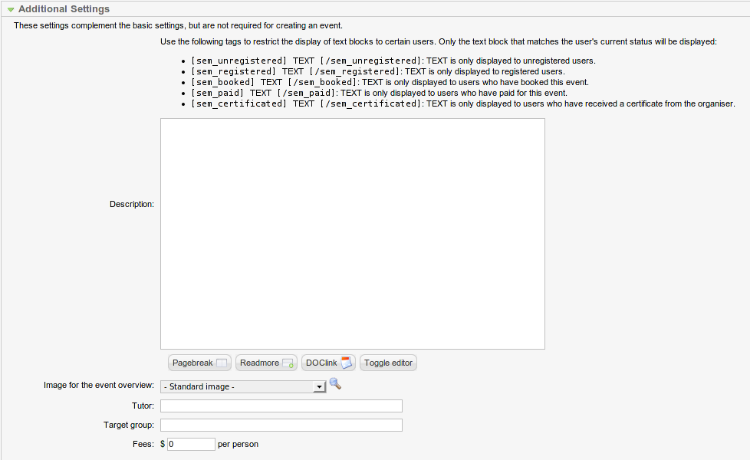
- In the Additional Settings section, you can add an additional description. In the Description box, add descriptions to particular groups of visitors. The syntax to add messages for different groups is shown above the text box. Select an image for the event overview. Then type the tutor's name, target group, and the fees per person. Then click on General Input Fields. This will show the following screen:
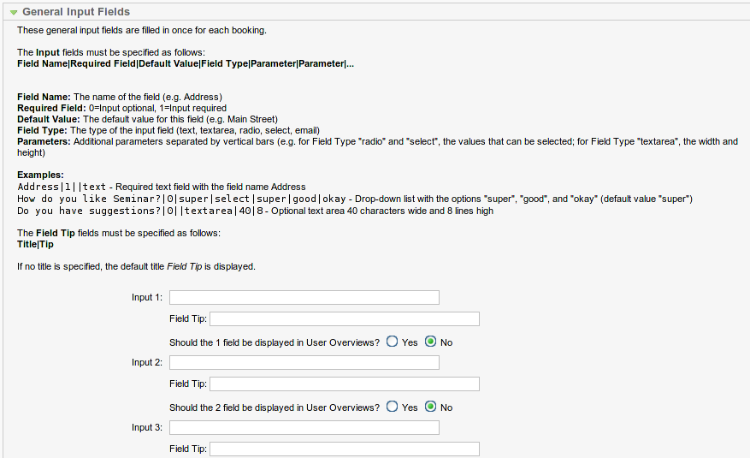
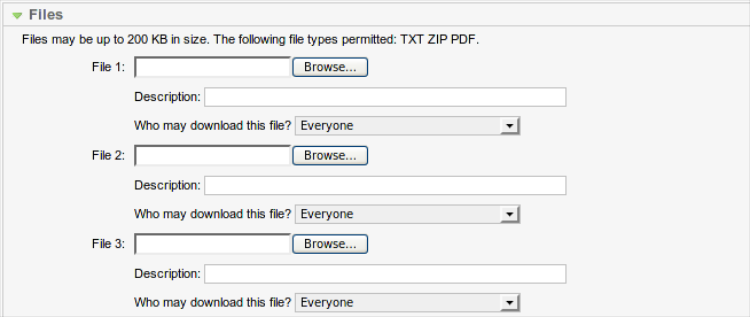
- In the General Input Fields section, you can include additional fields. To add additional fields, follow the syntax provided. When this is done, click on Files. This shows the following screen for file upload.
Unlock access to the largest independent learning library in Tech for FREE!
Get unlimited access to 7500+ expert-authored eBooks and video courses covering every tech area you can think of.
Renews at $19.99/month. Cancel anytime
- Click on the Browse button and select the file to upload. Type a description of the file and select the group that can view it. When this is done, click on the Save button in the toolbar.
- Select Menus | Main Menu, and then click on New. This will show you the Menu Item: [New] wizard. In the Select Menu Item Type section, select Seminar and provide a title for the menu item on the next screen. Then save the menu item.
- Preview the site's frontend, as a user logged in to the frontend, and click on the menu item for the seminar. This will display the following screen showing your added event.
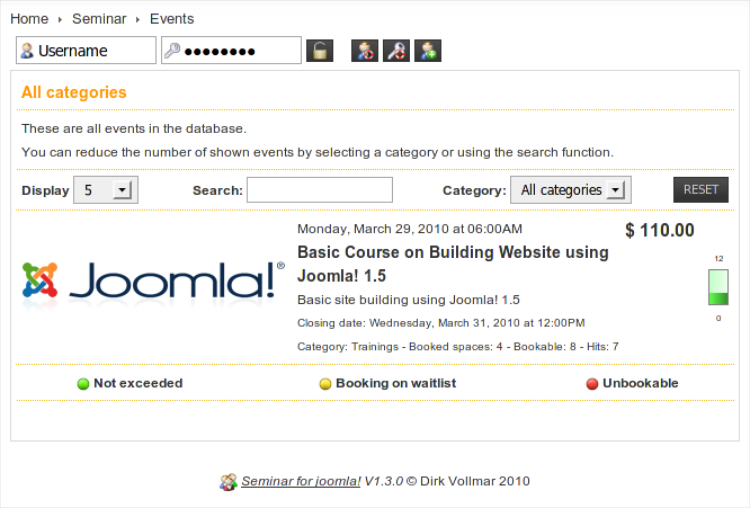
- The overview of the event shows the overview image, event title, category, reservation information, and an indicator for the booking status. Click on the event title, it will show you the event details, as shown in the following screenshot:
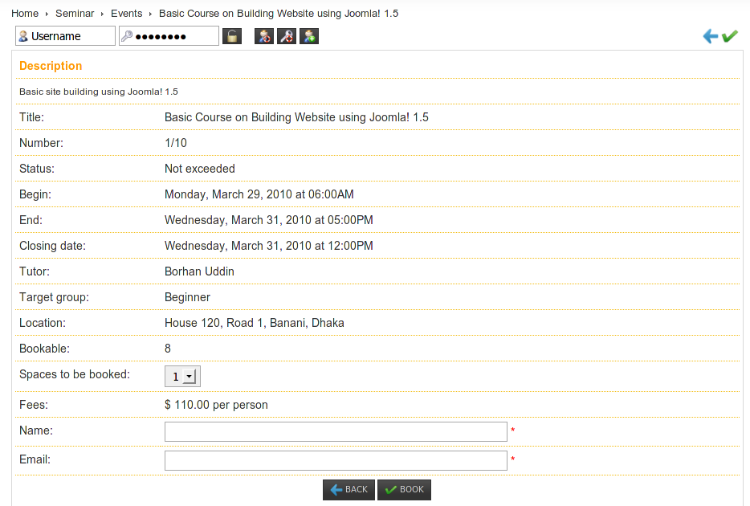
- Select the spaces to be booked. Then type your Name and Email address and click on the Book button. This books your space for the event. You can view your booking by clicking the My Bookings tab, as shown in the following screenshot.

Note that your participation status is indicated through a color-coded indicator.
There's more...
Most of the features of Seminar for the Joomla! component can be configured from the Settings screen.
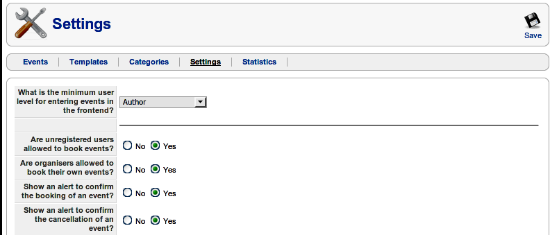
For example, you can configure who can book events, what happens when booking exceeds the number of seats, who can rate the events from the frontend, which folder will store images of the events, the maximum file upload size, the file extensions allowed for uploads, and so on.
Summary
This article showed you how to allow visitors to register for an event.
Further resources on this subject:

 United States
 Great Britain
 India
India
 Germany
 France
 Canada
 Russia
 Spain
Spain
 Brazil
 Australia
 Singapore
 Canary Islands
 Hungary
 Ukraine
 Luxembourg
 Estonia
 Lithuania
 South Korea
 Turkey
 Switzerland
 Colombia
 Taiwan
 Chile
Chile
 Norway
 Ecuador
 Indonesia
 New Zealand
 Cyprus
 Denmark
 Finland
 Poland
 Malta
Malta
 Czechia
 Austria
 Sweden
 Italy
Italy
 Egypt
Egypt
 Belgium
 Portugal
 Slovenia
 Ireland
 Romania
 Greece
 Argentina
 Netherlands
 Bulgaria
 Latvia
 South Africa
 Malaysia
 Japan
Japan
 Slovakia
 Philippines
 Mexico
 Thailand


