


In this article, given by Pradeeban Kathiravelu, author of the book Python Network Programming Cookbook – Second Edition, we will cover the following topics:
- Forwarding a local port to a remote host
- Pinging hosts on the network with ICMP
- Waiting for a remote network service
- Enumerating interfaces on your machine
- Finding the IP address for a specific interface on your machine
- Finding whether an interface is up on your machine
- Detecting inactive machines on your network
- Performing a basic IPC using connected sockets (socketpair)
- Performing IPC using Unix domain sockets
- Finding out if your Python supports IPv6 sockets
- Extracting an IPv6 prefix from an IPv6 address
- Writing an IPv6 echo client/server
(For more resources related to this topic, see here.)
This article extends the use of Python’s socket library with a few third-party libraries. It also discusses some advanced techniques, for example, the asynchronous asyncore module from the Python standard library. This article also touches upon various protocols, ranging from an ICMP ping to an IPv6 client/server.
In this article, a few useful Python third-party modules have been introduced by some example recipes. For example, the network packet capture library, Scapy, is well known among Python network programmers.
A few recipes have been dedicated to explore the IPv6 utilities in Python including an IPv6 client/server. Some other recipes cover Unix domain sockets.
Forwarding a local port to a remote host
Sometimes, you may need to create a local port forwarder that will redirect all traffic from a local port to a particular remote host. This might be useful to enable proxy users to browse a certain site while preventing them from browsing some others.
How to do it…
Let us create a local port forwarding script that will redirect all traffic received at port 8800 to the Google home page (http://www.google.com). We can pass the local and remote host as well as port number to this script. For the sake of simplicity, let’s only specify the local port number as we are aware that the web server runs on port 80.
Listing 3.1 shows a port forwarding example, as follows:
#!/usr/bin/env python
# This program is optimized for Python 2.7.12 and Python 3.5.2.
# It may run on any other version with/without modifications.


import argparse

LOCAL_SERVER_HOST = 'localhost'
REMOTE_SERVER_HOST = 'www.google.com'
BUFSIZE = 4096

import asyncore
import socket

class PortForwarder(asyncore.dispatcher):
    def __init__(self, ip, port, remoteip,remoteport,backlog=5):
        asyncore.dispatcher.__init__(self)
        self.remoteip=remoteip
        self.remoteport=remoteport
        self.create_socket(socket.AF_INET,socket.SOCK_STREAM)
        self.set_reuse_addr()
        self.bind((ip,port))
        self.listen(backlog)

    def handle_accept(self):
        conn, addr = self.accept()
        print ("Connected to:",addr)
        Sender(Receiver(conn),self.remoteip,self.remoteport)

class Receiver(asyncore.dispatcher):
    def __init__(self,conn):
        asyncore.dispatcher.__init__(self,conn)
        self.from_remote_buffer=''
        self.to_remote_buffer=''
        self.sender=None

    def handle_connect(self):
        pass

    def handle_read(self):
        read = self.recv(BUFSIZE)
        self.from_remote_buffer += read

    def writable(self):
        return (len(self.to_remote_buffer) > 0)

    def handle_write(self):
        sent = self.send(self.to_remote_buffer)
        self.to_remote_buffer = self.to_remote_buffer[sent:]

    def handle_close(self):
        self.close()
        if self.sender:
            self.sender.close()

class Sender(asyncore.dispatcher):
    def __init__(self, receiver, remoteaddr,remoteport):
        asyncore.dispatcher.__init__(self)
        self.receiver=receiver
        receiver.sender=self
        self.create_socket(socket.AF_INET, socket.SOCK_STREAM)
        self.connect((remoteaddr, remoteport))

    def handle_connect(self):
        pass

    def handle_read(self):
        read = self.recv(BUFSIZE)
        self.receiver.to_remote_buffer += read

    def writable(self):
        return (len(self.receiver.from_remote_buffer) > 0)

    def handle_write(self):
        sent = self.send(self.receiver.from_remote_buffer)
        self.receiver.from_remote_buffer = self.receiver.from_remote_buffer[sent:]

    def handle_close(self):
        self.close()
        self.receiver.close()


if __name__ == "__main__":
    parser = argparse.ArgumentParser(description='Stackless Socket Server Example')
    parser.add_argument('--local-host', action="store", dest="local_host", default=LOCAL_SERVER_HOST)
    parser.add_argument('--local-port', action="store", dest="local_port", type=int, required=True)
    parser.add_argument('--remote-host', action="store", dest="remote_host",  default=REMOTE_SERVER_HOST)
    parser.add_argument('--remote-port', action="store", dest="remote_port", type=int, default=80)
    given_args = parser.parse_args()
    local_host, remote_host = given_args.local_host, given_args.remote_host
    local_port, remote_port = given_args.local_port, given_args.remote_port

    print ("Starting port forwarding local %s:%s => remote %s:%s" % (local_host, local_port, remote_host, remote_port))
    PortForwarder(local_host, local_port, remote_host, remote_port)
    asyncore.loop()
If you run this script, it will show the following output:
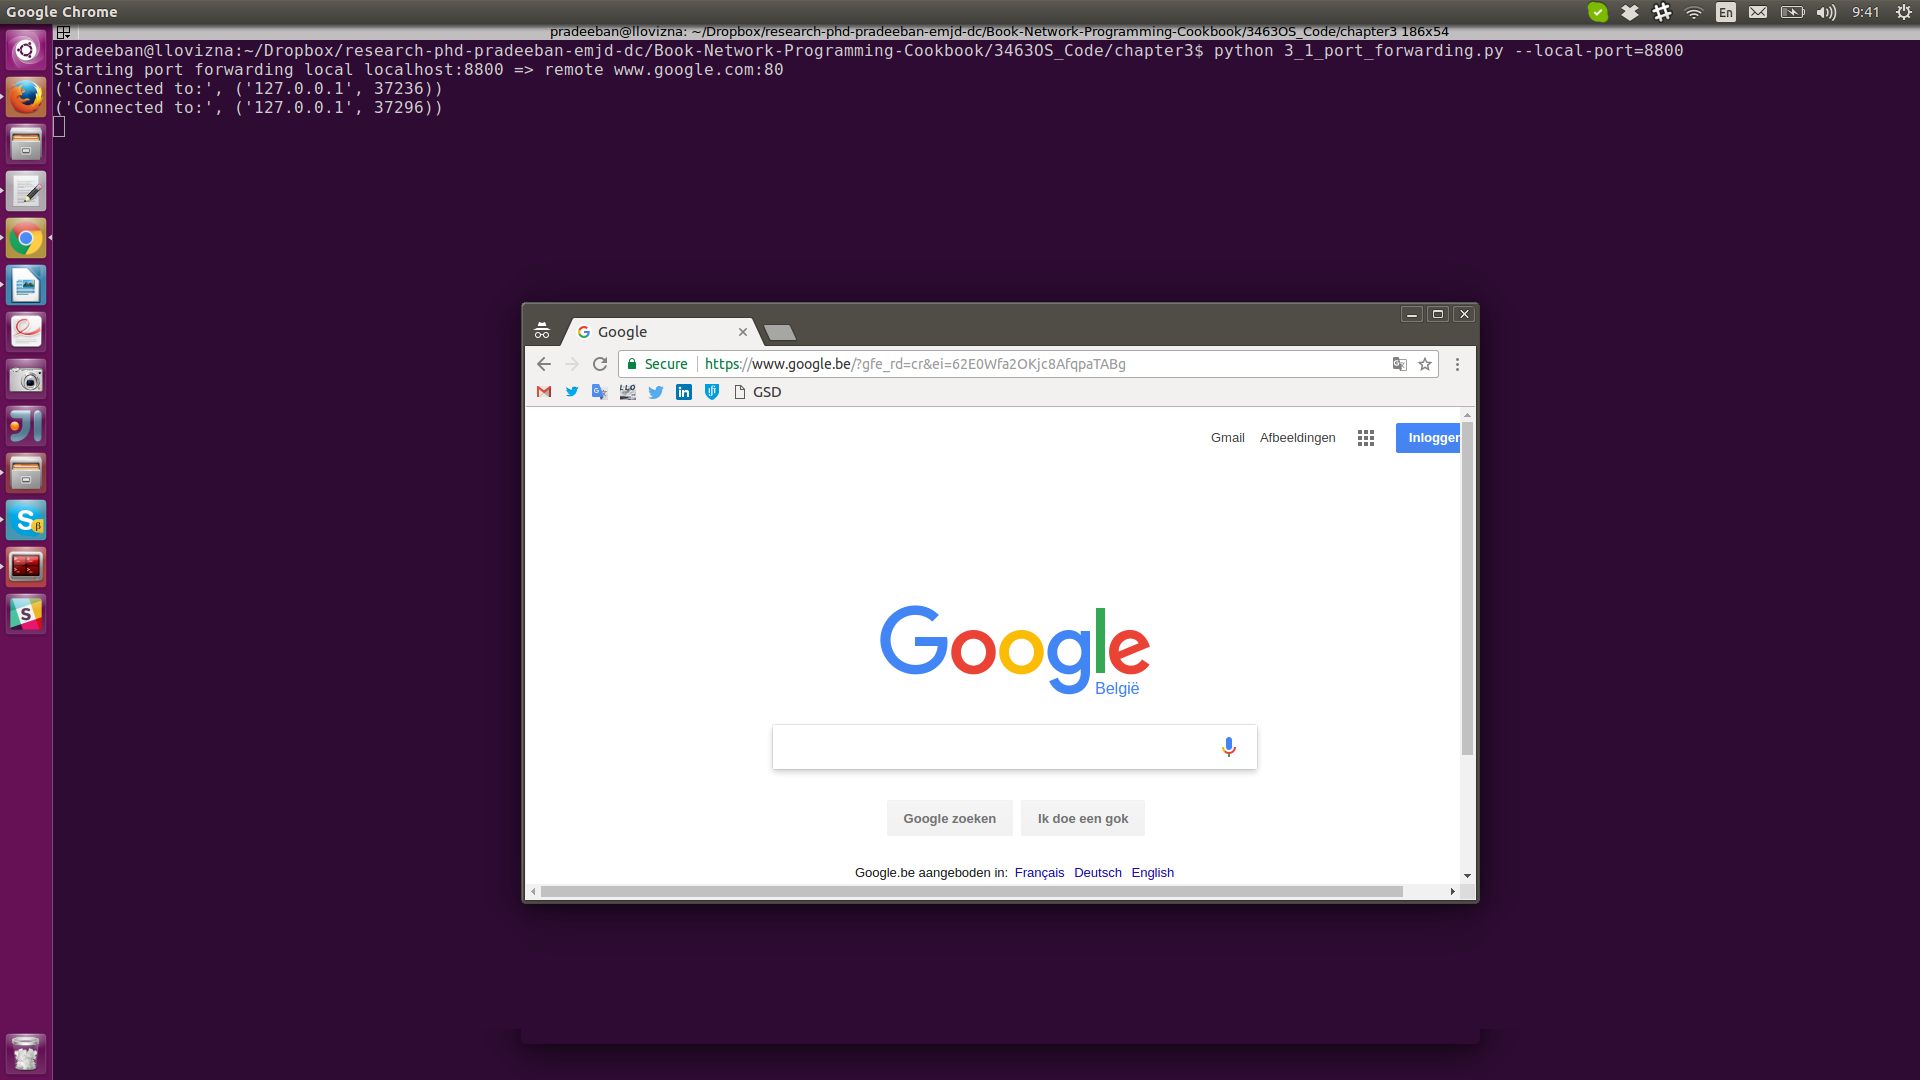
$ python 3_1_port_forwarding.py --local-port=8800
Starting port forwarding local localhost:8800 => remote www.google.com:80
Now, open your browser and visit http://localhost:8800. This will take you to the Google home page and the script will print something similar to the following command:
('Connected to:', ('127.0.0.1', 37236))The following screenshot shows the forwarding a local port to a remote host:
How it works…
We created a port forwarding class, PortForwarder subclassed, from asyncore.dispatcher, which wraps around the socket object. It provides a few additional helpful functions when certain events occur, for example, when the connection is successful or a client is connected to a server socket. You have the choice of overriding the set of methods defined in this class. In our case, we only override the handle_accept() method.
Two other classes have been derived from asyncore.dispatcher. The receiver class handles the incoming client requests and the sender class takes this receiver instance and processes the sent data to the clients. As you can see, these two classes override the handle_read(), handle_write(), and writeable() methods to facilitate the bi-directional communication between the remote host and local client.
In summary, the PortForwarder class takes the incoming client request in a local socket and passes this to the sender class instance, which in turn uses the receiver class instance to initiate a bi-directional communication with a remote server in the specified port.
Pinging hosts on the network with ICMP
An ICMP ping is the most common type of network scanning you have ever encountered. It is very easy to open a command-line prompt or terminal and type ping www.google.com. How difficult is that from inside a Python program? This recipe shows you an example of a Python ping.
Getting ready
You need the superuser or administrator privilege to run this recipe on your machine.
How to do it…
You can lazily write a Python script that calls the system ping command-line tool, as follows:
import subprocess
import shlex

command_line = "ping -c 1 www.google.com"
args = shlex.split(command_line)
try:
      subprocess.check_call(args,stdout=subprocess.PIPE,
stderr=subprocess.PIPE)
    print ("Google web server is up!")
except subprocess.CalledProcessError:
    print ("Failed to get ping.")
However, in many circumstances, the system’s ping executable may not be available or may be inaccessible. In this case, we need a pure Python script to do that ping. Note that this script needs to be run as a superuser or administrator.
Listing 3.2 shows the ICMP ping, as follows:
#!/usr/bin/env python
# This program is optimized for Python 3.5.2.
# Instructions to make it run with Python 2.7.x is as follows.
# It may run on any other version with/without modifications.

import os
import argparse
import socket
import struct
import select
import time


ICMP_ECHO_REQUEST = 8 # Platform specific
DEFAULT_TIMEOUT = 2
DEFAULT_COUNT = 4


class Pinger(object):
    """ Pings to a host -- the Pythonic way"""

    def __init__(self, target_host, count=DEFAULT_COUNT, timeout=DEFAULT_TIMEOUT):
        self.target_host = target_host
        self.count = count
        self.timeout = timeout


    def do_checksum(self, source_string):
        """  Verify the packet integritity """
        sum = 0
        max_count = (len(source_string)/2)*2
        count = 0
        while count < max_count:

            # To make this program run with Python 2.7.x:
            # val = ord(source_string[count + 1])*256 + ord(source_string[count])
            # ### uncomment the preceding line, and comment out the following line.
            val = source_string[count + 1]*256 + source_string[count]
            # In Python 3, indexing a bytes object returns an integer.
            # Hence, ord() is redundant.

            sum = sum + val
            sum = sum & 0xffffffff
            count = count + 2

        if max_count<len(source_string):
            sum = sum + ord(source_string[len(source_string) - 1])
            sum = sum & 0xffffffff

         sum = (sum >> 16)  +  (sum & 0xffff)
         sum = sum + (sum >> 16)
         answer = ~sum
         answer = answer & 0xffff
         answer = answer >> 8 | (answer << 8 & 0xff00)
         return answer

    def receive_pong(self, sock, ID, timeout):
        """
        Receive ping from the socket.
        """
        time_remaining = timeout
        while True:
            start_time = time.time()
            readable = select.select([sock], [], [], time_remaining)
            time_spent = (time.time() - start_time)
            if readable[0] == []: # Timeout
                return

            time_received = time.time()
            recv_packet, addr = sock.recvfrom(1024)
            icmp_header = recv_packet[20:28]
            type, code, checksum, packet_ID, sequence = struct.unpack(
                "bbHHh", icmp_header
            )
            if packet_ID == ID:
                bytes_In_double = struct.calcsize("d")
                time_sent = struct.unpack("d", recv_packet[28:28 + bytes_In_double])[0]
                return time_received - time_sent

            time_remaining = time_remaining - time_spent
            if time_remaining <= 0:
                return
We need a send_ping() method that will send the data of a ping request to the target host. Also, this will call the do_checksum() method for checking the integrity of the ping data, as follows:
def send_ping(self, sock,  ID):
        """
        Send ping to the target host
        """
        target_addr  =  socket.gethostbyname(self.target_host)

        my_checksum = 0

        # Create a dummy heder with a 0 checksum.
        header = struct.pack("bbHHh", ICMP_ECHO_REQUEST, 0, my_checksum, ID, 1)
        bytes_In_double = struct.calcsize("d")
        data = (192 - bytes_In_double) * "Q"
        data = struct.pack("d", time.time()) + bytes(data.encode('utf-8'))

        # Get the checksum on the data and the dummy header.
        my_checksum = self.do_checksum(header + data)
        header = struct.pack(
            "bbHHh", ICMP_ECHO_REQUEST, 0, socket.htons(my_checksum), ID, 1
        )
        packet = header + data
        sock.sendto(packet, (target_addr, 1))
Let us define another method called ping_once() that makes a single ping call to the target host. It creates a raw ICMP socket by passing the ICMP protocol to socket(). The exception handling code takes care if the script is not run by a superuser or if any other socket error occurs. Let’s take a look at the following code:
    def ping_once(self):
        """
        Returns the delay (in seconds) or none on timeout.
        """
        icmp = socket.getprotobyname("icmp")
        try:
            sock = socket.socket(socket.AF_INET, socket.SOCK_RAW, icmp)
        except socket.error as e:
            if e.errno == 1:
                # Not superuser, so operation not permitted
                e.msg +=  "ICMP messages can only be sent from root user processes"
                raise socket.error(e.msg)
        except Exception as e:
            print ("Exception: %s" %(e))

        my_ID = os.getpid() & 0xFFFF

        self.send_ping(sock, my_ID)
        delay = self.receive_pong(sock, my_ID, self.timeout)
        sock.close()
        return delay
The main executive method of this class is ping(). It runs a for loop inside which the ping_once() method is called count times and receives a delay in the ping response in seconds. If no delay is returned, that means the ping has failed. Let’s take a look at the following code:
def ping(self):
        """
        Run the ping process
        """
        for i in range(self.count):
            print ("Ping to %s..." % self.target_host,)
            try:
                delay  =  self.ping_once()
            except socket.gaierror as e:
                print ("Ping failed. (socket error: '%s')" % e[1])
                break

            if delay  ==  None:
                print ("Ping failed. (timeout within %ssec.)" % self.timeout)
            else:
                delay  =  delay * 1000
                print ("Get pong in %0.4fms" % delay)


if __name__ == '__main__':
    parser = argparse.ArgumentParser(description='Python ping')
    parser.add_argument('--target-host', action="store", dest="target_host", required=True)
    given_args = parser.parse_args()
    target_host = given_args.target_host
    pinger = Pinger(target_host=target_host)
    pinger.ping()
This script shows the following output. This has been run with the superuser privilege:
$ sudo python 3_2_ping_remote_host.py --target-host=www.google.com
Ping to www.google.com...
Get pong in 27.0808ms
Ping to www.google.com...
Get pong in 17.3445ms
Ping to www.google.com...
Get pong in 33.3586ms
Ping to www.google.com...
Get pong in 32.3212ms
How it works…
A Pinger class has been constructed to define a few useful methods. The class initializes with a few user-defined or default inputs, which are as follows:
- target_host: This is the target host to ping
- count: This is how many times to do the ping
- timeout: This is the value that determines when to end an unfinished ping operation
The send_ping() method gets the DNS hostname of the target host and creates an ICMP_ECHO_REQUEST packet using the struct module. It is necessary to check the data integrity of the method using the do_checksum() method. It takes the source string and manipulates it to produce a proper checksum. On the receiving end, the receive_pong() method waits for a response until the timeout occurs or receives the response. It captures the ICMP response header and then compares the packet ID and calculates the delay in the request and response cycle.
Waiting for a remote network service
Sometimes, during the recovery of a network service, it might be useful to run a script to check when the server is online again.
How to do it…
We can write a client that will wait for a particular network service forever or for a timeout. In this example, by default, we would like to check when a web server is up in localhost. If you specified some other remote host or port, that information will be used instead.
Listing 3.3 shows waiting for a remote network service, as follows:
#!/usr/bin/env python
# This program is optimized for Python 2.7.12 and Python 3.5.2.
# It may run on any other version with/without modifications.

import argparse
import socket
import errno
from time import time as now

DEFAULT_TIMEOUT = 120
DEFAULT_SERVER_HOST = 'localhost'
DEFAULT_SERVER_PORT = 80

class NetServiceChecker(object):
    """ Wait for a network service to come online"""
    def __init__(self, host, port, timeout=DEFAULT_TIMEOUT):
        self.host = host
        self.port = port
        self.timeout = timeout
        self.sock = socket.socket(socket.AF_INET, socket.SOCK_STREAM)

    def end_wait(self):
        self.sock.close()

    def check(self):
        """ Check the service """
        if self.timeout:
            end_time = now() + self.timeout

        while True:
            try:
                if self.timeout:
                    next_timeout = end_time - now()
                    if next_timeout < 0:
                        return False
                    else:
                        print ("setting socket next timeout %ss" %round(next_timeout))
                        self.sock.settimeout(next_timeout)
                self.sock.connect((self.host, self.port))
            # handle exceptions
            except socket.timeout as err:
                if self.timeout:
                    return False
            except socket.error as err:
                print ("Exception: %s" %err)
            else: # if all goes well
                self.end_wait()
                return True

if __name__ == '__main__':
    parser = argparse.ArgumentParser(description='Wait for Network Service')
    parser.add_argument('--host', action="store", dest="host",  default=DEFAULT_SERVER_HOST)
    parser.add_argument('--port', action="store", dest="port", type=int, default=DEFAULT_SERVER_PORT)
    parser.add_argument('--timeout', action="store", dest="timeout", type=int, default=DEFAULT_TIMEOUT)
    given_args = parser.parse_args()
    host, port, timeout = given_args.host, given_args.port, given_args.timeout
    service_checker = NetServiceChecker(host, port, timeout=timeout)
    print ("Checking for network service %s:%s ..." %(host, port))
    if service_checker.check():
        print ("Service is available again!")
If a web server is running on your machine, this script will show the following output:
$ python 3_3_wait_for_remote_service.py
Waiting for network service localhost:80 ...
setting socket next timeout 120.0s
Service is available again!
If you do not have a web server already running in your computer, make sure to install one such as Apache 2 Web Server:
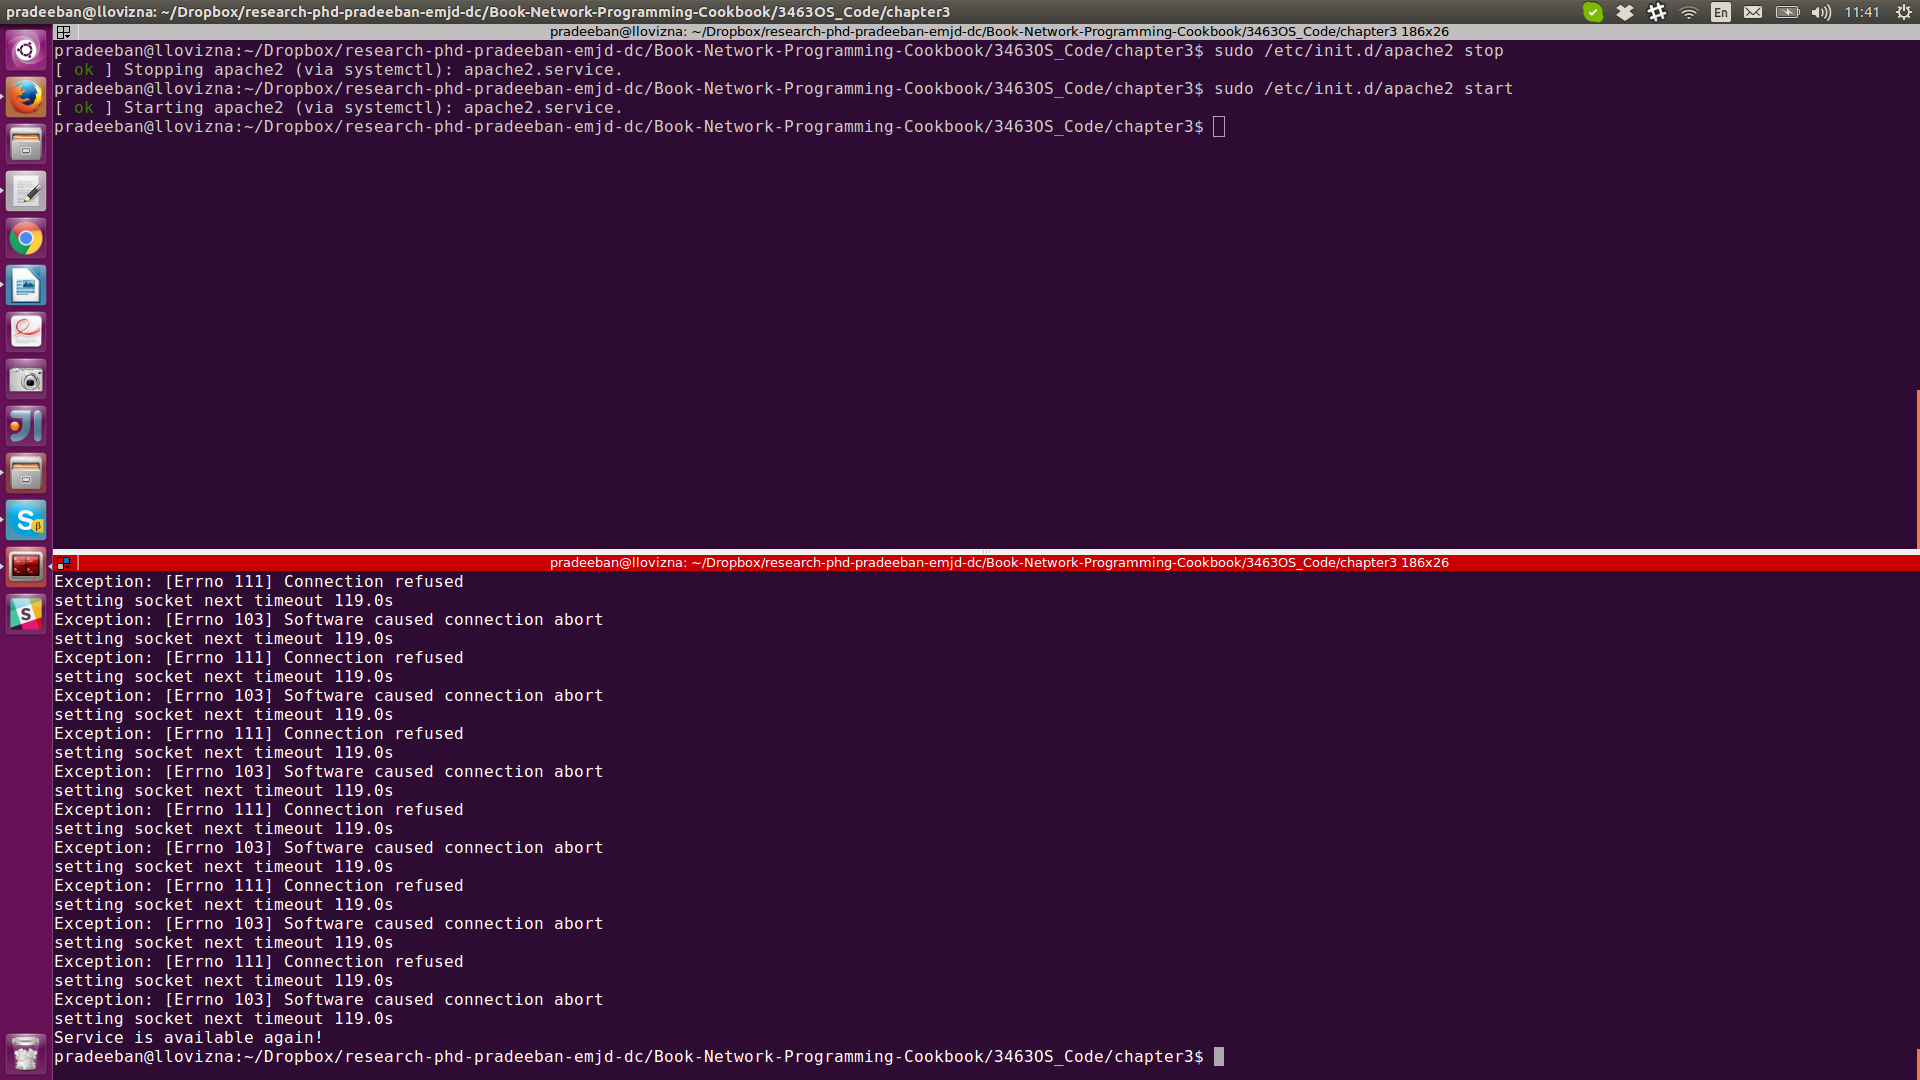
$ sudo apt install apache2Now, stop the Apache process:
$ sudo /etc/init.d/apache2 stopIt will print the following message while stopping the service.
[ ok ] Stopping apache2 (via systemctl): apache2.service.Run this script, and start Apache again.
$ sudo /etc/init.d/apache2 start
[ ok ] Starting apache2 (via systemctl): apache2.service.
The output pattern will be different. On my machine, the following output pattern was found:
Exception: [Errno 103] Software caused connection abort
setting socket next timeout 119.0s
Exception: [Errno 111] Connection refused
setting socket next timeout 119.0s
Exception: [Errno 103] Software caused connection abort
setting socket next timeout 119.0s
Exception: [Errno 111] Connection refused
setting socket next timeout 119.0s
And finally when Apache2 is up again, the following log is printed:
Service is available again!The following screenshot shows the waiting for an active Apache web server process:
How it works…
The preceding script uses the argparse module to take the user input and process the hostname, port, and timeout, that is how long our script will wait for the desired network service. It launches an instance of the NetServiceChecker class and calls the check() method. This method calculates the final end time of waiting and uses the socket’s settimeout() method to control each round’s end time, that is next_timeout. It then uses the socket’s connect() method to test if the desired network service is available until the socket timeout occurs. This method also catches the socket timeout error and checks the socket timeout against the timeout values given by the user.
Enumerating interfaces on your machine
If you need to list the network interfaces present on your machine, it is not very complicated in Python. There are a couple of third-party libraries out there that can do this job in a few lines. However, let’s see how this is done using a pure socket call.
Getting ready
You need to run this recipe on a Linux box. To get the list of available interfaces, you can execute the following command:
$ /sbin/ifconfigHow to do it…
Listing 3.4 shows how to list the networking interfaces, as follows:
#!/usr/bin/env python
# Python Network Programming Cookbook, Second Edition -- Article - 3
# This program is optimized for Python 2.7.12 and Python 3.5.2.
# It may run on any other version with/without modifications.
import sys
import socket
import fcntl
import struct
import array
SIOCGIFCONF = 0x8912 #from C library sockios.h
STUCT_SIZE_32 = 32
STUCT_SIZE_64 = 40
PLATFORM_32_MAX_NUMBER = 2**32
DEFAULT_INTERFACES = 8
def list_interfaces():
interfaces = []
max_interfaces = DEFAULT_INTERFACES
is_64bits = sys.maxsize > PLATFORM_32_MAX_NUMBER
struct_size = STUCT_SIZE_64 if is_64bits else STUCT_SIZE_32
sock = socket.socket(socket.AF_INET, socket.SOCK_DGRAM)
while True:
bytes = max_interfaces * struct_size
interface_names = array.array('B', b'�' * bytes)
sock_info = fcntl.ioctl(
sock.fileno(),
SIOCGIFCONF,
struct.pack('iL', bytes, interface_names.buffer_info()[0])
)
outbytes = struct.unpack('iL', sock_info)[0]
if outbytes == bytes:
max_interfaces *= 2
else:
break
namestr = interface_names.tostring()
for i in range(0, outbytes, struct_size):
interfaces.append((namestr[i:i+16].split(b'�', 1)[0]).decode('ascii', 'ignore'))
return interfaces
if __name__ == '__main__':
interfaces = list_interfaces()
print ("This machine has %s network interfaces: %s." %(len(interfaces), interfaces))
The preceding script will list the network interfaces, as shown in the following output:
$ python 3_4_list_network_interfaces.py
This machine has 2 network interfaces: ['lo', 'wlo1'].
How it works…
This recipe code uses a low-level socket feature to find out the interfaces present on the system. The single list_interfaces()method creates a socket object and finds the network interface information from manipulating this object. It does so by making a call to the fnctl module’s ioctl() method. The fnctl module interfaces with some Unix routines, for example, fnctl(). This interface performs an I/O control operation on the underlying file descriptor socket, which is obtained by calling the fileno() method of the socket object.
The additional parameter of the ioctl() method includes the SIOCGIFADDR constant defined in the C socket library and a data structure produced by the struct module’s pack() function. The memory address specified by a data structure is modified as a result of the ioctl() call. In this case, the interface_names variable holds this information. After unpacking the sock_info return value of the ioctl() call, the number of network interfaces is increased twice if the size of the data suggests it. This is done in a while loop to discover all interfaces if our initial interface count assumption is not correct.
The names of interfaces are extracted from the string format of the interface_names variable. It reads specific fields of that variable and appends the values in the interfaces’ list. At the end of the list_interfaces() function, this is returned.
Finding the IP address for a specific interface on your machine
Finding the IP address of a particular network interface may be needed from your Python network application.
Getting ready
This recipe is prepared exclusively for a Linux box. There are some Python modules specially designed to bring similar functionalities on Windows and Mac platforms. For example, see http://sourceforge.net/projects/pywin32/ for Windows-specific implementation.
How to do it…
You can use the fnctl module to query the IP address on your machine.
Listing 3.5 shows us how to find the IP address for a specific interface on your machine, as follows:
#!/usr/bin/env python
# This program is optimized for Python 2.7.12 and Python 3.5.2.
# It may run on any other version with/without modifications.

import argparse
import sys
import socket
import fcntl
import struct
import array


def get_ip_address(ifname):
    s = socket.socket(socket.AF_INET, socket.SOCK_DGRAM)
    return socket.inet_ntoa(fcntl.ioctl(
        s.fileno(),
        0x8915,  # SIOCGIFADDR
        struct.pack(b'256s', bytes(ifname[:15], 'utf-8'))
    )[20:24])

if __name__ == '__main__':
    parser = argparse.ArgumentParser(description='Python networking utils')
    parser.add_argument('--ifname', action="store", dest="ifname", required=True)
    given_args = parser.parse_args()
    ifname = given_args.ifname
    print ("Interface [%s] --> IP: %s" %(ifname, get_ip_address(ifname)))
The output of this script is shown in one line, as follows:
$ python 3_5_get_interface_ip_address.py --ifname=lo
Interface [lo] --> IP: 127.0.0.1
In the preceding execution, make sure to use an existing interface, as printed in the previous recipe. In my computer, I got the output previously for3_4_list_network_interfaces.py:
This machine has 2 network interfaces: ['lo', 'wlo1'].If you use a non-existing interface, an error will be printed.
For example, I do not have eth0 interface right now.So the output is,
$ python3 3_5_get_interface_ip_address.py --ifname=eth0
Traceback (most recent call last):
  File "3_5_get_interface_ip_address.py", line 27, in <module>
    print ("Interface [%s] --> IP: %s" %(ifname, get_ip_address(ifname)))
  File "3_5_get_interface_ip_address.py", line 19, in get_ip_address
    struct.pack(b'256s', bytes(ifname[:15], 'utf-8'))
OSError: [Errno 19] No such device
How it works…
This recipe is similar to the previous one. The preceding script takes a command-line argument: the name of the network interface whose IP address is to be known. The get_ip_address() function creates a socket object and calls the fnctl.ioctl() function to query on that object about IP information. Note that the socket.inet_ntoa() function converts the binary data to a human-readable string in a dotted format as we are familiar with it.
Finding whether an interface is up on your machine
If you have multiple network interfaces on your machine, before doing any work on a particular interface, you would like to know the status of that network interface, for example, if the interface is actually up. This makes sure that you route your command to active interfaces.
Getting ready
This recipe is written for a Linux machine. So, this script will not run on a Windows or Mac host. In this recipe, we use nmap, a famous network scanning tool. You can find more about nmap from its website http://nmap.org/.
Install nmap in your computer. For Debian-based system, the command is:
$ sudo apt-get install nmapYou also need the python-nmap module to run this recipe. This can be installed by pip, as follows:
$ pip install python-nmapHow to do it…
We can create a socket object and get the IP address of that interface. Then, we can use any of the scanning techniques to probe the interface status.
Listing 3.6 shows the detect network interface status, as follows:
#!/usr/bin/env python
# This program is optimized for Python 2.7.12 and Python 3.5.2.
# It may run on any other version with/without modifications.


import argparse
import socket
import struct
import fcntl
import nmap

SAMPLE_PORTS = '21-23'

def get_interface_status(ifname):
    sock = socket.socket(socket.AF_INET, socket.SOCK_DGRAM)
    ip_address = socket.inet_ntoa(fcntl.ioctl(
        sock.fileno(),
        0x8915, #SIOCGIFADDR, C socket library sockios.h
        struct.pack(b'256s', bytes(ifname[:15], 'utf-8'))
    )[20:24])
    nm = nmap.PortScanner()
    nm.scan(ip_address, SAMPLE_PORTS)
    return nm[ip_address].state()

if  __name__ == '__main__':
    parser = argparse.ArgumentParser(description='Python networking utils')
    parser.add_argument('--ifname', action="store", dest="ifname", required=True)
    given_args = parser.parse_args()
    ifname = given_args.ifname
    print ("Interface [%s] is: %s" %(ifname, get_interface_status(ifname)))
If you run this script to inquire the status of the eth0 status, it will show something similar to the following output:
$ python 3_6_find_network_interface_status.py --ifname=lo
Interface [lo] is: up
How it works…
The recipe takes the interface’s name from the command line and passes it to the get_interface_status() function. This function finds the IP address of that interface by manipulating a UDP socket object.
This recipe needs the nmap third-party module. We can install that PyPI using the pip install command. The nmap scanning instance, nm, has been created by calling PortScanner(). An initial scan to a local IP address gives us the status of the associated network interface.
Detecting inactive machines on your network
If you have been given a list of IP addresses of a few machines on your network and you are asked to write a script to find out which hosts are inactive periodically, you would want to create a network scanner type program without installing anything on the target host computers.
Getting ready
This recipe requires installing the Scapy library (> 2.2), which can be obtained at http://www.secdev.org/projects/scapy/files/scapy-latest.zip.
At the time of writing, the default Scapy release works with Python 2, and does not support Python 3. You may download the Scapy for Python 3 from https://pypi.python.org/pypi/scapy-python3/0.20
How to do it…
We can use Scapy, a mature network-analyzing, third-party library, to launch an ICMP scan. Since we would like to do it periodically, we need Python’s sched module to schedule the scanning tasks.
Listing 3.7 shows us how to detect inactive machines, as follows:
#!/usr/bin/env python
# This program is optimized for Python 2.7.12 and Python 3.5.2.
# It may run on any other version with/without modifications.
# Requires scapy-2.2.0 or higher for Python 2.7.
# Visit: http://www.secdev.org/projects/scapy/files/scapy-latest.zip
# As of now, requires a separate bundle for Python 3.x.
# Download it from: https://pypi.python.org/pypi/scapy-python3/0.20


import argparse
import time
import sched
from scapy.all import sr, srp, IP, UDP, ICMP, TCP, ARP, Ether

RUN_FREQUENCY = 10

scheduler = sched.scheduler(time.time, time.sleep)


def detect_inactive_hosts(scan_hosts):
    """
    Scans the network to find scan_hosts are live or dead
    scan_hosts can be like 10.0.2.2-4 to cover range.
    See Scapy docs for specifying targets.
    """
    global scheduler
    scheduler.enter(RUN_FREQUENCY, 1, detect_inactive_hosts, (scan_hosts, ))
    inactive_hosts = []
    try:
        ans, unans = sr(IP(dst=scan_hosts)/ICMP(), retry=0, timeout=1)
        ans.summary(lambda r : r.sprintf("%IP.src% is alive"))
        for inactive in unans:
            print ("%s is inactive" %inactive.dst)
            inactive_hosts.append(inactive.dst)

        print ("Total %d hosts are inactive" %(len(inactive_hosts)))


    except KeyboardInterrupt:
        exit(0)


if __name__ == "__main__":
    parser = argparse.ArgumentParser(description='Python networking utils')
    parser.add_argument('--scan-hosts', action="store", dest="scan_hosts", required=True)
    given_args = parser.parse_args()
    scan_hosts = given_args.scan_hosts
    scheduler.enter(1, 1, detect_inactive_hosts, (scan_hosts, ))
    scheduler.run()
The output of this script will be something like the following command:
$ sudo python 3_7_detect_inactive_machines.py --scan-hosts=10.0.2.2-4
Begin emission:
*.Finished to send 3 packets.
.
Received 6 packets, got 1 answers, remaining 2 packets
10.0.2.2 is alive
10.0.2.4 is inactive
10.0.2.3 is inactive
Total 2 hosts are inactive
Begin emission:
*.Finished to send 3 packets.
Received 3 packets, got 1 answers, remaining 2 packets
10.0.2.2 is alive
10.0.2.4 is inactive
10.0.2.3 is inactive
Total 2 hosts are inactive
How it works…
The preceding script first takes a list of network hosts, scan_hosts, from the command line. It then creates a schedule to launch the detect_inactive_hosts() function after a one-second delay. The target function takes the scan_hosts argument and calls Scapy’s sr() function.
This function schedules itself to rerun after every 10 seconds by calling the
schedule.enter() function once again. This way, we run this scanning task periodically.
Scapy’s sr() scanning function takes an IP, protocol and some scan-control information. In this case, the IP() method passes scan_hosts as the destination hosts to scan, and the protocol is specified as ICMP. This can also be TCP or UDP. We do not specify a retry and one-second timeout to run this script faster. However, you can experiment with the options that suit you.
The scanning sr()function returns the hosts that answer and those that don’t as a tuple. We check the hosts that don’t answer, build a list, and print that information.
Performing a basic IPC using connected sockets (socketpair)
Sometimes, two scripts need to communicate some information between themselves via two processes. In Unix/Linux, there’s a concept of connected socket, of socketpair. We can experiment with this here.
Getting ready
This recipe is designed for a Unix/Linux host. Windows/Mac is not suitable for running this one.
How to do it…
We use a test_socketpair() function to wrap a few lines that test the socket’s socketpair() function.
List 3.8 shows an example of socketpair, as follows:
#!/usr/bin/env python
# This program is optimized for Python 3.5.2.
# It may run on any other version with/without modifications.
# To make it run on Python 2.7.x, needs some changes due to API differences.
# Follow the comments inline to make the program work with Python 2.

import socket
import os

BUFSIZE = 1024

def test_socketpair():
    """ Test Unix socketpair"""
    parent, child = socket.socketpair()

    pid = os.fork()
    try:
        if pid:
            print ("@Parent, sending message...")
            child.close()

            parent.sendall(bytes("Hello from parent!", 'utf-8'))
            # Comment out the preceding line and uncomment the following line for Python 2.7.
            # parent.sendall("Hello from parent!")

            response = parent.recv(BUFSIZE)
            print ("Response from child:", response)
            parent.close()

        else:
            print ("@Child, waiting for message from parent")
            parent.close()
            message = child.recv(BUFSIZE)
            print ("Message from parent:", message)

            child.sendall(bytes("Hello from child!!", 'utf-8'))
            # Comment out the preceding line and uncomment the following line for Python 2.7.
            # child.sendall("Hello from child!!")

            child.close()
    except Exception as err:
        print ("Error: %s" %err)


if __name__ == '__main__':
    test_socketpair()
The output from the preceding script is as follows:
$ python 3_8_ipc_using_socketpairs.py
@Parent, sending message...
@Child, waiting for message from parent
Message from parent: b'Hello from parent!'
Response from child: b'Hello from child!!'
How it works…
The socket.socketpair() function simply returns two connected socket objects. In our case, we can say that one is a parent and another is a child. We fork another process via a os.fork() call. This returns the process ID of the parent. In each process, the other process’ socket is closed first and then a message is exchanged via a sendall() method call on the process’s socket. The try-except block prints any error in case of any kind of exception.
Performing IPC using Unix domain sockets
Unix domain sockets (UDS) are sometimes used as a convenient way to communicate between two processes. As in Unix, everything is conceptually a file. If you need an example of such an IPC action, this can be useful.
How to do it…
We launch a UDS server that binds to a filesystem path, and a UDS client uses the same path to communicate with the server.
Listing 3.9a shows a Unix domain socket server, as follows:
#!/usr/bin/env python
# This program is optimized for Python 2.7.12 and Python 3.5.2.
# It may run on any other version with/without modifications.


import socket
import os
import time

SERVER_PATH = "/tmp/python_unix_socket_server"

def run_unix_domain_socket_server():
    if os.path.exists(SERVER_PATH):
        os.remove( SERVER_PATH )

    print ("starting unix domain socket server.")
    server = socket.socket( socket.AF_UNIX, socket.SOCK_DGRAM )
    server.bind(SERVER_PATH)

    print ("Listening on path: %s" %SERVER_PATH)
    while True:
        datagram = server.recv( 1024 )
        if not datagram:
            break
        else:
            print ("-" * 20)
            print (datagram)
        if "DONE" == datagram:
            break
    print ("-" * 20)
    print ("Server is shutting down now...")
    server.close()
    os.remove(SERVER_PATH)
    print ("Server shutdown and path removed.")

if __name__ == '__main__':
    run_unix_domain_socket_server()
Listing 3.9b shows a UDS client, as follows:
#!/usr/bin/env python
# Python Network Programming Cookbook, Second Edition -- Article - 3
# This program is optimized for Python 3.5.2.
# It may run on any other version with/without modifications.
# To make it run on Python 2.7.x, needs some changes due to API differences.
# Follow the comments inline to make the program work with Python 2.


import socket
import sys

SERVER_PATH = "/tmp/python_unix_socket_server"

def run_unix_domain_socket_client():
    """ Run "a Unix domain socket client """
    sock = socket.socket(socket.AF_UNIX, socket.SOCK_DGRAM)

    # Connect the socket to the path where the server is listening
    server_address = SERVER_PATH
    print ("connecting to %s" % server_address)
    try:
        sock.connect(server_address)
    except socket.error as msg:
        print (msg)
        sys.exit(1)

    try:
        message = "This is the message.  This will be echoed back!"
        print  ("Sending [%s]" %message)

        sock.sendall(bytes(message, 'utf-8'))
        # Comment out the preceding line and uncomment the bfollowing line for Python 2.7.
        # sock.sendall(message)

        amount_received = 0
        amount_expected = len(message)

        while amount_received < amount_expected:
            data = sock.recv(16)
            amount_received += len(data)
            print ("Received [%s]" % data)

    finally:
        print ("Closing client")
        sock.close()

if __name__ == '__main__':
    run_unix_domain_socket_client()
The server output is as follows:
$ python 3_9a_unix_domain_socket_server.py
starting unix domain socket server.
Listening on path: /tmp/python_unix_socket_server
--------------------
This is the message.  This will be echoed back!
The client output is as follows:
$ python 3_9b_unix_domain_socket_client.py
connecting to /tmp/python_unix_socket_server
Sending [This is the message.  This will be echoed back!]
How it works…
A common path is defined for a UDS client/server to interact. Both the client and server use the same path to connect and listen to.
In a server code, we remove the path if it exists from the previous run of this script. It then creates a Unix datagram socket and binds it to the specified path. It then listens for incoming connections. In the data processing loop, it uses the recv() method to get data from the client and prints that information on screen.
The client-side code simply opens a Unix datagram socket and connects to the shared server address. It sends a message to the server using sendall(). It then waits for the message to be echoed back to itself and prints that message.
Finding out if your Python supports IPv6 sockets
IP version 6 or IPv6 is increasingly adopted by the industry to build newer applications. In case you would like to write an IPv6 application, the first thing you’d like to know is if your machine supports IPv6. This can be done from the Linux/Unix command line, as follows:
$ cat /proc/net/if_inet6
00000000000000000000000000000001 01 80 10 80       lo
fe80000000000000642a57c2e51932a2 03 40 20 80     wlo1
From your Python script, you can also check if the IPv6 support is present on your machine, and Python is installed with that support.
Getting ready
For this recipe, use pip to install a Python third-party library, netifaces, as follows:
$ pip install netifacesHow to do it…
We can use a third-party library, netifaces, to find out if there is IPv6 support on your machine. We can call the interfaces() function from this library to list all interfaces present in the system.
Listing 3.10 shows the Python IPv6 support checker, as follows:
#!/usr/bin/env python
# This program is optimized for Python 2.7.12 and Python 3.5.2.
# It may run on any other version with/without modifications.
# This program depends on Python module netifaces => 0.8

import socket
import argparse
import netifaces as ni


def inspect_ipv6_support():
    """ Find the ipv6 address"""
    print ("IPV6 support built into Python: %s" %socket.has_ipv6)
    ipv6_addr = {}
    for interface in ni.interfaces():
        all_addresses = ni.ifaddresses(interface)
        print ("Interface %s:" %interface)

        for family,addrs in all_addresses.items():
            fam_name = ni.address_families[family]
            print ('  Address family: %s' % fam_name)
            for addr in addrs:
                if fam_name == 'AF_INET6':
                    ipv6_addr[interface] = addr['addr']
                print ('    Address  : %s' % addr['addr'])
                nmask = addr.get('netmask', None)
                if nmask:
                    print ('    Netmask  : %s' % nmask)
                bcast = addr.get('broadcast', None)
                if bcast:
                    print ('    Broadcast: %s' % bcast)
    if ipv6_addr:
        print ("Found IPv6 address: %s" %ipv6_addr)
    else:
        print ("No IPv6 interface found!")


if __name__ == '__main__':
    inspect_ipv6_support()
The output from this script will be as follows:
$ python 3_10_check_ipv6_support.py
IPV6 support built into Python: True
Interface lo:
  Address family: AF_PACKET
    Address  : 00:00:00:00:00:00
  Address family: AF_INET
    Address  : 127.0.0.1
    Netmask  : 255.0.0.0
  Address family: AF_INET6
    Address  : ::1
    Netmask  : ffff:ffff:ffff:ffff:ffff:ffff:ffff:ffff/128
Interface enp2s0:
  Address family: AF_PACKET
    Address  : 9c:5c:8e:26:a2:48
    Broadcast: ff:ff:ff:ff:ff:ff
  Address family: AF_INET
    Address  : 130.104.228.90
    Netmask  : 255.255.255.128
    Broadcast: 130.104.228.127
  Address family: AF_INET6
    Address  : 2001:6a8:308f:2:88bc:e3ec:ace4:3afb
    Netmask  : ffff:ffff:ffff:ffff::/64
    Address  : 2001:6a8:308f:2:5bef:e3e6:82f8:8cca
    Netmask  : ffff:ffff:ffff:ffff::/64
    Address  : fe80::66a0:7a3f:f8e9:8c03%enp2s0
    Netmask  : ffff:ffff:ffff:ffff::/64
Interface wlp1s0:
  Address family: AF_PACKET
    Address  : c8:ff:28:90:17:d1
    Broadcast: ff:ff:ff:ff:ff:ff
Found IPv6 address: {'lo': '::1', 'enp2s0': 'fe80::66a0:7a3f:f8e9:8c03%enp2s0'}
How it works…
The IPv6 support checker function, inspect_ipv6_support(), first checks if Python is built with IPv6 using socket.has_ipv6. Next, we call the interfaces() function from the netifaces module. This gives us the list of all interfaces. If we call the ifaddresses() method by passing a network interface to it, we can get all the IP addresses of this interface. We then extract various IP-related information, such as protocol family, address, netmask,
and broadcast address. Then, the address of a network interface has been added to the IPv6_address dictionary if its protocol family matches AF_INET6.
Extracting an IPv6 prefix from an IPv6 address
In your IPv6 application, you need to dig out the IPv6 address for getting the prefix information. Note that the upper 64-bits of an IPv6 address are represented from a global routing prefix plus a subnet ID, as defined in RFC 3513. A general prefix (for example, /48) holds a short prefix based on which a number of longer, more specific prefixes (for example, /64) can be defined. A Python script can be very helpful in generating the prefix information.
How to do it…
We can use the netifaces and netaddr third-party libraries to find out the IPv6 prefix information for a given IPv6 address.
Make sure to have netifaces and netaddr installed in your system.
$ pip install netaddrThe program is as follows:
#!/usr/bin/env python
# This program is optimized for Python 2.7.12 and Python 3.5.2.
# It may run on any other version with/without modifications.
# This program depends on Python modules netifaces and netaddr.

import socket
import netifaces as ni
import netaddr as na

def extract_ipv6_info():
    """ Extracts IPv6 information"""
    print ("IPv6 support built into Python: %s" %socket.has_ipv6)
    for interface in ni.interfaces():
        all_addresses = ni.ifaddresses(interface)
        print ("Interface %s:" %interface)
        for family,addrs in all_addresses.items():
            fam_name = ni.address_families[family]

            for addr in addrs:
                if fam_name == 'AF_INET6':
                    addr = addr['addr']
                    has_eth_string = addr.split("%eth")
                    if has_eth_string:
                        addr = addr.split("%eth")[0]
                    try:
                        print ("    IP Address: %s" %na.IPNetwork(addr))
                        print ("    IP Version: %s" %na.IPNetwork(addr).version)
                        print ("    IP Prefix length: %s" %na.IPNetwork(addr).prefixlen)
                        print ("    Network: %s" %na.IPNetwork(addr).network)
                        print ("    Broadcast: %s" %na.IPNetwork(addr).broadcast)
                    except Exception as e:
                        print ("Skip Non-IPv6 Interface")

if __name__ == '__main__':
    extract_ipv6_info()
The output from this script is as follows:
$ python 3_11_extract_ipv6_prefix.py
IPv6 support built into Python: True
Interface lo:
    IP Address: ::1/128
    IP Version: 6
    IP Prefix length: 128
    Network: ::1
    Broadcast: ::1
Interface enp2s0:
    IP Address: 2001:6a8:308f:2:88bc:e3ec:ace4:3afb/128
    IP Version: 6
    IP Prefix length: 128
    Network: 2001:6a8:308f:2:88bc:e3ec:ace4:3afb
    Broadcast: 2001:6a8:308f:2:88bc:e3ec:ace4:3afb
    IP Address: 2001:6a8:308f:2:5bef:e3e6:82f8:8cca/128
    IP Version: 6
    IP Prefix length: 128
    Network: 2001:6a8:308f:2:5bef:e3e6:82f8:8cca
    Broadcast: 2001:6a8:308f:2:5bef:e3e6:82f8:8cca
Skip Non-IPv6 Interface
Interface wlp1s0:
How it works…
Python’s netifaces module gives us the network interface IPv6 address. It uses the interfaces() and ifaddresses() functions for doing this. The netaddr module is particularly helpful to manipulate a network address. It has a IPNetwork() class that provides us with an address, IPv4 or IPv6, and computes the prefix, network, and broadcast addresses. Here, we find this information class instance’s version, prefixlen, and network
and broadcast attributes.
Writing an IPv6 echo client/server
You need to write an IPv6 compliant server or client and wonder what could be the differences between an IPv6 compliant server or client and its IPv4 counterpart.
How to do it…
We use the same approach as writing an echo client/server using IPv6. The only major difference is how the socket is created using IPv6 information.
Listing 12a shows an IPv6 echo server, as follows:
#!/usr/bin/env python
# This program is optimized for Python 2.7.12 and Python 3.5.2.
# It may run on any other version with/without modifications.

import argparse
import socket
import sys

HOST = 'localhost'

def echo_server(port, host=HOST):
    """Echo server using IPv6 """
    for result in socket.getaddrinfo(host, port, socket.AF_UNSPEC, socket.SOCK_STREAM, 0, socket.AI_PASSIVE):
        af, socktype, proto, canonname, sa = result
        try:
            sock = socket.socket(af, socktype, proto)
        except socket.error as err:
            print ("Error: %s" %err)

        try:
            sock.bind(sa)
            sock.listen(1)
            print ("Server lisenting on %s:%s" %(host, port))
        except socket.error as msg:
            sock.close()
            continue
        break
        sys.exit(1)
    conn, addr = sock.accept()
    print ('Connected to', addr)
    while True:
        data = conn.recv(1024)
        print ("Received data from the client: [%s]" %data)
        if not data: break
        conn.send(data)
        print ("Sent data echoed back to the client: [%s]" %data)
    conn.close()

if __name__ == '__main__':
    parser = argparse.ArgumentParser(description='IPv6 Socket Server Example')
    parser.add_argument('--port', action="store", dest="port", type=int, required=True)
    given_args = parser.parse_args()
    port = given_args.port
    echo_server(port)
Listing 12b shows an IPv6 echo client, as follows:
#!/usr/bin/env python
# Python Network Programming Cookbook, Second Edition -- Article - 3
# This program is optimized for Python 2.7.12 and Python 3.5.2.
# It may run on any other version with/without modifications.

import argparse
import socket
import sys

HOST = 'localhost'
BUFSIZE = 1024

def ipv6_echo_client(port, host=HOST):
    for res in socket.getaddrinfo(host, port, socket.AF_UNSPEC, socket.SOCK_STREAM):
        af, socktype, proto, canonname, sa = res
        try:
            sock = socket.socket(af, socktype, proto)
        except socket.error as err:
            print ("Error:%s" %err)
        try:
            sock.connect(sa)
        except socket.error as msg:
            sock.close()
            continue
    if sock is None:
        print ('Failed to open socket!')
        sys.exit(1)
    msg = "Hello from ipv6 client"
    print ("Send data to server: %s" %msg)
    sock.send(bytes(msg.encode('utf-8')))
    while True:
        data = sock.recv(BUFSIZE)
        print ('Received from server', repr(data))
        if not data:
            break
    sock.close()


if __name__ == '__main__':
    parser = argparse.ArgumentParser(description='IPv6 socket client example')
    parser.add_argument('--port', action="store", dest="port", type=int, required=True)
    given_args = parser.parse_args()
    port = given_args.port
    ipv6_echo_client(port)
The server output is as follows:
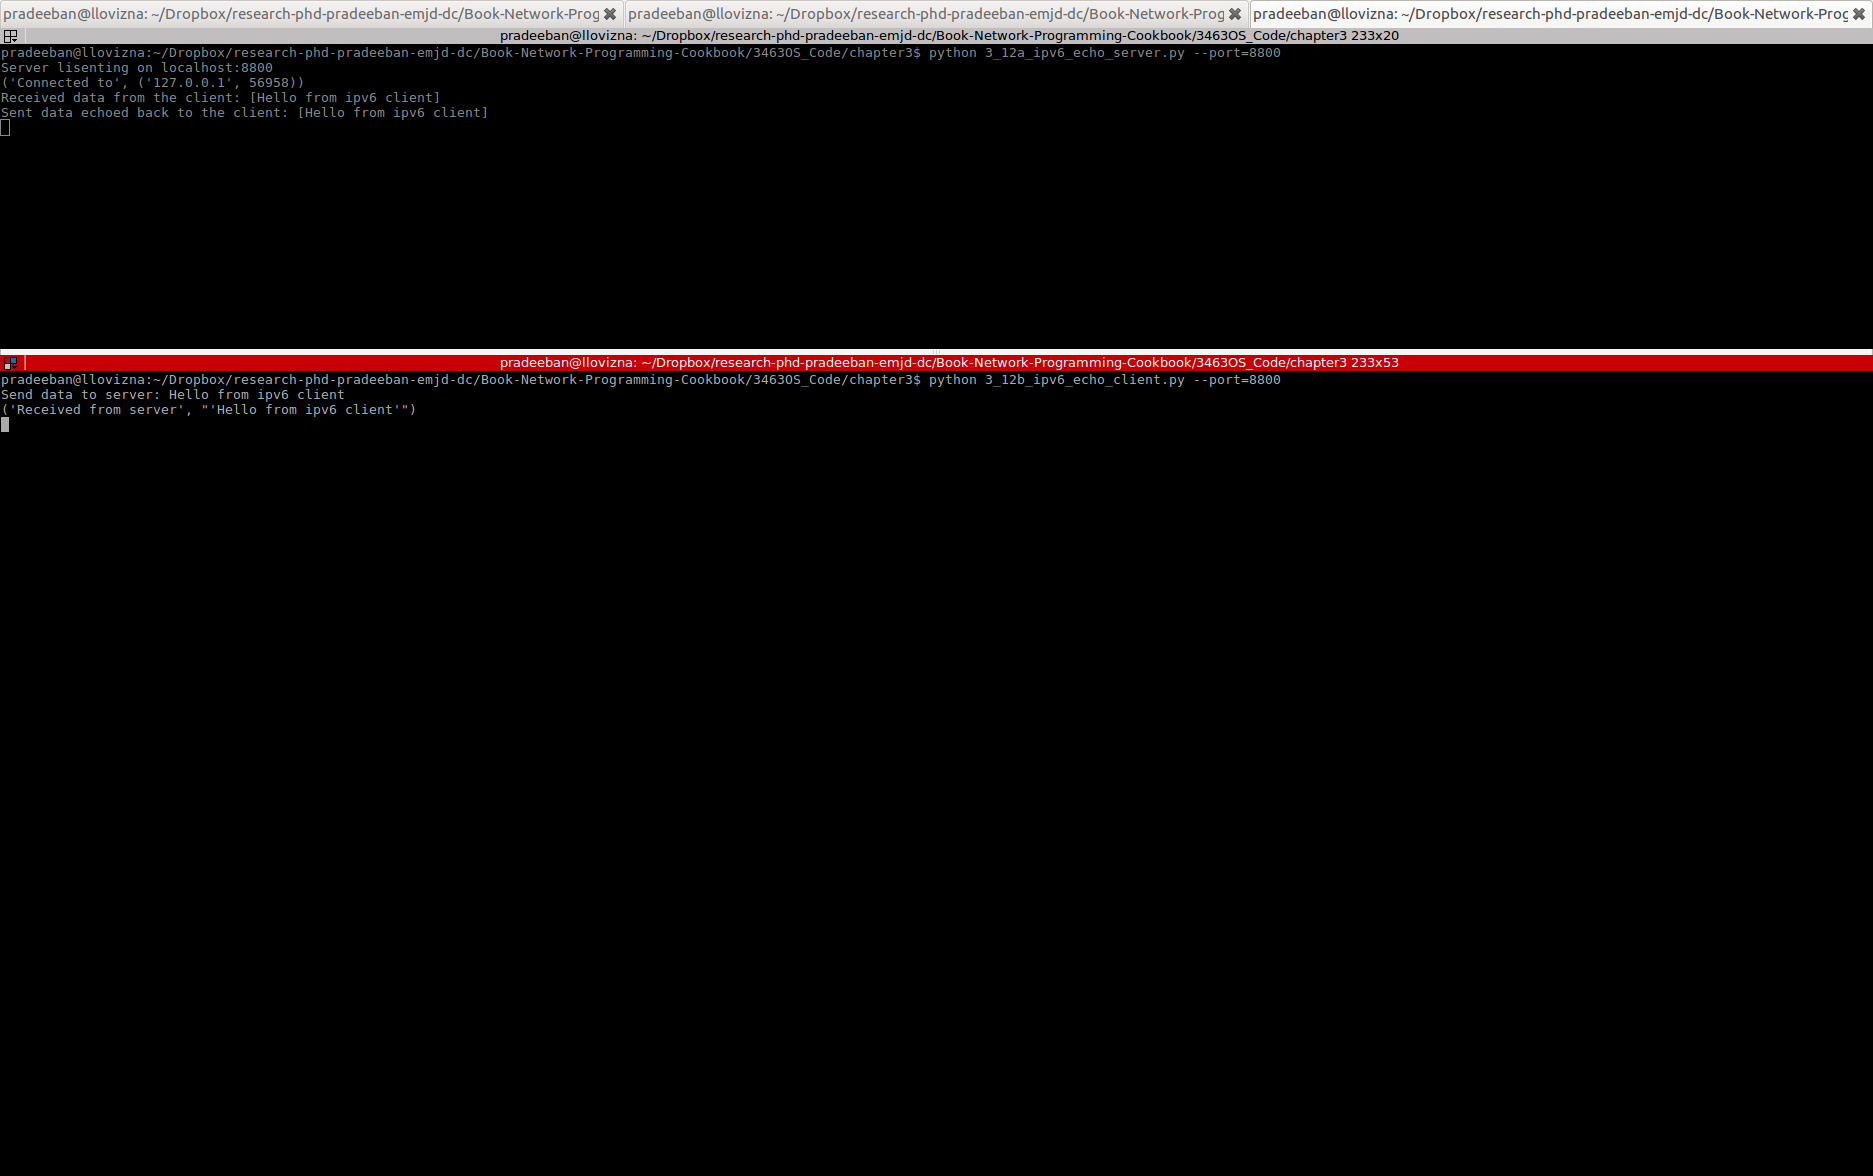
$ python 3_12a_ipv6_echo_server.py --port=8800
Server lisenting on localhost:8800
('Connected to', ('127.0.0.1', 56958))
Received data from the client: [Hello from ipv6 client]
Sent data echoed back to the client: [Hello from ipv6 client]
The client output is as follows:
$ python 3_12b_ipv6_echo_client.py --port=8800
Send data to server: Hello from ipv6 client
('Received from server', "'Hello from ipv6 client'")
The following screenshot indicates the server and client output:
How it works…
The IPv6 echo server first determines its IPv6 information by calling socket.getaddrinfo(). Notice that we passed the AF_UNSPEC protocol for creating a TCP socket. The resulting information is a tuple of five values. We use three of them, address family, socket type, and protocol, to create a server socket. Then, this socket is bound with the socket address from the previous tuple. It then listens to the incoming connections and accepts them. After a connection is made, it receives data from the client and echoes it back.
On the client-side code, we create an IPv6-compliant client socket instance and send the data using the send() method of that instance. When the data is echoed back, the recv() method is used to get it back.
Summary
In this article, the author has tried to explain certain recipes that explains the various IPv6 utilities in Python including an IPv6 client/server. Also some other protocols like ICMP ping and their working is touched upon throroughly. Scapy is explained so as to give a even better understanding about its popularity amongst the network Python programmers.
Resources for Article:
Further resources on this subject:
- Introduction to Network Security [article]
- Getting Started with Cisco UCS and Virtual Networking [article]
- Revisiting Linux Network Basics [article]