
Implement Moodle in your business to streamline your interview, training, and internal communication processes.
The Repository integration allows admins to set up external content management systems and use them to complement Moodle's own file management system. Using this integration you can now manage content outside of Moodle and publish it to the system once the document or other content is ready. The Portfolio integration enables users to store their Moodle content in an external e-portfolio system to share with evaluators, peers, and others.
Managing content in repositories
The repository system of Moodle 2 allows you to store and manipulate content outside of Moodle and easily add it to courses. By managing content outside of Moodle, you can provide users with a more robust editing experience. Many organizations utilize workflows and approval processes to ensure the accuracy of the content used in the LMS. A content repository can help you manage that process, and then make the content available on Moodle when it is ready for final publication.
Using Alfresco to manage content
Alfresco is an open source, enterprise content management system, similar in many ways to Microsoft Sharepoint or EMC's Documentum. Alfresco has seen widespread adoption over the last few years as more people begin to recognize the advantages of open source software. We will start by installing Alfresco, then look at how to link it to Moodle and add content to a Moodle site. At the end of this section, we'll take a look at Alfresco's content conversion services as a tool to ensure content is reliably converted to web friendly formats.
Time for action - installing Alfresco on your test site
To get us started, we'll install Alfresco on our test system to experiment with the integration. Alfresco runs on a different architecture than Moodle. Alfresco requires a Java application server instead of PHP. Fortunately, there are installers available on the Alfresco site that include everything we will need to develop a test system on your local computer.
To install Alfresco, run through the following steps:
- Open your browser and go to http:www.alfresco.com. Go to the Downloads tab and select the Download Now button for Alfresco Document Management in the Community Edition column.
- Select the installer for your operating system and download it to your computer.
- Double-click on the installer (it may take a moment to get started).
- Select your language for the installer.
- Choose the database option you want to use. Use the included database, unless you have a good reason not to.
- When prompted, enter a database password. Be sure to write it down somewhere.
- The next screen will prompt you for an Alfresco admin password. Definitely write this down.
- The final screen will prompt you to choose the packages you want to install. Choose the defaults and click on Next. For the examples below, you will need to make sure that you have the OpenOffice component installed.

- The installer will begin to run. This will probably take a while, so it may be time to go and get a cup of tea.
- Once the installer is complete, select Launch. This will take a while as well, so a second cup of tea might be in order.
- Once Alfresco has launched, you can configure the interface with Moodle.
What just happened
You now have a full-functioning open source enterprise content management system installed on your personal computer. Alfresco has a lot of power for manipulating and sharing documents, but we will only focus on a few features for now. There are a lot of books available to help you learn how to use the more advanced features in Alfresco (a few of them from this publisher as well).
Time for action - add a repository plugin to Moodle
To allow users to access your new Alfresco repository, you will need to configure Moodle to allow access to the repository. The new repository architecture of Moodle 2 enables developers to create plugins to connect Moodle with other systems. Each system will have its own type of plugin to allow a direct connection between Moodle and the system. To enable Moodle to talk to an external repository, we need to enable the plugin and any associated options.
To enable the Alfresco repository plug-in, go through the following steps:
- Login to Moodle as a Moodle admin.
- From the Site administration menu, select Plugins and then Repositories.
- The Manage repositories screen allows you to select from all of the available plugin repositories. For now, we will focus on the Alfresco repository. From the menu in the Active column, select Enabled and visible.The Alfresco plugin allows users in Moodle to add multiple instances of the repository. Most of the time, you will not want to allow users to add additional instances of the repository. As the admin, you can create a single site-wide instance of the repository plugin to allow users to link to Alfresco files. However, if you have more than one Alfresco instance, you can allow multiple users to create additional repositories at either the course level or the user level.
- Click the Save button to save the initial settings. This will return you to the Manage repositories page.
- Click on Settings under the Settings column to the right of the Alfresco repository row.
- This will take you back to the Alfresco settings page, but will provide an additional ability to add a repository instance at the site level.
- Click the Create a repository instance button at the bottom of the page.

Unlock access to the largest independent learning library in Tech for FREE!
Get unlimited access to 7500+ expert-authored eBooks and video courses covering every tech area you can think of.
Renews at $19.99/month. Cancel anytime
- Give the name of your Alfresco instance. If this is an institutional repository, give it the same name as you commonly use. For example, if you commonly refer to your Alfresco instance as the "ECM" (for Enterprise Content Management), name the Alfresco instance ECM.
- Add the URL of your Alfresco site. Be sure to point to the Alfresco Explorer, not the Share application. You will also need to add the API pointer at the end of the string. For example, if you are pointing to the locally installed Alfresco which we described in the preceding case, the URL should be http://127.0.0.1:8080/alfresco/api.
- Click on Save. You will now have an instance of Alfresco available for users to add content to their courses.

If you get the following error: Notice SOAP extension must be enabled for Alfresco plugin, then make sure that the SOAP library is enabled in your php.ini file. The location of the file will vary depending on the system you are using. Find the php.ini file and un-comment the extension=php_soap.dll line. Then restart Moodle and this should solve the error.
What just happened
You have just configured the Alfresco repository plugin to enable Moodle to talk to Alfresco. When you bring up the file picker in a course or at the site level, you should now see the Alfresco repository as an option.
Have a go hero
In the next article, we will configure the Google Docs plugin for Moodle, but there are a number of other plugins. Picasa and Flickr are two photo repositories on the web where many people share their photos. Wikimedia and YouTube are two very popular sources of media as well. Enable one or two of these additional plugins to practice configuring Moodle on your own.
Time for action - adding content to Alfresco
In Moodle 2, repository integrations are read-only. The Moodle design team decided the repository integration should only read from repositories, and the portfolio integration should save content to portfolio repositories. So you can't add content directly to Alfresco with the default plugin. To add content to the repository, we need to use the repository's own interface, then we can add it to Moodle. With Alfresco, that interface is either the Alfresco Explorer or Alfresco Share.
To add content to the repository using Share, run through the following steps:
- Go to your Alfresco share interface, found at http://<your Alfresco server>/share. If your Alfresco is on your local machine with the default install, go to http://127.0.0.1:8080/share.
- Login with your username and password.
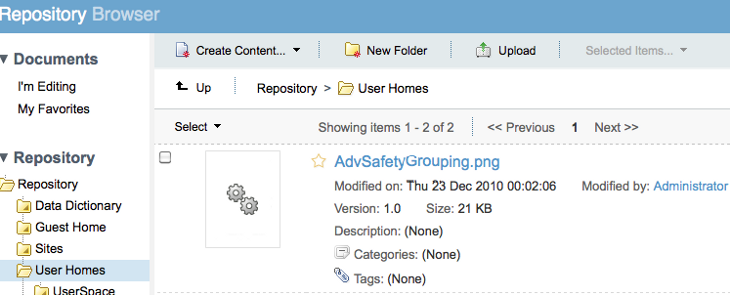
- Select the Repository link from the top of the page. This will display the folder structure for the default Alfresco repository.

- Select User Homes and then select your user space.
- From the menu above the file browser, select Upload.
- Click on the Select file(s) to upload button at the top of the Upload Files screen.
- Browse to find your file and then click on the Upload File(s) button.
- The file you selected should now appear in the file browser.
What just happened
You have now added a file to your Alfresco repository. We've explored a very simple example of adding a single file with no workflow or approval needed. You can use Share to create content, share it with colleagues, and use versioning and other features to manage the content creation process.
Have a go hero
Now that you've added a simple file to Alfresco Share, try some of the other features. Check out a file for editing, change it and check it back in for others to use, or create some content directly in Share.

 United States
 Great Britain
 India
India
 Germany
 France
 Canada
 Russia
 Spain
Spain
 Brazil
 Australia
 Singapore
 Canary Islands
 Hungary
 Ukraine
 Luxembourg
 Estonia
 Lithuania
 South Korea
 Turkey
 Switzerland
 Colombia
 Taiwan
 Chile
Chile
 Norway
 Ecuador
 Indonesia
 New Zealand
 Cyprus
 Denmark
 Finland
 Poland
 Malta
Malta
 Czechia
 Austria
 Sweden
 Italy
Italy
 Egypt
Egypt
 Belgium
 Portugal
 Slovenia
 Ireland
 Romania
 Greece
 Argentina
 Netherlands
 Bulgaria
 Latvia
 South Africa
 Malaysia
 Japan
Japan
 Slovakia
 Philippines
 Mexico
 Thailand


