(For more resources related to this topic, see here.)
Installing Drupal Commerce to an existing Drupal 7 website
There are two approaches to installing Drupal Commerce; this recipe covers installing Drupal Commerce on an existing Drupal 7 website.
Getting started
You will need to download Drupal Commerce from http://drupal.org/project/ commerce. Download the most recent recommended release you see that couples with your Drupal 7 website's core version:

You will also require the following modules to allow Drupal Commerce to function:
How to do it...
Now that you're ready, install Drupal Commerce by performing the following steps:
- Install the modules that Drupal Commerce depends on, first by copying the preceding module files into your Drupal site's modules directory, sites/all/modules.
- Install Drupal Commerce's modules next, by copying the files into the sites/all/ modules directory, so that they appear in the sites/all/modules/commerce directory.
- Enable the newly installed Drupal Commerce module in your Drupal site's administration panel (example.com/admin/modules if you've installed Drupal Commerce at example.com), under the Modules navigation option, by ensuring the checkbox to the left-hand side of the module name is checked.
- Now that Drupal Commerce is installed, a new menu option will appear in the administration navigation at the top of your screen when you are logged in as a user with administration permissions.
You may need to clear the cache to see this. Navigate to Configuration | Development | Performance in the administration panel to do this.

How it works...
Drupal Commerce depends on a number of other Drupal modules to function, and by installing and enabling these in your website's administration panel you're on your way to getting your Drupal Commerce store off the ground.
You can also install the Drupal Commerce modules via Drush (the Drupal Shell) too. For more information on Drush, see http://drupal.org/project/drush.
Installing Drupal Commerce with Commerce Kickstart 2
Drupal Commerce requires quite a number of modules, and doing a basic installation can be quite time-consuming, which is where Commerce Kickstart 2 comes in. It packages Drupal 7 core and all of the necessary modules.
Using Commerce Kickstart 2 is a good idea if you are building a Drupal Commerce website from scratch, and don't already have Drupal core installed.
Getting started
Download Drupal Commerce Kickstart 2 from its drupal.org project page at http://drupal.org/project/commerce kickstart.
How to do it...
Once you have decompressed the Commerce Kickstart 2 files to the location you want to install Drupal Commerce in, perform the following steps:
- Visit the given location in your web browser. For this example, it is assumed that your website is at example.com, so visit this address in your web browser.
- You'll see that you are presented with a welcome screen as shown in the following screenshot:
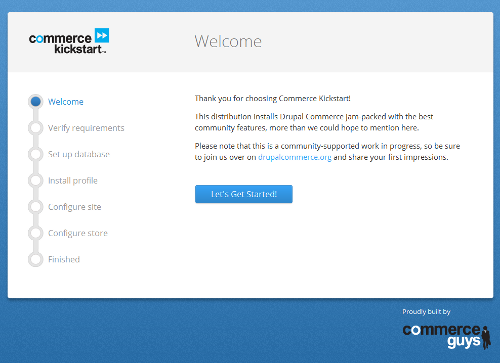
- Click the Let's Get Started button underneath this, and the installer moves to the next configuration option.
- Next, your server's requirements are checked to ensure Drupal can run in this environment.

- In the preceding screenshot you can see some common problems when installing Drupal that prevent installation. In particular, ensure that you create the /sites/ default/files directory in your Drupal installation and ensure it has permissions to allow Drupal to write to it (as this is where your website's images and files are stored).
- You will also need to copy the /sites/default/default.settings.php file to /sites/default/settings.php before you can start. Make sure this file is writeable by Drupal too (you'll secure it after installation is complete).
- Once these problems have been resolved, refresh the page and you will be taken to the Set up database screen. Enter the database username, password, and database name you want to use with Drupal, and click on Save and continue:

- The next step is the Install profile section, which can take some time as Drupal Commerce is installed for you. There's nothing for you to do here; just wait for installation to complete!

- You can now safely remove write permissions for the settings.php file in the /sites/default directory of your Drupal Commerce installation.
- The next step is Configure site. Enter the name of your new store and your e-mail address here, and provide a username and password for your Drupal Commerce administrator account. Don't forget to make a note of these as you'll need them to access your website later!

- Below these options, you can specify the country of your server and the default time zone. These are usually picked up from your server itself, but you may want to change them:

- Click on the Save and continue button to progress now; the next step is Configure store. Here you can set your Default store country field (if it's different from your server settings) and opt to install Drupal Commerce's demo, which includes sample content and a sample Drupal Commerce theme too:

Unlock access to the largest independent learning library in Tech for FREE!
Get unlimited access to 7500+ expert-authored eBooks and video courses covering every tech area you can think of.
Renews at $19.99/month. Cancel anytime
- Further down on this screen, you're presented with more options. By checking the Do you want to be able to translate the interface of your store? field, Drupal Commerce provides you with an ability to translate your website for customers of different languages (for this simple store installation, leave this set to No).
- Finally, you can set the Default store currency field you wish to use, and whether you want Commerce Kickstart to set up a sales tax rule for your store (select which is more appropriate for your store, or leave it set to No sample tax rate for now):

- Click on Create and finish at the bottom of the screen. If you chose to install the demo store in the previous screen, you will have to wait as it is added for you.

- There are now options to allow Drupal to check for updates automatically, and to receive e-mails about security updates. Leave these both checked to help you stay on top of keeping your Drupal website secure and up-to-date.

- Wait as Commerce Kickstart installs everything Drupal Commerce requires to run.
- That's it! Your Drupal Commerce store is now up and running thanks to Commerce Kickstart 2.
How it works...
The Commerce Kickstart package includes Drupal 7 core and the Drupal Commerce module. By packaging these together, installation and initial configuration for your Drupal Commerce store is made much easier!
Creating your first product
Now that you've installed Drupal Commerce, you can start to add products to display to customers and start making money.
In this recipe you will learn how to add a basic product to your Drupal Commerce store.
Getting started
Log in to your Drupal Commerce store's administration panel, and navigate to Products | Add a product:
If you haven't, navigate to Site settings | Modules and ensure that the Commerce Kickstart Menu module is enabled for your store.

Note the sample products from Drupal Kickstart's installation are displaying there.
How to do it...
To get started adding a product to your store, click on the Add product button and follow these steps:
- Click on the Product display. Product displays groups of multiple related product variations together for display on the frontend of your website.
- Fill in the form that appears, entering a suitable Title, using the Body field for the product's description, as well as filling in the SKU (stock keeping unit; a unique reference for this product) and Price fields. Ensure that the Status field is set to Active. You can also optionally upload an image for the product here:

- Optionally, you can assign the product to one of the pre-existing categories in the Product catalog tab underneath these fields, as well as a URL for it in the URL path settings tab:

- Click on the Save product button, and you've now created a basic product in your store.
- To view the product on the frontend of your store, you can navigate to the category listings if you imported Drupal Commerce's demo data, or else you can return to the Products menu and click on the name of the product in the Title column:

- You'll now see your product on the frontend of your Drupal Commerce store:

How it works...
In Drupal Commerce, a product can represent several things, listed as follows:
- A single product for sale (for example, a one-size-fits-all t-shirt)
- A variation of a product (for example, a medium-size t-shirt)
- An item that is not necessarily a purchase as such (for example, it may represent a donation to a charity)
- An intangible product which the site allows reservations for (for example, an event booking)
Product displays (for example, a blue t-shirt) are used to group product variations (for example, a medium-sized blue t-shirt and a large-sized blue t-shirt), and display them on your website to customers.
So, depending on the needs of your Drupal Commerce website, products may be displayed on unique pages, or multiple products might be grouped onto one page as a product display.

 United States
 Great Britain
 India
India
 Germany
 France
 Canada
 Russia
 Spain
Spain
 Brazil
 Australia
 Singapore
 Canary Islands
 Hungary
 Ukraine
 Luxembourg
 Estonia
 Lithuania
 South Korea
 Turkey
 Switzerland
 Colombia
 Taiwan
 Chile
Chile
 Norway
 Ecuador
 Indonesia
 New Zealand
 Cyprus
 Denmark
 Finland
 Poland
 Malta
Malta
 Czechia
 Austria
 Sweden
 Italy
Italy
 Egypt
Egypt
 Belgium
 Portugal
 Slovenia
 Ireland
 Romania
 Greece
 Argentina
 Netherlands
 Bulgaria
 Latvia
 South Africa
 Malaysia
 Japan
Japan
 Slovakia
 Philippines
 Mexico
 Thailand


