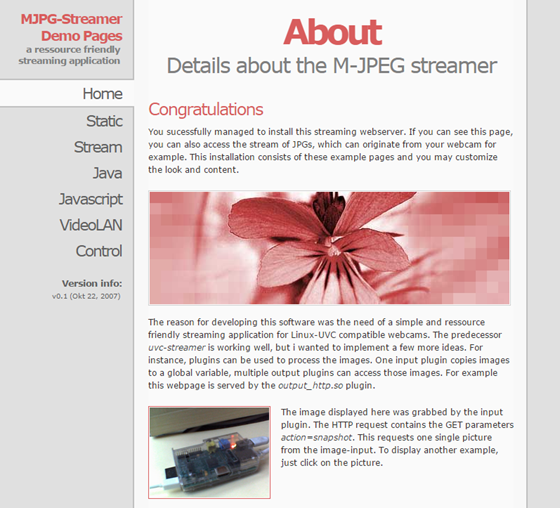
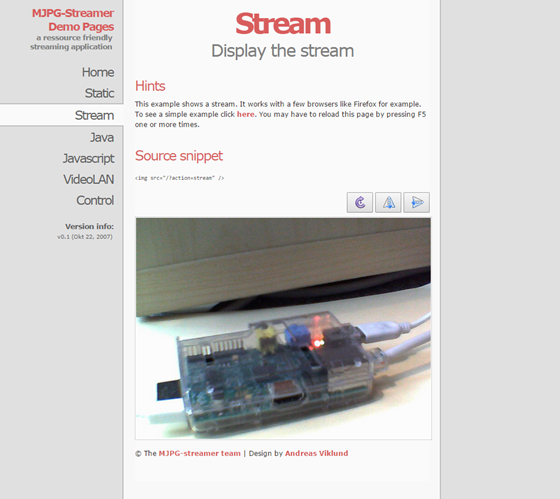
Say you want to build a remote controlled robot or a surveillance camera using your Raspberry Pi. What is the best method of transmitting the live footage to your screen? If only there was a program that could do this in a simple way while not frying your Pi. Fortunately, there is a program called mjpg-streamer to save the day. In its core, it grabs images from one input device and forwards them to one or more output devices. We are going to provide it with the video from our web-camera and feed it into a self-hosted HTTP server that lets us display the images in the browser.

Dependencies
Let’s get started! mjpg-streamer does not come as a standard package and must be compiled manually. But do not let that be the reason for giving up on it. In order to compile mjpg-streamer, we have to install several dependencies.
sudo apt-get update
sudo apt-get upgrade
sudo apt-get install build-essential libjpeg8-dev imagemagick libv4l-dev
Recently the videodev.h file has been replaced by a newer version videodev2.h. In order to fix the path references, just create a quick symbolic link.
sudo ln -s /usr/include/linux/videodev2.h /usr/include/linux/videodev.hDownloading
Now that we have all the dependencies we can download the mjpg-streamer repository. I am using a Github fork by jacksonliam.
git clone [email protected]:jacksonliam/mjpg-streamer.git
cd mjpg-streamer/mjpg-streamer-experimental
Compilation
There is a number of plugins that come with MJPEG-streamer. We are going to only compile these:
- input_file.so – used to provide a file as input
- input_uvc.so – provides input form USB web cameras
- input_raspicam.so – provides input from the raspicam module
- output_http.so – our http streaming output
Feel free to look through the rest of the plugins folder and explore the other inputs/outputs. Just add their names to the command below.
make mjpg_streamer input_file.so input_uvc.so input_raspicam.so output_http.soMoving mjpg-streamer
I recommend moving mjpg-streamer to a more permanent location in your file system. I personally use the /usr/local directory. But feel free to use any other path as long as you adjust any following steps in the setup process.
sudo cp mjpg_streamer /usr/local/bin
sudo cp input_file.so input_uvc.so input_raspicam.so output_http.so /usr/local/lib/
sudo cp -R www /usr/local/www
Finally reference the plugins in your bashrc file. Simply open it with your favorite text editor.
vim ~/.bashrcAnd append the following line to the file:
export LD_LIBRARY_PATH=/usr/local/lib/You can a Now source your bash and you are good to go.
source ~/.bashrcRunning mjpg-streamer
Running mjpg-streamer is very simple. If you have followed all the steps up to now all you have to do is one command.
mjpg_streamer -i input_uvc.so -o "output_http.so -w /usr/local/www"The flags mean the following: * -i – input to mjpg-streamer (our USB camera) * -o output from mjpg-streamer (our HTTP server) * -w a flag to the HTTP server of the location with the HTML and CSS which we moved to /usr/local/www.
There is a vast number of other flags that you can explore. Here I list a few of them.
- -f – framerate in seconds
- -c – protect the HTTP server with a username:password
- -b – run in background
- -p – use another port
Testing the stream
Now that you have your mjpg-streamer running go to http://ip-of-your-raspberry-pi:8080 and watch the live stream.

To just grab the stream, paste the following image tag into your HTML
<img src="http://ip-of-your-raspberry-pi:8080/?action=stream">This should work in most modern browsers. I found there to be a problem with Google Chrome on iOS devices, which is strange because it does work in Safari which is basically identical to Chrome.
Securing the stream
You could leave it at that. However as of now your stream is insecure and anyone with the IP address to your Raspberry Pi can access it. We have talked about the -c flag which can be passed to the output_http.so plugin. However, this does not prevent people eavesdropping on your connection. We need to use HTTPS. The easiest way to secure your mjpg-stream is using a utility called stunnel. Stunnel is a very lightweight HTTPS-proxy. You give it all the keys and certificates and a two ports. stunnel then forwards the traffic from one port to the other while silently encrypting it.
The installation is very simple.
sudo apt-get install stunnel4Next you have to generate an RSA key and certificate. This is very easy with OpenSSL
openssl req -x509 -newkey rsa:2048 -keyout key.pem -out cert.pem -days 720 -nodesJust fill the prompts with your information. This creates a 2048-bit RSA key pair and a self-signed certificate valid for 720 days.
Now create the following configuration file stunnel.conf.
; Paths to your key and certificate you generated in the previous step
key=./key.pem
cert=./cert.pem

debug=7

[https]
clinet=no
accept=1234 ; Secure port
connect=8080 ; mjpg streamer port
sslVersion=all
Now the last thing to do is start stunnel.
sudo stunnel4 stunnel.confGo to https://ip-of-your-raspberry-pi:1234. Confirm that you trust this certificate (it is self-signed so most browsers will complain about the security).
Conclusion
Now you can enjoy a live and secure stream directly from your Raspberry Pi. You can integrate it in your Home security system or on a robot. You can also grab the stream and use OpenCV to implement some cool computer vision ability. I used this on my PiNet Project to build a robot that can be controlled over the internet using a Webcam. I am curious what you can come up with!
About the author
Jakub Mandula is a student interested in anything to do with technology, computers, mathematics or science.


![How to create sales analysis app in Qlik Sense using DAR method [Tutorial] Financial and Technical Data Analysis Graph Showing Search Findings](https://hub.packtpub.com/wp-content/uploads/2018/08/iStock-877278574-218x150.jpg)


![Using Python Automation to interact with network devices [Tutorial] Why choose Ansible for your automation and configuration management needs?](https://hub.packtpub.com/wp-content/uploads/2018/03/Image_584-100x70.png)

