


Meet Grunt, the JavaScript Task Runner. As implied by its name, Grunt is a tool that allows us to automatically run any set of tasks. Grunt can even wait while you code, pick up changes made to your source code files (CSS, HTML, or JavaScript) and then execute a pre-configured set of tasks every time you save your changes. This way, you are no longer required to manually execute a set of commands in order for the changes to take effect.
In this article, we will learn how to optimize responsive web design using Grunt. Read this article about Tips and tricks to optimize your responsive web design before we get started with Grunt.
This article is an excerpt from Mastering Bootstrap 4 – Second Edition by Benjamin Jakobus, and Jason Marah.
Let’s go ahead and install Grunt:
npm install grunt
Before we can start using run with MyPhoto, we need to tell Grunt:
- What tasks to run, that is, what to do with the input (the input being our MyPhoto files) and where to save the output
- What software is to be used to execute the tasks
- How to name the tasks so that we can invoke them when required
With this in mind, we create a new JavaScript file (assuming UTF-8 encoding), called Gruntfile.js, inside our project root. We will also need to create a JSON file, called package.json, inside our project root. Our project folder should have the following structure (note how we created one additional folder, src, and moved our source code and development assets inside it):
src
|__bower_components
|__images
|__js
|__styles
|__index.html
Gruntfile.js
package.json
Open the newly created Gruntfile.js and insert the following function definition:
    module.exports = function(grunt) {
        grunt.initConfig({
            pkg: grunt.file.readJSON("package.json")
        });
    };
As you can see, this is plain, vanilla JavaScript. Anything that we need to make Grunt aware of (such as the Grunt configuration) will go inside the grunt.initConfig function definition. Adding the configuration outside the scope of this function will cause Grunt to ignore it.
Now open package.json and insert the following:
    {
        "name": "MyPhoto",
        "version": "0.1.0",
        "devDependencies": {
        }
    }
The preceding code should be self-explanatory. The name property refers to the project name, version refers to the project’s version, and devDependencies refers to any dependencies that are required (we will be adding to those in a while).
Great, now we are ready to start using Grunt!
Minification and concatenation using Grunt
The first thing that we want Grunt to be able to do is minify our files. Yes, we already have minifier installed, but remember that we want to use Grunt so that we can automatically execute a bunch of tasks (such as minification) in one go. To do so, we will need to install the grunt-contrib-cssmin package (a Grunt package that performs minification and concatenation. Visit https://github.com/gruntjs/grunt-contrib-cssmin for more information.):
npm install grunt-contrib-cssmin --save-dev
Once installed, inspect package.json. Observe how it has been modified to include the newly installed package as a development dependency:
    {
        "name": "MyPhoto",
        "version": "0.1.0",
        "devDependencies": {
            "grunt": "^0.4.5",
            "grunt-contrib-cssmin": "^0.14.0"
        }
    }
We must tell Grunt about the plugin. To do so, insert the following line inside the function definition within our Gruntfile.js:
grunt.loadNpmTasks("grunt-contrib-cssmin");
Our Gruntfile.js should now look as follows:
    module.exports = function(grunt) {
        grunt.initConfig({
            pkg: grunt.file.readJSON("package.json")
        });
        grunt.loadNpmTasks("grunt-contrib-cssmin");
    };
As such, we still cannot do much. The preceding code makes Grunt aware of the grunt-contrib-cssmin package (that is, it tells Grunt to load it). In order to be able to use the package to minify our files, we need to create a Grunt task. We need to call this task cssmin:
 module.exports = function(grunt) {
   grunt.initConfig({
      pkg: grunt.file.readJSON("package.json"),
        "cssmin": {
          "target": {
            "files": {
              "dist/styles/myphoto.min.css": [
                "styles/*.css",
                "!styles/myphoto-hcm.css"
               ]
              }
            }
          }
       });
     grunt.loadNpmTasks("grunt-contrib-cssmin");
   };
Whoa! That’s a lot of code at once. What just happened here? Well, we registered a new task called cssmin. We then specified the target, that is, the input files that Grunt should use for this task. Specifically, we wrote this:
"src/styles/myphoto.min.css": ["src/styles/*.css"]
The name property here is being interpreted as denoting the output, while the value property represents the input. Therefore, in essence, we are saying something along the lines of “In order to produce myphoto.min.css, use the files a11yhcm.css, alert.css, carousel.css, and myphoto.css“.
Go ahead and run the Grunt task by typing as follows:
grunt cssmin
Upon completion, you should see output along the lines of the following:

The first line indicates that a new output file (myphoto.min.css) has been created and that it is 3.25 kB in size (down from the original 4.99 kB). The second line is self-explanatory, that is, the task executed successfully without any errors.
Now that you know how to use grunt-contrib-cssmin, go ahead and take a look at the documentation for some nice extras!
Running tasks automatically
Now that we know how to configure and use Grunt to minify our style sheets, let’s turn our attention to task automation, that is, how we can execute our Grunt minification task automatically as soon as we make changes to our source files. To this end, we will learn about a second Grunt package, called grunt-contrib-watch (https://github.com/gruntjs/grunt-contrib-watch). As with contrib-css-min, this package can be installed using npm:
npm install grunt-contrib-watch --save-dev
Open package.json and verify that grunt-contrib-watch has been added as a dependency:
    {
        "name": "MyPhoto",
        "version": "0.1.0",
        "devDependencies": {
            "grunt": "^0.4.5",
            "grunt-contrib-cssmin": "^0.14.0",
            "grunt-contrib-watch": "^0.6.1"
        }
    }
Next, tell Grunt about our new package by adding grunt.loadNpmTasks('grunt-contrib-watch'); to Gruntfile.js. Furthermore, we need to define the watch task by adding a new empty property called watch:
 module.exports = function(grunt) {
   grunt.initConfig({
      pkg: grunt.file.readJSON("package.json"),
        "cssmin": {
           "target":{
              "files": {
                 "src/styles/myphoto.min.css":
                 ["src/styles/*.css", "src/styles!*.min.css"]
               }
             }
           },
         "watch": {
        }
     });
      grunt.loadNpmTasks("grunt-contrib-cssmin");
      grunt.loadNpmTasks("grunt-contrib-watch");
  };
Now that Grunt loads our newly installed watch package, we can execute the grunt watch command. However, as we have not yet configured the task, Grunt will terminate with the following:

The first thing that we need to do is tell our watch task what files to actually "watch". We do this by setting the files property, just as we did with grunt-contrib-cssmin:
    "watch": {
        "target": {
            "files": ["src/styles/myphoto.css"],
        }
    }
This tells the watch task to use the myphoto.css located within our src/styles folder as input (it will only watch for changes made to myphoto.css). Even better, we can watch all files:
"watch": {
    "target": {
        "files": [ "styles/*.css", "!styles/myphoto-hcm.css" ],
    }
}
Go ahead and execute grunt watch again. Unlike the first time that we ran the command, the task should not terminate now. Instead, it should halt with the Waiting… message. Go ahead and make a trivial change (such as removing a white space) to our myphoto.css file.
Then, save this change. Note what the terminal output is now:

Great! Our watch task is now successfully listening for file changes made to any style sheet within src/styles. The next step is to put this achievement to good use, that is, we need to get our watch task to execute the minification task that we created in the previous section. To do so, simply add the tasks property to our target:
      "watch": {
          "target": {
            "files": [
              "styles/*.css",
              "!styles/myphoto-hcm.css"
            ],
            "tasks": ["cssmin"]
          }
        }
Once again, run grunt watch. This time, make a visible change to our myphoto.css style sheet. For example, you can add an obvious rule such as body {background-color: red;}. Observe how, as you save your changes, our watch task now runs our cssmin task:

Refresh the page in your browser and observe the changes. Voilà! We now no longer need to run our minifier manually every time we change our style sheet.
Stripping our website of unused CSS
Dead code is never good. As such, whatever the project that you are working on maybe, you should always strive to eliminate code that is no longer in use, as early as possible. This is especially important when developing websites, as unused code will inevitably be transferred to the client and hence result in additional, unnecessary bytes being transferred (although maintainability is also a major concern).
Programmers are not perfect, and we all make mistakes. As such, unused code or style rules are bound to slip past us during development and testing. Consequently, it would be nice if we could establish a safeguard to ensure that at least no unused style makes it past us into production. This is where grunt-uncss fits in. Visit https://github.com/addyosmani/grunt-uncss for more.
UnCSS strips any unused CSS from our style sheet. When configured properly, it can, therefore, be very useful to ensure that our production-ready website is as small as possible. Let’s go ahead and install UnCSS:
npm install grunt-uncss -save-dev
Once installed, we need to tell Grunt about our plugin. Just as in the previous subsections, update the Gruntfile.js by adding the grunt.loadNpmTasks('grunt-uncss'); line to our Grunt configuration. Next, go ahead and define the uncss task:
"uncss": {
  "target": {
     "files": {
       "src/styles/output.css": ["src/index.html"]
      }
   }
},
In the preceding code, we specified a target consisting of the index.html file. This index.html will be parsed by Uncss. The class and id names used within it will be compared to those appearing in our style sheets. Should our style sheets contain selectors that are unused, then those are removed from the output. The output itself will be written to src/styles/output.css.
Let’s go ahead and test this. Add a new style to our myphoto.css that will not be used anywhere within our index.html. Consider this example:
    #foobar {
        color: red;
    }
Save and then run this:
grunt uncss
Upon successful execution, the terminal should display output along the lines of this:
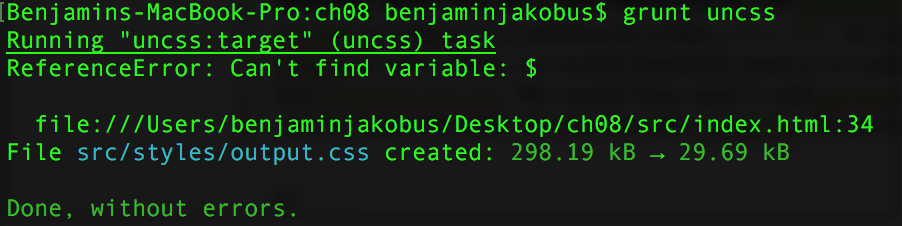
Go ahead and open the generated output.css file. The file will contain a concatenation of all of our CSS files (including Bootstrap). Go ahead and search for #foobar. Find it? That’s because UnCSS detected that it was no longer in use and removed it for us.
Now, we successfully configured a Grunt task to strip our website of the unused CSS. However, we need to run this task manually. Would it not be nice if we could configure the task to run with the other watch tasks? If we were to do this, the first thing that we would need to ask ourselves is how do we combine the CSS minification task with UnCSS? After all, grunt watch would run one before the other. As such, we would be required to use the output of one task as input for the other. So how would we go about doing this?
Well, we know that our cssmin task writes its output to myphoto.min.css. We also know that index.html references myphoto.min.css. Furthermore, we also know uncss receives its input by checking the style sheets referenced in index.html. Therefore, we know that the output produced by our cssmin task is sure to be used by our uncss as long as it is referenced within index.html.
In order for the output produced by uncss to take effect, we will need to reconfigure the task to write its output into myphoto.min.css. We will then need to add uncss to our list of watch tasks, taking care to insert the task into the list after cssmin. However, this leads to a problem—running uncss after cssmin will produce an un-minified style sheet. Furthermore, it also requires the presence of myphoto.min.css. However, as myphoto.min.css is actually produced by cssmin, the sheet will not be present when running the task for the first time. Therefore, we need a different approach. We will need to use the original myphoto.css as input to uncss, which then writes its output into a file called myphoto.min.css.
Our cssmin task then uses this file as input, minifying it as discussed earlier. Since uncss parses the style sheet references in index.html, we will need to first revert our index.html to reference our development style sheet, myphoto.css. Go ahead and do just that. Replace the <link rel="stylesheet" href="styles/myphoto.min.css" /> line with <link rel="stylesheet" href="styles/myphoto.css" />.
Processing HTML
For the minified changes to take effect, we now need a tool that replaces our style sheet references with our production-ready style sheets. Meet grunt-processhtml. Visit https://www.npmjs.com/package/grunt-processhtml for more.
Go ahead and install it using the following command:
npm install grunt-processhtml --save-dev
Add grunt.loadNpmTasks('grunt-processhtml'); to our Gruntfile.js to enable our freshly installed tool.
While grunt-processhtml is very powerful, we will only cover how to replace style sheet references. Therefore, we recommend that you read the tool’s documentation to discover further features.
In order to replace our style sheets with myphoto.min.css, we wrap them inside special grunt-processhtml comments:
    <!-- build:css styles/myphoto.min.css -->
        <link rel="stylesheet" href="bower_components/bootstrap/
        dist/css/bootstrap.min.css" />
        <link href='https://fonts.googleapis.com/css?family=Poiret+One'
        rel='stylesheet' type='text/css'>
        <link href='http://fonts.googleapis.com/css?family=Lato&
        subset=latin,latin-ext' rel='stylesheet' type='text/css'>
        <link rel="stylesheet" href="bower_components/Hover/css/
        hover-min.css" />
        <link rel="stylesheet" href="styles/myphoto.css" />
        <link rel="stylesheet" href="styles/alert.css" />
        <link rel="stylesheet" href="styles/carousel.css" />
        <link rel="stylesheet" href="styles/a11yhcm.css" />
        <link rel="stylesheet" href="bower_components/components-
        font-awesome/css/font-awesome.min.css" />
        <link rel="stylesheet" href="bower_components/lightbox-for
        -bootstrap/css/bootstrap.lightbox.css" />
        <link rel="stylesheet" href="bower_components/DataTables/
        media/css/dataTables.bootstrap.min.css" />
        <link rel="stylesheet" href="resources/animate/animate.min.css"
        />
    <!-- /build -->
Note how we reference the style sheet that is meant to replace the style sheets contained within the special comments on the first line, inside the comment:
<!-- build:css styles/myphoto.min.css -->
Last but not least, add the following task:
"processhtml": {
  "dist": {
    "files": {
      "dist/index.html": ["src/index.html"]
     }
   }
},
Note how the output of our processhtml task will be written to dist. Test the newly configured task through the grunt processhtml command.
The task should execute without errors:

Open dist/index.html and observe how, instead of the 12 link tags, we only have one:
<link rel="stylesheet" href="styles/myphoto.min.css">
Next, we need to reconfigure our uncss task to write its output to myphoto.min.css. To do so, simply replace the 'src/styles/output.css' output path with 'dist/styles/myphoto.min.css' inside our Gruntfile.js (note how myphoto.min.css will now be written to dist/styles as opposed to src/styles). We then need to add uncss to our list of watch tasks, taking care to insert the task into the list after cssmin:
"watch": {
  "target": {
     "files": ["src/styles/myphoto.css"],
     "tasks": ["uncss", "cssmin", "processhtml"],
     "options": {
    "livereload": true
   }
  }
}
Next, we need to configure our cssmin task to use myphoto.min.css as input:
 "cssmin": {
     "target": {
         "files": {
             "dist/styles/myphoto.min.css":
             ["src/styles/myphoto.min.css"]
         }
     }
 },
Note how we removed src/styles/*.min.css, which would have prevented cssmin from reading files ending with the min.css extension.
Running grunt watch and making a change to our myphoto.css file should now trigger the uncss task and then the cssmin task, resulting in console output indicating the successful execution of all tasks. This means that the console output should indicate that first uncss, cssmin, and then processhtml were successfully executed. Go ahead and check myphoto.min.css inside the dist folder. You should see how the following things were done:
- The CSS file contains an aggregation of all of our style sheets
- The CSS file is minified
- The CSS file contains no unused style rules
However, you will also note that the dist folder contains none of our assets—neither images nor Bower components, nor our custom JavaScript files. As such, you will be forced to copy any assets manually. Of course, this is less than ideal. So let’s see how we can copy our assets to our dist folder automatically.
The dangers of using UnCSS
UnCSS may cause you to lose styles that are applied dynamically. As such, care should be taken when using this tool. Take a closer look at the MyPhoto style sheet and see whether you spot any issues. You should note that our style rules for overriding the background color of our navigation pills were removed. One potential fix for this is to write a dedicated class for gray nav-pills (as opposed to overriding them with the Bootstrap classes).
Deploying assets
To copy our assets from src into dist, we will use grunt-contrib-copy. Visit https://github.com/gruntjs/grunt-contrib-copy for more on this. Go ahead and install it:
npm install grunt-contrib-copy -save-dev
Once installed, enable it by adding grunt.loadNpmTasks('grunt-contrib-copy'); to our Gruntfile.js. Then, configure the copy task:
    "copy": {
        "target": {
            "files": [
                {
                    "cwd": "src/images",
                    "src": ["*"],
                    "dest": "dist/images/",
                    "expand": true
                },
                {
                    "cwd": "src/bower_components",
                    "src": ["*"],
                    "dest": "dist/bower_components/",
                    "expand": true
                },
                {
                    "cwd": "src/js",
                    "src": ["**/*"],
                    "dest": "dist/js/",
                    "expand": true
                },
             ]
        }
    },
The preceding configuration should be self-explanatory. We are specifying a list of copy operations to perform: src indicates the source and dest indicates the destination. The cwd variable indicates the current working directory. Note how, instead of a wildcard expression, we can also match a certain src pattern. For example, to only copy minified JS files, we can write this:
"src": ["*.min.js"]
Take a look at the following screenshot:

Update the watch task:
"watch": {
   "target": {
       'files": ['src/styles/myphoto.css"],
        "tasks": ["uncss", "cssmin", "processhtml", "copy"]
        }
    },
Test the changes by running grunt watch. All tasks should execute successfully. The last task that was executed should be the copy task.
Stripping CSS comments
Another common source for unnecessary bytes is comments. While needed during development, they serve no practical purpose in production. As such, we can configure our cssmin task to strip our CSS files of any comments by simply creating an options property and setting its nested keepSpecialComments property to 0:
 "cssmin": {
    "target":{
       "options": {
          "keepSpecialComments": 0
        },
           "files": {
           "dist/src/styles/myphoto.min.css": ["src/styles
           /myphoto.min.css"]
       }
   }
},
We saw how to use the build tool Grunt to automate the more common and mundane optimization tasks.
To build responsive, dynamic, and mobile-first applications on the web with Bootstrap 4, check out this book Mastering Bootstrap 4 – Second Edition.
Read Next:
Get ready for Bootstrap v4.1; Web developers to strap up their boots
How to use Bootstrap grid system for responsive website design?


