Configure LiveCode so that it knows where to look for the Android SDK
Become an iOS developer with Apple
Download and install Xcode
Configure LiveCode so that it knows where to look for iOS SDKs
Set up simulators and physical devices
Test a stack in a simulator and physical device
(For more resources related to this topic, see here.)
Disclaimer
This article references many Internet pages that are not under our control. Here, we do show screenshots or URLs, so remember that the content may have changed since we wrote this. The suppliers may also have changed some of the details, but in general, our description of procedures should still work the way we have described them.
Here we go...
iOS, Android, or both?
It could be that you only have interest in iOS or Android. You should be able to easily skip to the sections you're interested in unless you're intrigued about how the other half works! If, like me, you're a capitalist, then you should be interested in both the operating systems.
Far fewer steps are needed to get the Android SDK than the iOS developer tools because for iOS, we have to sign up as a developer with Apple. However, the configuration for Android is more involved. We'll go through all the steps for Android and then the ones for iOS. If you're an iOS-only kind of person, skip the next few pages and start up again at the Becoming an iOS Developer section.
Becoming an Android developer
It is possible to develop Android OS apps without signing up for anything. We'll try to be optimistic and assume that within the next 12 months, you will find time to make an awesome app that will make you rich! To that end, we'll go over everything that is involved in the process of signing up to publish your apps in both Google Play (formally known as Android Market) and Amazon Appstore.
We will come back to this page again, shortly to download the Android SDK, but for now, click on the Distribute link in the menu bar and then on the Developer Console button on the following screen. Since Google changes these pages occasionally, you can use the URL https://play.google.com/apps/publish/ or search for "Google Play Developer Console". The screens you will progress through are not shown here since they tend to change with time.
There will be a sign-in page; sign in using your usual Google details.
Which e-mail address to use?
Some Google services are easier to sign up for if you have a Gmail account. Creating a Google+ account, or signing up for some of their cloud services, requires a Gmail address (or so it seemed to me at the time!). If you have previously set up Google Wallet as part of your account, some of the steps in signing up become simpler. So, use your Gmail address and if you don't have one, create one!
Google charges you a $25 fee to sign up for Google Play. At least now, you know about this! Enter the developer name, e-mail address, website URL (if you have one), and your phone number. The payment of $25 will be done through Google Wallet, which will save you from entering the billing details yet again.
Now, you're all signed up and ready to make your fortune!
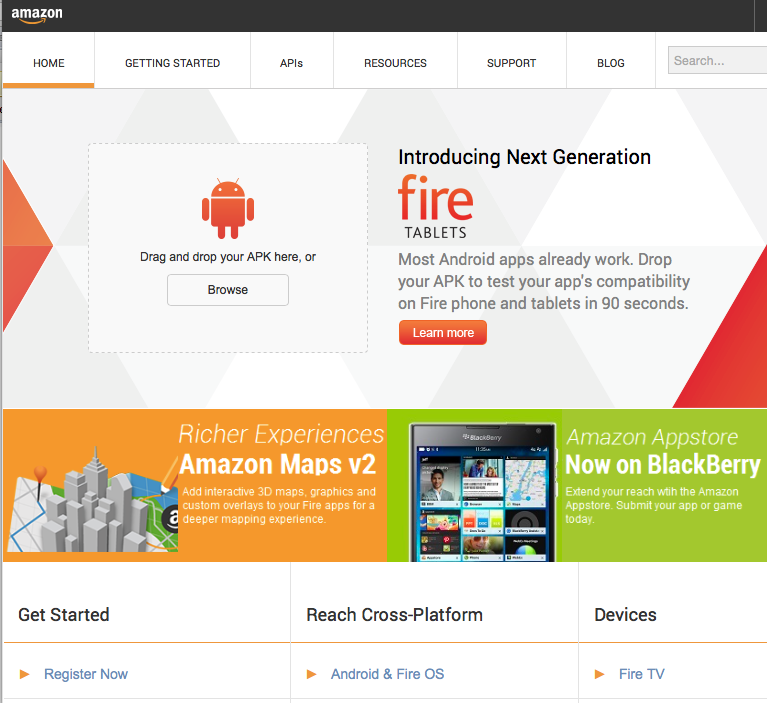
Amazon Appstore
Although the rules and costs for Google Play are fairly relaxed, Amazon has a more Apple-like approach, both in the amount they charge you to register and in the review process to accept app submissions. The URL to open Amazon Appstore is http://developer.amazon.com/public:
Follow these steps to start with Amazon Appstore:
When you select Get Started, you need to sign in to your Amazon account.
Which email address to use?
This feels like déjà vu! There is no real advantage of using your Google e-mail address when signing up for the Amazon Appstore Developer Program, but if you happen to have an account with Amazon, sign in with that one. It will simplify the payment stage, and your developer account and the general Amazon account will be associated with each other.
You are then asked to agree to the Appstore Distribution Agreement terms before learning about the costs.
These costs are $99 per year, but the first year is free. So that's good!
Unlike the Google Android Market, Amazon asks for your bank details up front, ready to send you lots of money later, we hope!
That's it, you're ready to make another fortune to go along with the one that Google sent you!
Pop quiz – when is something too much?
You're at the end of developing your mega app, it's 49.5 MB in size, and you just need to add title screen music. Why would you not add the two-minute epic tune you have lined up?
It would take too long to load.
People tend to skip the title screen soon anyway.
The file size is going to be over 50 MB.
Heavy metal might not be appropriate for a children's storybook app!
Answer: 3
The other answers are valid too, though you could play the music as an external sound to reduce loading time, but if your file size goes over 50 MB, you would then cut out potential sales from people who are connected by cellular and not wireless networks. At the time of writing this aticle, all the stores require that you be connected to the site via a wireless network if you intend to download apps that are over 50 MB.
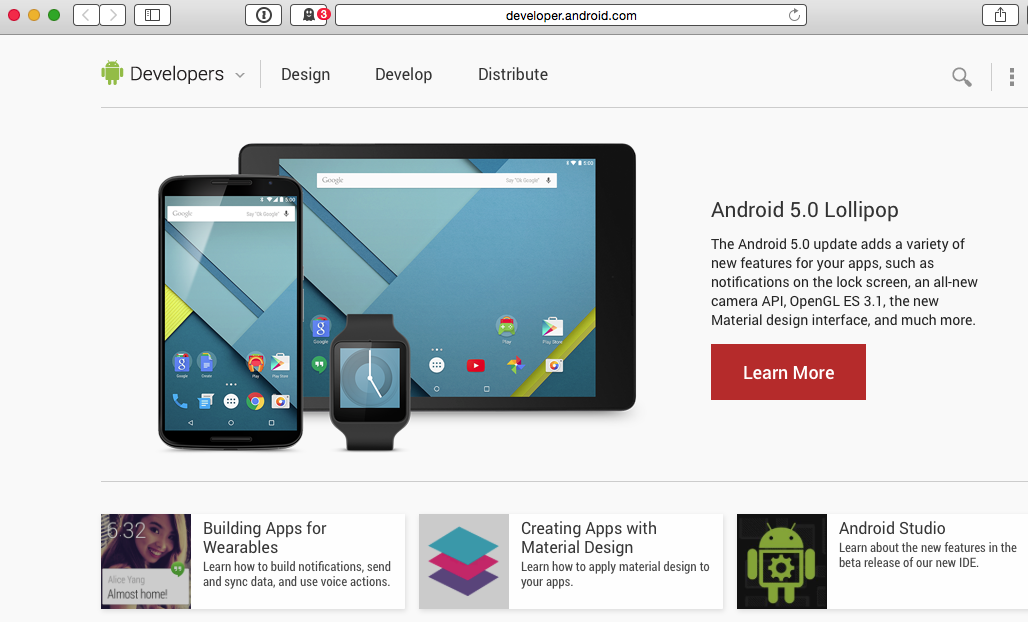
Downloading the Android SDK
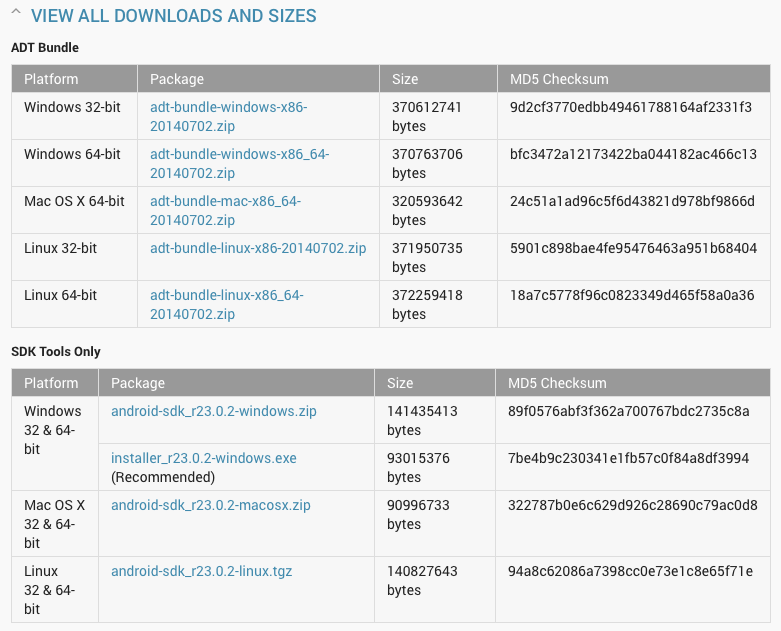
Head back to http://developer.android.com/ and click on the Get the SDK link or go straight to http://developer.android.com/sdk/index.html. This link defaults to the OS that you are running on. Click on the Other Download Options link to see the full set of options for other systems, as shown here:
In this article, we're only going to cover Windows and Mac OS X (Intel) and only as much as is needed to make LiveCode work with the Android and iOS SDKs. If you intend to make native Java-based applications, you may be interested in reading through all the steps that are described in the web page http://developer.android.com/sdk/installing.html.
Click on the SDK download link for your platform. Note that you don't need the ADT Bundle unless you plan to develop outside the LiveCode IDE. The steps you'll have to go through are different for Mac and Windows. Let's start with Mac.
Installing the Android SDK on Mac OS X (Intel)
LiveCode itself doesn't require Intel Mac; you can develop stacks using a PowerPC-based Mac, but both the Android SDK and some of the iOS tools require an Intel-based Mac, which sadly means that if you're reading this as you sit next to your Mac G4 or G5, you're not going to get too far!
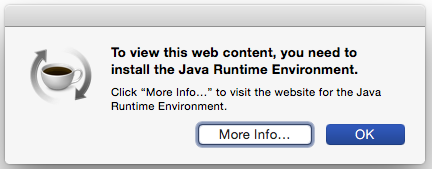
The Android SDK requires the Java Runtime Environment (JRE). Since Apple stopped including the JRE in more recent OS X systems, you should check whether you have it in your system by typing java –version in a Terminal window. The terminal will display the version of Java installed. If not, you may get a message like the following:
Click on the More Info button and follow the instructions to install the JRE and verify its installation. At the time of writing this article, JRE 8 doesn't work with OS X 10.10 and I had to use the JRE 6 obtained from http://support.apple.com/kb/DL1572.
The file that you just downloaded will automatically expand to show a folder named android-sdk-macosx. It may be in your downloads folder right now, but a more natural place for it would be in your Documents folder, so move it there before performing the next steps.
There is an SDK readme text file that lists the steps you need to follow during the installation. If these steps are different to what we have here, then follow the steps in the readme file in case they have been updated since the procedure here was written.
Open the Terminal application, which is in Applications/Utilities. You need to change the default directories present in the android-sdk-macosx folder. One handy trick, using Terminal, is that you can drag items into the Terminal window to get the file path to that item. Using this trick, you can type cd and a space in the Terminal window and then drag the android-sdk-macosx folder after the space character. You'll end up with this line if your username is Fred:
new-host-3:~ fred$ cd /Users/fred/Documents/android-sdk-macosx
Of course, the first part of the line and the user folder will match yours, not Fred's!
Whatever your name is, press the Return or Enter key after entering the preceding line. The location line now changes to look like this:
new-host-3:android-sdk-macosx colin$
Either carefully type or copy and paste the following line from the readme file:
tools/android update sdk --no-ui
Press Return or Enter again. How long the file takes to get downloaded depends on your Internet connection. Even with a very fast Internet connection, it could still take over an hour.
If you care to follow the update progress, you can just run the android file in the tools directory. This will open the Android SDK Manager, which is similar to the Windows version shown a couple of pages further on in this article.
Installing the Android SDK on Windows
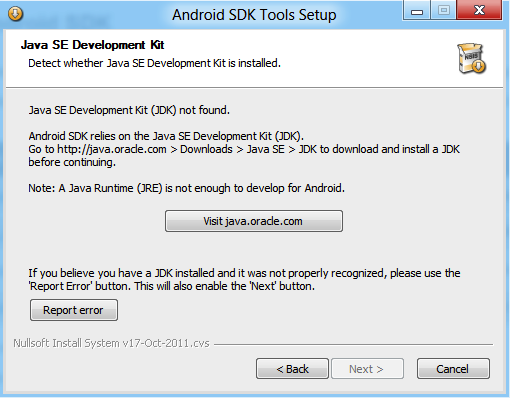
The downloads page recommends that you use the .exe download link, as it gives extra services to you, such as checking whether you have the Java Development Kit (JDK) installed. When you click on the link, either use the Run or Save options, as you would with any download of a Windows installer. Here, we've opted to use Run; if you use Save, then you need to open the file after it has been saved to your hard drive. In the following case, as the JDK wasn't installed, a dialog box appears saying go to Oracle's site to get the JDK:
If you see this screen too, you can leave the dialog box open and click on the Visit java.oracle.com button. On the Oracle page, click on a checkbox to agree to their terms and then on the download link that corresponds with your platform. Choose the 64-bit option if you are running a 64-bit version of Windows or the x86 option if you are running a 32-bit version of Windows.
Either way, you're greeted with another installer that you can Run or Save as you prefer. Naturally, it takes a while for the installer to do its thing too! When the installation is complete, you will see a JDK registration page and it's up to you, to register or not.
Back at the Android SDK installer dialog box, you can click on the Back button and then the Next button to get back to the JDK checking stage; only now, it sees that you have the JDK installed. Complete the remaining steps of the SDK installer as you would with any Windows installer.
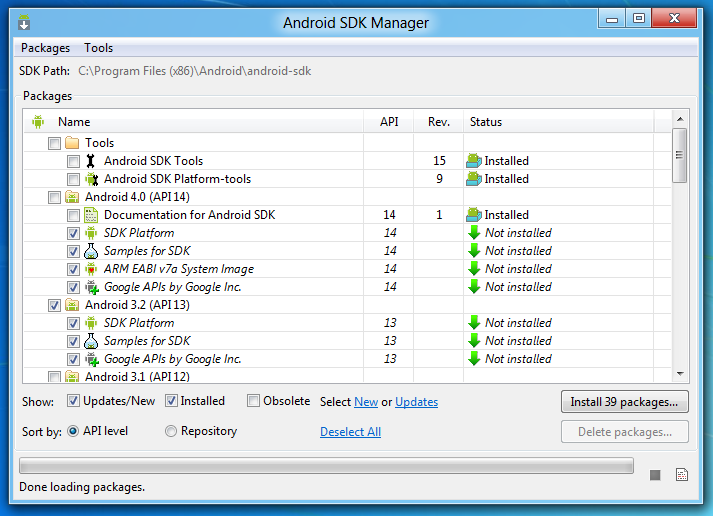
One important thing to note is that the last screen of the installer offers to open the SDK Manager. You should do that, so resist the temptation to uncheck that box!
Click on Finish and you'll be greeted with a command-line window for a few moments, as shown in the following screenshot, and then, the Android SDK Manager will appear and do its thing:
As with the Mac version, it takes a very long time for all these add-ons to download.
Pointing LiveCode to the Android SDK
After all the installation and command-line work, it's a refreshing change to get back to LiveCode!
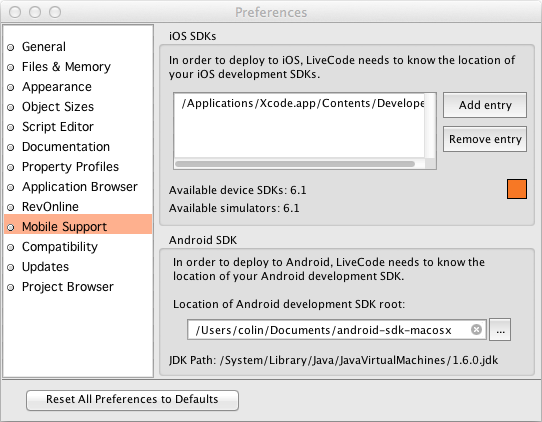
Open the LiveCode Preferences and choose Mobile Support:
We will set the two iOS entries after we get iOS going (but these options will be grayed out in Windows). For now, click on the … button next to the Android development SDK root field and navigate to where the SDK is installed. If you've followed the earlier steps correctly, then the SDK will be in the Documents folder on Mac or you can navigate to C:Program Files (x86)Android to find it on Windows (or somewhere else, if you choose to use a custom location).
Depending on the APIs that were loaded in the SDK Manager, you may get a message that the path does not include support for Android 2.2 (API 8). If so, use the Android SDK Manager to install it. LiveCode seems to want API 8 even though at this time Android 5.0 uses API 21.
Phew! Now, let's do the same for iOS…
Pop quiz – tasty code names
An Android OS uses some curious code names for each version. At the time of writing this article, we were on Android OS 5, which had a code name of Lollipop. Version 4.1 was Jelly Bean and version 4.4 was KitKat. Which of these is most likely to be the code name for the next Android OS?
Lemon Cheesecake
Munchies
Noodle
Marshmallow
Answer: 4
The pattern, if it isn't obvious, is that the code name takes on the next letter of the alphabet, is a kind of food, but more specifically, it's a dessert. "Munchies" almost works for Android OS 6, but "Marshmallow" or "Meringue Pie" would be a better choices!
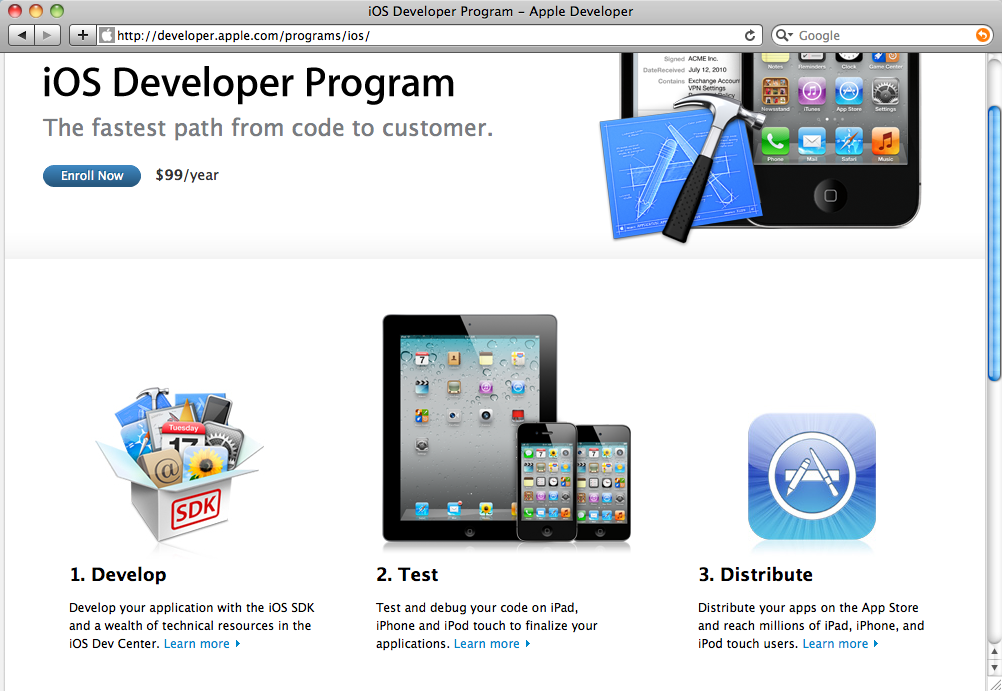
Becoming an iOS developer
Creating iOS LiveCode applications requires that LiveCode must have access to the iOS SDK. This is installed as part of the Xcode developer tools and is a Mac-only program. Also, when you upload an app to the iOS App Store, the application used is Mac only and is part of the Xcode installation. If you are a Windows-based developer and wish to develop and publish for iOS, you need either an actual Mac based system or a virtual machine that can run the Mac OS. We can even use VirtualBox for running a Mac based virtual machine, but performance will be an issue. Refer to http://apple.stackexchange.com/questions/63147/is-mac-os-x-in-a-virtualbox-vm-suitable-for-ios-development for more information.
The biggest difference between becoming an Android developer and becoming an iOS developer is that you have to sign up with Apple for their developer program even if you never produce an app for the iOS App Store, but no such signing up is required when becoming an Android developer. If things go well and you end up making an app for various stores, then this isn't such a big deal. It will cost you $25 to submit an app to the Android Market, $99 a year (with the first year free) to submit an app to the Amazon Appstore, and $99 a year (including the first year) to be an iOS developer with Apple. Just try to sell more than 300 copies of your amazing $0.99 app and you'll find that it has paid for itself!
Note that there is a free iOS App Store and app licensing included, with LiveCode Membership, which also costs $99 per year. As a LiveCode member, you can submit your free non-commercial app to RunRev who will provide a license that will allow you to submit your app as "closed source" to iOS App Store. This service is exclusively available for LiveCode members. The first submission each year is free; after that, there is a $25 administration fee per submission. Refer to http://livecode.com/membership/ for more information.
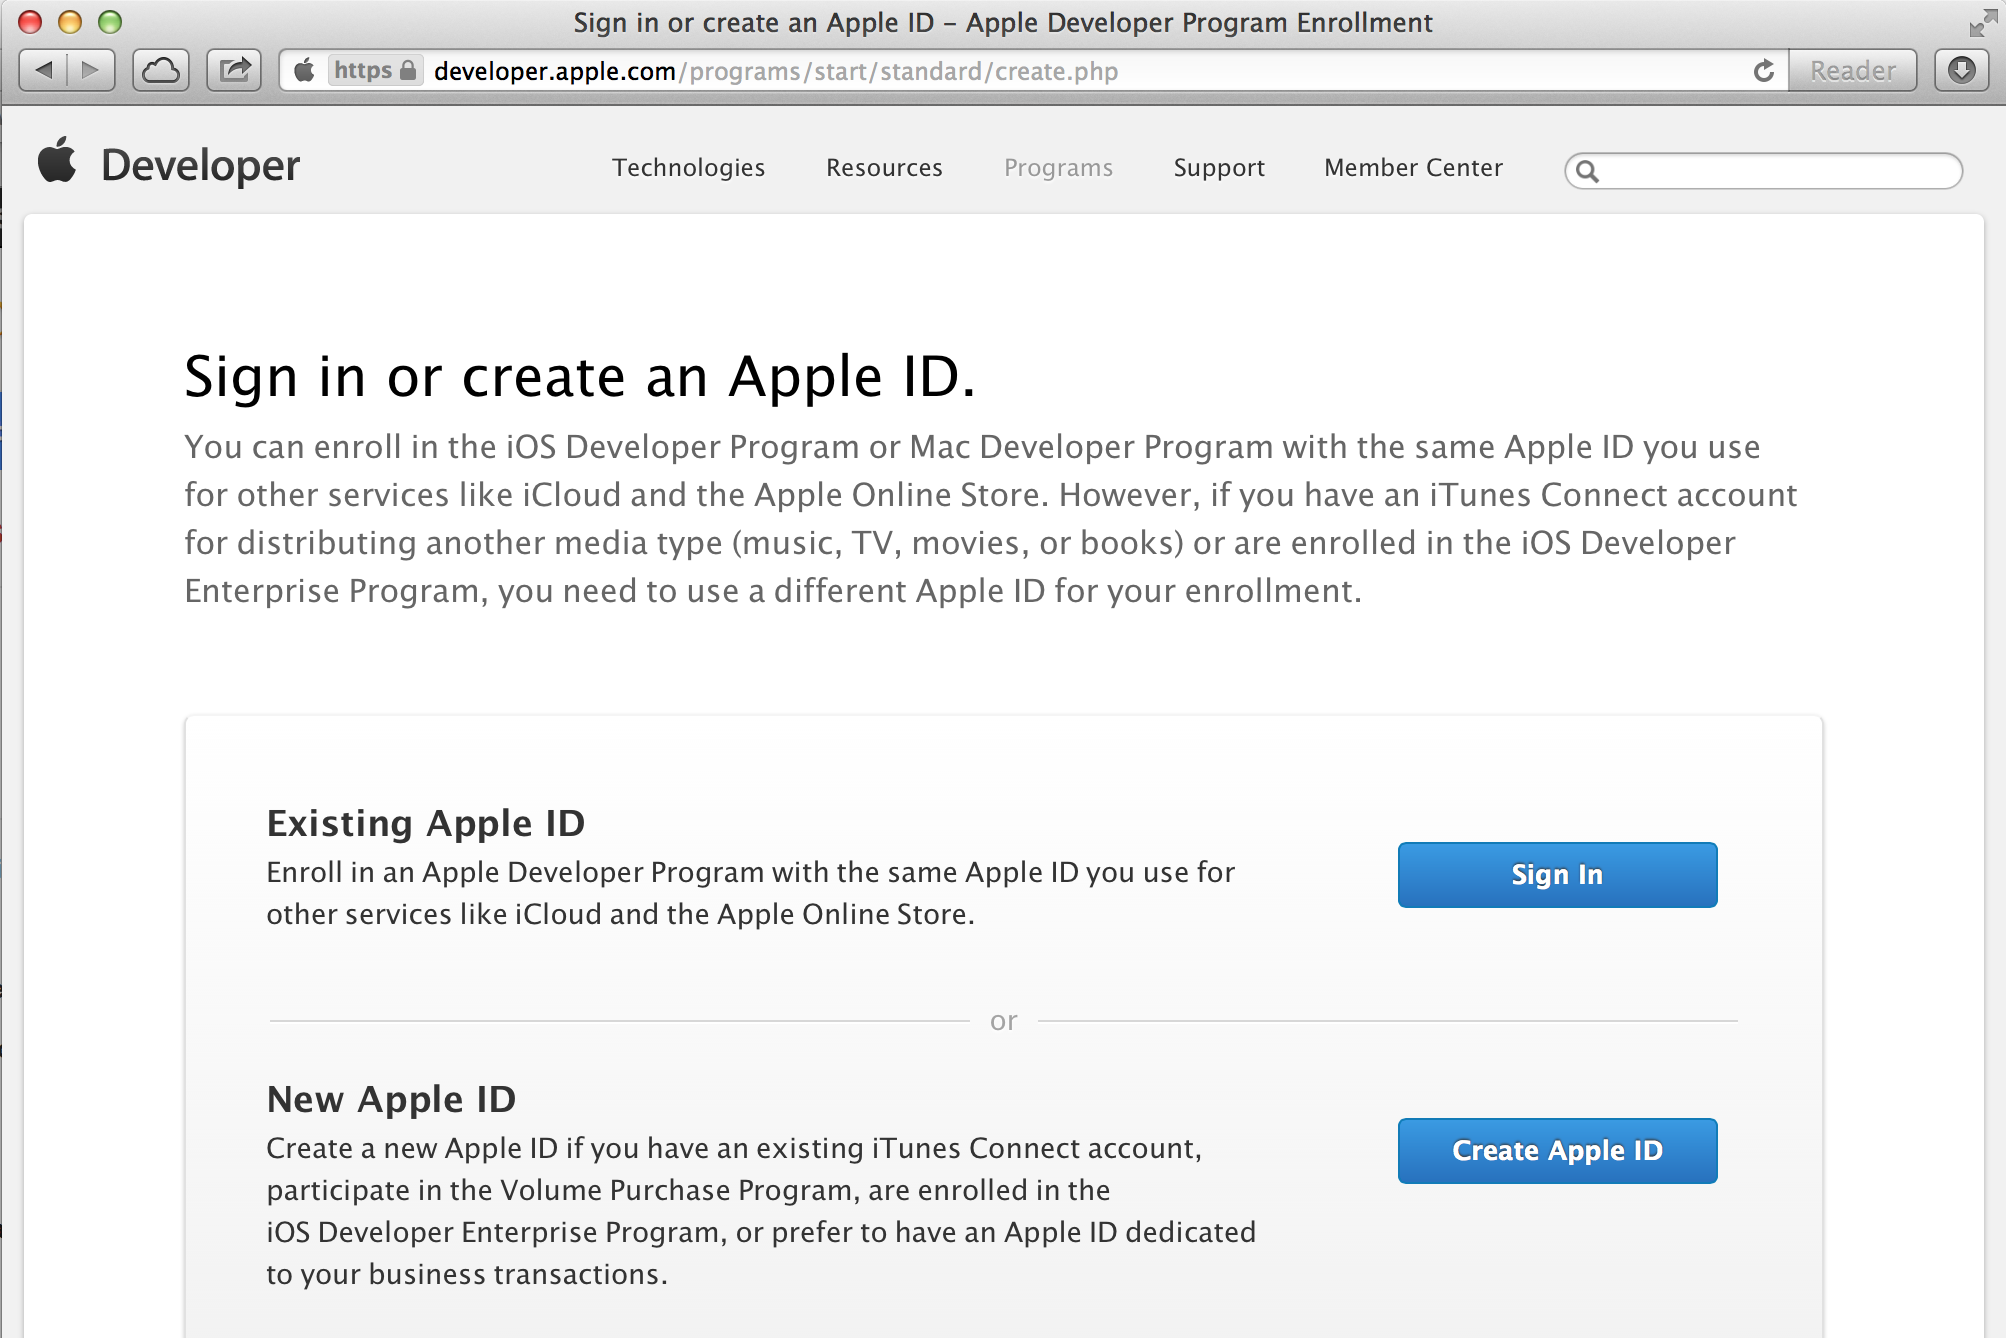
While signing up to be an iOS developer, there are a number of possibilities when it comes to your current status. If you already have an Apple ID, which you use with your iTunes or Apple online store purchases, you could choose the I already have an Apple ID… option. In order to illustrate all the steps to sign up, we will start as a brand new user, as shown in the following screenshot:
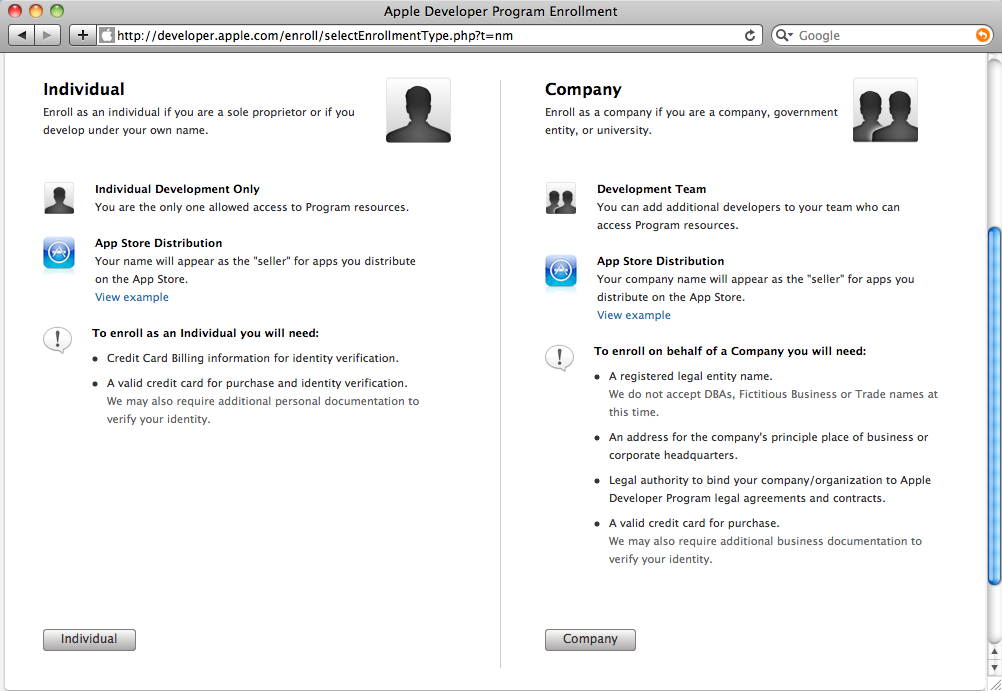
You can choose whether you want to sign up as an individual or as a company. We will choose Individual, as shown in the following screenshot:
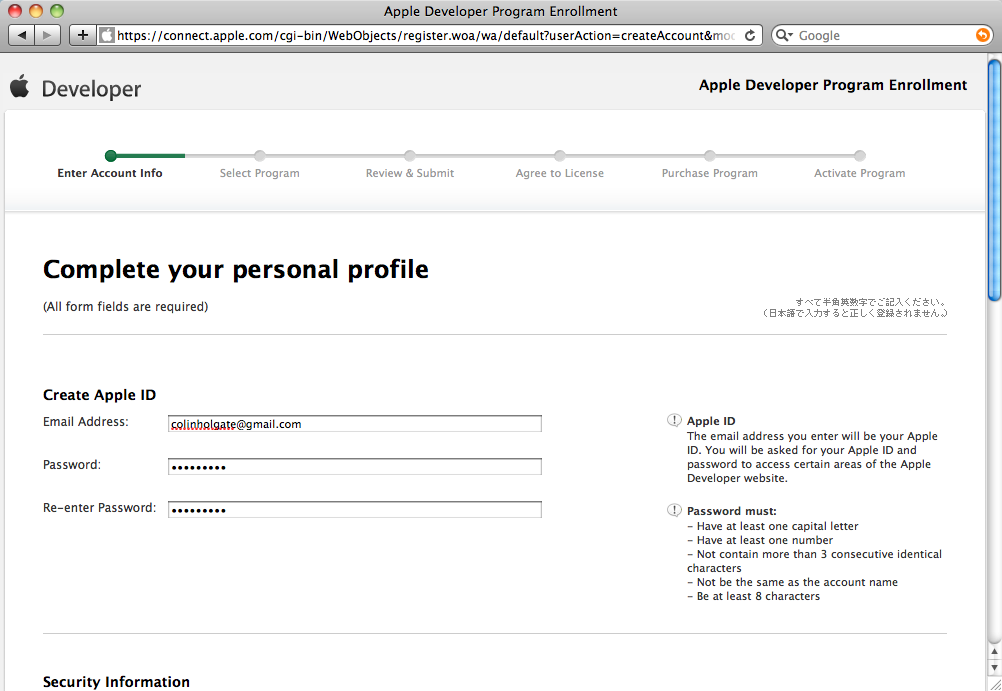
With any such sign up process, you need to enter your personal details, set a security question, and enter your postal address:
Unlock access to the largest independent learning library in Tech for FREE!
Get unlimited access to 7500+ expert-authored eBooks and video courses covering every tech area you can think of.
Renews at $19.99/month. Cancel anytime
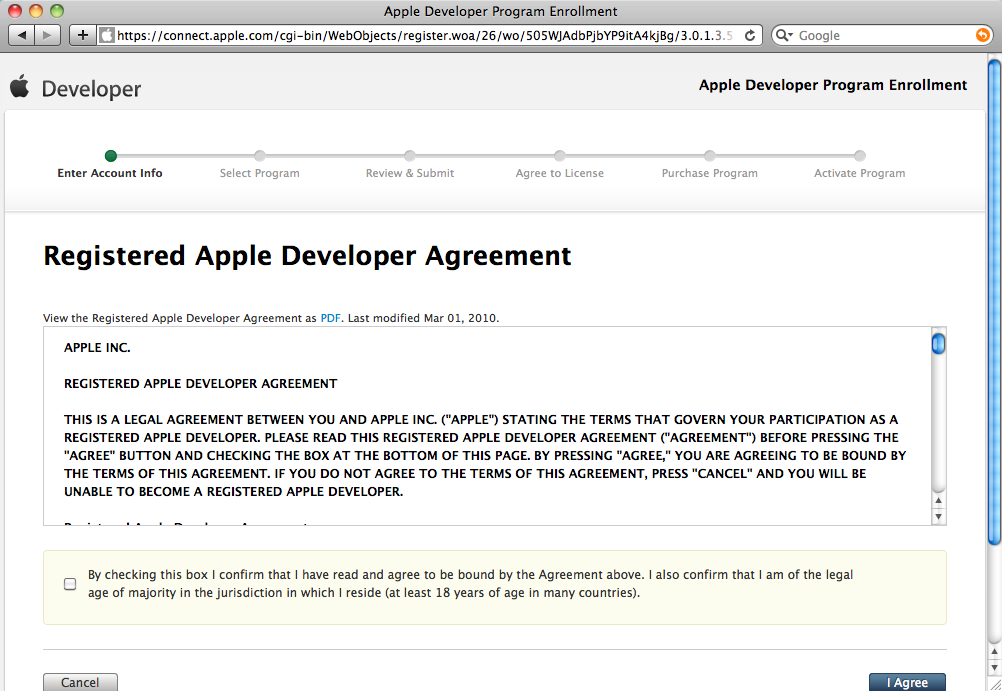
Most Apple software and services have their own legal agreement for you to sign. The one shown in the following screenshot is the general Registered Apple Developer Agreement:
In order to verify the e-mail address you have used, a verification code is sent to you with a link in the e-mail, you can click this, or enter the code manually. Once you have completed the verification code step, you can then enter your billing details.
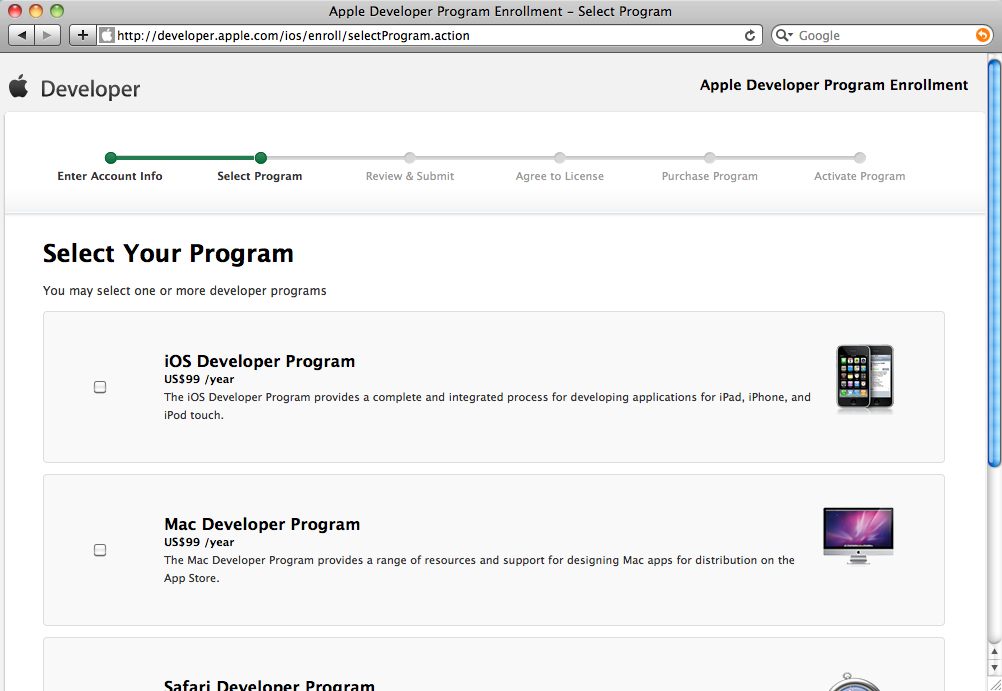
It could be that you might go on to make LiveCode applications for the Mac App Store, in which case, you will need to add the Mac Developer Program product. For our purpose, we only need to sign up for the iOS Developer Program, as shown in the following screenshot:
Each product that you sign up for has its own agreement. Lots of small print to read!
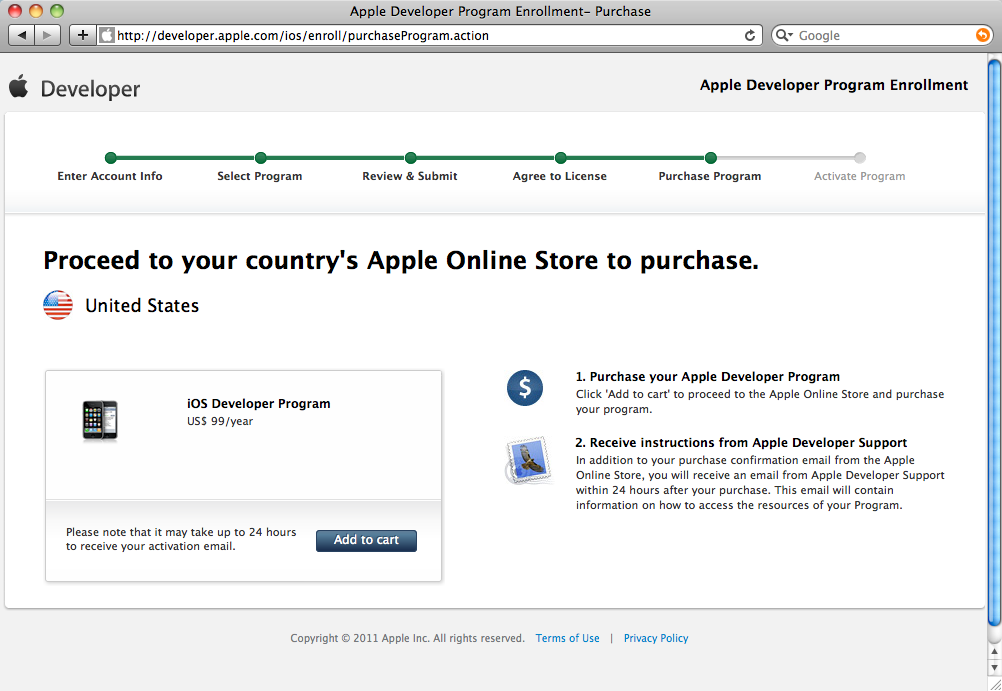
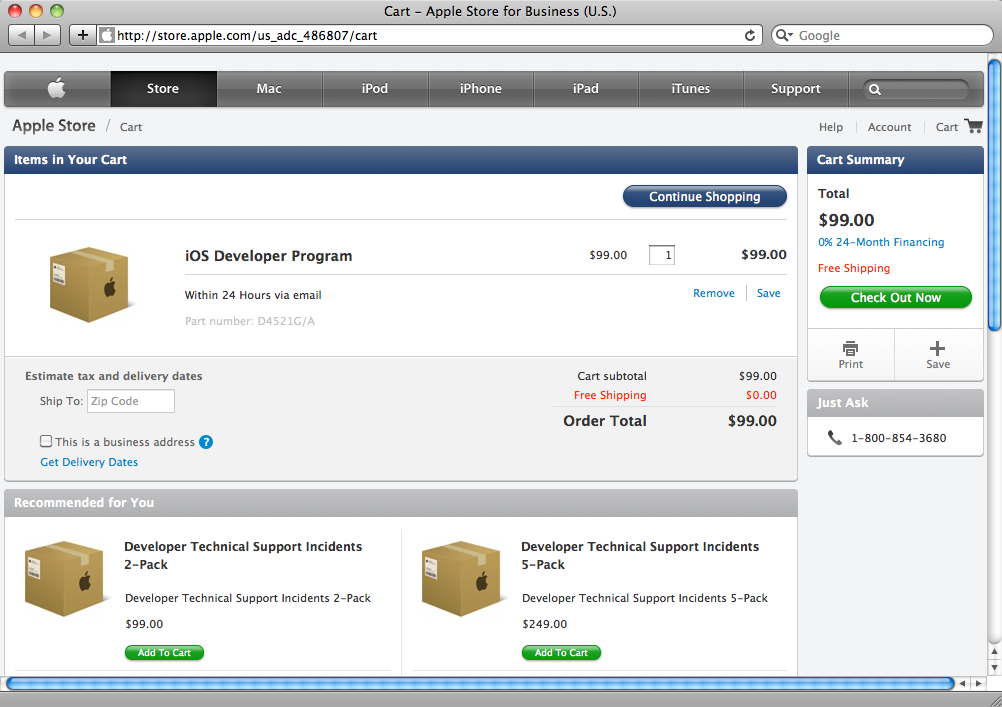
The actual purchasing of the iOS developer account is handled through the Apple Store of your own region, shown as follows:
As you can see in the next screenshot, it is going to cost you $99 per year or $198 per year if you also sign up for the Mac Developer account. Most LiveCode users won't need to sign up for the Mac Developer account unless their plan is to submit desktop apps to the Mac App Store.
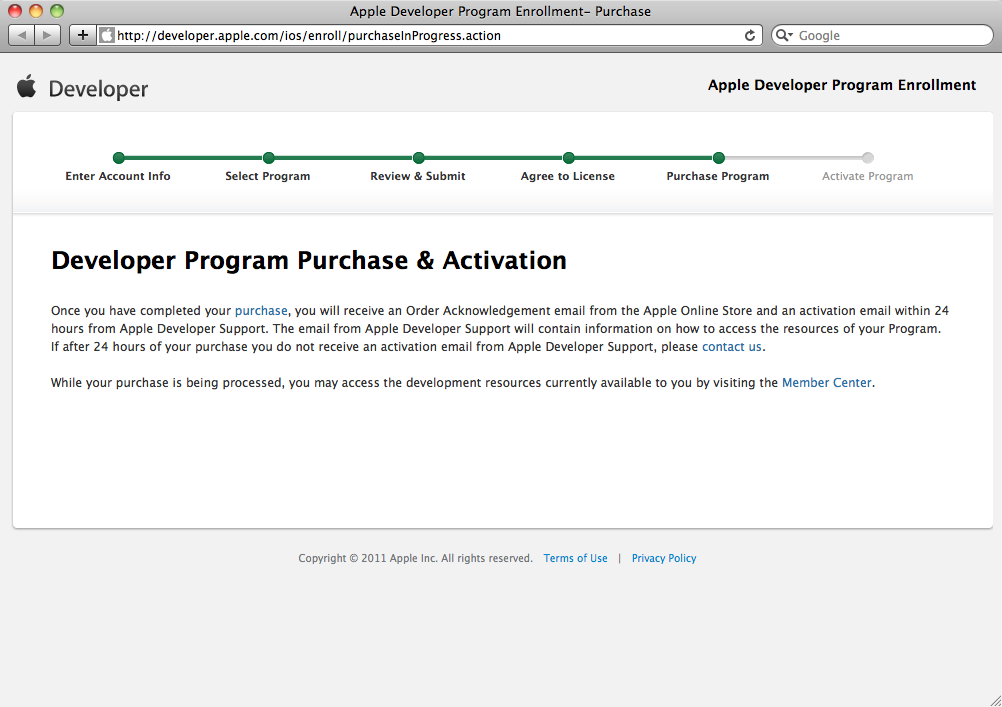
After submitting the order, you are rewarded with a message that tells you that you are now registered as an Apple developer!
Sadly, you won't get an instant approval, as was the case with Android Market or Amazon Appstore. You have to wait for the approval for five days. In the early iPhone Developer days, the approval could take a month or more, so 24 hours is an improvement!
Pop quiz – iOS code names
You had it easy with the pop quiz about Android OS code names! Not so with iOS.
Which of these names is more likely to be a code name for a future version of iOS?
Las Vegas
Laguna Beach
Hunter Mountain
Death Valley
Answer: 3
Although not publicized, Apple does use code names for each version of iOS. Previous examples included Big Bear, Apex, Kirkwood, and Telluride. These, and all the others are apparently ski resorts. Hunter Mountain is a relatively small mountain (3,200 feet), so if it does get used, perhaps it would be a minor update!
This same page is used by iOS developers who are not using LiveCode and is full of support documents that can help you create native applications using Xcode and Objective-C. We don't need all the support documents, but we do need to download Xcode's support documents.
In the downloads area of the iOS Dev Center page, you will see a link to the current version of Xcode and a link to get to the older versions as well. The current version is delivered via Mac App Store; when you try the given link, you will see a button that takes you to the App Store application.
Installing Xcode from Mac App Store is very straightforward. It's just like buying any other app from the store, except that it's free! It does require you to use the latest version of Mac OS X. Xcode will show up in your Applications folder.
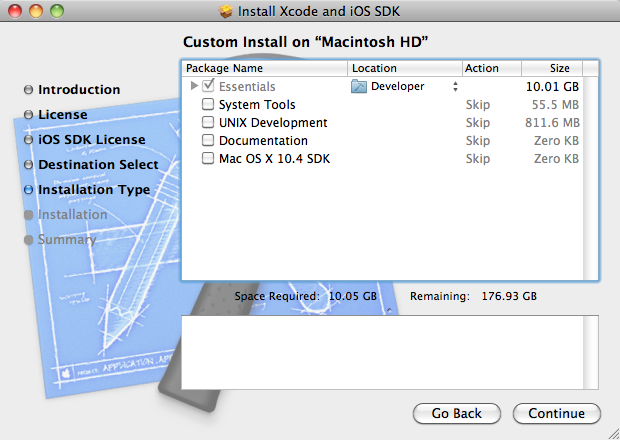
If you are using an older system, then you need to download one of the older versions from the developer page. The older Xcode installation process is much like the installation process of any other Mac application:
The older version of Xcode takes a long time to get installed, but in the end, you should have the Developer folder or a new Xcode application ready for LiveCode.
Coping with newer and older devices
In early 2012, Apple brought to the market a new version of iPad. The main selling point of this one compared to iPad 2 is that it has a Retina display. The original iPads have a resolution of 1024 x 768 and the Retina version has a resolution of 2048 x 1536. If you wish to build applications to take advantage of this, you must get the current version of Xcode from Mac App Store and not one of the older versions from the developer page. The new version of Xcode demands that you work on Mac OS 10.10 or its later versions. So, to fully support the latest devices, you may have to update your system software more than you were expecting! But wait, there's more… By taking a later version of Xcode, you are missing the iOS SDK versions needed to support older iOS devices, such as the original iPhone and iPhone 3G. Fortunately, you can go to Preferences in Xcode where there is a Downloads tab where you can get these older SDKs downloaded in the new version of Xcode. Typically, Apple only allows you to download one version older than the one that is currently provided in Xcode. There are older versions available, but are not accepted by Apple for App Store submission.
Pointing LiveCode to the iOS SDKs
Open the LiveCode Preferences and choose Mobile Support:
Click on the Add Entry button in the upper-right section of the window to see a dialog box that asks whether you are using Xcode 4.2 or 4.3 or a later version. If you choose 4.2, then go on to select the folder named Developer at the root of your hard drive. For 4.3 or later versions, choose the Xcode application itself in your Applications folder. LiveCode knows where to find the SDKs for iOS.
Before we make our first mobile app…
Now that the required SDKs are installed and LiveCode knows where they are, we can make a stack and test it in a simulator or on a physical device. We do, however, have to get the simulators and physical devices warmed up…
Getting ready for test development on an Android device
Simulating on iOS is easier than it is on Android, and testing on a physical device is easier on Android than on iOS, but the setting up of physical Android devices can be horrendous!
Time for action – starting an Android Virtual Device
You will have to dig a little deep in the Android SDK folders to find the Android Virtual Device setup program. You might as well provide a shortcut or an alias to it for quicker access. The following steps will help you setup and start an Android virtual device:
Navigate to the Android SDK tools folder located at C:Program Files (x86)Androidandroid-sdk on Windows and navigate to your Documents/android-sdk-macosx/tools folder on Mac.
Open AVD Manager on Windows or android on Mac (these look like a Unix executable file; just double-click on it and the application will open via a command-line window).
If you're on Mac, select Manage AVDs… from the Tools menu.
Select Tablet from the list of devices if there is one. If not, you can add your own custom devices as described in the following section.
Click on the Start button.
Sit patiently while the virtual device starts up!
Open LiveCode, create a new Mainstack, and click on Save to save the stack to your hard drive.
Navigate to File | Standalone Application Settings….
Click on the Android icon and click on the Build for Android checkbox to select it.
Close the settings dialog box and take a look at the Development menu.
If the virtual machine is up and running, you should see it listed in the Test Target submenu.
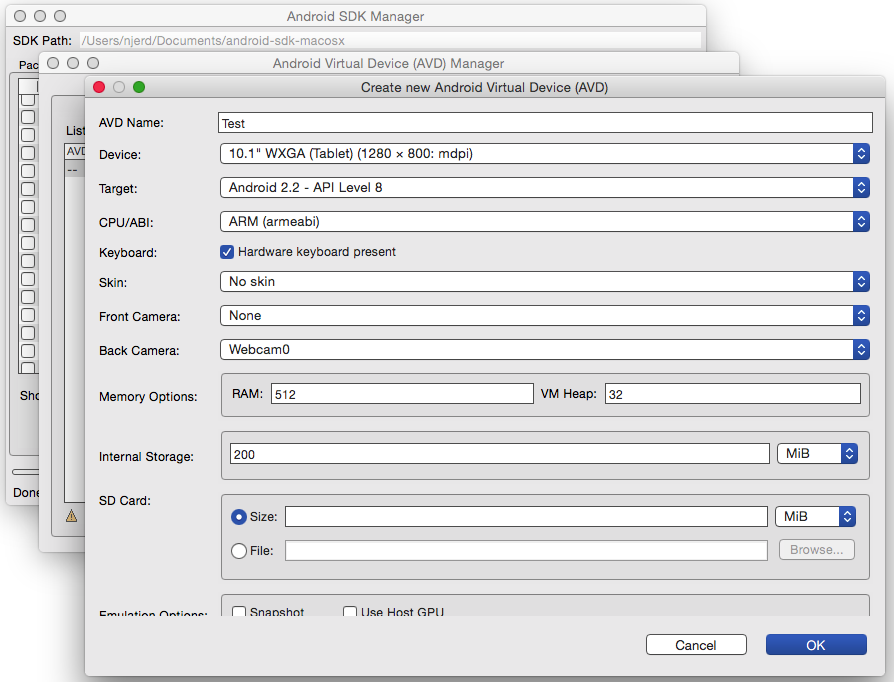
Creating an Android Virtual Device
If there are no devices listed when you open the Android Virtual Device (AVD) Manager, you may If you wish to create a device, so click on the Create button. The following screenshot will appear when you do so. Further explanation of the various fields can be found at https://developer.android.com/tools/devices/index.html.
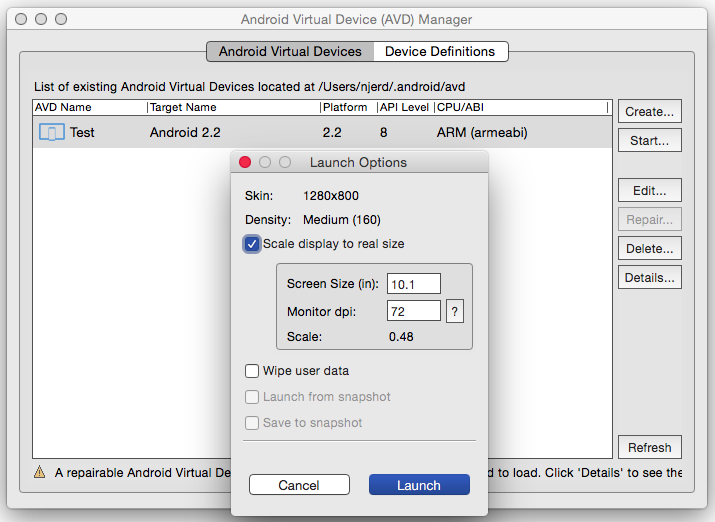
After you have created a device, you can click on Start to start the virtual device and change some of the Launch Options. You should typically select Scale display to real size unless it is too big for your development screen. Then, click on Launch to fire up the emulator. Further information on how to run the emulator can be found at http://developer.android.com/tools/help/emulator.html.
What just happened?
Now that you've opened an Android virtual device, LiveCode will be able to test stacks using this device. Once it has finished loading, that is!
Connecting a physical Android device
Connecting a physical Android device can be extremely straightforward:
Connect your device to the system by USB.
Select your device from the Development | Test Target submenu.
Select Test from the Development menu or click on the Test button in the Tool Bar.
There can be problem cases though, and Google Search will become your best friend before you are done solving these problems! We should look at an example problem case, so that you get an idea of how to solve similar situations that you may encounter.
Using Kindle Fire
When it comes to finding Android devices, the Android SDK recognizes a lot of them automatically. Some devices are not recognized and you have to do something to help Android Debug Bridge (ADB) find these devices.
Android Debug Bridge (ADB) is part of the Android SDK that acts as an intermediary between your device and any software that needs to access the device. In some cases, you will need to go to the Android system on the device to tell it to allow access for development purposes. For example, on an Android 3 (Honeycomb) device, you need to go to the Settings | Applications | Development menu and you need to activate the USB debugging mode. Before ADB connects to a Kindle Fire device, that device must first be configured, so that it allows connection. This is enabled by default on the first generation Kindle Fire device. On all other Kindle Fire models, go to the device settings screen, select Security, and set Enable ADB to On.
The original Kindle Fire model comes with USB debugging already enabled, but the ADB system doesn't know about the device at all. You can fix this!
Time for action – adding Kindle Fire to ADB
It only takes one line of text to add Kindle Fire to the list of devices that ADB knows about. The hard part is tracking down the text file to edit and getting ADB to restart after making the required changes. Things are more involved when using Windows than with Mac because you also have to configure the USB driver, so the two systems are shown here as separate steps.
The steps to be followed for adding a Kindle Fire to ADB for a Windows OS are as follows:
In Windows Explorer, navigate to C:Usersyourusername.android where the adv_usb.ini file is located.
Open the adv_usb.ini text file in a text editor. The file has no visible line breaks, so it is better to use WordPad than NotePad.
On the line after the three instruction lines, type 0x1949.
Make sure that there are no blank lines; the last character in the text file would be 9 at the end of 0x1949.
Now, save the file.
Navigate to C:Program Files (x86)Androidandroid-sdkextrasgoogleusb_driver where android_winusb.inf is located.
Right-click on the file and in Properties, Security, select Users from the list and click on Edit to set the permissions, so that you are allowed to write the file.
Open the android_winusb.inf file in NotePad.
Add the following three lines to the [Google.NTx86] and [Google.NTamd64] sections and save the file:
;Kindle Fire
%SingleAdbInterface% = USB_Install, USBVID_1949&PID_0006
%CompositeAdbInterface% = USB_Install, USBVID_1949&PID_0006&MI_01
You need to set the Kindle so that it uses the Google USB driver that you just edited.
In the Windows control panel, navigate to Device Manager and find the Kindle entry in the list that is under USB.
Right-click on the Kindle entry and choose Update Driver Software….
Choose the option that lets you find the driver on your local drive, navigate to the googleusb_driver folder, and then select it to be the new driver.
When the driver is updated, open a command window (a handy trick to open a command window is to use Shift-right-click on the desktop and to choose "Open command window here").
Change the directories to where the ADB tool is located by typing:
cd C:Program Files (x86)Androidandroid-sdkplatform-tools
Type the following three line of code and press Enter after each line:
adb kill-server
adb start-server
adb devices
You should see the Kindle Fire listed (as an obscure looking number) as well as the virtual device if you still have that running.
The steps to be followed for a Mac (MUCH simpler!) system are as follows:
Navigate to where the adv_usb.ini file is located. On Mac, in Finder, select the menu by navigating to Go | Go to Folder… and type ~/.android/in.
Open the adv_usb.ini file in a text editor.
On the line after the three instruction lines, type 0x1949.
Make sure that there are no blank lines; the last character in the text file would be 9 at the end of 0x1949.
Save the adv_usb.ini file.
Navigate to Utilities | Terminal.
You can let OS X know how to find ADB from anywhere by typing the following line (replace yourusername with your actual username and also change the path if you've installed the Android SDK to some other location):
Now, try the same three lines as we did with Windows:
adb kill-server
adb start-server
adb devices
Again, you should see the Kindle Fire listed here.
What just happened?
I suspect that you're going to have nightmares about all these steps! It took a lot of research on the Web to find out some of these obscure hacks. The general case with Android devices on Windows is that you have to modify the USB driver for the device to be handled using the Google USB driver, and you may have to modify the adb_usb.ini file (on Mac too) for the device to be considered as an ADB compatible device.
Getting ready for test development on an iOS device
If you carefully went through all these Android steps, especially on Windows, you will hopefully be amused by the brevity of this section! There is a catch though; you can't really test on an iOS device from LiveCode. We'll look at what you have to do instead in a moment, but first, we'll look at the steps required to test an app in the iOS simulator.
Time for action – using the iOS simulator
The initial steps are much like what we did for Android apps, but the process becomes a lot quicker in later steps. Remember, this only applies to a Mac OS; you can only do these things on Windows if you are using a Mac OS in a virtual machine, which may have performance issues. This is most likely not covered by the Mac OS's user agreement! In other words, get a Mac OS if you intend to develop for iOS. The following steps will help you achieve that:
Open LiveCode and create a new Mainstack and save the stack to your hard drive.
Select File and then Standalone Application Settings….
Click on the iOS icon to select the Build for iOS checkbox.
Close the settings dialog box and take a look at the Test Target menu under Development.
You will see a list of simulator options for iPhone and iPad and different versions of iOS.
To start the iOS simulator, select an option and click on the Test button.
What just happened?
This was all it took for us to get the testing done using the iOS simulators! To test on a physical iOS device, we need to create an application file first. Let's do that.
Appiness at last!
At this point, you should be able to create a new Mainstack, save it, select either iOS or Android in the Standalone Settings dialog box, and be able to see simulators or virtual devices in the Development/Test menu item. In the case of an Android app, you will also see your device listed if it is connected via USB at the time.
Time for action – testing a simple stack in the simulators
Feel free to make things that are more elaborate than the ones we have made through these steps! The following instructions make an assumption that you know how to find things by yourself in the object inspector palette:
Open LiveCode, create a new Mainstack, and save it someplace where it is easy to find in a moment from now.
Set the card window to the size 480 x 320 and uncheck the Resizable checkbox.
Drag a label field to the top-left corner of the card window and set its contents to something appropriate. Hello World might do.
If you're developing on Windows, skip to step 11.
Open the Standalone Application Settings dialog box, click on the iOS icon, and click on the Build for iOS checkbox.
Under Orientation Options, set the iPhone Initial Orientation to Landscape Left.
Close the dialog box.
Navigate to the Development | Test Target submenu and choose an iPhone Simulator.
Select Test from the Development menu.
You should now be able to see your test stack running in the iOS simulator!
As discussed earlier, launch the Android virtual device.
Open the Standalone Application Settings dialog box, click on the Android icon, and click on the Build for Android checkbox.
Under User Interface Options, set the Initial Orientation to Landscape.
Close the dialog box.
If the virtual device is running by now, do whatever it takes to get past the locked home screen, if that's what it is showing.
From the Development/Test Target submenu, choose the Android emulator.
Select Test from the Development menu.
You should now see your test stack running in the Android emulator!
What just happened?
All being well, you just made and ran your first mobile app on both Android and iOS! For an encore, we should try this on physical devices only to give Android a chance to show how easy it can be done. There is a whole can of worms we didn't open yet that has to do with getting an iOS device configured, so that it can be used for testing. You could visit the iOS Provisioning Portal at https://developer.apple.com/ios/manage/overview/index.action and look at the How To tab in each of the different sections.
Time for action – testing a simple stack on devices
Now, let's try running our tests on physical devices. Get your USB cables ready and connect the devices to your computer.
Lets go through the steps for an Android device first:
You should still have Android selected in Standalone Application Settings.
Get your device to its home screen past the initial Lock screen if there is one.
Choose Development/Test Target and select your Android device. It may well say "Android" and a very long number.
Choose Development/Test.
The stack should now be running on your Android device.
Now, we'll go through the steps to test a simple stack on an iOS device:
Change the Standalone Application Settings back to iOS.
Under Basic Application Settings of the iOS settings is a Profile drop-down menu of the provisioning files that you have installed. Choose one that is configured for the device you are going to test.
Close the dialog box and choose Save as Standalone Application… from the File menu.
In Finder, locate the folder that was just created and open it to reveal the app file itself. As we didn't give the stack a sensible name, it will be named Untitled 1.
Open Xcode, which is in the Developer folder you installed earlier, in the Applications subfolder.
In the Xcode folder, choose Devices from the Window menu if it isn't already selected.
You should see your device listed. Select it and if you see a button labeled Use for Development, click on that button.
Drag the app file straight from the Finder menu to your device in the Devices window. You should see a green circle with a + sign. You can also click on the + sign below Installed Apps and locate your app file in the Finder window. You can also replace or delete an installed app from this window.
You can now open the app on your iOS device!
What just happened?
In addition to getting a test stack to work on real devices, we also saw how easy it is, once it's all configured, to test a stack, straight on an Android device. If you are developing an app that is to be deployed on both Android and iOS, you may find that the fastest way to work is to test with the iOS Simulator for iOS tests, but for this, you need to test directly on an Android device instead of using the Android SDK virtual devices.
Have a go hero – Nook
Until recently, the Android support for the Nook Color from Barnes & Noble wasn't good enough to install LiveCode apps. It seems to have improved though and could well be another worthwhile app store for you to target.
Investigate about the sign up process, download their SDK, and so on. With any luck, some of the processes that you've learned while signing up for the other stores will also apply to the Nook store. You can start the signing up process at
The SDK providers, Google and Apple, have extensive pages of information on how to set up development environments, create certificates and provisioning files, and so on. The information covers a lot of topics that don't apply to LiveCode, so try not to get lost! These URLs would be good starting points if you want to read further:
Signing up for programs, downloading files, using command lines all over the place, and patiently waiting for the Android emulator to launch. Fortunately, you only have to go through it once.
In this article, we worked through a number of tasks that you have to do before you create a mobile app in LiveCode. We had to sign up as an iOS developer before we could download and install Xcode and iOS SDKs. We then downloaded and installed the Android SDK and configured LiveCode for devices and simulators.
We also covered some topics that will be useful once you are ready to upload a finished app. We showed you how to sign up for the Android Market and Amazon Appstore.
There will be a few more mundane things that we have to cover at the end of the article, but not for a while! Next up, we will start to play with some of the special abilities of mobile devices.

 United States
 Great Britain
 India
India
 Germany
 France
 Canada
 Russia
 Spain
Spain
 Brazil
 Australia
 Singapore
 Canary Islands
 Hungary
 Ukraine
 Luxembourg
 Estonia
 Lithuania
 South Korea
 Turkey
 Switzerland
 Colombia
 Taiwan
 Chile
Chile
 Norway
 Ecuador
 Indonesia
 New Zealand
 Cyprus
 Denmark
 Finland
 Poland
 Malta
Malta
 Czechia
 Austria
 Sweden
 Italy
Italy
 Egypt
Egypt
 Belgium
 Portugal
 Slovenia
 Ireland
 Romania
 Greece
 Argentina
 Netherlands
 Bulgaria
 Latvia
 South Africa
 Malaysia
 Japan
Japan
 Slovakia
 Philippines
 Mexico
 Thailand