


In this blog post we will deploy a game to Heroku so that everybody can enjoy it. We will deploy the game *Tag* that we created in the blog post [Real-time Communication with SocketIO].
Heroku is a platform as a service (PaaS) provider. A PaaS is a:
category of cloud computing services that provides a platform allowing customers to develop, run and manage Web applications without the complexity of building and maintaining the infrastructure typically associated with developing and launching an app.
Pricing
Nothing comes for free. Luckily Heroku has a pay as you grow pricing philosophy. This means that if you start out using Heroku server in moderation, you are free to use it. Only when your app starts to use more resources you need to pay, or let your application be unavailable for a while.
Follow Along
If you want to follow along deploying the Tag server to Heroku, download follow-along. Unzip it in a suitable location and enter it. Heroku depends on Git for the deployment process. Make sure you download and install Git for your platform, if you have not already done so.
With Git installed enter the Tag-follow-along-deployment directory, initialize a Git repository, add all the files and make a commit with the following commands
cd Tag-follow-along-deployment
git init
git add .
git commit -m "following along"
If you want to know what the end result looks like, take a peek.
Signing Up
You need to register with Heroku in order to start using their services. You can sign up with a form where you provide Heroku with your full name, your email-address and optionally a company name.
If you have not already signed up, do so now. Make sure to read Heroku’s terms of service and their privacy statement.
Heroku Toolbelt
Once you have signed up, you can start downloading the Heroku toolbelt. The toolbelt is Heroku’s workhorse. It is a set of command line tools that are responsible for running your application locally, deploying the application to Heroku, starting, stopping and scaling the application and monitoring the application state.
Make sure to download the appropriate toolbelt for your operating system.
Login In
Having installed the Heroku toolbelt it is now time to login with the same credentials we signed up with. Issue the command:
heroku loginAnd provide it with the correct email and password. The command should responds with
Authentication successful.Create an App
With Heroku successfully authenticating us we can start creating an app. This is done with the heroku create command. When issued, the Heroku toolbelt will start working to create an app on the Heroku servers, give it an unique, albeit random, name and add a remote to your Git repository.
heroku createIt responded in my case with
Creating peaceful-caverns-9339... done, stack is cedar-14
https://peaceful-caverns-9339.herokuapp.com/ | https://git.heroku.com/peaceful-caverns-9339.git
Git remote heroku added
If you run the command the names and URLs could be different, but the overall response should be similar.
Remote
A remote is a tracked repository, i.e. a repository that is related to the repository you’re working on. You can inspect the tracked repositories with the git remote command. It will tell you that it tracks the repository known by the name heroku.
If you want to learn more about Git remotes, see the documentation.
Add a Procfile
A Procfile is used by Heroku to configure what processes should run. We are going to create one now.
Open you favorite editor and create a file Procfile in the root of the Tag-follow-along-deployment. Write the following content into it:
web: node server.jsThis tells Heroku to start a web process and let it run node server.js.
Save it and then add it to the repository with the following commands:
git add Procfile
git commit -m "Configured a Procfile"
Deploy your code
The next step is to deploy your code to Heroku. The following command will do this for you.
git push heroku masterNotice that this is a Git command. What happens is that the code is pushed to Heroku. This triggers Heroku to start taking the necessary steps to start your server.
Heroku informs you what it is doing. The run should look similar to the output below:
counting objects: 29, done.
Delta compression using up to 8 threads.
Compressing objects: 100% (26/26), done.
Writing objects: 100% (29/29), 285.15 KiB | 0 bytes/s, done.
Total 29 (delta 1), reused 0 (delta 0)
remote: Compressing source files... done.
remote: Building source:
remote:
remote: -----> Node.js app detected
remote:
remote: -----> Reading application state
remote:       package.json...
remote:       build directory...
remote:       cache directory...
remote:       environment variables...
remote:
remote:       Node engine:         unspecified
remote:       Npm engine:         unspecified
remote:        Start mechanism:     Procfile
remote:       node_modules source: package.json
remote:       node_modules cached: false
remote:
remote:       NPM_CONFIG_PRODUCTION=true
remote:       NODE_MODULES_CACHE=true
remote:
remote: -----> Installing binaries
remote:       Resolving node version (latest stable) via semver.io...
remote:       Downloading and installing node 0.12.2...
remote:       Using default npm version: 2.7.4
remote:
remote: -----> Building dependencies
remote:       Installing node modules
remote:
remote:       > [email protected] install /tmp/build_bce51a5d2c066ee14a706cebbc28bd3e/node_modules/socket.io/node_modules/engine.io/node_modules/ws
remote:       > (node-gyp rebuild 2> builderror.log) || (exit 0)
remote:
remote:       make: Entering directory `/tmp/build_bce51a5d2c066ee14a706cebbc28bd3e/node_modules/socket.io/node_modules/engine.io/node_modules/ws/build'
remote:         CXX(target) Release/obj.target/bufferutil/src/bufferutil.o
remote:         SOLINK_MODULE(target) Release/obj.target/bufferutil.node
remote:         SOLINK_MODULE(target) Release/obj.target/bufferutil.node: Finished
remote:         COPY Release/bufferutil.node
remote:         CXX(target) Release/obj.target/validation/src/validation.o
remote:         SOLINK_MODULE(target) Release/obj.target/validation.node
remote:         SOLINK_MODULE(target) Release/obj.target/validation.node: Finished
remote:         COPY Release/validation.node
remote:       make: Leaving directory `/tmp/build_bce51a5d2c066ee14a706cebbc28bd3e/node_modules/socket.io/node_modules/engine.io/node_modules/ws/build'
remote:
remote:       > [email protected] install /tmp/build_bce51a5d2c066ee14a706cebbc28bd3e/node_modules/socket.io/node_modules/socket.io-client/node_modules/engine.io-client/node_modules/ws
remote:       > (node-gyp rebuild 2> builderror.log) || (exit 0)
remote:
remote:       make: Entering directory `/tmp/build_bce51a5d2c066ee14a706cebbc28bd3e/node_modules/socket.io/node_modules/socket.io-client/node_modules/engine.io-client/node_modules/ws/build'
remote:         CXX(target) Release/obj.target/bufferutil/src/bufferutil.o
remote:       make: Leaving directory `/tmp/build_bce51a5d2c066ee14a706cebbc28bd3e/node_modules/socket.io/node_modules/socket.io-client/node_modules/engine.io-client/node_modules/ws/build'
remote:       [email protected] node_modules/express
remote:       ├── [email protected]
remote:      ├── [email protected]
remote:       ├── [email protected]
remote:       ├── [email protected]
remote:       ├── [email protected]
remote:       ├── [email protected]
remote:       ├── [email protected]
remote:       ├── [email protected]
remote:       ├── [email protected]
remote:       ├── [email protected]
remote:       ├── [email protected]
remote:       ├── [email protected]
remote:       ├── [email protected]
remote:       ├── [email protected]
remote:       ├── [email protected]
remote:       ├── [email protected]
remote:       ├── [email protected] ([email protected])
remote:       ├── [email protected]
remote:       ├── [email protected] ([email protected])
remote:       ├── [email protected] ([email protected])
remote:       ├── [email protected] ([email protected], [email protected], [email protected])
remote:       ├── [email protected] ([email protected], [email protected])
remote:       ├── [email protected] ([email protected], [email protected])
remote:       └── [email protected] ([email protected], [email protected])
remote:
remote:       [email protected] node_modules/nodemon
remote:       ├── [email protected] ([email protected], [email protected])
remote:       ├── [email protected] ([email protected])
remote:       ├── [email protected] ([email protected])
remote:       └── [email protected] ([email protected], [email protected], [email protected], [email protected], [email protected], [email protected])
remote:
remote:       [email protected] node_modules/socket.io
remote:       ├── [email protected] ([email protected])
remote:       ├── [email protected] ([email protected])
remote:       ├── [email protected] ([email protected], [email protected], [email protected])
remote:       ├── [email protected] ([email protected], [email protected], [email protected], [email protected], [email protected])
remote:       ├── [email protected] ([email protected], [email protected], [email protected], [email protected])
remote:       └── [email protected] ([email protected], [email protected], [email protected], [email protected], [email protected], [email protected], [email protected], [email protected], [email protected], [email protected])
remote:
remote: -----> Checking startup method
remote:       Found Procfile
remote:
remote: -----> Finalizing build
remote:       Creating runtime environment
remote:       Exporting binary paths
remote:       Cleaning npm artifacts
remote:       Cleaning previous cache
remote:       Caching results for future builds
remote:
remote: -----> Build succeeded!
remote:
remote:       [email protected] /tmp/build_bce51a5d2c066ee14a706cebbc28bd3e
remote:       ├── [email protected]
remote:       ├── [email protected]
remote:       └── [email protected]
remote:
remote: -----> Discovering process types
remote:       Procfile declares types -> web
remote:
remote: -----> Compressing... done, 12.3MB
remote: -----> Launching... done, v3
remote:       https://peaceful-caverns-9339.herokuapp.com/ deployed to Heroku
remote:
remote: Verifying deploy... done.
To https://git.heroku.com/peaceful-caverns-9339.git
* [new branch]     master -> master
Scale the App
The application is deployed, but now we need to make sure that Heroku assign resources to it.
heroku ps:scale web=1The above command instructs Heroku to scale your app so that one instance of it is running.
You should now be able to open a browser and go to the URL Heroku mentioned at the end of the deployment step. In my case that would be https://peaceful-caverns-9339.herokuapp.com/.
There is a convenience method that helps you in that regard. The heroku open command will open the registered URL in your default browser.
Inspect the Logs
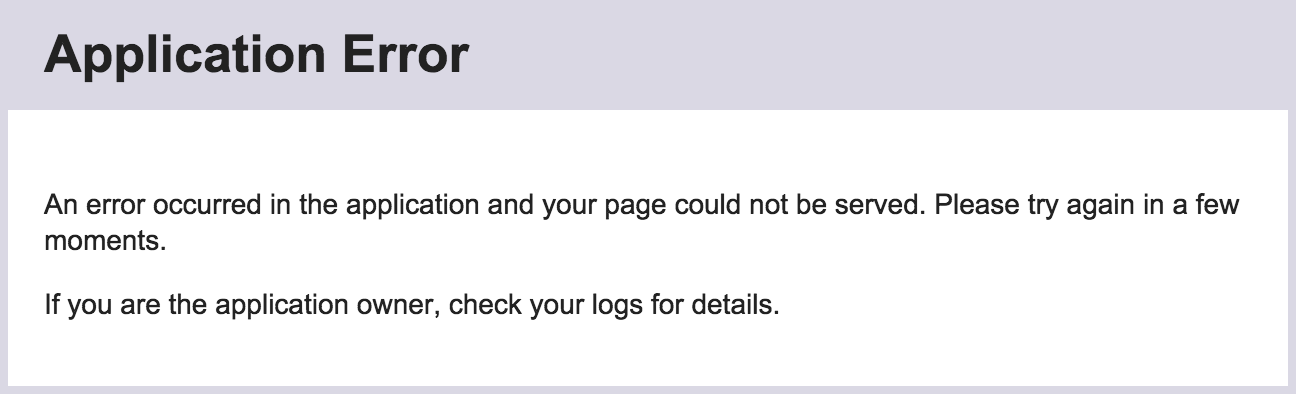
If you followed along and open the application you would know that at this point you would have been greeted by an application error:
So what did go wrong? Let’s find out by inspecting the logs. Issue the following command:
heroku logsTo see the available logs. Below you find an excerpt:
2015-05-11T14:29:37.193792+00:00 heroku[api]: Enable Logplex by [email protected]
2015-05-11T14:29:37.193792+00:00 heroku[api]: Release v2 created by [email protected]
2015-05-12T08:47:13.899422+00:00 heroku[api]: Deploy ee12c7d by [email protected]
2015-05-12T08:47:13.848408+00:00 heroku[api]: Scale to web=1 by [email protected]
2015-05-12T08:47:13.899422+00:00 heroku[api]: Release v3 created by [email protected]
2015-05-12T08:47:16.548876+00:00 heroku[web.1]: Starting process with command `node server.js`
2015-05-12T08:47:18.142479+00:00 app[web.1]: Recommending WEB_CONCURRENCY=1
2015-05-12T08:47:18.142456+00:00 app[web.1]: Detected 512 MB available memory, 512 MB limit per process (WEB_MEMORY)
2015-05-12T08:47:18.676440+00:00 app[web.1]: Listening on http://:::3000
2015-05-12T08:48:17.132841+00:00 heroku[web.1]: Error R10 (Boot timeout) -> Web process failed to bind to $PORT within 60 seconds of launch
2015-05-12T08:48:17.132841+00:00 heroku[web.1]: Stopping process with SIGKILL
2015-05-12T08:48:18.006812+00:00 heroku[web.1]: Process exited with status 137
2015-05-12T08:48:18.014854+00:00 heroku[web.1]: State changed from starting to crashed
2015-05-12T08:48:18.015764+00:00 heroku[web.1]: State changed from crashed to starting
2015-05-12T08:48:19.731467+00:00 heroku[web.1]: Starting process with command `node server.js`
2015-05-12T08:48:21.328988+00:00 app[web.1]: Detected 512 MB available memory, 512 MB limit per process (WEB_MEMORY)
2015-05-12T08:48:21.329000+00:00 app[web.1]: Recommending WEB_CONCURRENCY=1
2015-05-12T08:48:21.790446+00:00 app[web.1]: Listening on http://:::3000
2015-05-12T08:49:20.337591+00:00 heroku[web.1]: Error R10 (Boot timeout) -> Web process failed to bind to $PORT within 60 seconds of launch
2015-05-12T08:49:20.337739+00:00 heroku[web.1]: Stopping process with SIGKILL
2015-05-12T08:49:21.301823+00:00 heroku[web.1]: State changed from starting to crashed
2015-05-12T08:49:21.290974+00:00 heroku[web.1]: Process exited with status 137
2015-05-12T08:57:58.529222+00:00 heroku[router]: at=error code=H10 desc="App crashed" method=GET path="/" host=peaceful-caverns-9339.herokuapp.com request_id=50cfbc6c-0561-4862-9254-d085043cb610 fwd="87.213.160.18" dyno= connect= service= status=503 bytes=
2015-05-12T08:57:59.066974+00:00 heroku[router]: at=error code=H10 desc="App crashed" method=GET path="/favicon.ico" host=peaceful-caverns-9339.herokuapp.com request_id=608a9f0f-c2a7-45f7-8f94-2ce2f5cd1ff7 fwd="87.213.160.18" dyno= connect= service= status=503 bytes=
2015-05-12T11:10:09.538209+00:00 heroku[web.1]: State changed from crashed to starting
2015-05-12T11:10:11.968702+00:00 heroku[web.1]: Starting process with command `node server.js`
2015-05-12T11:10:13.905318+00:00 app[web.1]: Detected 512 MB available memory, 512 MB limit per process (WEB_MEMORY)
2015-05-12T11:10:13.905338+00:00 app[web.1]: Recommending WEB_CONCURRENCY=1
2015-05-12T11:10:14.509612+00:00 app[web.1]: Listening on http://:::3000
2015-05-12T11:11:12.622517+00:00 heroku[web.1]: Error R10 (Boot timeout) -> Web process failed to bind to $PORT within 60 seconds of launch
2015-05-12T11:11:12.622876+00:00 heroku[web.1]: Stopping process with SIGKILL
2015-05-12T11:11:13.668749+00:00 heroku[web.1]: Process exited with status 137
2015-05-12T11:11:13.677915+00:00 heroku[web.1]: State changed from starting to crashed
Analyzing the Problem
While looking at the log we see that the application got deployed and scaled properly.
2015-05-12T08:47:13.899422+00:00 heroku[api]: Deploy ee12c7d by [email protected]
2015-05-12T08:47:13.848408+00:00 heroku[api]: Scale to web=1 by daan.v.berkel.1980+trash@gmail
It then tries to run node server.js:
2015-05-12T08:48:19.731467+00:00 heroku[web.1]: Starting process with command `node server.js`
This succeeds because we see the expected Listening on message:
2015-05-12T08:48:21.790446+00:00 app[web.1]: Listening on http://:::3000Unfortunately, it all breaks down after that.
2015-05-12T08:49:20.337591+00:00 heroku[web.1]: Error R10 (Boot timeout) -> Web process failed to bind to $PORT within 60 seconds of launchIt retries starting the application, but eventually it gives up.
The problem is that we hard-coded our application server to listen on port `3000`, but Heroku expects an other port. Heroku communicates the port to use with the `PORT` environment variable.
Using Environment Variables
In order to start our application correctly we need to use the environment variable PORT that Heroku provides. We can do that by opening server.js and going to line 15:
server.listen(3000, function(){
   var host = server.address().address;
   var port = server.address().port;
   console.log('Listening on http://%s:%s', host, port);
});
This snippet will start the server and it will listening on port 3000. We need to change that value so that it will use the environment variable PORT. This is done with the following code:
server.listen(process.env.PORT || 3000, function(){
   var host = server.address().address;
   var port = server.address().port;
   console.log('Listening on http://%s:%s', host, port);
});
process.env.PORT || 3000 will use the PORT environment variable if it is set and will default to port 3000, e.g. for testing purposes.
Re-deploy Application
We need to deploy our code changes to Heroku. This is done with the following set of commands.
git add server.js
git commit -m "use PORT environment variable"
git push heroku master
The first two commands at the changes in server.js to the repository. The third updates the tracked repository with these changes. This triggers Heroku to try and restart the application anew.
If you now inspect the log with heroku logs you will see that the application is successfully started.
2015-05-12T12:22:15.829584+00:00 heroku[api]: Deploy 9a2cac8 by [email protected]
2015-05-12T12:22:15.829584+00:00 heroku[api]: Release v4 created by [email protected]
2015-05-12T12:22:17.325749+00:00 heroku[web.1]: State changed from crashed to starting
2015-05-12T12:22:19.613648+00:00 heroku[web.1]: Starting process with command `node server.js`
2015-05-12T12:22:21.503756+00:00 app[web.1]: Recommending WEB_CONCURRENCY=1
2015-05-12T12:22:21.503733+00:00 app[web.1]: Detected 512 MB available memory, 512 MB limit per process (WEB_MEMORY)
2015-05-12T12:22:22.118797+00:00 app[web.1]: Listening on http://:::10926
2015-05-12T12:22:23.355206+00:00 heroku[web.1]: State changed from starting to up
Tag Time
If you now open the application in your default browser with heroku open, you should be greeted by the game of Tag. If you move your mouse around in the Tag square you will see your circle trying to chase it. You can now invite other people to play on the same address and soon you will have a real game of Tag on your hands.

Conclusion
We have seen that Heroku provides an easy to use Platform as a Service, that can be used to deploy your game server on with the help of the Heroku toolbelt.
About the author
Daan van Berkel is an enthusiastic software craftsman with a knack for presenting technical details in a clear and concise manner. Driven by the desire for understanding complex matters, Daan is always on the lookout for innovative uses of software.


