(For more resources related to this topic, see here.)
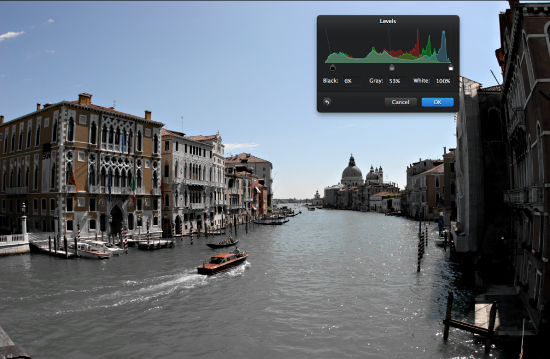
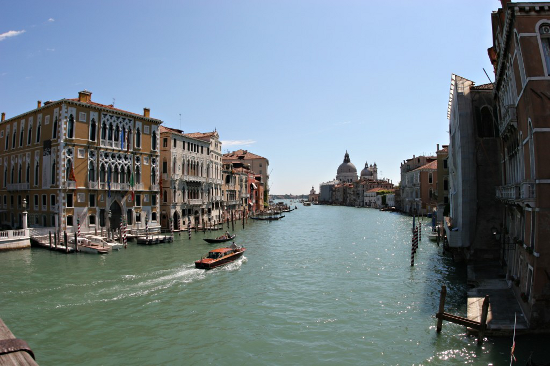
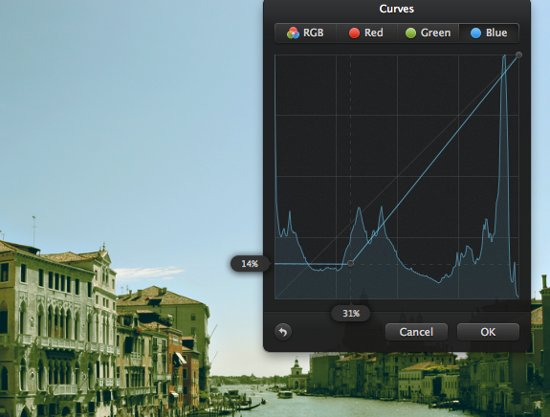
I am going to start with this image of Venice and walk through one way to apply a vintage style to the photograph.

First head over to the effects browser (Command – 3 if it’s not already open). Choose the Hue effect under the Color Options section. Drag the saturation slider down about 10-15 percent. Next we will want to darken the shadows of the image and increase the contrast. To do this open up the Levels effect and move the black point on the left of the histogram over to the right just a little bit.

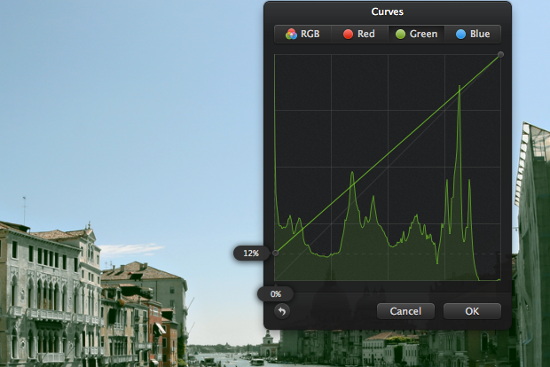
Now we want to give a color shift to the image. We will add a greenish tint to the image by going into the curves color adjustment section. In your effects browser double-click on the Curves effect and then select the Green level. Move the handle on the left of the curve up to about 12 percent.
After you set the green level then move over to the blur and also move the leftmost point up on the curve adjustment to around 12-15 percent. Then slide this point over to the right to create a straight line and move it to somewhere around 30 percent. These are just guidelines but always modify the color to fit your needs.

Unlock access to the largest independent learning library in Tech for FREE!
Get unlimited access to 7500+ expert-authored eBooks and video courses covering every tech area you can think of.
Renews at $19.99/month. Cancel anytime

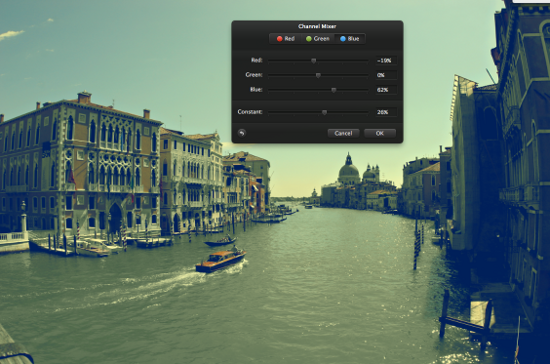
Now we will want to add some yellow colors to the image to give it that aged, warm tone. For this go to the Channels effect. Since we can only adjust the RGB colors (Red, Green, Blue), we will choose the Blue channel since this is the opposite of yellow. When we remove blue we are adding in yellow.
For this example I moved the red down to -19 percent, the blue down to 62 percent(from 100 percent), and changed the constant to 26 percent. That’s it and now we have a cool retro style effect to our image.

Summary
There we have it, a few very quick ways to take a normal color photograph and give it that aged film vintage look.
Resources for Article :
Further resources on this subject:
 United States
 Great Britain
 India
India
 Germany
 France
 Canada
 Russia
 Spain
Spain
 Brazil
 Australia
 Singapore
 Canary Islands
 Hungary
 Ukraine
 Luxembourg
 Estonia
 Lithuania
 South Korea
 Turkey
 Switzerland
 Colombia
 Taiwan
 Chile
Chile
 Norway
 Ecuador
 Indonesia
 New Zealand
 Cyprus
 Denmark
 Finland
 Poland
 Malta
Malta
 Czechia
 Austria
 Sweden
 Italy
Italy
 Egypt
Egypt
 Belgium
 Portugal
 Slovenia
 Ireland
 Romania
 Greece
 Argentina
 Netherlands
 Bulgaria
 Latvia
 South Africa
 Malaysia
 Japan
Japan
 Slovakia
 Philippines
 Mexico
 Thailand

