


In this article by James Kent Lewis author for the book Linux Shell Scripting Bootcamp, we will learn how to create and call subroutines in a script.
The topics covered in this article are as follows:
- Show subroutines that take parameters
- Mention return codes again and how they work in scripts
- How to use subroutines
First, let’s start with a selection of simple but powerful scripts. These are mainly shown to give the reader an idea of just what can be done quickly with a script.
(For more resources related to this topic, see here.)
Clearing the screen
The tput clear terminal command can be used to clear the current command-line session. You could type tput clear all the time, but wouldn’t just cls be nicer?
Here’s a simple script that clears the current screen:
Chapter 4 – Script 1
#!/bin/sh
#
# 5/9/2017
#
tput clear
Notice that this was so simple that I didn’t even bother to include a Usage message or return code. Remember, to make this a command on your system, do this:
- cd $HOME/bin
- Create/edit a file named cls
- Copy and paste the preceding code into this file
- Save the file
- Run chmod 755 cls
You can now type cls from any terminal (under that user) and your screen will clear. Try it.
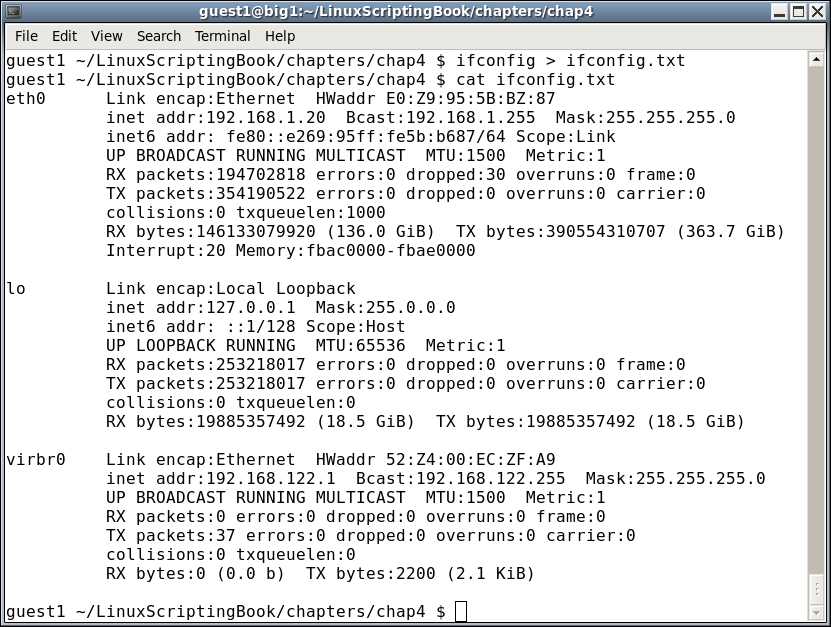
File redirection
At this point, we need to go over file redirection. This is the ability to have the output from a command or script be copied into a file instead of going to the screen. This is done using the redirection operator, which is really just the greater than sign.
These commands were run on my system and here is the output:
Command piping
Now, let’s look at command piping, which is the ability to run a command and have the output from it serve as the input to another command.
Suppose a program or script named loop1 is running on your system and you want to know the PID of it. You could run the psauxw command to a file, and then grep the file for loop1. Alternatively, you could do it in one step using a pipe as follows:
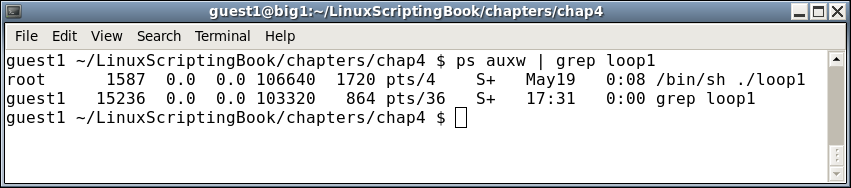
Pretty cool, right? This is a very powerful feature in a Linux system and is used extensively. We will be seeing a lot more of this soon.
The next section shows another very short script using some command piping. This clears the screen and then shows only the first 10 lines from dmesg.
Chapter 4 – Script 2
#!/bin/sh
#
# 5/9/2017
#
tput clear
dmesg | head 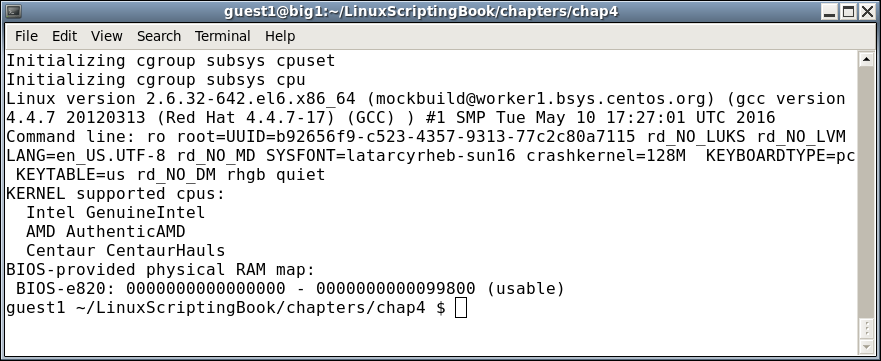
The next section shows file redirection.
Chapter 4 – Script 3
#!/bin/sh
#
# 5/9/2017
#
FN=/tmp/dmesg.txt
dmesg> $FN
echo "File $FN created."
Try it on your system!
This shows how easy it is to create a script to perform commands that you would normally type on the command line. Also, notice the use of the FN variable. If you want to use a different filename later, you only have to make the change in one place.
Subroutines
Now, let’s really get into subroutines. To do this, we will use more of the tput commands:
tput cup <row><col>        # puts the cursor at row, col
tput cup 0 0                # puts the cursor at the upper left hand side of terminal
tput cup $LINES $COLUMNS    # puts the cursor at bottom right hand side
tput clear                  # clears the terminal screen
tputsmso                   # bolds the text that follows
tputrmso                   # un-bolds the text that follows
test of Code[PACKT]
123456789012345678901234567890
tput cup 0 0                                       #
tputsmso                                           #
The script is shown in the next section. This was mainly written to show the concept of subroutines; however, it can also be used as a guide on writing interactive tools.
Chapter 4 – Script 4
i
#!/bin/sh
#
# 5/9/2017
#
echo "script4 - Linux Scripting Book"

# Subroutines

cls()
{
tput clear
 return 0
}

home()
{
tput cup 0 0
 return 0
}

end()
{
 let x=$COLUMNS-1
tput cup $LINES $x
 echo -n "X"                 # no newline or else will scroll
}

bold()
{
tputsmso
}

unbold()
{
tputrmso
}

underline()
{
tputsmul
}

normalline()
{
tputrmul
}

# Code starts here

rc=0                         # return code
if [ $# -ne 1 ] ; then
 echo "Usage: script4 parameter"
 echo "Where parameter can be: "
 echo " home      - put an X at the home position"
 echo " cls       - clear the terminal screen"
 echo " end       - put an X at the last screen position"
 echo " bold      - bold the following output"
 echo " underline - underline the following output"
 exit 255
fi

parm=$1                      # main parameter 1

if [ "$parm" = "home" ] ; then
 echo "Calling subroutine home."
 home
 echo -n "X"
elif [ "$parm" = "cls" ] ; then
cls
elif [ "$parm" = "end" ] ; then
 echo "Calling subroutine end."
 end
elif [ "$parm" = "bold" ] ; then
 echo "Calling subroutine bold."
 bold
 echo "After calling subroutine bold."
unbold
 echo "After calling subroutine unbold."
elif [ "$parm" = "underline" ] ; then
 echo "Calling subroutine underline."
 underline
 echo "After subroutine underline."
normalline
 echo "After subroutine normalline."
else
 echo "Unknown parameter: $parm"
rc=1
fi

exit $rc
The following is the output:

Try this on your system. If you run it with the home parameter, it might look a little strange to you. The code puts a capital X at the home position (0,0) and this causes the prompt to print 1 character over. Nothing is wrong here, it just looks a little weird. Don’t worry if this still doesn’t make sense to you, just go ahead and look at Script 5.
Using parameters
Okay, let’s add some routines to this script to show how to use parameters with a subroutine. In order to make the output look better, the cls routine is called first to clear the screen, which is shown in the next section.
Chapter 4 – Script 5
#!/bin/sh
#
# 5/9/2017
#
echo "script5 - Linux Scripting Book"
# Subroutines
cls()
{
tput clear
return 0
}
home()
{
tput cup 0 0
return 0
}
end()
{
let x=$COLUMNS-1
tput cup $LINES $x
echo -n "X" # no newline or else will scroll
}
bold()
{
tputsmso
}
unbold()
{
tputrmso
}
underline()
{
tputsmul
}
normalline()
{
tputrmul
}
move() # move cursor to row, col
{
tput cup $1 $2
}
movestr() # move cursor to row, col
{
tput cup $1 $2
echo $3
}
# Code starts here
cls # clear the screen to make the output look better
rc=0 # return code
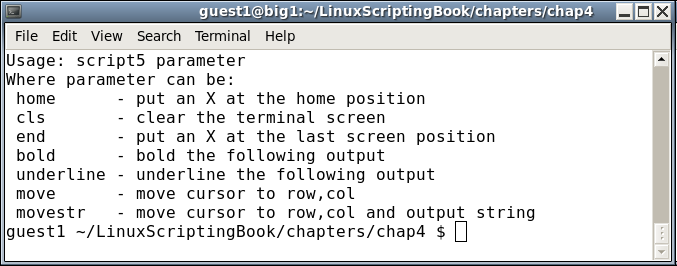
if [ $# -ne 1 ] ; then
echo "Usage: script5 parameter"
echo "Where parameter can be: "
echo " home - put an X at the home position"
echo " cls - clear the terminal screen"
echo " end - put an X at the last screen position"
echo " bold - bold the following output"
echo " underline - underline the following output"
echo " move - move cursor to row,col"
echo " movestr - move cursor to row,col and output string"
exit 255
fi
parm=$1 # main parameter 1
if [ "$parm" = "home" ] ; then
home
echo -n "X"
elif [ "$parm" = "cls" ] ; then
cls
elif [ "$parm" = "end" ] ; then
move 0 0
echo "Calling subroutine end."
end
elif [ "$parm" = "bold" ] ; then
echo "Calling subroutine bold."
bold
echo "After calling subroutine bold."
unbold
echo "After calling subroutine unbold."
elif [ "$parm" = "underline" ] ; then
echo "Calling subroutine underline."
underline
echo "After subroutine underline."
normalline
echo "After subroutine normalline."
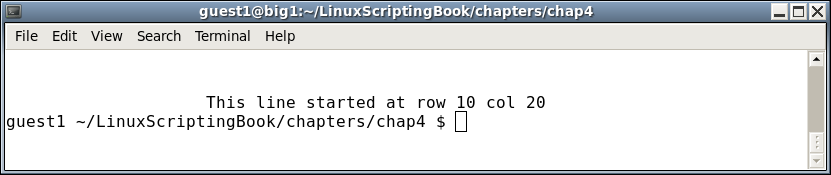
elif [ "$parm" = "move" ] ; then
move 10 20
echo "This line started at row 10 col 20"
elif [ "$parm" = "movestr" ] ; then
movestr 30 40 "This line started at 30 40"
else
echo "Unknown parameter: $parm"
rc=1
fi
exit $rc
Since this script only has two extra functions, you can just run them. This will be shown one command at a time as follows:
guest1 $ script5
guest1 $ script5 move
guest1 $ script5 movestr
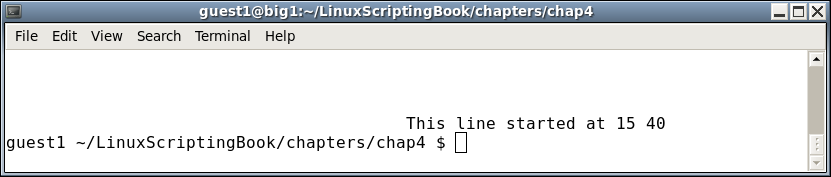
Since we are now placing the cursor at a specific location, the output should make more sense to you. Notice how the command-line prompt reappears where the last cursor position was.
You probably noticed that the parameters to a subroutine work just like with a script. Parameter 1 is $1, parameter 2 is $2, and so on. This is good and bad, good because you don’t have to learn anything radically different. But bad in that it is very easy to get the $1, $2, and vars mixed up if you are not careful.
A possible solution, and the one I use, is to assign the $1, $2, and so on variables in the main script to a variable with a good meaningful name.
For example, in these example scripts, I set parm1 equal to $1 (parm1=$1), and so on.
Summary
We started with some very simple scripts and then proceeded to show some simple subroutines.
We then showed some subroutines that take parameters. Return codes were mentioned again to show how they work in subroutines.
We included several scripts to show the concepts, and also included a special bonus script at no extra charge.
Resources for Article:
Further resources on this subject:
- Linux Shell Scripting [article]
- Linux Shell Scripting – various recipes to help you [article]
- GLSL 4.0: Using Subroutines to Select Shader Functionality [article]


