
Over 70 practical recipes for administering a high-performance SQL Server 2008 R2 system
Installing and configuring a Master Data Services Solution
The administrative control of data is a primary task in any line of business management; as long as the data-flow is intended to meet enterprise level business needs, it serves the purpose. The essence of Master Data Management (MDM) is identified when the data is used for operational and analytical processes; however, those management processes must be able to clearly define the business concepts, identify different ways the data sets represent commonly understood concepts, and integrate the data into a consistent view that is available across the organization.
SQL Server 2008 R2 introduces Master Data Services (MDS), which is designed to provide hierarchies that can be customized to group and summarize the master data. This kind of hierarchical representation helps to change the reporting structures and incorporate new aspects of the business rules by reducing the data-duplication. The best usage of MDS will help us to maintain a central database of master data, which is managed for reporting and analysis. In this recipe, we will go through the important steps to install and configure an MDS solution on an existing data platform. The core components of MDS are MDS configuration manager, MDS manager, and MDS web service.
Getting ready
There are certain pre-installation tasks required to install Master Data Services (MDS) and the setup must meet minimum requirements. The installation requirement is divided into MDS setup, MDM web application services, and MDS database.
The MDS setup prerequisites are as follows:
- The MDS setup is possible only on the 64-bit versions of SQL Server 2008 R2 Datacenter, SQL Server 2008 R2 Enterprise, and SQL Server 2008 R2 Developer editions
- The supported operating systems are Enterprise Editions of Windows Server 2008 R2, Windows Server 2008, and Ultimate editions of Windows 7, and Windows Vista Ultimate. Also, Windows 7 or Vista Professional edition support this feature
- Microsoft .NET framework 3.5 Service Pack1 is required, to download refer to http://go.microsoft.com/fwlink/?LinkId=128220
- The user account used to install MDS must be a member of the Administrators group on the local server
The MDM web application and web services prerequisites are as follows:
The MDS database prerequisites are as follows:
- MDS requires a database to support MDM web applications and web services
- In this recipe, the machine that hosts an MDS database is using an instance of SQL Server 2008 R2 database engine
How to do it...
To implement the Master Data Management solution, MDS must be installed, which has two main components, an MDS database component and an MDS web component. Ensure that all of the prerequisites (mentioned in the earlier sections) are in place and by default the MDS is not installed as a part of the regular SQL Server 2008 R2 installation. We need to install the MDS separately as follows:
- On the SQL Server 2008 R2 installation media, navigate to the MasterDataServicesX641033_ENU folder and double-click on masterdataservices.msi file that will present a welcome screen
- Similar to the SQL Server installation screens, the MDS setup requires default information on the remaining steps that are self-explanatory
- The presented screens are License Agreement, Registration Information, Feature selection, and Ready to install to complete the Master Data Services installation
Now that we have installed the Master Data Services components on the server, we need to configure the MDS to make it available for use.
- The MDM configuration is implemented as a two-fold phase: Databases and Web Configuration.
- To launch the MDS configuration manager, go to Start | All Programs | SQL Server 2008 R2 | Master Data Services | Configuration Manager.
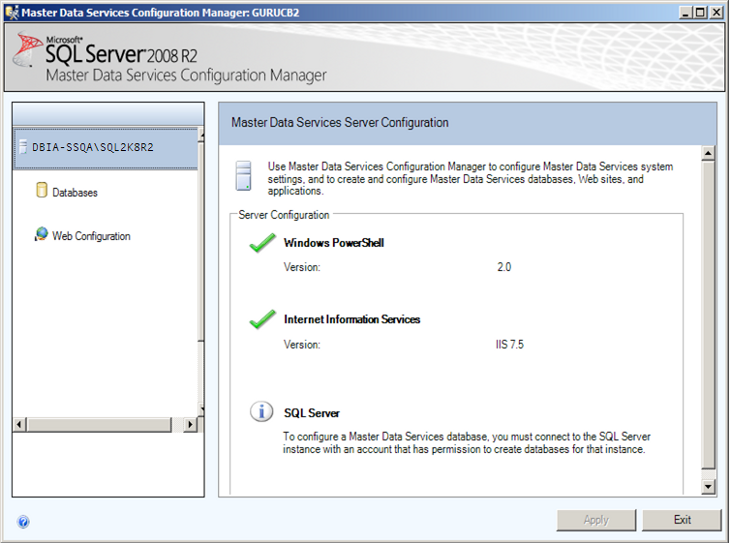
- The tabs on the left-hand side represent Databases and Web configuration. Databases configure and store MDS configuration, web configuration for MDS, and web service for application integration.
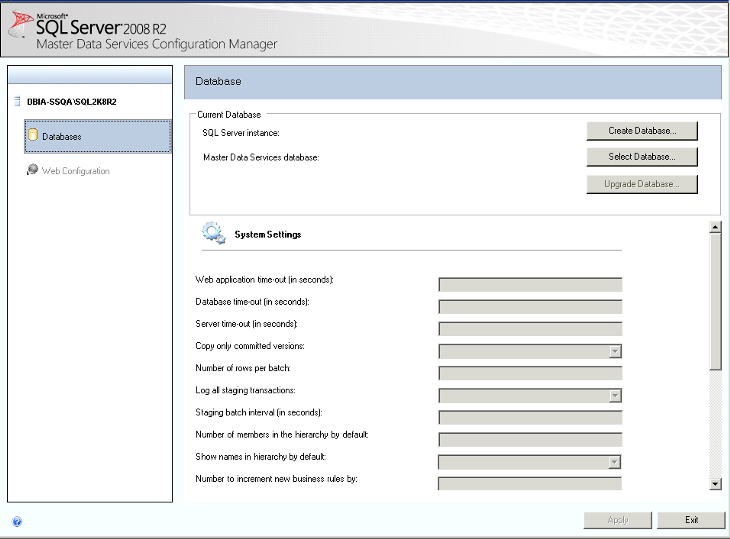
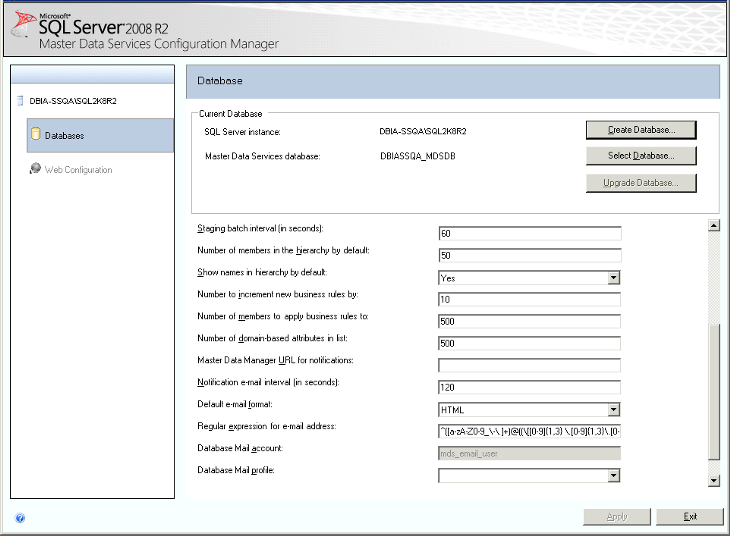
- Make sure you click on the Databases page to create an MDS database to configure and store MDS objects. The database that is used or created must be on SQL Server 2008 R2.
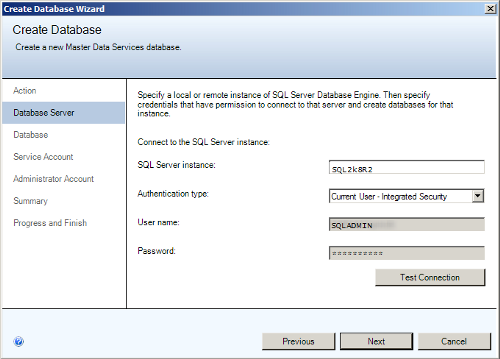
- To ensure that the supplied configuration is working, click on the Test Connection button.
- Click Next to create a new Master Data Services database.
Unlock access to the largest independent learning library in Tech for FREE!
Get unlimited access to 7500+ expert-authored eBooks and video courses covering every tech area you can think of.
Renews at $19.99/month. Cancel anytime
- On the Create Database screen, provide the database name and collation (choose SQL Server default collation or Windows collation). The collation is a single-selection, when we choose the SQL Server default collation, the Windows collation and other options (binary/case-sensitive) are disabled.
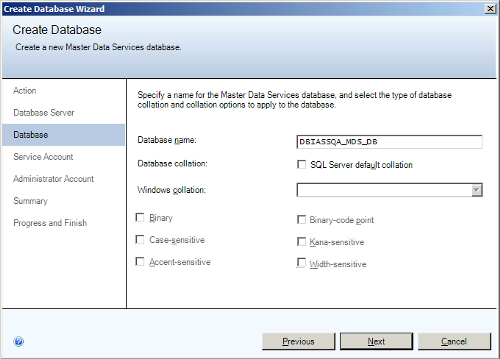
The Collation is an important step to plan when Unicode data is stored and managed within the database. It is essential to plan proper collation settings during the SQL Server installation.
- The remaining two options Service Account and Administrator Account are self-explanatory.
- The username specified in the Service Account screen is added as member of dbo role for DBIASSQA_MDS_DB database. The user name specified in the Administrator Account screen will be the site administrator (super user) and will also have permissions to log on and add users to MDM applications.
- The account must be a domain account that is required to use application pools to connect to a database. Access the database using MDS manager site and web services based on the permissions.
- The Summary screen is an informative window that will help to review the details, click Next to start the configuration.
- The status for the MDS database creation and configuration will be shown as a Success.
- Click Finish to complete the Create Database wizard. To hold the metadata for the MDS repository, proceed to Metadata Services configuration manager.
- It is ideal to leave all the System Settings to default except Master Data Manager URL for notifications value.
- The MDS configuration manager for Databases is complete, so we will now proceed to the Web Configuration tab.
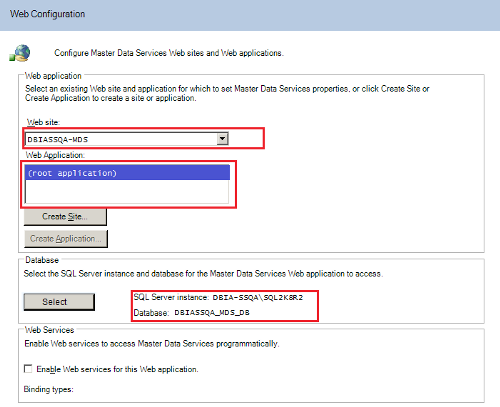
- Click on the Web Configuration option, which will present the following screenshot.
- The configuration will provide you with various options such as:
- Select the required website (from Web site drop-down) and web applications that hold MDS and can be configured
- Select required websites that do not have MDS and click on Create Application
- Create a new website by clicking on Create Site–that is specific to MDS only–that automatically creates a web application
- To choose an existing SQL server instance and database for MDS web application to access, click on the Select button.
- For this recipe, we will use an existing website: DBIASSQA-MDS, so select an existing SQL Server instance: DBIA-SSQASQL2K8R2 and database: DBIASSQA_MDS_DB.
- To configure the web services to enable programmatic access to MDS, click on the Enable Web services for this Web application option.
- Click on Apply to complete the MDS configuration. This completes the configuration and presents a popup indicating that the MDS configuration is complete.
- On the Configuration Complete screen, choose the Launch Web application in browser option and click OK to open the MDS Getting Started page in the browser.
This completes the configuration of the Master Data Services databases and web configuration that will enable you to feature the MDS solution on an existing data platform.
How it works...
The Master Data Services setup will host the MDS web application and installs relevant MDS folders and files at the location and assigns permission to the objects. The setup will register MDS assemblies in the Global Assembly Cache (GAC). The MDS snap-in for Windows PowerShell is registered and installs the MDS configuration manager. A new windows group called MDS_ServiceAccount is created to contain the MDS service accounts for application pools. The MDS installation path creates a folder MDSTempDir where temporary compilation files are compiled for the MDM web application, and permissions are assigned for the MDS_ServiceAccount group.
The web application configuration section follows a different workflow method, by including an option to Create Site followed by specifying settings for the new site and the MDS web application configured as the root web application in the site. This process will not allow you to configure the MDS web application under any virtual paths or specify an alias for the application. The Create New Application process enables you to select a website to create an MDS application in and the Create Application screen allows you to specify settings for the new application. The MDS application will be configured as an application in the selected site at the virtual path and at a specified alias.

 United States
 Great Britain
 India
India
 Germany
 France
 Canada
 Russia
 Spain
Spain
 Brazil
 Australia
 Singapore
 Canary Islands
 Hungary
 Ukraine
 Luxembourg
 Estonia
 Lithuania
 South Korea
 Turkey
 Switzerland
 Colombia
 Taiwan
 Chile
Chile
 Norway
 Ecuador
 Indonesia
 New Zealand
 Cyprus
 Denmark
 Finland
 Poland
 Malta
Malta
 Czechia
 Austria
 Sweden
 Italy
Italy
 Egypt
Egypt
 Belgium
 Portugal
 Slovenia
 Ireland
 Romania
 Greece
 Argentina
 Netherlands
 Bulgaria
 Latvia
 South Africa
 Malaysia
 Japan
Japan
 Slovakia
 Philippines
 Mexico
 Thailand


