


Have you ever wanted an easy way to connect your Arduino to your phone? The Blend Micro from RedBearLab is an Arduino-compatible development board that includes a Bluetooth Low-Energy (BLE) module for connecting with phones and computers. With BLE you can make a quick connection between your phone and Arduino to exchange simple messages like sensor readings or commands for the Arduino to execute.
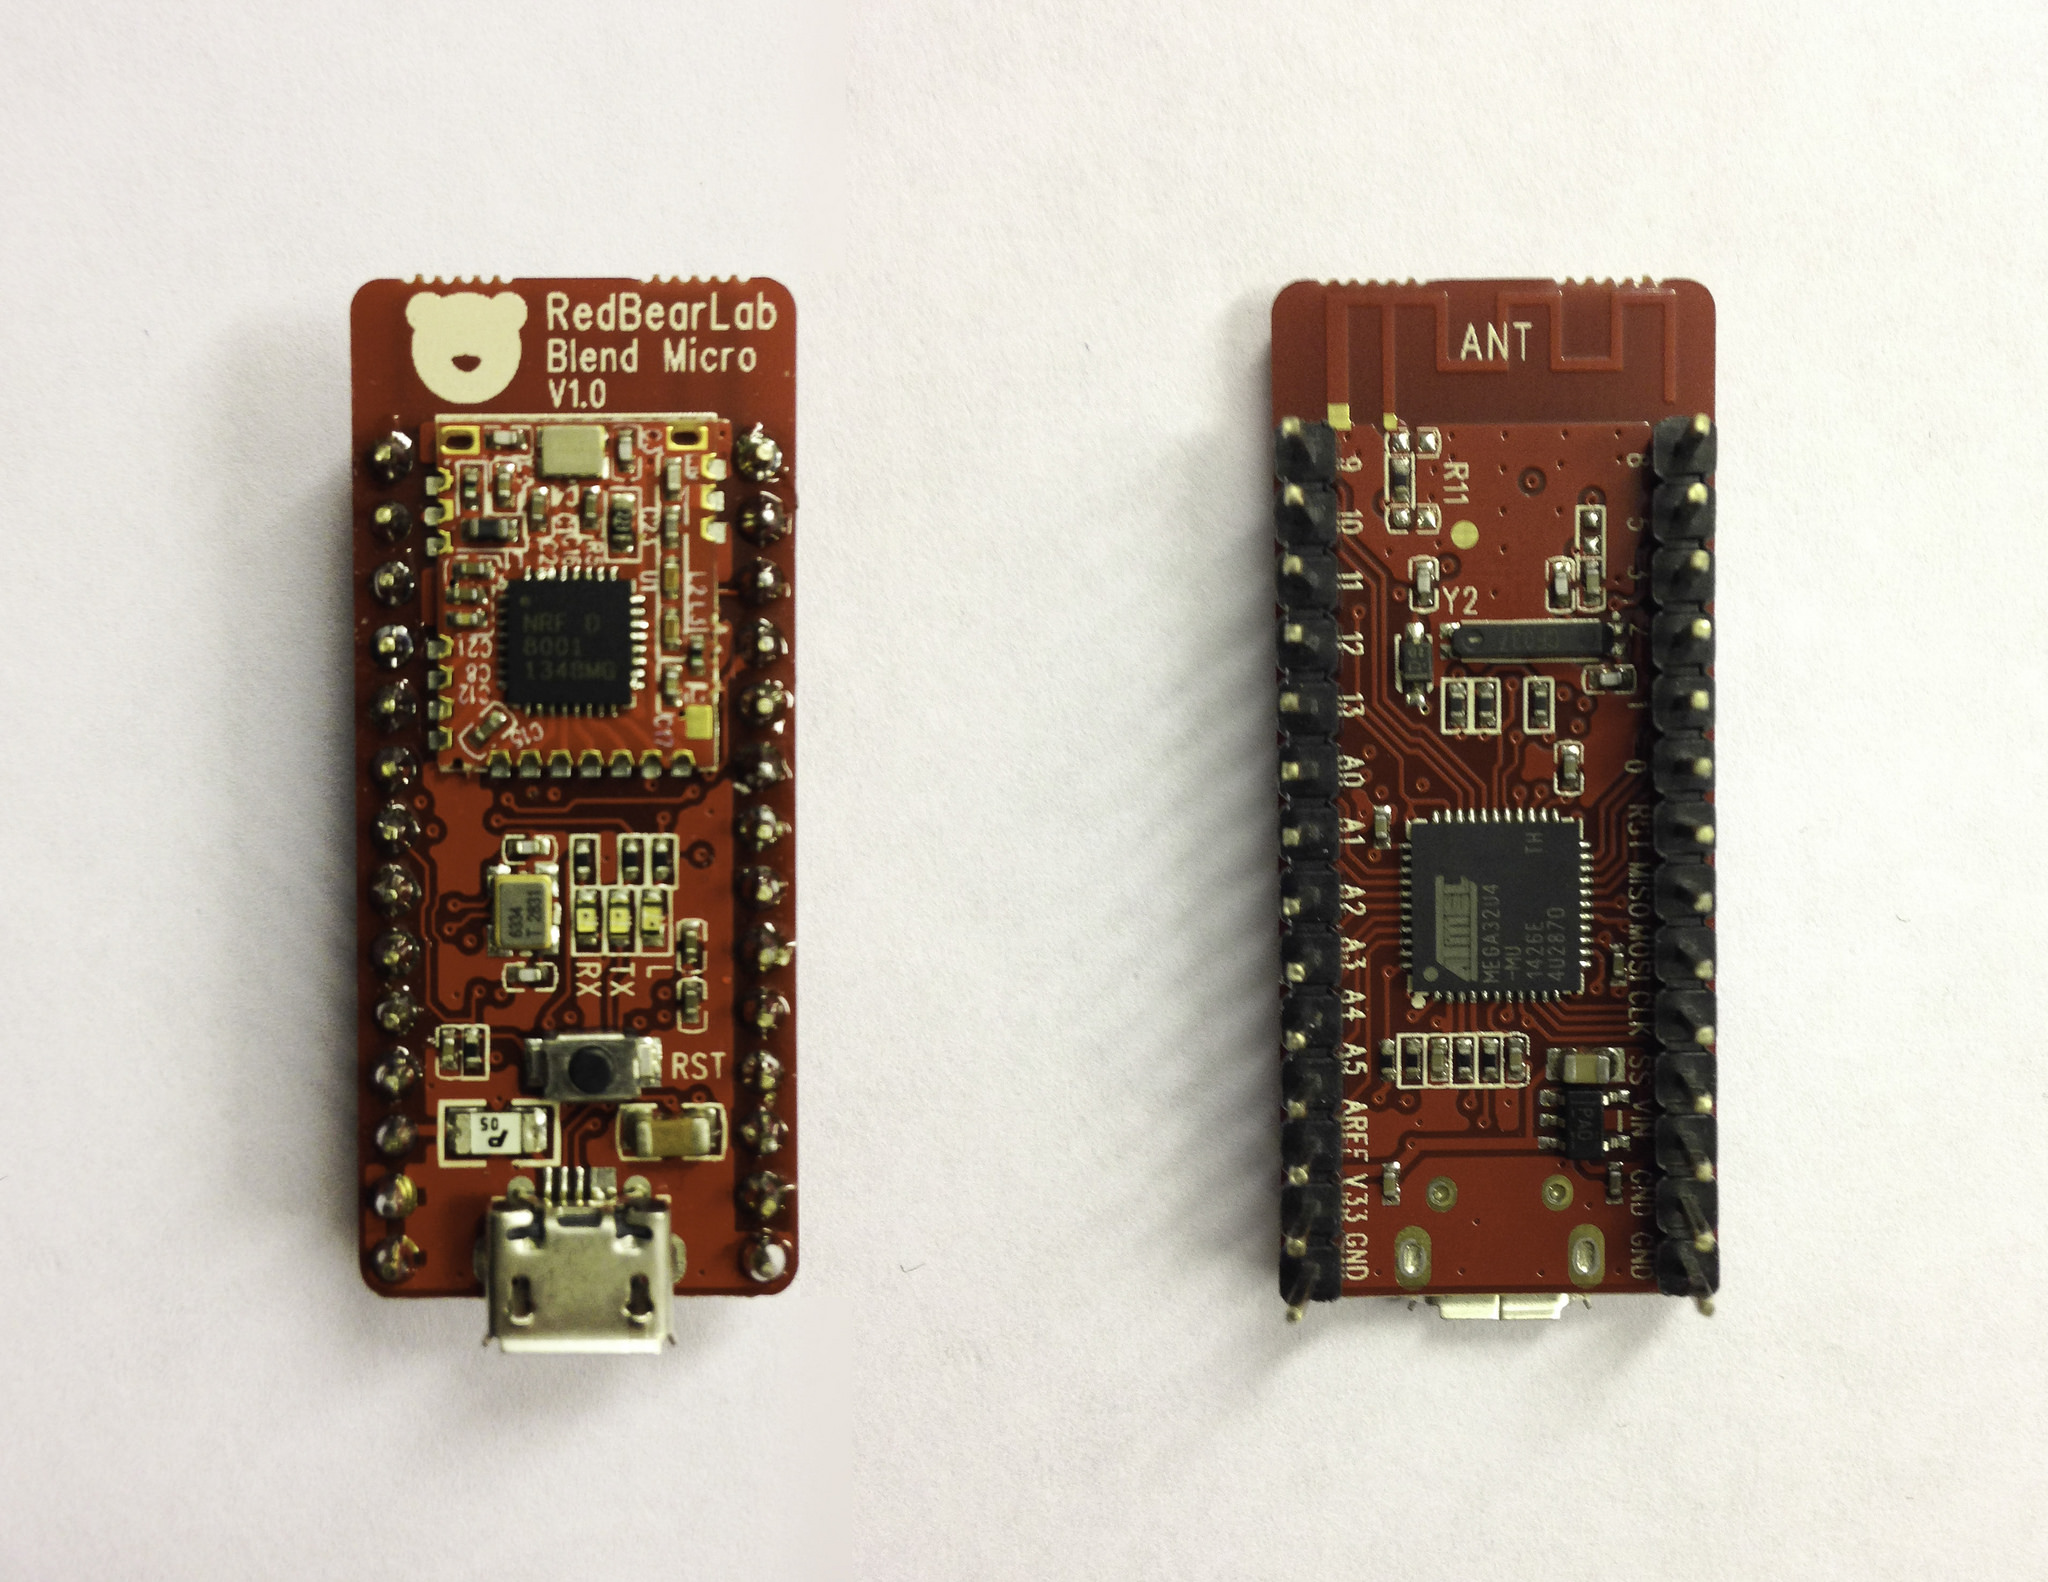
Blend Micro top and bottom showing Bluetooth module on the top side. ATMega32u4 (Arduino) microcontroller on the bottom and on-board antenna.
The Blend Micro is a rather small development board – much smaller than a normal-sized Arduino. This makes it great for portable devices – just the kind we might like to connect to our phone! The larger Blend is available in the full-size Arduino format, if you have shields you’d like to connect.
Bluetooth Low-Energy offers a lot of advantages over older versions of Bluetooth, particularly for battery-powered devices that aren’t always transmitting data. Recent iOS / Android devices and laptops with Bluetooth 4.0 should work (there’s a list of compatible devices on the Blend Micro page). I’ve been using the Blend Micro with my iPhone 5.
 Even on a breadboard it’s small enough to be portable. Coin cell battery pack on the right.
Getting set up for development is unfortunately a bit complicated. To use the normal Arduino IDE you have to download an older version of Arduino (I’m using 1.0.6), install a few libraries, and patch a file inside the Arduino application itself (details here). Luckily that only has to be done once. A potentially easier way to get started is to use the online programming environment Codebender (quickstart instructions). One hitch with Codebender is you may need to manually press the reset button on the Blend Micro while programming (this isn’t required when programming using the normal Arduino IDE). If the Blend Micro is actively connected via Bluetooth, closing the connection on your phone or other device before programming seems to help.
Once you’re set up for development programming the board is relatively straightforward. Blinking an LED from your Arduino is cool. How about blinking an LED on an Arduino, controlled by your phone? You can load the SimpleControls example onto your Blend Micro and the BLE Controller app onto your phone (iOS, Android). Connecting to the Blend Micro is simple – with the app open just tap “Scan” and your Blend Micro should be shown in the list of discovered devices. There’s no pairing step (required by previous Bluetooth versions) so connecting is easy.
The BLE Controller app lets you control a few pins on the Arduino and receive data back, all without needing any more hardware on your phone. Pretty slick! Having the user interface to our device on our phone allows us to show a lot of information since there’s a lot of screen real estate. Since we already have our phone with us, why carry another screen for our portable device?
I’m currently working on a wearable light logger that will record the intensity and color of the ambient light that people experience throughout their day. The wearable device is part of my Light Catchers project that collects our “light histories” into a public light sculpture. The wearable will have an Arduino-compatible micro-controller, RGB light sensor and data storage. For prototyping the wearable I’ve been using the Blend Micro to get a real-time view of the light sensor data on my phone so I can see how the sensor reacts to different lighting conditions.
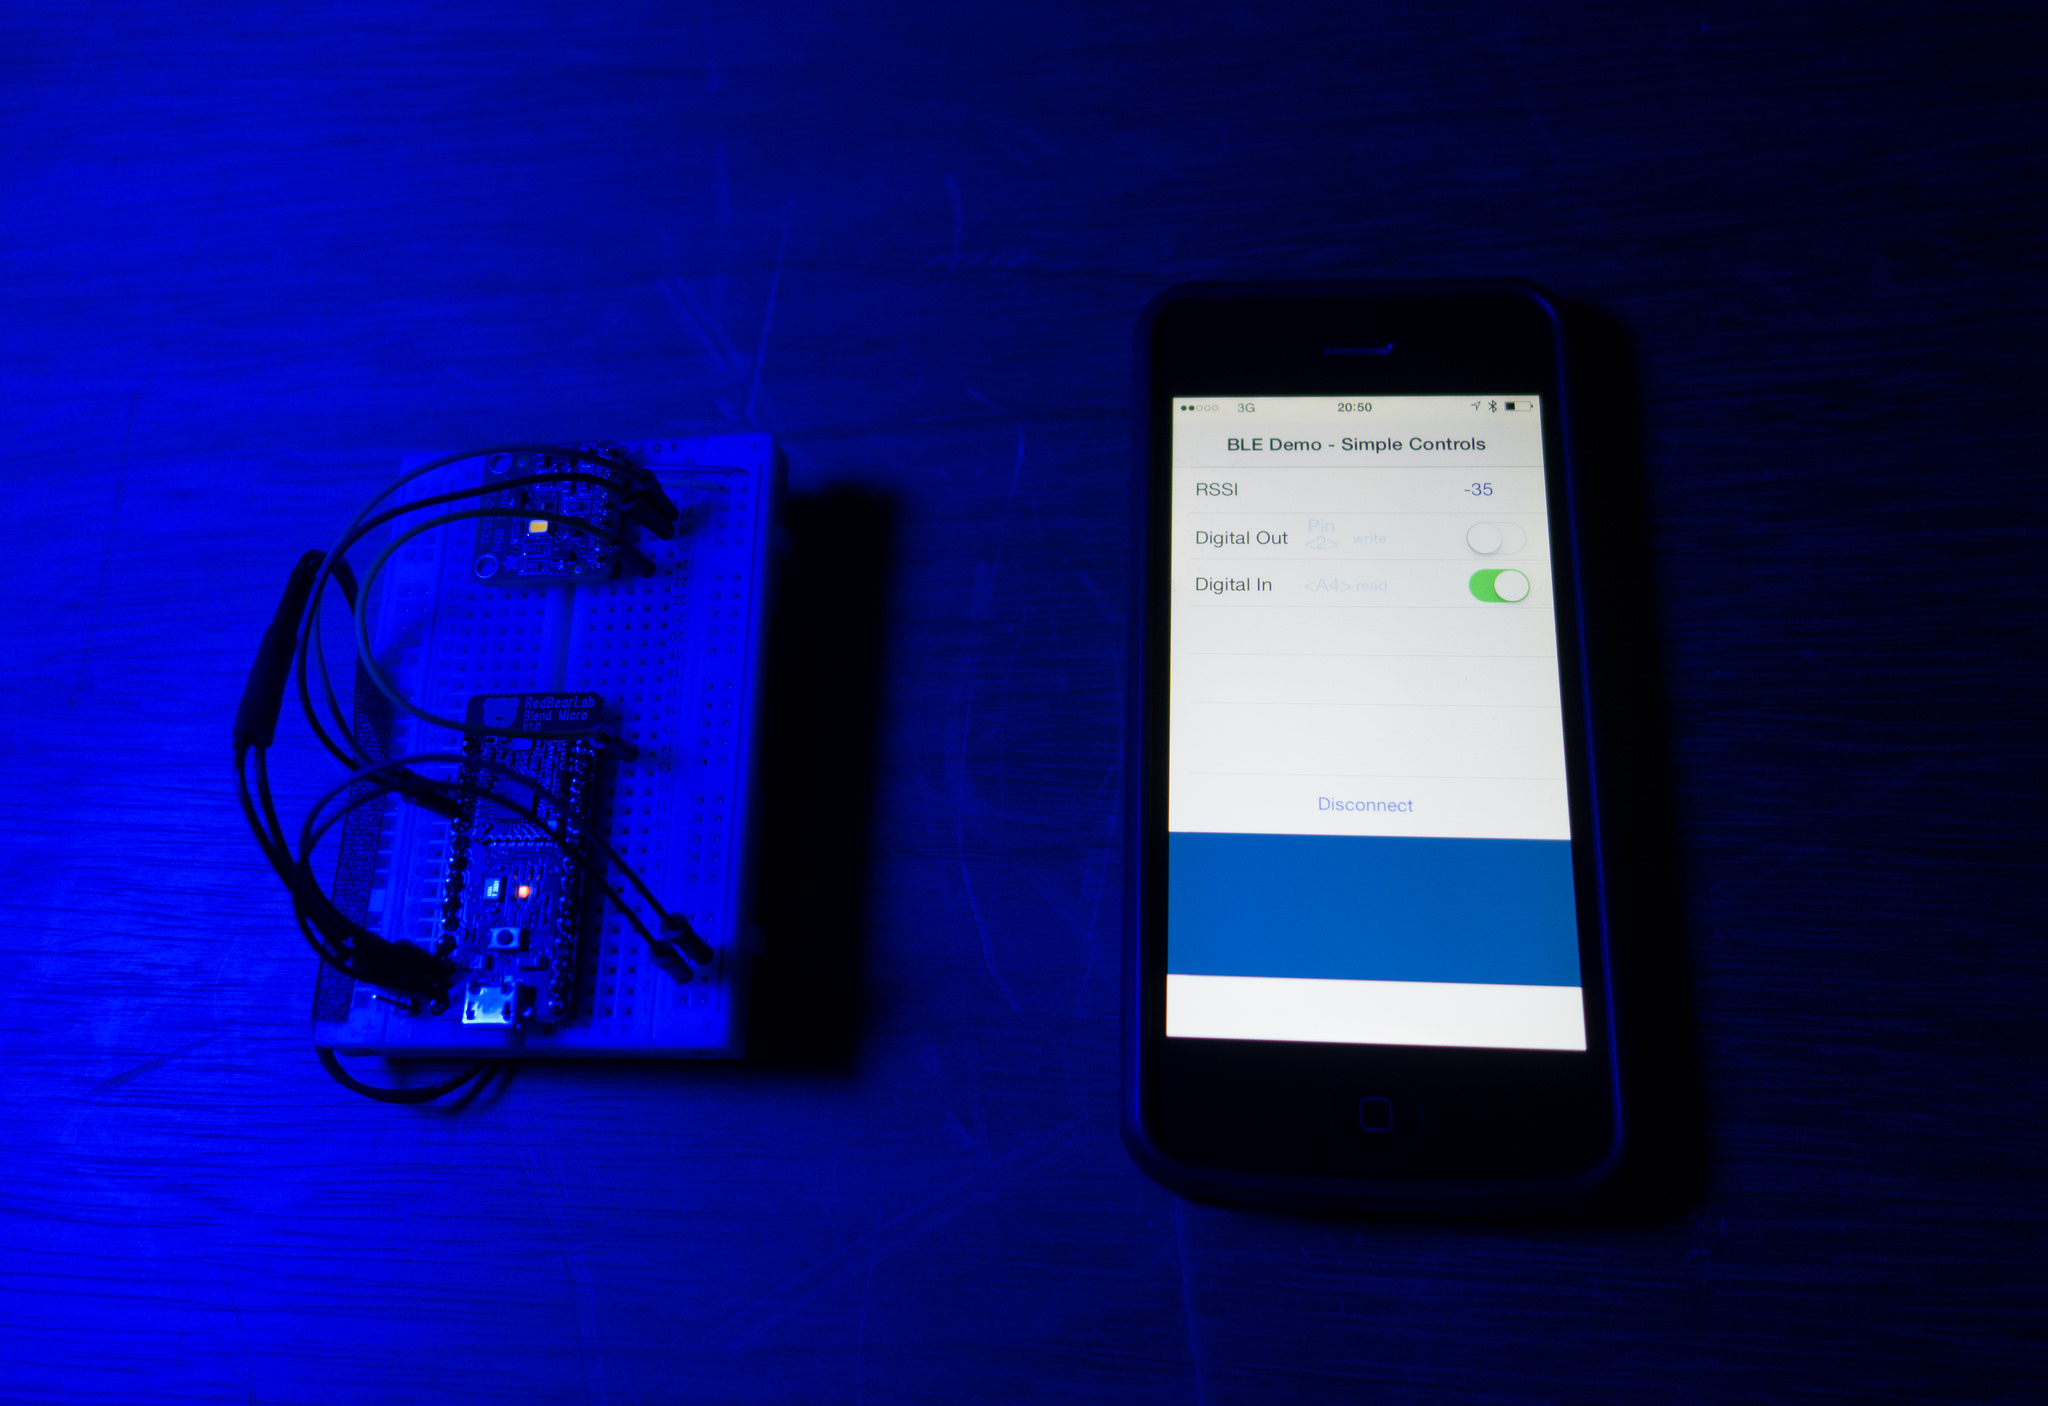 Sending live color readings under blue light.
I started with the SimpleControls example and adapted it to send the RGB data from the light sensor. You can see the full code that runs on the Blend in my RGBLE.ino sketch. Sending the light sensor data was fairly straight forward. Let’s have a quick look at the code that’s needed to send data over BLE.
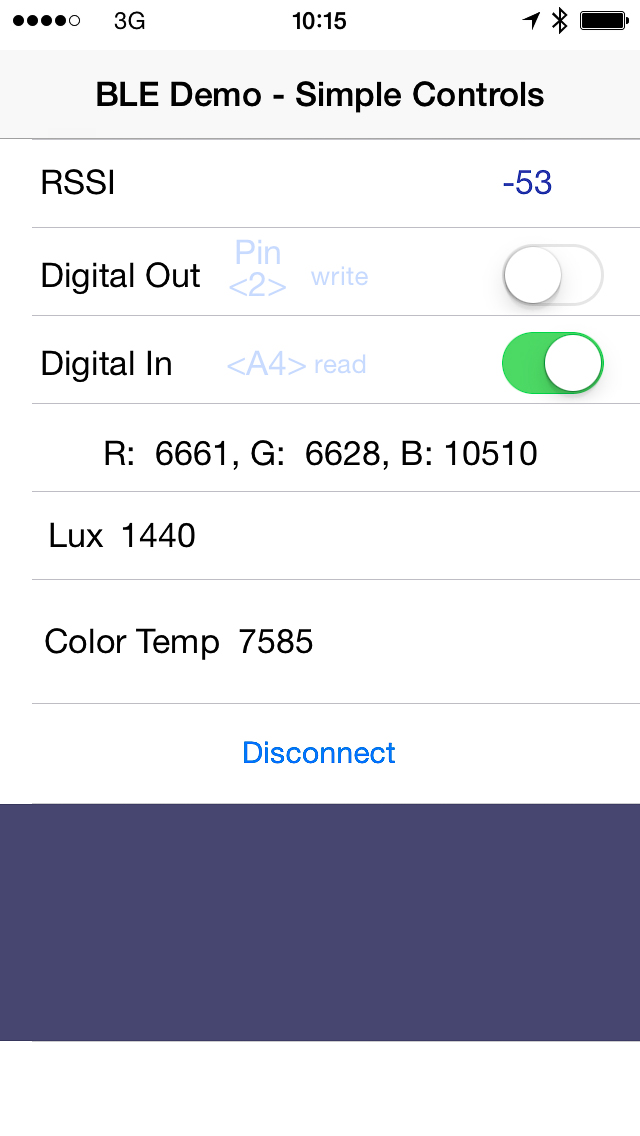 Color display on the iPhone. RSSI is Bluetooth signal strength.
Inside our setup function we can set the name of our BLE device. This name will show up when we scan for the device on our phone. Then we start the BLE library.
void setup()
{
  // ...
  // Set your BLE device name here, max. length 10
  ble_set_name("RGB Sensor");

  // Init. and start BLE library.
  ble_begin();
  // ...
}
Inside our loop function, we can check if data is available, and read the bytes that were sent from the phone.
void loop()
{
  // ...

  // If data is ready
  while(ble_available())
  {
    // read out command and data
    byte data0 = ble_read();
The RGB sensor that I’m using reads each color channel as a 10-bit value. Since the data won’t fit in an 8-bit byte the value is stored as two bytes. Sending a byte over the BLE connection is as simple as calling ble_write. I send each byte of the two-byte value separately using a little math with the shift operator (>>). I only take a reading and send the data if there is an active BLE connection.
// Check if we’re connected
  if (ble_connected())
  {
      // Take a light reading
      // ...

      // Send reading as bytes.
      ble_write(r >> 8);
      ble_write(r);
At the end of our loop function the library needs to do some work to handle the Bluetooth data.
// Allow BLE library to send/receive data
  ble_do_events();

} // end loop
The app I run on my iPhone is a customized version of the Simple Controls sample app. My app shows the received color values on-screen. RedBearLab has sample code for various platforms available on the RedBearLab github page.
For prototyping my device having an on-screen display with debugging controls is great. The small size of the Blend Micro makes it well suited for prototyping my wearable device. Range seems to be fairly limited (think inside a room rather than between rooms) but I haven’t done anything to optimize the antenna placement, so your mileage may vary.
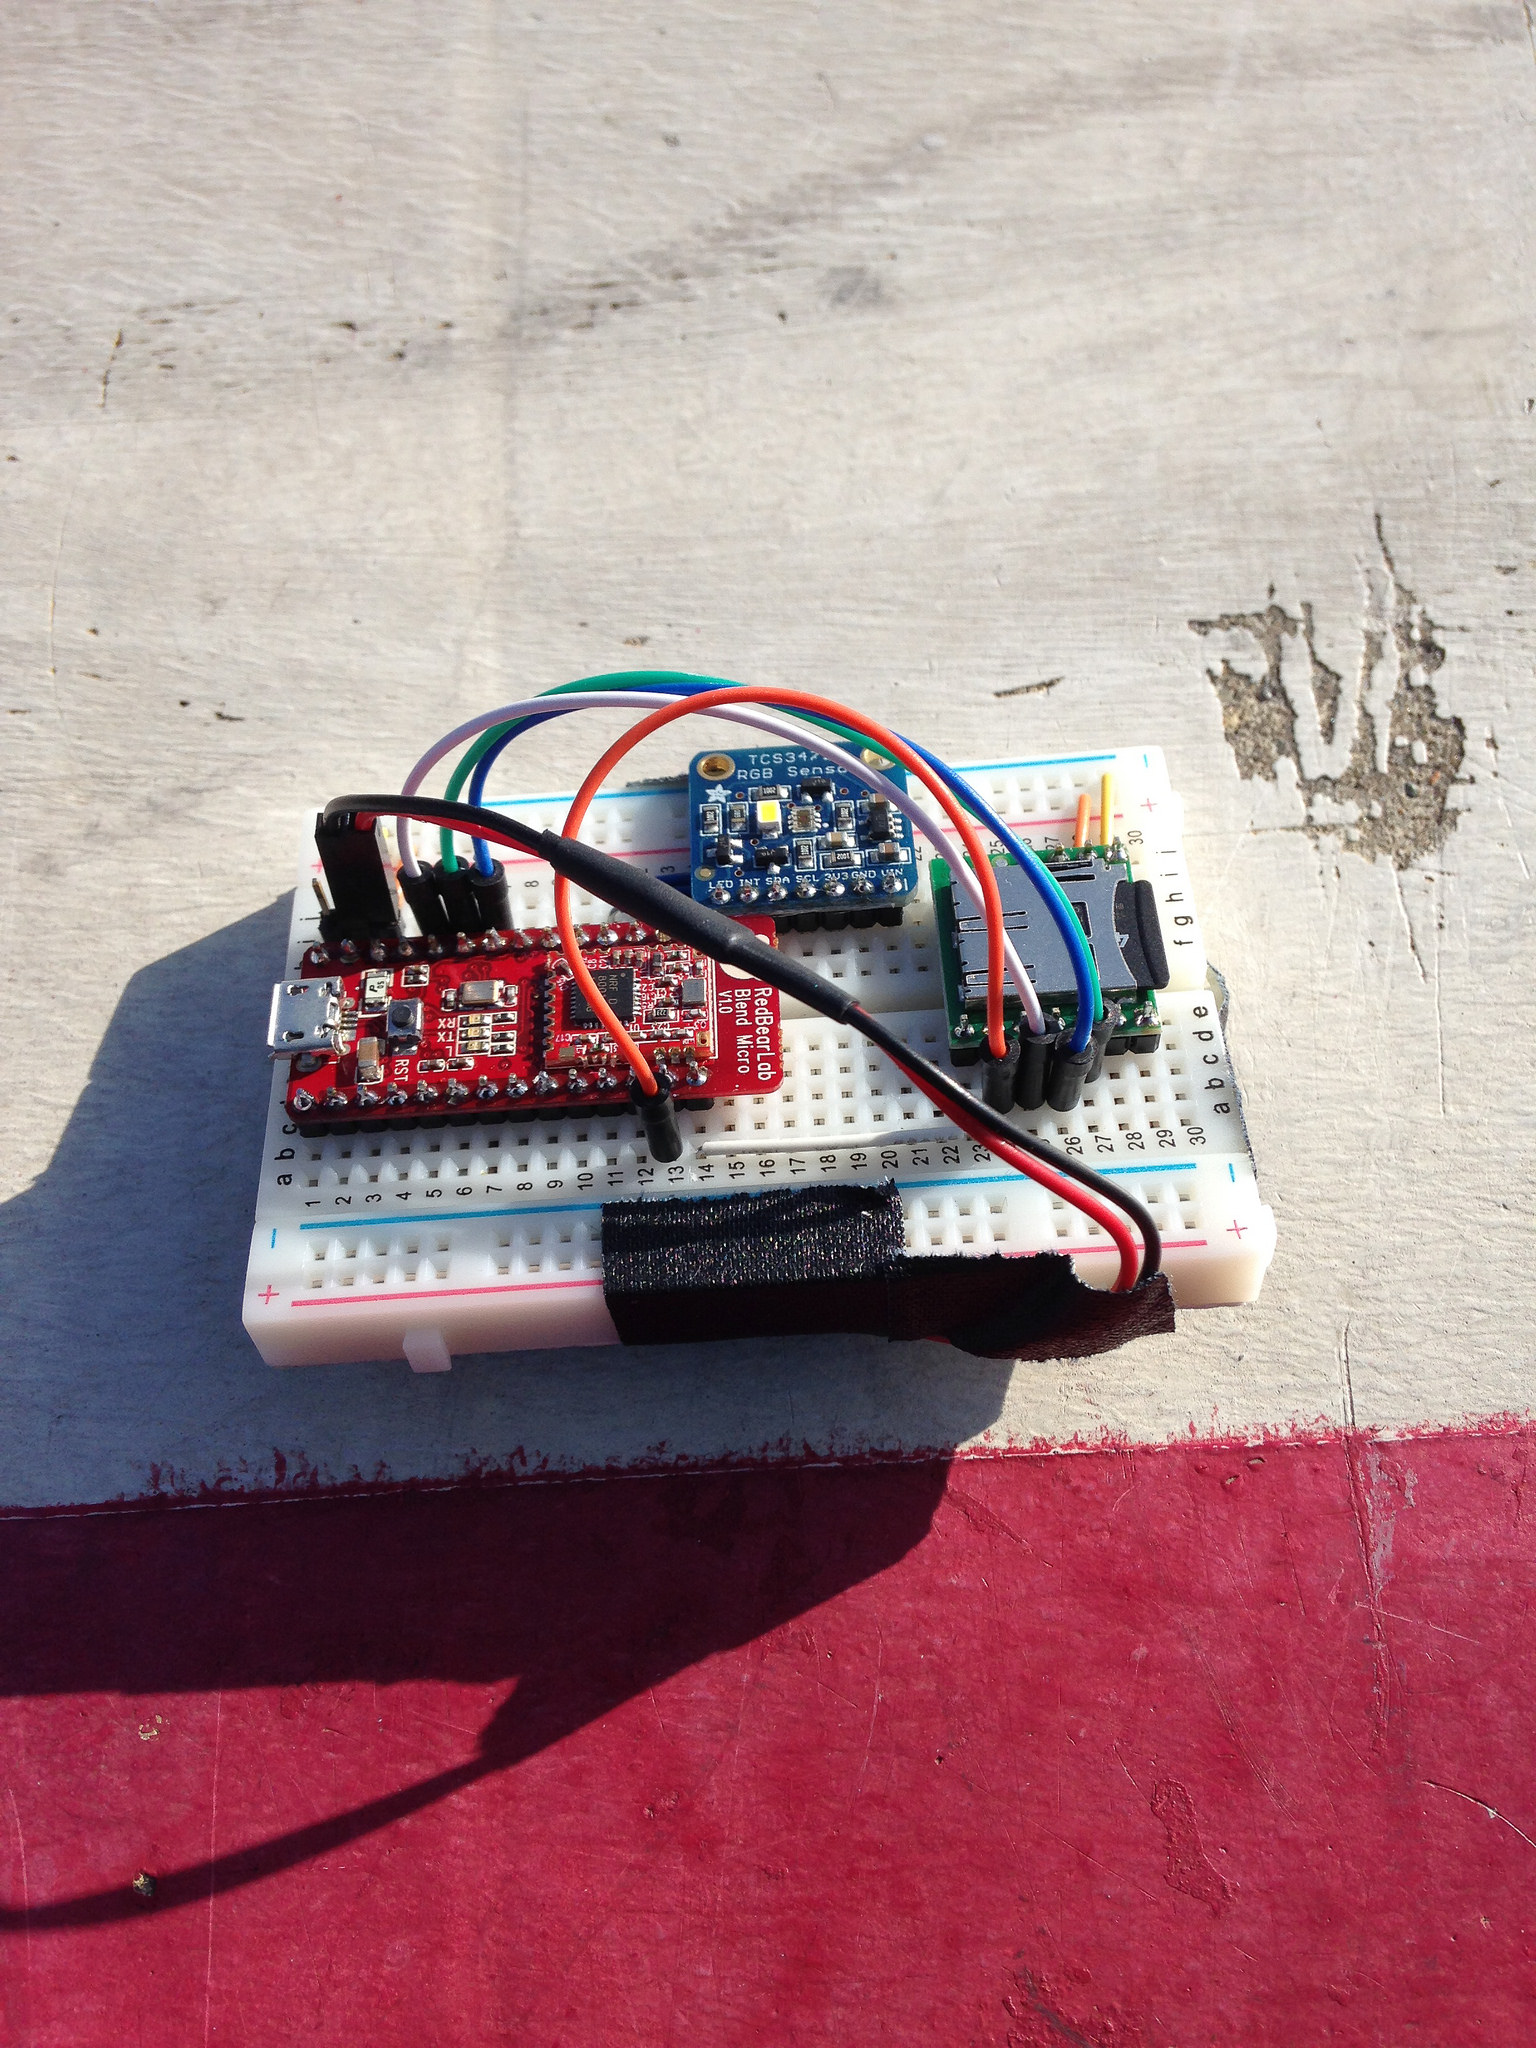 Color sensor prototype “in the field” on a sunny day at Tempelhofer Feld in Berlin.
Battery life seems quite promising. I’m running my prototype off two 3V lithium coin cells and get several hours of life even before doing power optimization. Some Arduino boards have a power LED that’s always on while the board is powered. That LED might draw 20mA of current, which is a lot when you consider that good coin cells might provide 240mAh of current in the best case (typical datasheet). With the Blend Micro it’s easy to turn off all the onboard LEDs (see the RGBLE sketch for details). I measured the current consumption of my prototype around 14-16mA, with peaks around 20mA when starting the Bluetooth connection to my phone. It’s impressive to be sending data over the air using less power than you might use to light an LED! Accurately measuring the power consumption can be tricky since the radio transmissions can happen in short bursts. Probably the topic of another post!
Other than some initial difficulty setting up the development environment programming with the Blend Micro is pretty smooth. Connecting your Arduino to your phone over a low power radio link opens up a lot of possibilities when you consider that your phone probably has a large touchscreen, cellular Internet connection, GPS and more. Once you try an Arduino that can wirelessly talk to your phone and computer, you always want it to do that!
Resources
(We Are) Light Catchers – wearable light logger
About the Author
Michael Ang is a Berlin-based artist and engineer working at the intersection of art, engineering and human experience. His works use technology to enhance our understanding of natural phenomena, modulate social interaction, and bridge the divide between the virtual and physical. His Light Catchers workshops and public installations will take place in Germany for the International Year of Light 2015.


