
When it comes to Angular development, there are some things that are good to know and some things that we need to know to embark on our great journey. One of the things that is good to know is semantic versioning. This is good to know because it is the way the Angular team has chosen to deal with changes. This will hopefully make it easier to find the right solutions to future app development challenges when you go to https://angular.io/ or Stack Overflow and other sites to search for solutions.
In this tutorial, we will discuss Angular components and few practical examples to help you get real world understanding of Angular components.

This article is an excerpt from the book Learning Angular Second edition, written by Christoffer Noring & Pablo Deeleman.
Web components
Web components is a concept that encompasses four technologies designed to be used together to build feature elements with a higher level of visual expressivity and reusability, thereby leading to a more modular, consistent, and maintainable web. These four technologies are as follows:
- Templates: These are pieces of HTML that structure the content we aim to render.
- Custom elements: These templates not only contain traditional HTML elements, but also the custom wrapper items that provide further presentation elements or API functionalities.
- Shadow DOM: This provides a sandbox to encapsulate the CSS layout rules and JavaScript behaviors of each custom element.
- HTML imports: HTML is no longer constrained to host HTML elements, but to other HTML documents as well.
In theory, an Angular component is indeed a custom element that contains a template to host the HTML structure of its layout, the latter being governed by a scoped CSS style sheet encapsulated within a shadow DOM container.
Let’s try to rephrase this in plain English. Think of the range input control type in HTML5. It is a handy way to give our users a convenient input control for entering a value ranging between two predefined boundaries. If you have not used it before, insert the following piece of markup in a blank HTML template and load it in your browser:
<input id="mySlider" type="range" min="0" max="100" step="10">You will see a nice input control featuring a horizontal slider in your browser. Inspecting such control with the browser developer tools will unveil a concealed set of HTML tags that were not present at the time you edited your HTML template. There you have an example of shadow DOM in action, with an actual HTML template governed by its own encapsulated CSS with advanced dragging functionality. You will probably agree that it would be cool to do that yourself.
Well, the good news is that Angular gives you the tool set required for delivering this very same functionality, to build our own custom elements (input controls, personalized tags, and self-contained widgets). We can feature the inner HTML markup of our choice and our very own style sheet that is not affected (nor is impacted) by the CSS of the page hosting our component.
Why TypeScript over other syntaxes to code Angular apps?
Angular applications can be coded in a wide variety of languages and syntaxes: ECMAScript 5, Dart, ECMAScript 6, TypeScript, or ECMAScript 7.
TypeScript is a typed superset of ECMAScript 6 (also known as ECMAScript 2015) that compiles to plain JavaScript and is widely supported by modern OSes. It features a sound object-oriented design and supports annotations, decorators, and type checking.
The reason why we picked (and obviously recommend) TypeScript as the syntax of choice for instructing how to develop Angular applications is based on the fact that Angular itself is written in this language. Being proficient in TypeScript will give the developer an enormous advantage when it comes to understanding the guts of the framework.
On the other hand, it is worth remarking that TypeScript’s support for annotations and type introspection turns out to be paramount when it comes to managing dependency injection and type binding between components with a minimum code footprint. Check out the book, Learning Angular 2nd edition, to learn how to do this.
Ultimately, you can carry out your Angular projects in plain ECMAScript 6 syntax if that is your preference. Even the examples provided in this book can be easily ported to ES6 by removing type annotations and interfaces, or replacing the way dependency injection is handled in TypeScript with the most verbose ES6 way.
For the sake of brevity, we will only cover examples written in TypeScript. We recommend its usage because of its higher expressivity thanks to type annotations, and its neat way of approaching dependency injection based on type introspection out of such type annotations.
Setting up our workspace with Angular CLI
There are different ways to get started, either using the Angular quickstart repository on the https://angular.io/ site, or installing the scaffolding tool Angular CLI, or, you could use Webpack to set up your project.
It is worth pointing out that the standard way of creating a new Angular project is through using Angular CLI and scaffold your project. Systemjs, used by the quickstart repository, is something that used to be the default way of building Angular projects. It is now rapidly diminishing, but it is still a valid way of setting up an Angular project.
Setting up a frontend project today is more cumbersome than ever. We used to just include the necessary script with our JavaScript code and a link tag for our CSS and img tag for our [SN1] assets and so on. Life used to be simple. Then frontend development became more ambitious and we started splitting up our code in modules, we started using preprocessors for both our code and CSS. All in all, our projects became more complicated and we started to rely on build systems such as Grunt, Gulp, Webpack, and so on.
Most developers out there are not huge fans of configuration, they just want to focus on building apps. Modern browsers, however, do more to support the latest ECMAScript standard and some browsers have even started to support modules, which are resolved at runtime. This is far from being widely supported though. In the meantime, we still have to rely on tools for bundling and module support.
Setting up a project with leading frameworks such as React or Angular can be quite difficult. You need to know what libraries to import and ensure that files are processed in the correct order, which leads us to the topic of scaffolding tools.
For AngularJS, it was quite popular to use Yeoman to scaffold up a new application quickly and get a lot of nice things preconfigured. React has a scaffolder tool called create-react-app, which you probably have saved and it saves countless hours for React developers. Scaffolder tools becomes almost a necessity as complexity grows, but also where every hour counts towards producing business value rather than fighting configuration problems.
The main motivation behind creating the Angular CLI tool was to help developers focus on app building and not so much on configuration. Essentially, with a simple command, you should be able to scaffold an application, add a new construct to it, run tests, or create a production grade bundle. Angular CLI supports all that.
Prerequisites for installing Angular CLI
What you need to get started is to have Git and Node.js installed. Node.js will also install something called NPM, a node package manager that you will use later to install files you need for your project. After this is done, you are ready to set up your Angular application. You can find installation files to Node.js.
The easiest way to have it installed is to go to the site:
Installing Node.js will also install something called NPM, Node Package Manager, which you will need to install dependencies and more. The Angular CLI requires Node 6.9.0 and NPM 3 or higher. Currently on the site, you can choose between an LTS version and the current version. The LTS version should be enough.
Angular CLI Installation
Installing the Angular CLI is as easy as running the following command in your Terminal:
npm install -g @angular/cliOn some systems, you may need to have elevated permissions to do so; in that case, run your Terminal window as an administrator and on Linux/macOS instead run the command like this:
sudo npm install -g @angular/cliBuilding your first app
Once the Angular CLI is in place the time has come to create your first project. To do so place yourself in a directory of your choice and type the following:
ng new <give it a name here>Type the following:
ng new TodoAppThis will create a directory called TodoApp. After you have run the preceding command, there are two things you need to do to see your app in a browser:
Navigate to the just created directory Serve up the application
This will be accomplished by the following commands:
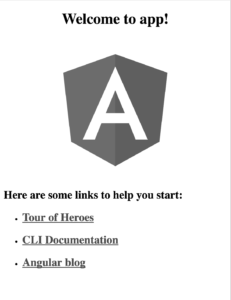
cd TodoApp npm startAt this point, open up your browser on http://localhost:4200 and you should see the following:
Testing your app
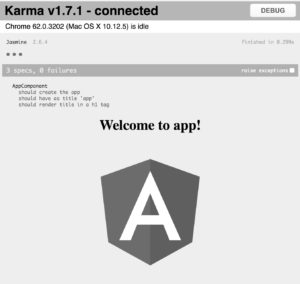
The Angular CLI doesn’t just come with code that makes your app work. It also comes with code that sets up testing and includes a test. Running the said test is as easy as typing the following in the Terminal:
You should see the following:
How come this works? Let’s have a look at the package.json file that was just created and the scripts tag. Everything specified here can be run using the following syntax:
npm run <key>In some cases, it is not necessary to type run and it will be enough to just type:
npm <key>This is the case with the start and test commands.
The following listing makes it clear that it is possible to run more commands than start and test that we just learned about:
"scripts": { "ng": "ng",

"start": "ng serve",

"build": "ng build",

"test": "ng test",

"lint": "ng lint",

"e2e": "ng e2e"

}
So far we have learned how to install the Angular CLI. Using the Angular CLI we have learned to:
- Scaffold a new project.
- Serve up the project and see it displayed in a browser.
- Run tests.
That is quite an accomplishment. We will revisit the Angular CLI in a later chapter as it is a very competent tool, capable of a lot more.
Hello Angular
We are about to take the first trembling steps into building our first component. The Angular CLI has already scaffolded our project and thereby carried out a lot of heavy lifting. All we need to do is to create new file and starting filling it with content. The million dollar question is what to type?
So let’s venture into building our first component. There are three steps you need to take in creating a component. Those are:
- Import the component decorator construct.
- Decorate a class with a component decorator.
- Add a component to its module (this might be in two different places).
Creating the component
First off, let’s import the component decorator:
import { Component } from '@angular/core';Then create the class for your component:
class AppComponent { title:string = 'hello app';

}
Then decorate your class using the Component decorator:
@Component({ selector: 'app',

template: `<h1>{{ title }}</h1>`

})

export class AppComponent { title: string = 'hello app';

}
We give the Component decorator, which is function, an object literal as an input parameter. The object literal consists at this point of the selector and template keys, so let’s explain what those are.
Selector
A selector is what it should be referred to if used in a template somewhere else. As we call it app, we would refer to it as:
<app></app>Template/templateUrl
The template or templateUrl is your view. Here you can write HTML markup. Using the template keyword, in our object literal, means we get to define the HTML markup in the same file as the component class. Were we to use templateUrl, we would then place our HTML markup in a separate file.
The preceding example also lists the following double curly braces, in the markup:
<h1>{{ title }}</h1>This will be treated as an interpolation and the expression will be replaced with the value of AppComponent‘s title field. The component, when rendered, will therefore look like this:
hello appTelling the module
Now we need to introduce a completely new concept, an Angular module. All types of constructs that you create in Angular should be registered with a module. An Angular module serves as a facade to the outside world and it is nothing more than a class that is decorated by the decorate @NgModule. Just like the @Component decorator, the @NgModule decorator takes an object literal as an input parameter. To register our component with our Angular module, we need to give the object literal the property declarations. The declarations property is of a type array and by adding our component to that array we are registering it with the Angular module.
The following code shows the creation of an Angular module and the component being registered with it by being added to declarations keyword array:
import { AppComponent } from './app.component';

@NgModule({

declarations: [AppComponent]

})

export class AppModule {}
At this point, our Angular module knows about the component. We need to add one more property to our module, bootstrap. The bootstrap keyword states that whatever is placed in here serves as the entry component for the entire application. Because we only have one component, so far, it makes sense to register our component with this bootstrap keyword:
@NgModule({

declarations:  [AppComponent],

bootstrap: [AppComponent]

})

export class AppModule {}
It’s definitely possible to have more than one entry component, but the usual scenario is that there is only one.
For any future components, however, we will only need to add them to the declarations property, to ensure the module knows about them.
So far we have created a component and an Angular module and registered the component with said the module. We don’t really have a working application yet, as there is one more step we need to take. We need to set up the bootstrapping.
To summarize, we have shown how to get started with the Angular CLI and create your first Angular component efficiently.
If you are interested to know more, check out Learning Angular Second edition, to get your way through Angular and create dynamic applications with it.
Read Next:
Building Components Using Angular
Why switch to Angular for web development – Interview Insights
8 built-in Angular Pipes in Angular 4 that you should know