In this article by Muhammad A.Moniem, author of the book Unreal Engine Lighting and Rendering Essentials speaks about rendering without mentioning one of the most and old (but important) rendering features since the rise of the 3D rendering. Fog effects have always been an essential part of any rendering engines regardless of the main goal of that engine. However, in games, it is a must to have this feature, not only because of the ambiance and feel it will give to the game, but because it will minimize the draw distance while rendering the large and open areas, which is great performance wise!
The fog effects can be used for a lot of purposes, starting from adding ambiance to the world to setting a global mood (perhaps scary), to simulating a real environment, or even to distracting the players.
By the end of this little article, you'll be able to:
- Understand both the fog types in Unreal Engine
- Understand the difference between both the fog types
- Master all the parameters to control the fog types
Having said this, let's get started!
(For more resources related to this topic, see here.)
The fog types
Unreal Engine provides the user with two varieties of fog; each has its own set of parameters to modify and provide different results of effects. The two supported fog types are as follows:
- The Atmospheric Fog
- The Exponential Height Fog
The Atmospheric Fog
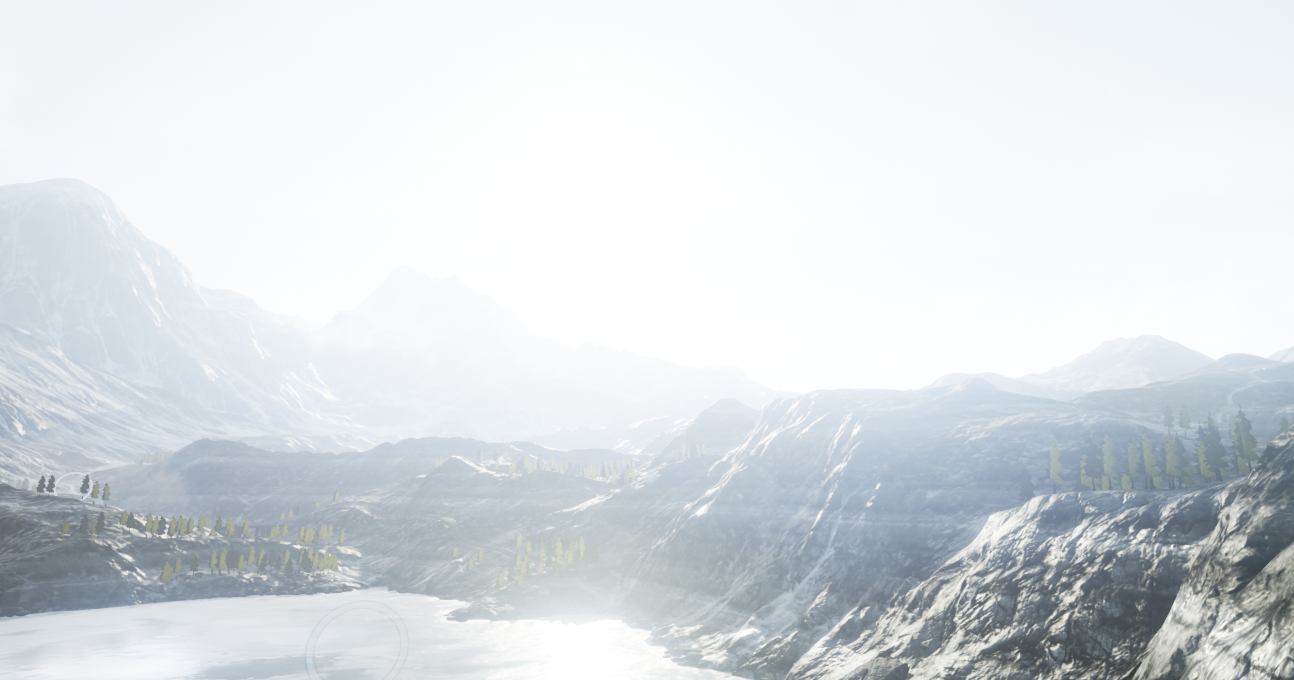
The Atmospheric Fog gives an approximation of light scattering through a planetary atmosphere. It is the best fog method that can be used with a natural environment scene, such as landscape scenes. One of the most core features of this fog is that it gives your directional light a sun disc effect.
Adding it to your game
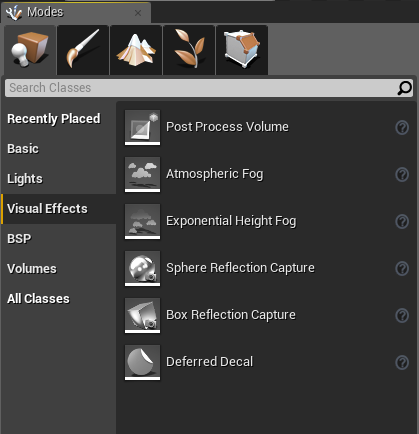
By adding an actor from the Visual Effects section of the Modes panel, or even from the actor's context menu by right-clicking on the scene view, you can install the Atmospheric Fog in your level directly.
In the Visual Effects submenu of the Modes panel, you can find both the fog types listed here.
In order to be able to control the quality of the final visual look of the recently inserted fog, you will have to do some tweaks for its properties attached to the actor.
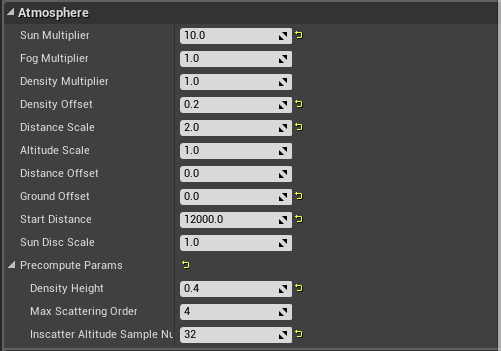
- Sun Multiplier: This is an overall multiplier for the directional light's brightness. Increasing this value will not only brighten the fog color, but will also brighten the sky color as well.
- Fog Multiplier: This is a multiplier that affects only the fog color (does not affect the directional light).
- Density Multiplier: This is a fog density multiplier (does not affect the directional light).
- Density Offset: This is a fog opacity controller.
- Distance Scale: This is a distance factor that is compared to the Unreal unit scale. This value is more effective for a very small world. As the world size increases, you will need to increase this value too, as larger values cause changes in the fog attenuation to take place faster.
- Altitude Scale: This is the scale along the z axis.
- Distance Offset: This is the distance offset, calculated in km, is used to manage the large distances.
- Ground Offset: This is an offset for the sea level. (normally, the sea level is 0, and as the fog system does not work for regions below the sea level, you need to make sure that all the terrain remains above this value in order to guarantee that the fog works.)
- Start Distance: This is the distance from the camera lens that the fog will start from.
- Sun Disk Scale: This is the size of the sun disk, but keep in mind that this can't be 0, as earlier there was an option to disable the sun disk, but in order to keep it real, Epic decided to remove this option and keep the sun disk, but it gives you the chance to make it as small as possible.
- Precompute Params: The properties included in this group need recomputation of precomputed texture data:
- Density Height: This is the fog density decay height controller. The lower the values, the denser the fog will be, while the higher the values, the less scatter the fog will have.
- Max Scattering Num: This sets a limit on the number of scattering calculations.
- Inscatter Altitude Sample Number: This is the number of different altitudes at which you can sample inscatter color.
The Exponential Height Fog
This type of fog has its own unique requirement. While the Atmospheric Fog can be added anytime or anywhere and it works, the Exponential Height Fog requires a special type of map where there are low and high bounds, as its mechanic includes creating more density in the low places of a map and less density in the high places of the map.
Between both these areas, there will be a smooth transition.
Unlock access to the largest independent learning library in Tech for FREE!
Get unlimited access to 7500+ expert-authored eBooks and video courses covering every tech area you can think of.
Renews at $19.99/month. Cancel anytime
One of the most interesting features of the Exponential Height Fog is that is has two fog colors: one for the hemisphere facing the dominant directional light and another color for the opposite hemisphere.

Adding it to your game
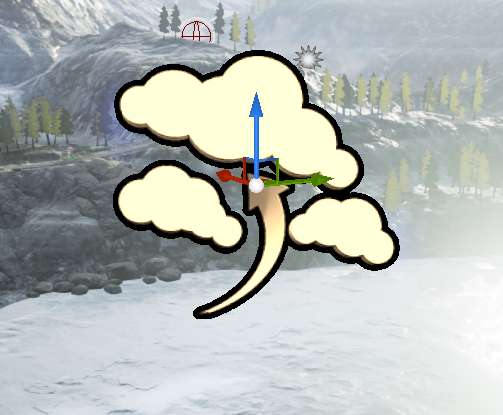
As mentioned earlier, to add the volume type from the same Visual Effects section of the Modes panel is very simple. You can select the Exponential Height Fog actor and drag and drop it into the scene. As you can see, even the icon implies the high and low places from the sea level.

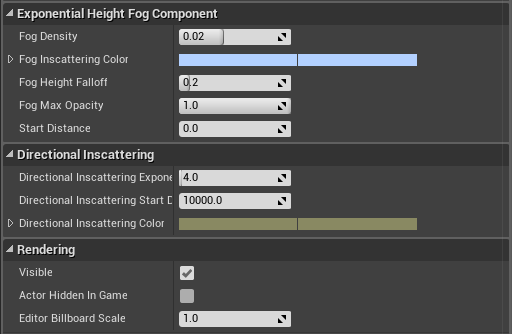
In order to be able to control the final visual look of the recently inserted fog, you would have to do some tweaks for its properties attached to the actor:
- Fog Density: This is the global density controller of the fog.
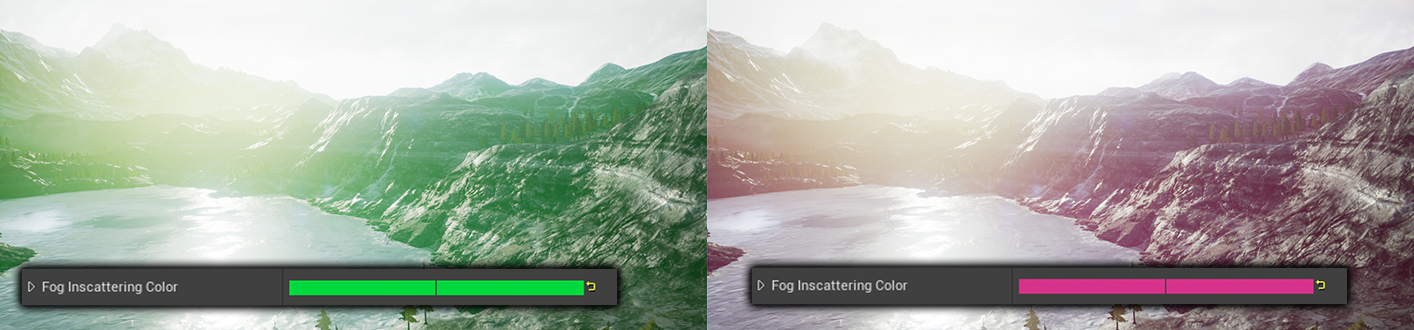
- Fog Inscattering Color: This is the inscattering color for the fog (the primary color). In the following image, you can see how different values work:
- Fog Height Falloff: This is the Height density controller that controls how the density increases as the height decreases.
- Fog Max Opacity: This controls the maximum opacity of the fog. A value of 0 means the fog will be invisible.
- Start Distance: This is the distance from the camera where the fog will start.
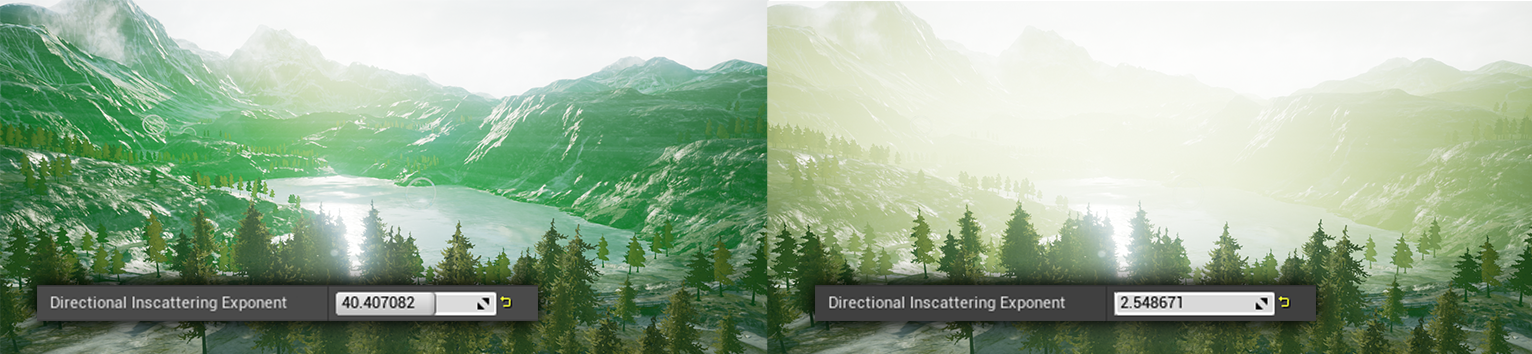
- Directional Inscattering Exponent: This controls the size of the directional inscattering cone. The higher the value, the clearer vision you get, while the lower the value, the more fog dense you get.
- Directional Inscattering Start Distance: This controls the start distance from the viewer of the directional inscattering.
- Directional Inscattering Color: This sets the color for directional inscattering that is used to approximate inscattering from a directional light.
- Visible: This controls the fog visibility.
- Actor Hidden in Game: This enables or disables the fog in the game (it will not affect the editing mode).
- Editor Billboard Scale: This is the scale of the billboard components in the editor.
The animated fog
Almost like any other thing in Unreal Engine, you can do some animations for it. Some parts of the engine are super responsive to the animation system, while other parts have a limited access. However, speaking of the fog, it has a limited access in order to animate some values. You can use different ways and methods to animate values at runtime or even during the edit mode.
The color
The height fog color can be changed at runtime using the LinearColor Property Track in the Matinee Editor. By performing the following given steps, you can change the height fog color in the game:
- Create a new Matinee Actor.
- Open the newly created actor in the Matinee Editor.
- Create a Height Fog Actor.
- Create a group in Matinee.
- Attach the Height Fog Actor from the scene to the group created in the previous step.
- Create a linear color property track in the group.
- Choose the FogInscatteringColor or DirectionalInscatteringColor to control its value (using two colors is an advantage of that fog type, remember!).
- Add keyframes to the track, and set the color for them.
Animating the Exponential Height Fog
In order to animate the Exponential Height Fog, you can use one of the following two ways:
- Use Matinee to animate the Exponential Height Fog Actor values
- Use a timeline node in the Level Blueprint and control the Exponential Height Fog Actor values
Summary
In this article, you learned about the fog effects and the supported types in the Unreal Editor, the different parameters, and how to use any of the fog types. Now, it is recommended that you go ahead directly to your editor, and start adding some fog and play with its values. Even better if you can start to do some animation for the parameters as mentioned earlier.
Don't just try in the Edit mode; sometimes, the results are different when you hit play or even more different when you cook a build, so feel free to build any level you made in an executable and check the results.
Resources for Article:
Further resources on this subject:

 United States
 Great Britain
 India
India
 Germany
 France
 Canada
 Russia
 Spain
Spain
 Brazil
 Australia
 Singapore
 Canary Islands
 Hungary
 Ukraine
 Luxembourg
 Estonia
 Lithuania
 South Korea
 Turkey
 Switzerland
 Colombia
 Taiwan
 Chile
Chile
 Norway
 Ecuador
 Indonesia
 New Zealand
 Cyprus
 Denmark
 Finland
 Poland
 Malta
Malta
 Czechia
 Austria
 Sweden
 Italy
Italy
 Egypt
Egypt
 Belgium
 Portugal
 Slovenia
 Ireland
 Romania
 Greece
 Argentina
 Netherlands
 Bulgaria
 Latvia
 South Africa
 Malaysia
 Japan
Japan
 Slovakia
 Philippines
 Mexico
 Thailand


