Getting ready...
There are many extensions to add event calendars to Joomla!. However, JEvents is the most feature-rich and popular extension. Download this extension from http://www.jevents.net/jevents-download and install it from the Extensions | Install/Uninstall screen.
How to do it...
After installing JEvents, follow these steps to add the calendar:
-
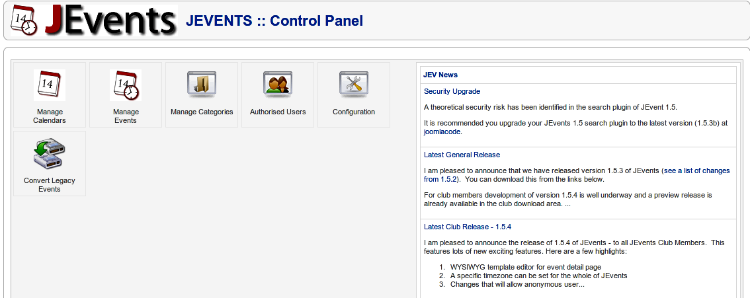
- From the Joomla! administration panel, select Components | JEvents. This will show you the JEvents:: Control Panel screen.
-
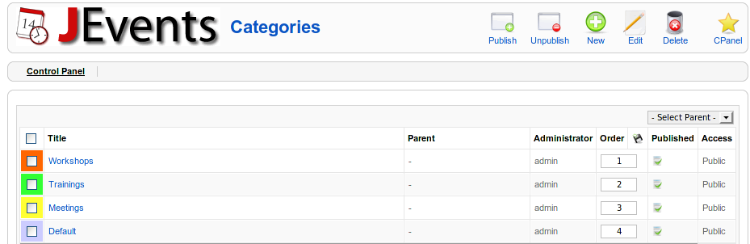
- Click on the Manage Categories icon in the Control Panel screen. This will show you the Categories screen, listing all the available categories, if any.
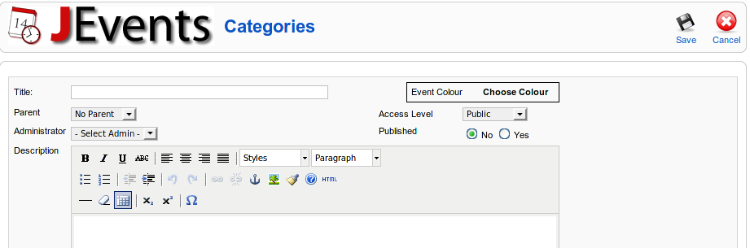
- Click on the New button in the toolbar. It will show you a form similar to that in the following screenshot:
Unlock access to the largest independent learning library in Tech for FREE!
Get unlimited access to 7500+ expert-authored eBooks and video courses covering every tech area you can think of.
Renews at $19.99/month. Cancel anytime
Enter a Title, select the parent category (if any), then select Access Level and Administrator, select Yes in Published field, and type a brief description of the category. From the Event Colour field, choose the color for the events in this category. Then click on the Save icon in the toolbar. Repeat the step to create another category.
- To go back to the Control Panel page, click on the CPanel icon on the Categories screen. Then click on the Manage Calendars icon in the Control Panel screen. That shows the Calendars screen.

- Click on the New button. This shows you a form similar to the one in the following screenshot:

- Type a Unique Identifier (name) for the calendar, select the default category and Access Level, select No for the Is Default field, and click on Create Calendar from Scratch. This creates a new calendar.
- Go back to the Control Panel page, and click on the Manage Events icon. This will shows you the Events screen. Click on the New button in the toolbar, and you will get the Edit Event screen.
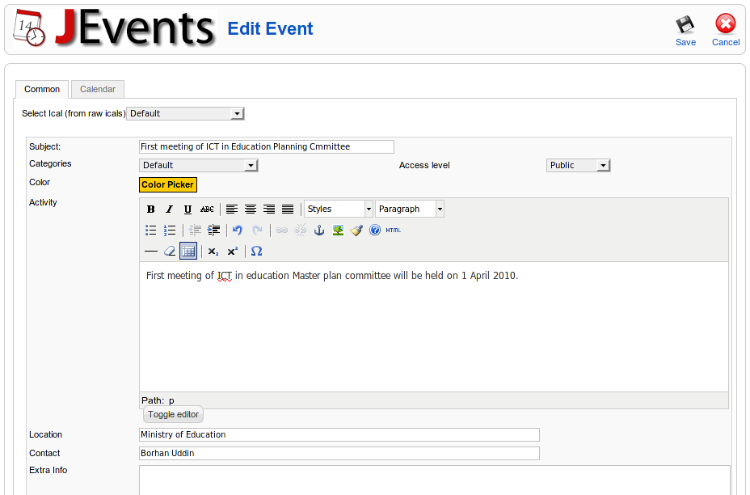
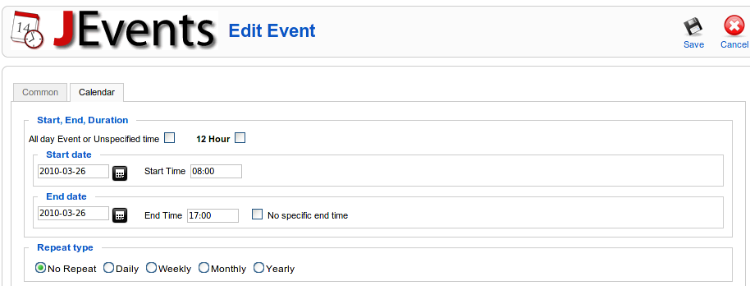
- On the Edit Event screen, first select a calendar and then type the subject of the event. Then select a category, a color for the event, and the access level. In the Activity field briefly describe the activity, and then fill in the Location, Contact, and Extra Info fields. Then click on the Calendar tab.

 United States
 Great Britain
 India
India
 Germany
 France
 Canada
 Russia
 Spain
Spain
 Brazil
 Australia
 Singapore
 Canary Islands
 Hungary
 Ukraine
 Luxembourg
 Estonia
 Lithuania
 South Korea
 Turkey
 Switzerland
 Colombia
 Taiwan
 Chile
Chile
 Norway
 Ecuador
 Indonesia
 New Zealand
 Cyprus
 Denmark
 Finland
 Poland
 Malta
Malta
 Czechia
 Austria
 Sweden
 Italy
Italy
 Egypt
Egypt
 Belgium
 Portugal
 Slovenia
 Ireland
 Romania
 Greece
 Argentina
 Netherlands
 Bulgaria
 Latvia
 South Africa
 Malaysia
 Japan
Japan
 Slovakia
 Philippines
 Mexico
 Thailand


