(For more resources related to this topic, see here.)
Exploring 3D hierarchies
The ability to parent objects among one another is a versatile feature in Unity3D. So far, in this article, we have seen how hierarchies can be used as a means of associating objects with one another and organizing them into hierarchies. One example of this is the character Prefabs with their child hats we developed for the player Prefab and the racers. In this example, by dragging-and-dropping the hat object onto the player's body, we associated the hat with the object body by putting the child into the parent's coordinate system. After doing this, we saw that the rotations, translations, and scales of the body's transform component were propagated to the hat. In practice, this is how we attach objects to one another in 3D games, that is, by parenting them to different parents and thereby changing their coordinate systems or frames of reference.
Another example of using hierarchies as a data structure was for collections. Examples of this are the splineData collections we developed for the NPCs. These objects had a single game object at the head and a collection of data as child objects. We could then perform operations on the head, which lets us process all of the child objects in the collection (in our case, installing the way points).
A third use of hierarchies was for animation. Since rotations, translations, and scales that are applied to a parent transform are propagated to all of the children, we have a way of developing fine-tuned motion for a hierarchy of objects. It turns out that characters in games and animated objects alike use this hierarchy of transforms technique to implement their motion.
Skinned meshes in Unity3D
A skinned mesh is a set of polygons whose positions and rotations are computed based on the positions of the various transforms in a hierarchy. Instead of each GameObject in the hierarchy have its own mesh, a single set of polygons is shared across a number of transforms. This results in a single mesh that we call a skin because it envelops the transforms in a skin-like structure. It turns out that this type of mesh is great for in-game characters because it moves like skin.
We will now use www.mixamo.com to download some free models and animations for our game.
Acquiring and importing models
Let's download a character model for the hero of our game.
- Open your favorite Internet browser and go to www.mixamo.com.
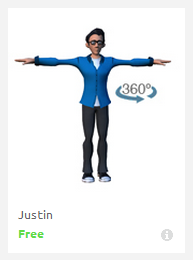
- Click on Characters and scroll through the list of skinned models. From the models that are listed free, choose the one that you want to use. At the time of writing this article, we chose Justin from the free models available, as shown in the following screenshot:

- Click on Justin and you will be presented with a preview window of the character on the next page. Click on Download to prepare the model for download. Note, you may have to sign up for an account on the website to continue.
- Once you have clicked on Download, the small downloads pop-up window at the bottom-right corner of the screen will contain your model. Open the tab and select the model. Make sure to set the download format to FBX for Unity (.fbx) and then click on Download again. FBX (Filmbox)—originally created by a company of the same name and now owned by AutoDesk—is an industry standard format for models and animations. Congratulations! You have downloaded the model we will use for the main player character.
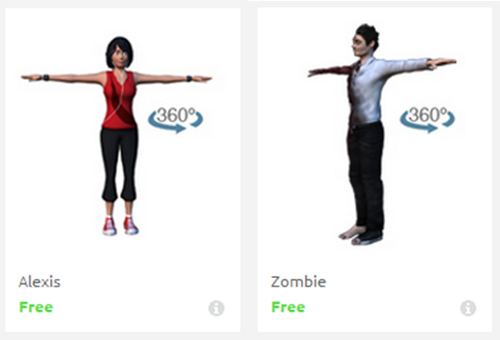
- While this model will be downloaded and saved to the Downloads folder of your browser, go back to the character select page and choose two more models to use for other NPCs in the game. At the time of writing this article, we chose Alexis and Zombie from the selection of free models, as shown in the following screenshot:

- Go to Unity, create a folder in your Project tab named Chapter8, and inside this folder, create a folder named models. Right-click on this folder and select Open In Explorer. Once you have the folder opened, drag-and-drop the two character models from your Download folder into the models folder. This will trigger the process of importing a model into Unity, and you should then see your models in your Project view as shown in the following screenshot:

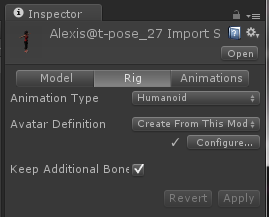
- Click on each model in the models folder, and note that the Preview tab shows a t-pose of the model as well as some import options. In the Inspector pane, under the Rig tab, ensure that Animation Type is set to Humanoid instead of Generic. The various rig options tell Unity how to animate the skinned mesh on the model. While Generic would work, choosing Humanoid will give us more options when animating under Mechanim. Let Unity create the avatar definition file for you and you can simply click on Apply to change the Rig settings, as shown in the following screenshot:

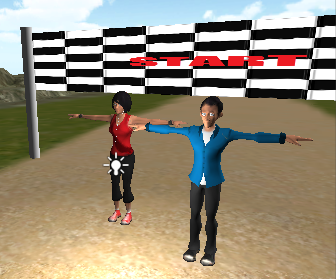
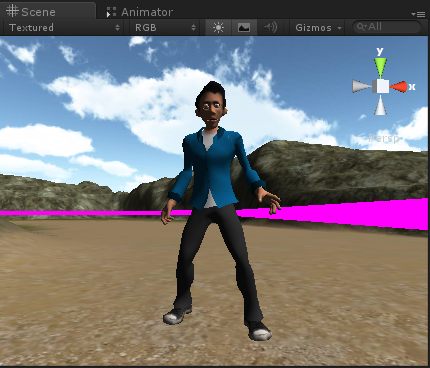
- We can now drag-and-drop your characters to the game from the Project tab into the Scene view of the level, as shown in the following screenshot:

Congratulations! You have successfully downloaded, imported, and instantiated skinned mesh models. Now, let's learn how to animate them, and we will do this starting with the main player's character.
Unlock access to the largest independent learning library in Tech for FREE!
Get unlimited access to 7500+ expert-authored eBooks and video courses covering every tech area you can think of.
Renews at $19.99/month. Cancel anytime
Exploring the Mechanim animation system
The Mechanim animation system allows the Unity3D user to integrate animations into complex state machines in an intuitive and visual way! It also has advanced features that allow the user to fine-tune the motion of their characters, right from the use of blend trees to mix, combine, and switch between animations as well as Inverse Kinematics (IK) to adjust the hands and feet of the character after animating. To develop an FSM for our main player, we need to consider the gameplay, moves, and features that the player represents in the game.
Choosing appropriate animations
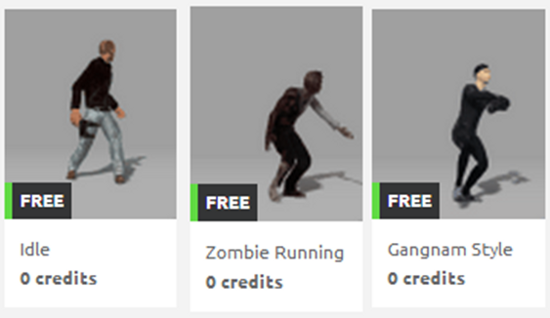
In level one, our character needs to be able to walk around the world collecting flags and returning them to the flag monument. Let's go back to www.mixamo.com, click on Animations, and download the free Idle, Gangnam Style, and Zombie Running animations, as shown in the following screenshot:

Building a simple character animation FSM
Let's build an FSM that the main character will use. To start, let's develop the locomotion system.
- Import the downloaded animations to a new folder named anims, in Chapter8. If you downloaded the animations attached to a skin, don't worry. We can remove it from the model, when it is imported, and apply it to the animation FSM that you will build.
- Open the scene file from the first gameplay level TESTBED1.
- Drag-and-drop the Justin model from the Projects tab into the Scene view and rename it Justin.
- Click on Justin and add an Animator component. This is the component that drives a character with the Mechanim system. Once you have added this component, you will be able to animate the character with the Mechanim system.
- Create a new animator controller and call it JustinController.
- Drag-and-drop JustinController into the controller reference on the Animator component of the Justin instance. The animator controller is the file that will store the specific Mechanim FSM that the Animator component will use to drive the character. Think of it as a container for the FSM.
- Click on the Justin@t-pose model from the Project tab, and drag-and-drop the avatar definition file from Model to the Avatar reference on the Animator component on the Justin instance.
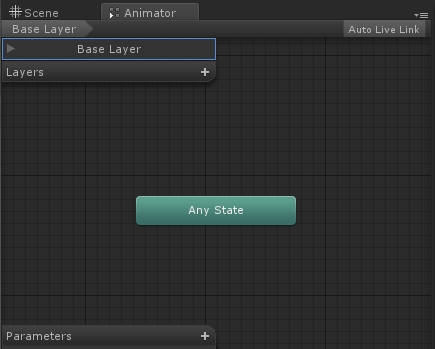
- Go to the Window drop-down menu and select Animator. You will see a new tab open up beside the Scene view. With your Justin model selected, you should see an empty Animator panel inside the tab, as shown in the following screenshot:

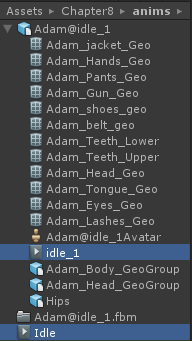
- Right now our Justin model has no animations in his FSM. Let's add the idle animation (named Idle_1) from the Adam model we downloaded. You can drag-and-drop it from the Project view to any location inside this panel. That's all there is to it! Now, we have a single anim FSM attached to our character. When you play the game now, it should show Justin playing the Idle animation. You may notice that the loop doesn't repeat or cycle repeatedly. To fix this, you need to duplicate the animation and then select the Loop Pose checkbox.
- Highlight the animation child object idle_1 and press the Ctrl + D shortcut to duplicate it. The duplicate will appear outside of the hierarchy. You can then rename it to a name of your choice. Let's choose Idle as shown in the following screenshot:

- Now, click on Idle, and in the Inspector window, make sure that Loop Pose is selected.
Congratulations! Using this Idle animation now results in a character who idles in a loop. Let's take a look at adding the walk animation.

- Click on the Zombie Running animation, which is a child asset of the Zombie model, and duplicate it such that a new copy appears in the Project window. Rename this copy Run.
- Click on this animation and make sure to check the Loop Pose checkbox so that the animation runs in cycles.
- Drag-and-drop the Run animation into the Animator tab. You should now have two animations in your FSM, with the default animation still as Idle; if you run the game, Justin should still just be idle. To make him switch animations, we need to do the following:
- Add some transitions to the Run animation from the Idle animation and vice versa.
- Trigger the transitions from a script.
- You will want to switch from the Idle to the Run animation when the player's speed (as determined from the script) is greater than a small number (let's say 0.1 f). Since the variable for speed only lives in the script, we will need a way for the script to communicate with the animation, and we will do this with parameters.
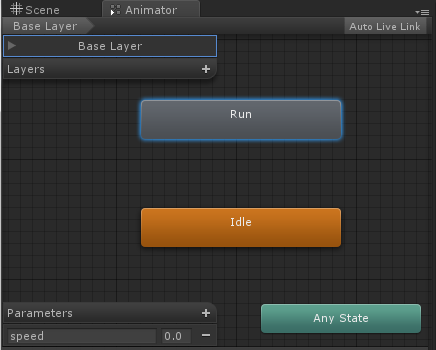
- In your Animator tab, note that the FSM we are developing lives in the Base Layer screen. While it is possible to add multiple animation layers by clicking on the + sign under Base Layer, this would allow the programmer to design multiple concurrent animation FSMs that could be used to develop varying degrees/levels of complex animation.
- Add a new parameter by clicking on the + sign beside the Parameters panel. Select float from the list of datatypes. You should now see a new parameter. Name this speed as shown in the following screenshot:

- Right-click on the Idle Animation and select Make Transition. You will now see that a white arrow is visible, which extends from Idle, that tracks the position of your mouse pointer. If you now click on the Run animation, the transition from Idle to Run will lock into place.
- Left-click on the little white triangle of the transition and observe the inspector for the transition itself. Scroll down in the Inspector window to the very bottom and set the condition for the transition to speed greater than 0.1, as shown in the following screenshot:

- Make the transition from the Run animation cycle back to the Idle cycle by following the same procedure. Right-click on the Run animation to start the transition. Then, left-click on Idle. After this, left-click on the transition once it is locked into place. Then, when the transition is activated in Conditions, set its speed to less than 0.09.
Congratulations! Our character will now transition from Idle to Run when the speed crosses the 0.1 threshold. The transition is a nice blend from the first animation to the second over a brief period of time, and this is indicated in the transition graph.
 United States
 Great Britain
 India
India
 Germany
 France
 Canada
 Russia
 Spain
Spain
 Brazil
 Australia
 Singapore
 Canary Islands
 Hungary
 Ukraine
 Luxembourg
 Estonia
 Lithuania
 South Korea
 Turkey
 Switzerland
 Colombia
 Taiwan
 Chile
Chile
 Norway
 Ecuador
 Indonesia
 New Zealand
 Cyprus
 Denmark
 Finland
 Poland
 Malta
Malta
 Czechia
 Austria
 Sweden
 Italy
Italy
 Egypt
Egypt
 Belgium
 Portugal
 Slovenia
 Ireland
 Romania
 Greece
 Argentina
 Netherlands
 Bulgaria
 Latvia
 South Africa
 Malaysia
 Japan
Japan
 Slovakia
 Philippines
 Mexico
 Thailand

